Replaces
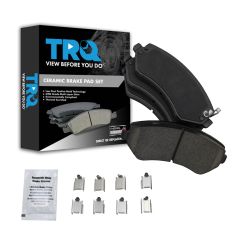
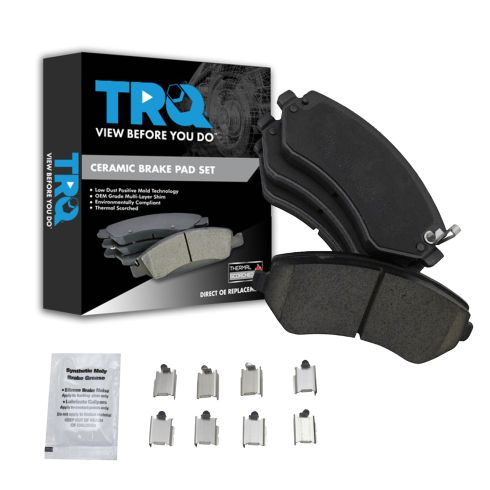
2007 Dodge Grand Caravan Front with Rear Drum Brakes Ceramic Brake Pads TRQ BFA73086

BFA73086
This part doesn’t fit a . Select from parts that fit.
Specify your vehicle's year, make and model to guarantee fit.
This part does not fit a .
Buy in the next and
Get it by: Wednesday, Dec 24 with expedited shipping
Recommended for your 2007 Dodge Grand Caravan
Frequently bought together
Specify your vehicle's year, make and model to guarantee fit.
This part does not fit a .
Part Details
- 0.67 in
- 17 mm
- 0.67 in
- 17 mm
- Yes
- Bonded
- Yes
- No
- Yes
- 2.36 in
- 60 mm
- Contact Point Grease
- Hardware
- 147 mm
- 5.79 in
- Yes
- 4
- N
- Premium Posi
- Ceramic
- Mechanical
- Ceramic
- Black
- Black
- 17 mm
- 0.67 in
- Yes
- Yes
- Yes
- No
- 5.79 in
- 147 mm
- Yes
- Yes
- 0.67 in
- 17 mm
- Steel
- 2.36 in
- 60 mm
- R-S-R
- No
- Yes
- Standard Replacement
Specifications
- with Rear Drum Brakes
- Front
About TRQ:
TRQ is a trusted brand dedicated to making every repair a success story by combining premium parts with easy installation. Each TRQ part is engineered by a team of automotive experts to meet or exceed OEM standards, delivering enhanced performance and maximum longevity. With rigorous in-house testing, the brand ensures superior fit and function across every product line. TRQ also provides customers with best-in-class, step-by-step installation videos—so you can complete repairs with confidence, whether you're a first-time DIYer or an industry professional.
Product Features
TRQ brake pads are manufactured using premium raw materials and design standards to restore original performance. TRQ brake pads are positive molded and utilize a multi-layer shim for enhanced performance and service life. TRQ’s combination of materials and design ensures a low dust and low noise braking experience. TRQ recommends replacing your brake rotors when you replace your brake pads to ensure even wear of components and improved braking comfort. All products are fit and road-tested in our Massachusetts R&D facility to ensure we deliver on our promise of Trusted Reliable Quality.
Attention California Customers:
![]() WARNING: This product can expose you to chemicals including Lead and Lead Compounds, which are known to the State of California to cause cancer, and birth defects or other reproductive harm. For more information, go to www.P65Warnings.ca.gov.
WARNING: This product can expose you to chemicals including Lead and Lead Compounds, which are known to the State of California to cause cancer, and birth defects or other reproductive harm. For more information, go to www.P65Warnings.ca.gov.
Lifetime Warranty
This item is backed by our limited lifetime warranty. In the event that this item should fail due to manufacturing defects during intended use, we will replace the part free of charge. This warranty covers the cost of the part only.
FREE Shipping is standard on orders shipped to the lower 48 States (Contiguous United States). Standard shipping charges apply to Hawaii and Alaska.
Shipping is not available to a P.O. Box, APO/FPO/DPO addresses, US Territories, or Canada for this item.
Expedited is available on checkout to the United States, excluding Alaska, Hawaii.
Final shipping costs are available at checkout.


Created on:
Tools used
- Pry off the wheel cover with a flat blade screwdriver Loosen the 19mm lug nuts with the vehicle on the ground Raise the vehicle with a floor jack Secure the vehicle on jack stands Remove the lug nuts Pull off the wheel
- Check for gouges on both sides of the rotor Check the thickness of the brake pads Check the brake pad wear indicator
- Remove the two 12mm bolts from the brake caliper Pry the caliper piston in with a flat blade screwdriver Pull the caliper aside and wire-tie it into place Pry the brake pads out of the caliper with a flat blade screwdriver Remove the two 21mm bolts from the back of the caliper bracket Remove the caliper bracket Pull the rotor off
- Clean the rotor with brake parts cleaner Apply grease to the brake pad tabs Clean the brake pad slides with a wire brush Grease the caliper slides
- Slide the rotor on Install the caliper bracket and the 21mm bolts Torque the 21mm bolts to 85 ft/lbs Put an old pad in the caliper Use a large C-clamp and the old pad to push the pistons back Check that the caliper slides move freely If necessary, apply grease to the caliper slides Install the new brake pads into the caliper Put the caliper on Thread the two 12mm bolts by hand Tighten bolts to between 20 - 25 foot-pounds of torque
- Slide the wheel into place Start the lug nuts by hand Tighten the lug nuts preliminarily Lower the vehicle to the ground Tighten the lug nuts to 100 foot-pounds in a crossing or star pattern Reattach the wheel cover
- Pump your brakes repeatedly until they feel firm Test your brakes at 5 miles per hour and then 10 miles per hour Road test the vehicle
Brought to you by 1AAuto.com, your source for quality replacement parts and the best service on the Internet.
Hi, I'm Mike from 1A Auto. I hope this how-to video helps you out, and next time you need parts for your vehicle, think of 1AAuto.com. Thanks.
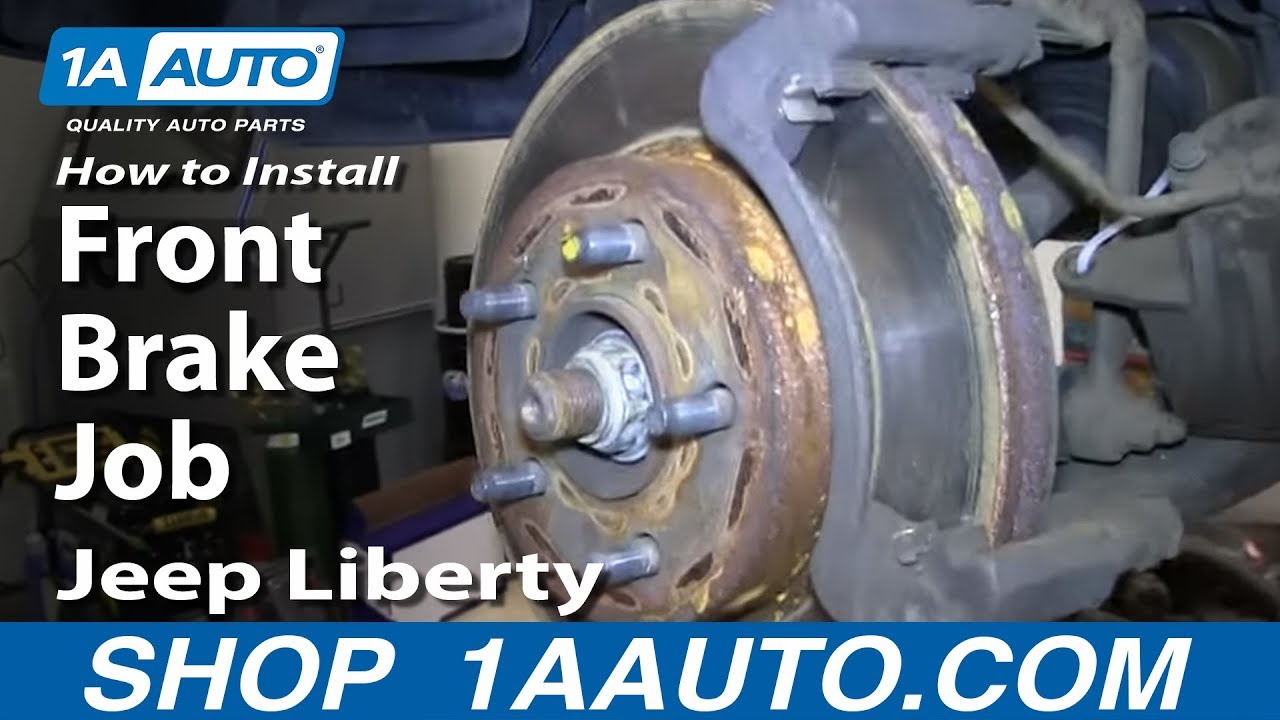
In this video, we're going to show you how to replace the front brakes on this 2006 Jeep Liberty. We show you on the passenger's side, but the driver's side is a similar procedure. You'll need new brake pads and a rotor kit from 1AAuto.com, a flat blade screw driver, 12mm, 19mm, and 21mm sockets, a ratchet, a torque wrench, jack and jack stands, a wire brush, brake cleaner, brake grease, and a large C-clamp.
Pry off your wheel cover if you have one, and remove the 19mm lug nuts. If you don't have air-powered tools, you want to loosen the lug nuts up while the vehicle is on the ground. Jack the vehicle up and then remove the lug nuts. Once they're removed, the wheel pulls right off. Turn your wheel so that you have better access to the brakes. Now that we got the wheel off, we can take a look at the condition of the brakes. Here, we have the rotor. What you want to do is run your finger along it, make sure that there's no excessive rust or pitting. You want to look for a ridge up here to see how much it's been worn. These are in good shape.
Now, over to the brake pads. You can look through here, and you can see that this is the material right there, and these look like they're pretty new. These are in good shape, but we're going to go ahead and replace them just to show you how it's done. Pry the rotor back. This will make it easier to get the caliper off. Now, you want to remove this 12mm bolt and this 12mm bolt. We'll fast-forward as Don does this. Now, you can pull your caliper up and off, and then wire tight in place so it doesn't swing down and hit you. Also, so it doesn't stress the brake hose. Pry your brake pads out. On the back of your caliper bracket, you'll see this 21mm bolt and this 21mm bolt. We'll just fast-forward as Don removes those, and you can see he does use a piece of pipe for some added leverage to help break them free.
Once those bolts are removed, the caliper bracket pulls right off, and so does your rotor. On the right is the old rotor and brake pads; on the left are the new ones from 1A Auto. You can see they're identical, the they'll mount exactly the same. Take some brake cleaner and clean off your rotor. Then, using a wire brush, clean your brake pad slides. Now, check your caliper slides to make sure they're greased up. You can see both the wires are. Now, take some brake grease and put it on the tabs on either end of your brake pads. Put your new rotor into place, put your caliper bracket back into place, and replace those two 21mm bolts. We'll just fast-forward as Don does this.
Torque both of these bolts to 85 foot-pounds. Push your new brake pads into place. Free your rotor from whatever you had halting it up, and then you want to reset the piston. What we're doing is we put an old brake pad back into the rotor, and then we use a C-clamp and tighten the C-clamp, and that pushes that piston back inside the rotor.
Now, put the caliper back in place and start those bolts back in. You may have to just push the slides in the caliper bracket to make sure that you get everything to go in correctly. Torque each of these bolts to 20 to 25 foot-pounds. Replace the wheel, replace the lug nuts, and you want to tighten them preliminarily. Lower the vehicle, tighten them the rest of the way, and then torque each of them in a crossing pattern to 100 foot-pounds.
If you have a wheel cover, replace it. Very important, before road testing the vehicle, get in, pump the brakes. After you do brake work, you should feel that it will be soft but you pump them a few times and they'll firm up and then do test stops from five and ten miles an hour before taking your vehicle out on the road.
We hope this video helps you out. Brought to you by www.1AAuto.com, your source for quality replacement parts and the best service on the Internet. Please feel free to call us toll-free, 888-844-3393. We're the company that's here for you on the Internet and in person.
Tools used
- Remove hub cap or center cap if you have it While your car is still on the ground, use your 22mm socket to loosen your lug nuts Jack up and secure your car with jack stands Remove the lug nuts with your 22mm socket and ratchet Remove the wheel and set aside
- Remove the two 5/16 Allen bolts securing the caliper Use a screwdriver to force the pistons back in Use a screwdriver to pry off the caliper Use a wire tie to fasten the caliper out of the way Use your 21mm socket and ratchet to remove the caliper bracket Use your screwdriver to pry out your brake pads Pull off the brake rotor Hit the rotor with a rubber mallet or hammer if necessary Take care not to damage the lug studs
- Check the caliper piston's condition and clean them with a wire brush if necessary Clean new rotor with brake cleaner Put your caliper bracket back on, and tighten the 21 mm bolts to 120 ft lbs Insert your new pads into the brackets Compress the caliper piston with a C-clamp Mount your bracket back on and tighten the 5/16 Allen bolts to 20-25ft lbs
- Replace hubcap/center cap Make sure to use a star pattern when putting your wheel lugs back on Tighten to 100 ft lbs
- Before driving the car again, start it up and pump the brakes a few times to get the pistons in the brakes in place Test the brakes in your driveway before taking the car onto the road Set your rotors by evenly braking from 30mph to 10mph, 50mph-30mph and finally 70mph to 40mph This is best done on a straight back road without any traffic
Brought to you by www.1AAuto.com-- your source for quality replacement parts and the best service on the internet.
Hi, I'm Mike Green. I'm one of the owners of 1A Auto. I want to help you save time and money repairing and maintaining your vehicle. I'm going to use my twenty plus years' experience restoring and repairing cars and trucks like this to show you the correct way to install parts from 1AAuto.com. The right part installed correctly, that's going to save you time and money. Thank you and enjoy the video.
In this video we're going to show you a front brake job on this 2003 Chrysler Voyager same as many of the Chrysler and Dodge minivans from this era Chrysler Town and Country, Voyager, as well as Dodge Caravan. Tools you'll need are jack and jack stands, 19mm and 21mm sockets with a ratchet or your lug wrench would work for the 19mm socket, and you'll need a breaker bar or pipe for some extra leverage on a couple of the bolts; they can be tight, 5/16 large Allen wrench or T45 Torx bit with a handle, a large screwdriver or pry bar, and a large c-clamp.
If you don't have air tools, you'll want to loosen the lug nuts on the ground first, then raise and secure the vehicle, then remove the lug nuts the rest of the way. We'll speed it up here as I take off the lug nuts, hub cap, and then remove the wheel. Once you have the tire off, turn your steering so that you have easy access to the back of the caliper and we can check for condition of the brakes when I turn the rotor. You can see this is the rotor, this is the metal part of my pad and there is very little left on my brake pad there so it definitely needs new pads and then these rotors are pretty well worn, they're probably the original rotors. I can tell that by using the back of my finger nail and there are pretty some grooves in the rotor, so I'm going to replace the rotors as well.
So my next step is to remove these two bolts here. The correct tool for this is 5/16 Allen bit or T45 Torx bit, which is what I'm using. It allows me to get in there and get a handle on it so I can get good leverage. I'm just going to speed up as I remove those two bolts the rest of the way. Before you pull your caliper off right here is your piston, as you can see as your pads wear the piston works its way out and you can reset it in a couple ways. You can use a clamp, which I'll show you later or you can use a large screwdriver or pry bar. As you see I'm just prying out and that piston is working its way back inside the caliper. You can see the piston is back inside the caliper now. In order to get the caliper off push it out forward and pry it out on these little tabs. That kind of comes apart, and off. Just going to rest the caliper right up here, like that. Now I need to get this bracket off.
Get a bolt set holder 21mm, I'm going to put my ratchet on here and then I'm going to slide a piece of pipe on here that allows me more leverage, then slowly pull down and that one up, again slowly push down. Then the rotor comes off. The rotor from 1A Auto goes right on. What I like to do is I like to stick a lug nut on here to kind of hold everything in place. Then the bracket goes back on. Now using a torque wrench I'm going to tighten these up to 120 foot-pounds. Now you want to make sure that your piston is all the way back in your caliper. You can use a big c-clamp like this, all I'm doing is just pushing, making sure that piston is pushed all the way back into the caliper. Your pads from 1A Auto, put this one in and push it right into the caliper like that. This one we can put right here against the disc. Slide the caliper right down and on, push that right on like that. Caliper mounting bolts, push them in the backside. With my Torx bit basically kind of pull on them, pull the plates, they don't have to be extremely tight. I've got 20-25 foot pounds.
Take the lug nut off, you'll want to slide on the tire. These ones with the wheel covers, note where your valve stem is, put two lug nuts kind of counter opposite of it. Then your valve stems here, put that on. This wheel cover is broken; it's supposed to snap over those two lug nuts. Speed it up as we just put the lug nuts on, snug them up with the impact wrench and we'll torque them when the vehicle is on the ground. Now torque them to 100 foot-pounds using a star pattern. Very important after you do brake work, pump your brakes a bunch of times to make sure the pedal is nice and firm, then do a stop from 5 miles per hour and 10 miles per hour before you do the road test.
We hope this helps you out. Brought to you by www.1AAuto.com -- Your source for quality replacement parts and the best service on the internet. Please feel free to call us toll free 888-844-3393. We're the company that's with you on the internet and in person.
Tools used
- Loosen the lug nuts on the wheel. Jack the car up. Remove the lug nuts and the wheel. If it won't move put a couple lug nuts on partially and hit the top of the wheel to break it free. Then remove the lug nuts and pull the wheel off.
- Check the rotor. If the rotor is rough it needs to be replaced. Turn the wheel. Remove the two bolts from the back of the caliper using a T45 torx bit or Allen bit. Place a screwdriver into the hole on the side of the caliper. Pry the caliper. Pry off the bracket to remove the caliper. Remove the inner brake shoe. Wire tie the caliper up.
- Remove the two 21mm bolts from the back of the bracket using a breaker bar or pipe for leverage. Slide the bracket off. Remove the locks around the bolts if they are there. Coat the disk with penetrating oil. Partially replace a couple lug nuts and hit the disk to break it free. Remove the lug nuts and disk.
- Slide the rotor into place. Put the bracket onto the rotor. Secure it with the two bolts. Tighten to 120ft/lbs. Clip the wire ties and pull the caliper down. Put the old pad back in to the caliper and tighten with a C-Clamp to push the piston back in. Put the pads into place with the clips to secure them. Put the caliper into place on the rotor. Slide the bracket into the caliper. Place the bolts onto the back and tighten to 30ft/lbs.
- Remove the lug nuts. Put the wheel back into place. Replace the lug nuts and tighten them in a star pattern. Put the car on the ground and tighten the lug nuts to 100ft/lbs in a star pattern
- Before driving pump the brakes until they become firm. Test at low speeds that the brakes work before driving on the road.
Brought to you by 1AAuto.com, your source for quality replacement parts and the best service on the internet. Hi, I'm Mike from 1A Auto. I hope this how to video helps you out. Next time you need parts for your vehicle, think of 1AAuto.com. In this video, we're going to show you how to service the front breaks on this 2005 Town and Country, same as most '04 to '08s and this is a vehicle that has the rear disk brakes. The front breaks are a little different from vehicle.
Tools you'll need are jack and jack stands, 19mm socket and ratchet or your tire iron, penetrating oil, hammer, the bigger the better, T45 Torx or an 8mm Allen driver, flat blade screwdriver, a 21mm socket with a breaker bar or a pipe for some leverage, a large C-clamp and a torque wrench. If you don't have the benefits of air tools, you'll want to start your vehicle on the ground, loosen the lug nuts then raise and support your vehicle then take the lug nuts, wheel and tire off. I do have a lift and impact wrench so I will use them.
If you find it's tough to get your wheel off, what you can do is put a couple of lug nuts back on and then basically just hit the top or bottom of it and that usually breaks it free. The lug nuts just help to hold it in place when it breaks free. Okay, we can check the condition of our break. Okay, you can see the rotors. You take the back of your fingernail, this surface should be smooth. On this vehicle, these are pretty deeply grooved so this rotor at the very least needs to be turned and by the look of the condition of it, we're going to replace it and if you're replacing the rotor, you're going to replace your brake pads anyways and we can look in here and you can see that that break pad, here's the metal of the pad, the metal of the rotor and then between there is the pad and you can see it's pretty thin so this is in need of some new brakes in the front here.
Straighten the steering wheel or turn the wheel just so you can get to the back of the cover. There's our brake calipers here, there are two bolts, one there and one down there and there's actually a T45 or proper sized Allen. TheT45 Torx bit this style I can use a 3/8 ratchet to turn it. Okay, I'll just fast forward here as I use that Torx bit and my ratchet and remove those two bolts. Okay, that's a big square. This is a caliper piston. Let's fit and work its way out. What you're going to do is take a big screw driver and pry on the caliper. Just pry slowly and you can probably see that the piston is kind of working its way back in. Now there's a bracket that holds the caliper, you pry that off with a flat blade screwdriver. Now your caliper comes off and you can just pull the inner break shoe right out. Then put your caliper, I kind of hung it on the strut. Okay, we'll put the caliper up and if we're going to do any other work secure it with some wire tires and then you can take your outer pad off just by pulling it right out. Next, I'll want to remove this bracket. Okay, there are two 21mm bolts here and here. You'll need a 21mm socket and I suggest a breaker bar and if you don't have a breaker bar, you can use your ratchet, okay and hook a piece of pipe on to it .That gives us some extra leverage. Apply pressure nice and easy and the bolt will start to go.
Speed up here as I loosen that one up and I'll do the same thing for the lower bolt. Then I remove the pipe and just use the ratchet and take them out the rest of the way and then take that bracket right off. Your vehicle may still have these little locks on it. Pull those right off with a pair of pliers. I'm going to coat this with penetrating oil, hopefully it will let me get the disk off easier. Okay, I'll just fast forward through this a little bit. You'll see I put a couple of lug nuts onto the disk and then the bigger the hammer the better. Ours is pretty rusted on there so I just give it some strategic hits and eventually it comes off.
Here's a new one from 1A Auto. Take your bracket. The bracket goes between the steering knuckle back here and the rotter. Okay, poor shooting here but I'm just putting that bracket in place, holding it in place, starting the bolts on and then tightening it up preliminarily. I'll also put a lug nut on to the stud just to hold things in place, make it a little easier to work. You'll want to tighten these with 120 foot pounds. Just use a pair of wire cutters, something to clip your wire tires or whatever you have holding the caliper up top.
Okay, now you'll want to actually put your old pad back in and use the large C-clamp and force the piston back in. I'm going to tighten up the C-clamp right over there. I'm going to tighten up the C-clamp. You'll see the piston go back in the rest of the way. All right. Take it off and take the old pad out. Okay, new pad, it comes with the clips to put it right in. This one just goes right into the piston. Put the other one into your caliper bracket. Then put your caliper down on. Okay, once your disk is on there, kind of put the one side of this bracket in and then push the other side in and push the bracket down and on.
Then come around the back, push your bolts in. Let's speed up here a little bit as I just tighten up those bolts, the Allen or Torx bit and ratchet. Torque for 30 foot pounds. Okay, now take that lug nut off and then you lift your wheel in place. Start the two lug nuts that are opposite the valve stem and then put your wheel cover on and start with the rest of the lug nuts. Now with the van on the ground, you want to torque the lug nuts to 100 foot pounds using a star pattern as you tighten them. Once you're done on both sides, pump the break a bunch of times and then test stops from 5 to 10 miles an hour before road testing the vehicle.
We hope this helps you out. Brought to you by www.1AAuto.com, your source for quality replacement parts and the best service on the internet. Please feel free to call us toll-free, 888-844-3393. We're the company that's here for you on the internet and in person.
BFA73086
877-844-3393
Monday - Friday 8:00am - 9:30pm ET
Saturday - Sunday 8:00am - 4:30pm ET
Specify your vehicle's year, make and model to guarantee fit.
This part does not fit a .


