Replaces


Recommended for your 2003 Honda Civic
Frequently bought together
About TRQ:
TRQ is a trusted brand dedicated to making every repair a success story by combining premium parts with easy installation. Each TRQ part is engineered by a team of automotive experts to meet or exceed OEM standards, delivering enhanced performance and maximum longevity. With rigorous in-house testing, the brand ensures superior fit and function across every product line. TRQ also provides customers with best-in-class, step-by-step installation videos—so you can complete repairs with confidence, whether you're a first-time DIYer or an industry professional.
Attention California Customers:
 WARNING: Cancer and Reproductive Harm - www.P65Warnings.ca.gov.
Wear and Tear
This item is backed by a 60-day warranty against defects in materials and workmanship under its intended use. The warranty does not cover normal wear and tear. This warranty covers the cost of the part only.
FREE Shipping is standard on Orders shipped to the lower 48 States (Contiguous United States). Standard shipping charges apply to Hawaii, Alaska and US Territories. Shipping is not available to Canada.
Expedited is available on checkout to the United States, excluding Alaska, Hawaii and US Territories as well as P.O. Boxes and APO/FPO/DPO addresses. Final shipping costs are available at checkout.

Created on:
Tools used
Brought to you by 1AAuto.com, your source for quality replacement parts and the best service on the Internet.
Hi, I'm Mike from 1A Auto. I hope this how-to video helps you out, and next time you need parts for your vehicle, think of 1AAuto.com. Thanks.
In this video, we're going to show you how to replace the fresh air or cabin dust and pollen filter on this 2003 Honda Civic. It's pretty much the same for any 2001 - 2005. When I did the video, I didn't have a new one available. So, I do just kind of remove the old one and put it back in, just to show you how everything works. You do not need any tools for this.
For your cabin filter, start in the glove box here. Open it up. There's little stops right here on each side. If you look at the back side, you can see that there are just little clips. You basically want to use both hands and pry on one side, squeeze the clips on the other, and pull those stops right out. Bring that out and pull the stuff out of the glove box.
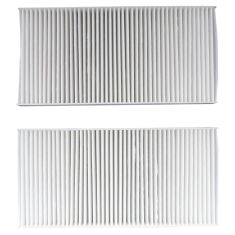
Right back in here, is your cabin filter. There's a little tab here. Pull the tab out and this door comes right off. Right in here, is your filter, and there's this little tab right here. You just pull it right out. There's one element, pull the other one over. Pull out the second element.
Slide the first one in, and slide it over. Put the second one in and then put this door back on, in place like that. Bring your glove box up. Bring the glove box up into place.
Put one of the stops. Put your stop through, slide it forward and lock it into place. Do the same thing on the other side. Push the glove box up a little bit. Push the stop in and slide it in forward so it's in place. You can put this back in your glove box and shut it.
We hope this video helps you out. Brought to you by www.1AAuto.com, your source for quality replacement parts and the best service on the Internet. Please feel free to call us toll-free, 888-844-3393. We're the company that's here for you on the Internet and in person.
Tools used
Brought to you by 1AAuto.com, your source for quality replacement parts and the best service on the Internet.
Hi, I'm Mike from 1A Auto. I hope this how-to video helps you out, and next time you need parts for your vehicle, think of 1AAuto.com. Thanks.
In this video, we're going to show you cabin air filter replacement. This is a 2003 Honda Civic. This process is the same for a lot of different Honda models and you actually don't need any tools. You just need a new cabin air filer from 1AAuto.com.
Open your glove box. Remove anything you might have in there and place it off to the side because the glove box is going to hang down. This clip snaps out. Push the glove box in slightly to take the pressure off the latch and pop it out. You can see it hooks in, snaps into place, snaps out. You have to bring it out at an angle. Normally there's one on each side. They remove the same way, but ours is missing one.
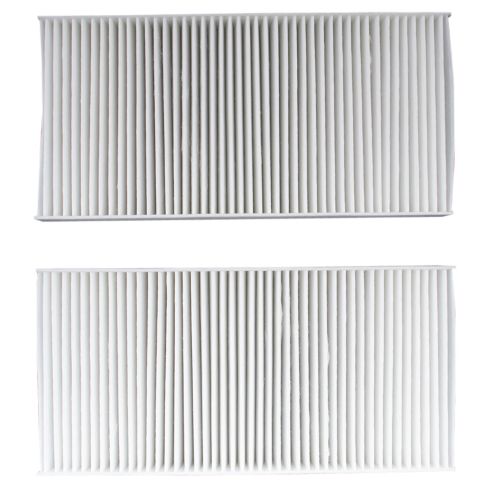
Allow the glove box to hang. Release the latch on the left side and move the cover. Place the tab to the right. I'm going to pull out one cabin air filter slide. Slide the other tab all the way to the left. Remove the other cabin air filter box.
You can see this is all the stuff that this filter is keeping out of the cabin of your car when you have your heat and A/C going, just letting the air in through the vents. As you can see, our cabin filer is marked air flow with an arrow, and the air filter housing is marked air flow. You want to make sure both of those arrows face the same direction before installing our filter.
The tab on the left goes in first. Slide it in to the right. It does the same thing on our other filter. Match up the air flow arrows. Put it into the housing. With the tab on the right side, slide your air filter housing back in. Lock the tab with the door into the hinge on the right side and snap the cover back into place.
Put our glove box in past the opening, hook our stop in, and snap it into place. Repeat this on the opposite side if you have both, and you're ready to put all your stuff back in your glove box and good to go.
Thanks for tuning in. We hope this video helped you out. Next time you need parts for your car, please visit 1AAuto.com. Also check out our other helpful how-to and diagnosis videos.

CFA18261