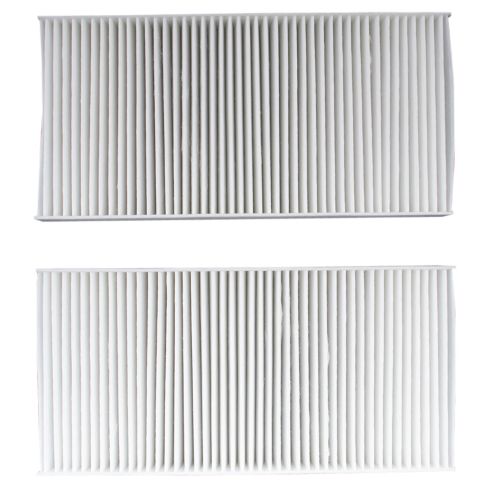
WARNING: Cancer and Reproductive Harm - www.P65Warnings.ca.gov.
Lifetime Warranty
This item is backed by our limited lifetime warranty. In the event that this item should fail due to manufacturing defects during intended use, we will replace the part free of charge. This warranty covers the cost of the part only.
FREE Shipping is standard on Orders shipped to the lower 48 States (Contiguous United States). Standard shipping charges apply to Hawaii, Alaska and US Territories. Shipping is not available to Canada.
Expedited is available on checkout to the United States, excluding Alaska, Hawaii and US Territories as well as P.O. Boxes and APO/FPO/DPO addresses. Final shipping costs are available at checkout.
How to Replace Cabin Air Filter 2001-05 Honda Civic
How to Replace Cabin Air Filter 2002-06 Honda CR-V
How to Replace Cabin Air Filter 2001-05 Honda Civic
Created on:
Tools used
No Tools Needed
1. Removing the Glove Box
Open the glove box
Pull the stops out of the glove box
Pull the glove box out
2. Removing the Cabin Air Filters
Pull off the cabin air filter door
Pull out the outer air filter
Pull the inner air filter to the side
Pull out the inner air filter
3. Installing the New Cabin Air Filters
Slide the inner air filter into place
Slide the inner air filter to the side
Slide in the outer air filter
Push on the air filter door
4. Reinstalling the Glove Box
Put the glove box into place
Push the two stops into the glove box
Brought to you by 1AAuto.com, your source for quality replacement parts and the best service on the Internet.
Hi, I'm Mike from 1A Auto. I hope this how-to video helps you out, and next time you need parts for your vehicle, think of 1AAuto.com. Thanks.
In this video, we're going to show you how to replace the fresh air or cabin dust and pollen filter on this 2003 Honda Civic. It's pretty much the same for any 2001 - 2005. When I did the video, I didn't have a new one available. So, I do just kind of remove the old one and put it back in, just to show you how everything works. You do not need any tools for this.
For your cabin filter, start in the glove box here. Open it up. There's little stops right here on each side. If you look at the back side, you can see that there are just little clips. You basically want to use both hands and pry on one side, squeeze the clips on the other, and pull those stops right out. Bring that out and pull the stuff out of the glove box.
Right back in here, is your cabin filter. There's a little tab here. Pull the tab out and this door comes right off. Right in here, is your filter, and there's this little tab right here. You just pull it right out. There's one element, pull the other one over. Pull out the second element.
Slide the first one in, and slide it over. Put the second one in and then put this door back on, in place like that. Bring your glove box up. Bring the glove box up into place.
Put one of the stops. Put your stop through, slide it forward and lock it into place. Do the same thing on the other side. Push the glove box up a little bit. Push the stop in and slide it in forward so it's in place. You can put this back in your glove box and shut it.
We hope this video helps you out. Brought to you by www.1AAuto.com, your source for quality replacement parts and the best service on the Internet. Please feel free to call us toll-free, 888-844-3393. We're the company that's here for you on the Internet and in person.
Tools used
No Tools Needed
1. Accessing the Air Filter
Open the glove box
Locate the glove box tabs
Push up on one tab from the outside as you pry it off from the inside
Push up on the other tab from the outside as you pry it off from the inside
Pull down the glove box
Undo the access door tab
Remove the access door
2. Removing the Cabin Air Filters
Pull out the first cabin air filter
Slide the second air filter to the driver side and out
Pull the filters out of their plastic cartridges
3. Installing the New Cabin Air Filters
Insert the new air filters into the plastic cartridges with the air flow arrows pointing down
Clear any debris in the filter compartment by hand
Put the inner filter in first and slide it to the passenger side
Put in the other air filter
4. Reattaching the Glove Box
Reattach the access door starting at the passenger side
Clear debris from the back of the glove box
Hold the glove box up, while you install the glove box tabs
Clip the tabs in
Clean any loose debris
Brought to you by 1AAuto.com, your source for quality replacement parts and the best service on the Internet.
Hi, I'm Mike from 1A Auto. I hope this how-to video helps you out, and next time you need parts for your vehicle, think of 1AAuto.com. Thanks.
To replace your cabin air filter, you're going to want to open up your glove box, empty it of its contents. Then on each side there's little hooks here. They go on the outside. You can see that there are little tabs here that hold it. Gently push up on one of the tabs. You're pushing on the tabs on the outside with your finger. Pry on the inside. Then lift the box up a little bit. This little hook comes out. Then there's one on the other side. Do the same thing.
Now, your box can come down. Right inside here there's a little door. This is the door here. There's a little tab over here. Pull this tab over. Bring the door out. Here is your cabin air filter. There's half of it. Then, another half slides over and comes out. You can see, especially if you don't ever replace them they can get pretty ugly. The filters actually come out of the plastic encasements.
Here's a new filter. Make sure that the airflow is pointing down. For the top and this side, take it out. The airflow arrow is pointing down in from the top. This one goes in first. Get any debris that you can reach with your hand. There are a couple leaves down in the fan motor. You can feel the fan motor right down in there. I'm just turning it a little bit to see if there's any more debris. You put your first cartridge back in and slide it over, and then put the second cartridge back in. For the door, there's a little tab on the side. Slide it in, and then clip it in. Clean off any debris from the back of your glove box here. Put the glove box up. Take one of your hooks. While you're pushing the glove box up a little bit further put the hook in. You have to push the glove box in a little bit more and put the hook in. Let the glove box rest down into position. The hook flips in. The same thing with the other side: push the glove box up in a little bit. Put the hook in. Let the glove box rest down, and then click the hook into place. Put the stuff back in your glove box and you're all set. Maybe vacuum up the floor a little bit after all that debris got all over the place.
We hope this helps you out. Brought to you by www.1AAuto.com, your source for quality replacement parts and the best service on the Internet. Please feel free to call us toll-free, 888-844-3393. We're the company that's here for you on the Internet and in person.
Tools used
No Tools Needed
1. Removing the Cabin Air Filter
Open the glove box
Snap out the clip on the glove box
Let the glove box drop
Remove the cabin air filter cover
Remove the first cabin air filter
Remove the second cabin air filter
2. Installing the Cabin Air Filter
Insert the air filter into the plastic slot, lining up the arrows
Insert the first air filter into place
Insert the second air filter into place
Insert the cover into place
Lift the glove box up
Hook the glove box stop in
Brought to you by 1AAuto.com, your source for quality replacement parts and the best service on the Internet.
Hi, I'm Mike from 1A Auto. I hope this how-to video helps you out, and next time you need parts for your vehicle, think of 1AAuto.com. Thanks.
In this video, we're going to show you cabin air filter replacement. This is a 2003 Honda Civic. This process is the same for a lot of different Honda models and you actually don't need any tools. You just need a new cabin air filer from 1AAuto.com.
Open your glove box. Remove anything you might have in there and place it off to the side because the glove box is going to hang down. This clip snaps out. Push the glove box in slightly to take the pressure off the latch and pop it out. You can see it hooks in, snaps into place, snaps out. You have to bring it out at an angle. Normally there's one on each side. They remove the same way, but ours is missing one.
Allow the glove box to hang. Release the latch on the left side and move the cover. Place the tab to the right. I'm going to pull out one cabin air filter slide. Slide the other tab all the way to the left. Remove the other cabin air filter box.
You can see this is all the stuff that this filter is keeping out of the cabin of your car when you have your heat and A/C going, just letting the air in through the vents. As you can see, our cabin filer is marked air flow with an arrow, and the air filter housing is marked air flow. You want to make sure both of those arrows face the same direction before installing our filter.
The tab on the left goes in first. Slide it in to the right. It does the same thing on our other filter. Match up the air flow arrows. Put it into the housing. With the tab on the right side, slide your air filter housing back in. Lock the tab with the door into the hinge on the right side and snap the cover back into place.
Put our glove box in past the opening, hook our stop in, and snap it into place. Repeat this on the opposite side if you have both, and you're ready to put all your stuff back in your glove box and good to go.
Thanks for tuning in. We hope this video helped you out. Next time you need parts for your car, please visit 1AAuto.com. Also check out our other helpful how-to and diagnosis videos.
CFA18261
In Stock
Product Reviews
Loading reviews
5.00/ 5.08
8 reviews
5 Stars
4 Stars
3 Stars
2 Stars
1 Star
8
0
0
0
0
A+
Winstanley
March 24, 2018
Didn't know about cabin air filters! Until I saw the instruction video! So I changed mines and it was easy
Great product, great price
D
March 26, 2018
Great product, great price, great timely service. Fits perfectly.
Easy to install.
Worked great on my Honda CRV
Ned
July 31, 2019
I never knew my 2003 had a cabin filter. The videos on 1aauto made it simple to replace. After all these years, still had original filter (2003-2019 LOL). What a mess it was. Now my fan feels stronger and AC seems cooler , if thats possible . Five stars for product and 1aauto.
Great item
Paul
July 30, 2020
Exactly as described. Really appreciate the YouTube videos to do more car maintenance on my own. Thanks!
Cabin air filter installation
Roger
October 12, 2020
The cabin air filters fit perfectly and definitely needed to be changed out. The "how to" videothat 1AAuto had online was invaluable and saved the money that would have been charged at a repair facility. 1AAuto service is excellent. Highly reccommend this company.
Fits and works well
J
December 28, 2020
These fit like a factory unit and does the job. I would buy again.
Good so far
Greg
October 29, 2021
Good so far. Did this project during covid. no problems yet.
Surprised my 17 year old year old civic had a cabin filter
Jack
March 31, 2023
My wifes car is a 2005 Civic. I never knew there was a cabin filter until the car mechanic asked last week if he could replace the cabin filter. I came to this website and ordered one. It was easy to replace and saved me a lot of money. I will order from these folks again.
Customer Q&A
May I have the model number?July 8, 2019
Kwok E
10
Here is the original equipment number: OE # 80292S5DA01
July 9, 2019
Corey M
Customer service
877-844-3393
Monday - Friday 8:00am - 9:30pm ET Saturday - Sunday 8:00am - 4:30pm ET
Enter Vehicle Year Make Model
Specify your vehicle's year, make and model to guarantee fit.
Year
Make
Model
Options
Drivetrain
This part doesn’t fit a . Select from parts that fit.