Replaces


Recommended for your 2002 Honda Civic
Frequently bought together
Part Details
Specifications
Returns: Parts with electrical components cannot be returned once installed.
Lifetime Warranty
This item is backed by our limited lifetime warranty. In the event this item should fail due to manufacturing defects during intended use, we will replace the part free of charge. This warranty covers the cost of the part only.
Returns: Parts with electrical components cannot be returned once installed.
FREE Shipping is standard on Orders shipped to the lower 48 States (Contiguous United States). Standard shipping charges apply to Hawaii, Alaska and US Territories. Shipping is not available to Canada.
Expedited is available on checkout to the United States, excluding Alaska, Hawaii and US Territories as well as P.O. Boxes and APO/FPO/DPO addresses. Final shipping costs are available at checkout.

Created on:
Tools used
Brought to you by 1AAuto.com, your source for quality replacement parts and the best service on the Internet!
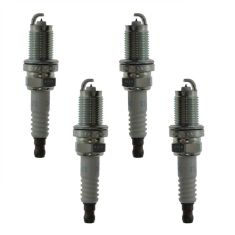
Here's the old, original plug that came out of the engine, and new plugs from 1A Auto. We carry some different name brands. We have generic. This is actually an NGK example. Obviously, a spark plug is going to be just like the original.
Some background information: your old plugs, they have a tolerance on these Hondas. This is a Honda with a 1.7-liter. The plug can be between 1 and 1.3 millimeters. If your plug is within those specs - right now, I'm at 1.27. This is a spark plug gapping gauge. You probably can't see it, but there are different measurements on the gap gauge.
It's at 1.3, so I'm going to go to my closest one, which is 1.27. It doesn't fit in there, okay, so this plug technically is still within spec and could be used. On that 1.02 on this one, you can see it goes in. It moves around, so it's definitely higher than 1.
When you go to put your new plugs in, and it's just for any spark plug, you want to find the specifications for your vehicle. New plugs in this vehicle should be between 1 and 1.1 millimeters, so I've got 1.02. To gauge a plug, try and force it in there. They really should come gapped, but it looks like this one's just a little bit off.
You use this part here to bend the tab and open it up slightly. Then try to put your gauge in there again. If it starts to go in, you can just kind of work it in until it goes in and out. It takes a little bit of force. Now you could be between 1 and 1.1. That's 1.02, it goes in. At 1.14, it shouldn't go in, and it doesn't.
Thanks for tuning in. We hope this video helped you out. Next time you need parts for your car, please visit 1AAuto.com. Also check out our other helpful how-to and diagnosis videos.
Tools used
Brought to you by 1AAuto.com, your source for quality replacement parts and the best service on the Internet.
Hi, I'm Mike from 1A Auto. I hope this how-to video helps you out, and next time you need parts for your vehicle, think of 1AAuto.com. Thanks!
In this video, we're going to show you spark plug replacement. This is a 2003 Honda Civic with a 1.7-liter VTEC engine, and it's the same process for many vehicles with a 1.7-liter as well as a 3.5-liter. Items you'll need include new spark plugs from 1AAuto.com, flatblade screwdriver, 10mm socket, ratchet, or wrench, a 5/8 spark plug socket with a ratchet and extension.
Open the hood. Just pull the lever right here. Underneath, there's a safety latch, lift up. Lift it up and put the prop rod in place. Your ignition coils are located right on the top of the engine. Right here: one, two, three, and four.
Remove the top trim panel with a flat blade screwdriver. Remove the nut that holds the coil in place with a 10mm socket or a wrench. Lift it out. There's a tab on the harness connection, press down and pull and disconnect. Pull it up and out. And we'll do the same thing for the other three. Once you have the coils out, the plugs are right down inside.
Use a 5/8 inch spark plug socket with a ratchet and extension. The reason you want a spark plug socket is that once you twist it out, pull it up and out and the plug comes right with the socket. The socket has an insert that holds on to the plug. The spark plug socket is the best tool but if you didn't have one, you just had a regular 5/8, you would at least need a deep socket, and obviously when you unscrew it the plug is not going to come up with the socket, so you'll need a stick magnet put down in there to pull the spark plug up and out.
Use the spark plug gap tool and make sure you set the gap on the new plug to between 1 and 1.1mm. Once you have your gap checked, install it in. You can see the spark plug socket keeps it from falling down. Put it down in and very carefully start to spin it in. Make sure you don't cross-thread it. Once you get them in place, tighten them up. Use a torque wrench, 13 foot pounds. Then repeat the same thing for the other three.
I highly recommend a spark plug socket, but if you do have to use just a regular 5/8 socket, you want to be very careful not to cross-thread the spark plug. So use your magnet, put the plug down in there first, and then socket. Make sure you get the socket on to the spark plug, and then lightly turn it. If you feel too much force back it out, because you don't want to cross-thread the spark plug. As long as you're just lightly turning and it's not giving you any resistance, you can kind of look down in and it's centered in the hole.
Everything is good so you can then proceed the same way. Reinstall, push them down in. You'll want to just put the connector on them. It should go down. Then push them nice and firm, and then make sure your connect is clean. Put your four 10mm nuts back on and tighten them. You don't want to go too tight. Reinstall your cover. You're all set.
Thanks for tuning in. We hope this video helped you out. Next time you need parts for your car, please visit 1AAuto.com. Also check out our other helpful how-to and diagnosis videos.

NGETK00001