Replaces
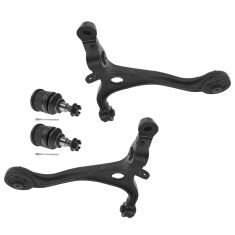
2 Piece Control Arm with Ball Joint Set
$159.95
8 Piece Steering & Suspension Kit
$174.95
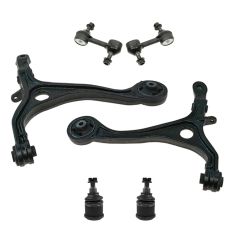
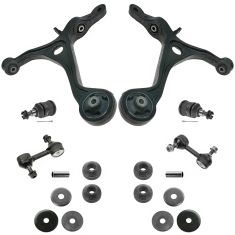
6 Piece Suspension Kit
$174.95
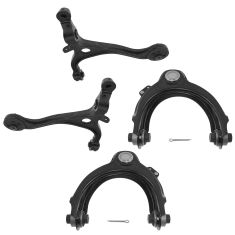
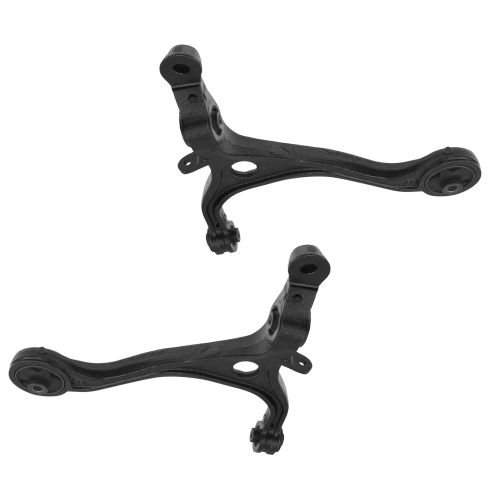
4 Piece Control Arm Set
$199.95
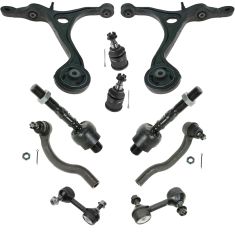
10 Piece Steering & Suspension Kit
$199.95
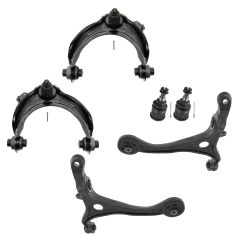
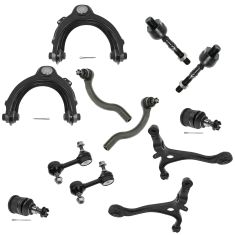
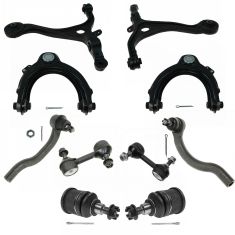
6 Piece Control Arm with Ball Joint Set
$204.95
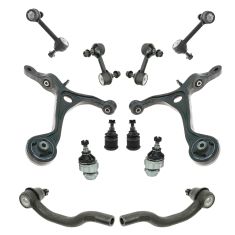
12 Piece Steering & Suspension Kit
$214.95
12 Piece Steering & Suspension Kit
$238.95
10 Piece Steering & Suspension Kit
$239.95
Our control arms are designed to be direct replacements for the original factory parts. They are 100% brand new and require no modifications for installation. No special tools are required because all of the bushings come pre-installed.
Our steering and suspension components are pre-greased and sealed for long life and do not require the extra maintenance typically required by greaseable versions.
Attention California Customers:
 WARNING: This product can expose you to chemicals including Lead and Lead Compounds, which are known to the State of California to cause cancer, and birth defects or other reproductive harm. For more information, go to www.P65Warnings.ca.gov.
Lifetime Warranty
This item is backed by our limited lifetime warranty. In the event that this item should fail due to manufacturing defects during intended use, we will replace the part free of charge. This warranty covers the cost of the part only.
FREE Shipping is standard on orders shipped to the lower 48 States (Contiguous United States). Standard shipping charges apply to Hawaii and Alaska.
Shipping is not available to a P.O. Box, APO/FPO/DPO addresses, US Territories, or Canada for this item.
Expedited is available on checkout to the United States, excluding Alaska, Hawaii.
Final shipping costs are available at checkout.

Created on:
Tools used
Hi, I'm Mike from 1A Auto. We've been selling auto parts for over 30 years.
Hey everyone. Sue here from 1A Auto, and today we have an 07 Honda Accord in the shop and we're going to be showing you how to do a lower control arm. If you need that part or any other part for your car, click on the link below and head on over to 1aauto.com.
19 millimeter socket to loosen up the lug nuts. Now I'm going to raise and support my vehicle with my two post lift and you can use jack stands with a jack. Now we're clear to remove the tire. So this customer complained about a vibration and a bang also over bumps. So after checking the whole front end out, everything was tight except that you could see that the little control arm bushings are torn, and separating from the actual control arm. So when this is leveled and the weight is on the actual arm, that's a pretty good gap there. So if you hear that banging noise, the first thing I would check is if the front end's tight.
17 millimeter socket. We're going to loosen out the back side of the inner lower control arm bolt. I'm going to take the lower ball joint nut off. Take the old cotter pin out. We're not replacing the ball joint, so I really want this cotter pin to come out and not break in there. So I'm hoping for the best. And it looks like I'm going to get my wish. Nice. 17 millimeter socket. I'm going to break the castle nut off the lower ball joint. So I'm going to be using this tool that's going to separate the ball joint from the knuckle without damaging the boot. And it's a pretty neat little tool. Slide it right underneath that boot. Make sure I get in there, take a hammer, tap it if I have to. Nice. Want it to bottom out. Let's see if we can get in there.
When this releases, the ball joint releases, it's a loud noise. Sometimes the tool will actually fall, slide and fall out. Just like that. 14 millimeter wrench. I'm going to break that nut free and then of course it's going to spin, so I'm going to have to hold the inner part of it. There is an Allen head right here, but there's no way I can get there from that wishbone. I can do it on the top one, but not on the lower, so I'm going to have to hold the inner piece of metal with a pair of locking pliers. Make sure you can get your wrench out. There we go. I'm going to release, remove the upper sway bar link to the sway bar. 14 millimeter wrench again. See how much we can get before it starts to spin. It's spinning. Okay, so I'll put some locking pliers on the back just like I did on the bottom. See if I can hold that from ... Wonderful.
Now we're going to remove the sway bar link from the actual linking control arm. I'm going to just take a pry bar and see if I can pry that free. Next we're going to remove the wishbone long bolt that holds the control arm bushing in. 17 millimeter on both sides. So a socket and a wrench. Break that free. I'm just going to take a hammer and tap that bolt right through. We might have to get a punch, a brass punch. I'm just going to take a brass punch and tap the bolt through. Last bolt's the front hockey puck bolt and that's a 19 millimeter socket. You see how bad that bushing is, how torn it is. The metal bushing started to spin with it. I crossed my fingers and toes and hoped that the bolt would break free because if not, that was not going to be a fun day. I'm going to use a pry bar and pry down at the same time. There we go.
This is a good time to check these threads. I'm going to see, is this a lot of rust. I'm going to use a wire brush and clean it up. Make sure it's reusable. You can see after the wire brush, the threads cleaned up nice and clean. That's just where it was sitting in the actual threads. It looks stripped real quick but it's not. You can't just use any bolt. It has to be a front end, grade eight bolt and in this case it really would have to be the factory bolt because of the design of the shank on this and the way it sits. You just can't throw any bolts in there. If you throw a bolt on there from a hardware store, that's not a grade eight or lower, it's just going to snap. Now we're going to take the little control arm completely out. All the bolts are out and we're ready to go. Let's see if we can separate it from the ball joint first. Might take a pry bar or two, or maybe a hammer.
Okay, just watch all your digits. Nice pry bar on the back here. Let's see if we can pry it out of here first. Let's just spin it around. Take it out. Wow. Look how bad that bushing was.
Here we have our brand new lower control arm for our 07 Honda Accord. We've got this from 1A Auto, and this is the factory control arm that we just took out. The same exact design, comes with all the bushings already pressed in, same size. You can see it comes with the bracket for the sway bar link, all milled in, one piece cast steel, pressed in bushings, just like the factory, angled for the ball joint. So if you need this part or any other part for your car, click on the link below and head on over to 1aauto.com.
Installing the lower control arm, I'm going to put the hockey puck in first, so basically I'm almost reversing procedure. And push it in as far as you can because you need to get it over to the backside of the frame. Okay, I'm going to take a hammer. I just hammered that front just a pitch forward so that I can now hopefully guide this rear control arm up into the spot like that. Looking good. Let's see if we can get the back bolt in, take a pry bar, pry it up a little bit. Let's see if we can line that up. Wonderful. See if we can tap that in. Okay, I can see that the control arm needs to come down just as smidge in the front. Perfect. Now let's put the front bolt in, see if it'll wind up. Nope. So we'll get the pry bar. All right, so we know that that's a 19 in the front. Let's get our 19 socket, see if we can start that.
I'm going to say that's not starting. Got the back bolts started at least. That's a 17 millimeter socket. Now I'm going to undo my bungee cord. Because I'm working by myself, I had to hold the knuckle out so that I could get that little control arm in. Now I'll take this out of the way and I'm going to see if I can get that lower ball joint lined up and then that front bushing hopefully will slide right in. Okay, we got to get the wishbone over. Let's get that bolt in. Put the nut on. Now we can lift up the knuckle to put the ball joint in spot. We put the castle nut on. Now let's see if we can get that front bolt to go into place. And that's exactly what I needed. The arm just needed to be a different angle, so I'm going to torque down the wishbone bolt and nut and that is 47 foot-pounds, 17 millimeter socket and wrench.
Now I'm going to torque the lower control arm inner bolt. This is the horizontal one, and this is 47 foot-pounds, 17 millimeter socket. Now we're going to torque the front vertical bolt on the lower control arm and this is 61 foot-pounds, 19 millimeter socket. Now I'm going to tighten up the castle nut on the lower ball joint where it goes through the lower control arm and its torque specs are 58 to 65. I'm going to go with 65 because it's a used ball joint. Nothing's wrong with it, but it's not a new one. That's a 17 millimeter socket. Now you just want to make sure that you have a spot to put the new cotter pin in and I do not, so I'm just going ... You never loosen it. Always tighten it until the cotter pin hole lines up. It's right there. I see it now. Yup, there you go. So I'm putting a new cotter pin in and this cotter pin is a one eighth. If you need to go buy one.
And to install the front sway bar link is just basically to reverse procedure. I like to put the sway bar link into the top of the sway bar first. The new nuts are 15 millimeter, not a 14, and it still has the Allen head in the center, which is a five millimeter Allen head. Now I'm going to put the lower one, start the nut. With the wishbone in the way I have found that it's kind of difficult to put an Allen head in there and hold that. So you're going to have to use a pair of the needle nose vice grips like I did to remove it. Just being careful, not pinching the new boot. Using a gear wrench or ratchet wrench.
I'm going to snug that as tight as I can, pretty much as tight as I can get it because I'm going to end up torquing it. Now I'm going to start the bottom. Put a pair of locking pliers on there, needle nose locking pliers. See if I can catch it without pinching that boot. As careful as I can be. I'm going to put a longer wrench on here to tighten this because obviously I can't get a torque wrench in there. So the specs for this is 22 foot-pounds. Now, I can put the torque wrench on the top. So we're going to torque this to 22 foot-pounds. Okay. Now we're ready to put our wheel back on.
I'm just going to snug them up by hand then I'll lower it down on the ground with the weight of the vehicle on it and I'll torque the wheel to 80 foot-pounds. 19 millimeter socket and we're going to torque the wheel to 80 foot-pounds in a star pattern. Double check.
Now we're going to repeat the process on the other side. Thanks for watching. Visit us at 1aauto.com for quality auto parts, fast and free shipping, and the best customer service in the industry.


