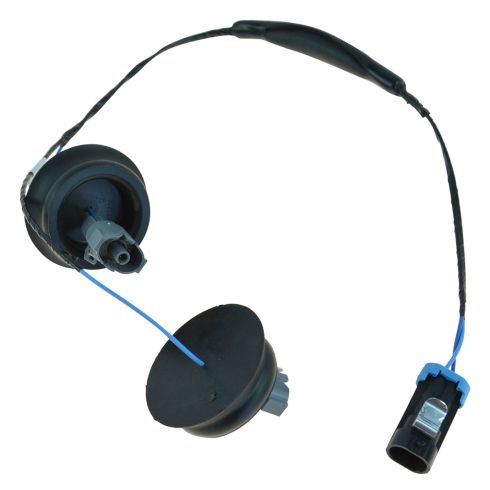
Replaces
This part doesn’t fit a . Select from parts that fit.
Specify your vehicle's year, make and model to guarantee fit.
Frequently bought together
Part Details
Genuine original equipment part (OEM) that was factory installed on your vehicle by the manufacturer.
Item Condition:
New
1 Year Warranty
This item is backed by our 1-year warranty. In the event this item should fail during intended use, we will replace the part free of charge. This warranty covers the cost of the part only.
Returns: Parts with electrical components cannot be returned once installed.
FREE Shipping is standard on Orders shipped to the lower 48 States (Contiguous United States). Standard shipping charges apply to Hawaii, Alaska and US Territories. Shipping is not available to Canada.
Expedited is available on checkout to the United States, excluding Alaska, Hawaii and US Territories as well as P.O. Boxes and APO/FPO/DPO addresses. Final shipping costs are available at checkout.
Created on:
Tools used
Brought to you by 1AAuto.com, your source for quality replacement parts and the best service on the Internet.
Hi, I'm Don from 1A Auto. I hope this how-to video helps you out, and the next time you need a part for your vehicle, think of 1AAuto.com. Thanks.
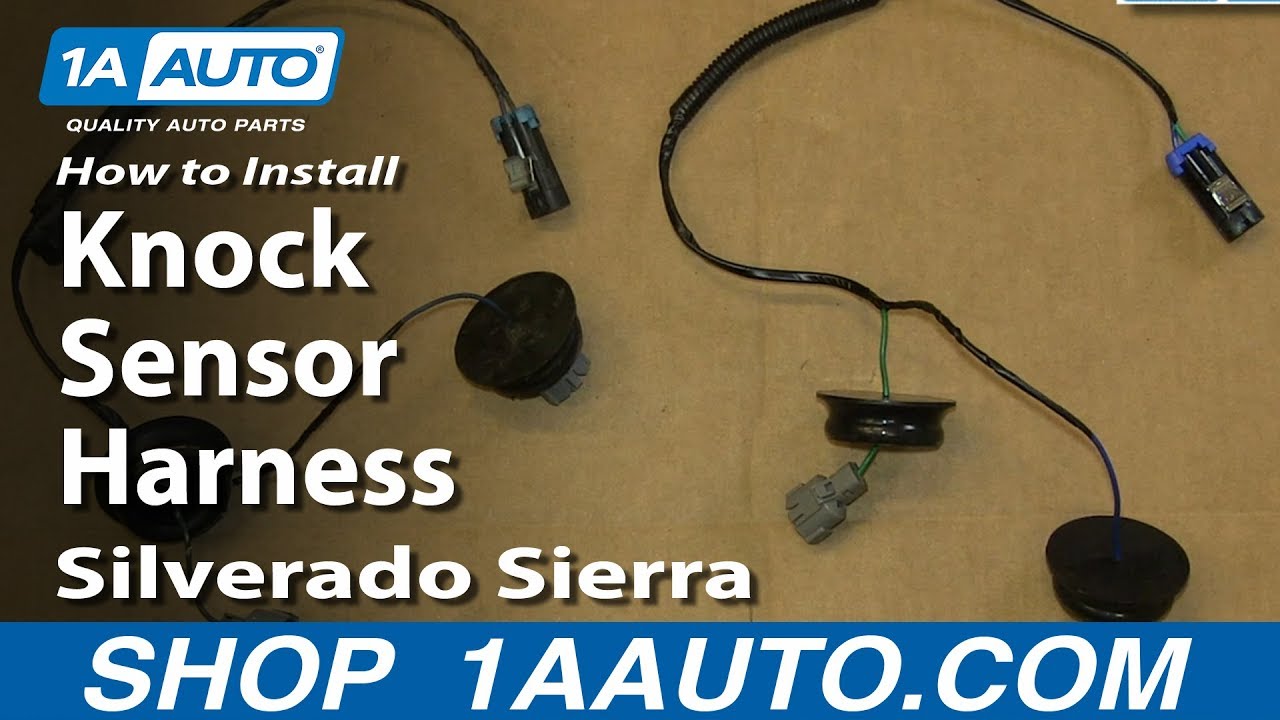
In this video, we're going to show you how to replace the knock sensor harness on this 2002 Chevy Suburban, and it's the same part and similar process on the Suburbans from 2001 to 2006. The items you'll need for this are: a new knock sensor harness from 1AAuto.com, flat blade screwdriver, 8mm and 10mm sockets, a ratchet with an extension, a fuel line disconnect tool (in this case a 3/8 inch), pliers, vacuum, penetrating oil, and a torque wrench.
Start off by removing the 8mm bolt that holds on your engine cover. That pulls free. Then, using a flat blade screwdriver, just loosen up this hose clamp right here and this hose clamp right over here. Now, you can pull the hose free. Pull it free from this side, then just lift it up and pry out the hose from the intake hose. Then it's free. Now, remove these three 8mm bolts right here. We'll fast forward as Don does this. Then remove these three 8mm bolts right here.
Next, disconnect these two harnesses. To do that, you just pull up on the tab and pull them free. Then pry this hose right here free, and then remove these three 10mm nuts. Lift up this bracket and pull it aside, and then remove this 8mm bolt right here, and then just pull that bracket aside, and then disconnect this hose clamp, and do the same thing back here with this one. You want to make sure you disconnect that harness as well and pull that aside. Do the same thing back here, until this set of harnesses loosens up. Then just remove this 10mm nut right here, and then you can just pull that set of harnesses aside. Then pull up the clip on the harness for your fuel injector, then push the tab on the harness and disconnect it, and repeat the process for the other seven.
Now, just loosen up this fuel line cap, and using a flat blade screwdriver and a rag, you want to just put the rag over it and push the tab on the fuel bleeder. It should spray out just a little bit, and it'll release the pressure. Then replace the cap and come over here and just pry off this clip. Then, using a fuel line separator tool, you just want to push that all the way in. For this one, it's a 3/8 inch. Then, once that's pushed all the way in, you can pull the fuel line free, and then it just pulls off. You put it on the fuel line below it and repeat the same process. Take a pair of pliers and push the teeth together on this hose clamp. Slide it down the hose, and then pull the hose free. Then just remove this series of 10mm bolts along each side of your intake manifold. You can kind of see them, they're down below the fuel rail there. We'll just fast forward as Don removes these.
Lift your intake manifold up and out. You will have to maneuver a lot of harnesses and wires and everything but you just want to get this out as far as you can get it to go, which at this point should be right about here. Once you get to this point, take your EGR and just feed it through the harnesses and out. Once you feed it through, you can just lift your intake manifold up and out
Pry up on your knock sensor harness caps. Then, using a pair of needle nose pliers, preferably bent ones, you want to push in the sides of the harness and then pull up. Do the same thing to this side and then your harness is free. On the left is the old harness; on the right is the new one from 1A Auto. You can see they are identical and they will fit exactly the same.
Push your new harness down onto the knock sensors and replace the caps. Set your intake manifold back down into place, then just feed this hose down and pull it out through the other side. Now, disconnect your EGR by just pulling out on the clip with a flat blade screwdriver and just pulling the hose free. Then feed that hose through the side of your intake manifold. Just maneuver it down and into place. We're going to fast forward as Don continues to do this. You just have to move the cables and wires around until you can finally get it to set down, it does take a second but it will go down. Now reconnect this hose. Just using pliers, slide that hose clamp back into place, and then reconnect this bracket. You want to just line this up and push it back onto those studs. Then just replace those nuts.
Take the EGR valve and push it back down into place, and replace the bolt that holds it there, and then reconnect that hose. Reconnect your other hose to the top of your intake manifold, replace this bracket and replace the bolts that hold it into place, reconnect this hose over here, and then replace this bracket and the bolts that hold it into place and just tighten those up. Then just replace each of these long 10mm bolts that line the side of your intake manifold, and then just tighten each of those up. You can see that we use a variety of different extensions just to help get there. You can use a longer one for these ones, then, as you get further back, you may need to use a shorter one. It does help to have a flashlight, too. Just make sure you reconnect your fuel lines, and then put those clips back into place to lock them.
Okay, you want to torque the manifold bolts. Start in the middle and go across, then work your way around the manifold in a counter-clockwise pattern. You want to tighten them on the first pass to 44 inch pounds, then 89 inch pounds. Now, just reconnect each of your fuel injectors. You just want to push the harness in and replace that clip and push it down into place. We'll fast forward as Don does this to the other fuel injectors. Lower the intake hose back down into place. You just push it back and then tighten up those two hose clamps. Double check that all your harnesses are connected and all the hoses are connected, and then replace your engine cover. Once you get it lined up, just replace that bolt and tighten it up. Then you're all set.
We hope this video helps you out, brought to you by 1AAuto.com, your source for quality replacement parts and the best service on the Internet. Please feel free to call us toll-free, 888-844-3393. We're the company that's here for you on the Internet and in person.
Tools used
Tools used
Because we're gonna have to disconnect the fuel system, we wanna take the pressure out of the fuel system. Just take this relay out right here. Find the fuel pump relay, grab that, take that out. And then you can try to start the vehicle. Our vehicle doesn't run right now. So if you crank the vehicle and then it dies, the fuel system should be unpressurized. Now I'm gonna disconnect the battery. Use an 8-millimeter wrench. Loosen up the negative side terminal and just set that wire aside. Take this cover off. Use an 8-millimeter socket and slide it off. Take the snorkel off, this little retainer right here. Just use a trim tool. Slide that off. Then loosen up the worm clamp. Use an 8-millimeter socket or you can use a straight blade screwdriver. Same with this one. Grab the snorkel, slide it back, and slide it out. Take this nut off right here. Use a 10-millimeter socket and then these 2 10-millimeter bolts, and then that one. And take this cover off. And we're gonna disconnect the connectors. Disconnect that one right there. It's off the purge solenoid. Disconnect the alternator connector right here, slide under the lock and pull it out. And this connector right here and the MAP sensor as well. Disconnect that. And I'm just gonna use a bungee cord to just keep the wires out of the way. Just wrap it around the wiper arm.
This wire connector right here, just unattach that from the intake, set that aside. Now we have to disconnect all the fuel injectors. There is a lock on them. This one doesn't have that lock on it, but you pull back on the lock and then you push down on that little lock tab and then slide the connector out. This one does have the lock, so the lock, you just grab the lock and just slide it up just a little bit, and then you should be able to push on the connector. Sometimes it's easier to slide whole lock out. This is how the lock works. So when it's locked in there, this is all the way down. Slide this out. You should be able to slide this out a little bit. You don't have to slide it out that much. Okay. That's how it's locked. Should be able to slide it out to there and then push down on the tab and release it. But like I said, sometimes it's easier just to slide this whole thing out, push it down, slide it out. Do that for all eight of them. All right. Disconnect the connector to the throttle body and just pull back on this little lock. Once it's back that far, push down on the tab, disconnect it. Now you could leave the throttle body attached. There's just coolant hoses that go to it. So you can either take those hoses off and just leave that all attached, take it all off on the intake or take the throttle body off. I'm gonna use a 10-millimeter socket. Take these nuts off.
And sometimes the stud comes out completely. That's okay. Let's get the other two out. Now, you wanna be careful with this. It is sensitive. You don't wanna drop it. And slide this hose out of the way over here. And disconnect this hose right here. This goes to the valve cover. You can either disconnect it down here or up here. And it's been on there for a long time, so it's kind of hard to get it loose. Just try to twist it back and forth. Screwdriver or a trim tool or something, just try to push on it. It should probably be replaced. The rubber is very dry. Just try not to crack this little port. There we go. Yeah. See the hose is starting to rip already. Move that to the side. Disconnect this EVAP line. Might need a screwdriver or something to push on the tab. It slides up. Now, when we take the intake off, since I'm not pulling the injector rail up, we're just gonna have to feed this through there. So just keep that in mind. And back here, disconnect this line that goes to the valve cover. Just pop that up. You could disconnect it up here if you wanted to and just put that out of the way.
Now, if you weren't able to bleed the pressure off the fuel system like I showed you earlier, taking the relay out and cranking it, just take the cap off right here. Take some rags and a screwdriver and you're just gonna push on this Schrader valve. Just be careful. It's a good idea to wear safety glasses while you're doing this. And just release the pressure. There wasn't a lot of pressure in this one, but sometimes they spray pretty good. It's good. Put the cap back on so I don't lose it. Now we'll disconnect the fuel line, just pull this lock off, and just slide it up and then pull it out. You're gonna need a special fuel line release tool. Just slide this over the pipe, pull the line forward, and then push the tool into the line. Once the tool is in the right spot, you should be able to pull the line back. Just like that. Pop it off.
Now wer're gonna take the intake bolts out. There's one there, one there, one there, and then there's two in the back on this side, on the opposite side. There's two in the front, one in the middle, and then two further back. So there's 5 per side, 10 in total. I'm gonna use an 8-millimeter socket. It helps to use a wobble socket or a swivel socket. And it's a good idea not to use an electric tool with the gas being out. You don't wanna cause any sparks. So I'm just gonna use an air tool. All right. All those bolts are loose. Just grab the intake, slide it up. Just remember this hose has to go underneath the fuel rail over here. And just slide it through there. Like that. Just be careful, it is plastic. You don't wanna crack it. And then when you go back in, you're gonna have to feed that through there again and slide it out.
So it's pretty dirty under here. I wanna clean some of this up. I don't want any of this stuff to fall into the intake ports. What you could do is put a rag in each one of those ports and then clean it all up if that's what you wanna do or just be careful. And you don't really wanna use a electric vacuum on this because the potential of getting some of the fuel in there and then catching the vacuum on fire. So just be careful. All right. So I put rags in all the ports. I just need to remember to take those out when I go to put the intake back on. Just use a blowgun. Just try to blow most of this away. And we're gonna pull this little cover up right here. Just use a trim tool or a screwdriver and just slide it up. It should slide on the wire. And just be careful. There we go. Disconnect the connector. It's kind of hard to do with your fingers. Might be easier with some needle nose pliers. And disconnect the connector. When you squeeze that, that releases the locks. And just do the same with the back one. There we go.
And the harness is disconnected. And just pull it away. And take the new connector and just lock it in place. Do the same on the back one. That's good. Now we can push these seals down. That's good. Do the same on this one. Perfect. Now you wanna run the harness this way. Just have it sitting back here so when we go to put the intake back on we can plug it right back in. Before I put the intake on, I just wanna take some brake parts cleaner and just clean the surfaces where the intake gasket is gonna sit. You don't have to clean all this up crystal clear or anything, but just where the gasket is gonna sit, make sure that's nice and clean. You can gently use a razor blade to clean some of this up. Just be careful. You don't wanna gouge the metal or you don't wanna cut yourself.
We'll take the old gaskets off. There's a little clip right here. There's another clip right here and then another one on the bottom. Take those off. Try not to tip the intake completely upside down. Just try to keep it on its side so none of the dirt goes into the ports and then just take a little rag and some brake parts cleaner and just wipe around the intake. And take the new gasket, just line it up, and click it into place right there, right there, and on the bottom. Just make sure that looks good. Do the same on the other one.
Don't forget to take these rags out. You can check all the ports. Just look down and make sure there's nothing that went in there. You could always spray a little compressed air. Now when we go to put the intake back on, we have to slide this back through the fuel rail. You could always disconnect it right here and just put this on the intake and then reconnect it down there if that makes it easier for you. And take the intake. This line is gonna go through right here. And just line it up. Watch this line, push that back there, and just wiggle the intake a little bit. Make sure you didn't crush any of the wires. Make sure this wire is accessible. It goes to the knock sensors. We can actually put this...just attach that right there right now so you don't lose that and get all the bolts started. Now I'm just gonna snug them down first. There is a sequence to tighten these up, but I'll snug them down first and then we'll do the torquing and the sequence after.
So, number one, I'm gonna torque this bolt to 44-inch-pounds, and that's the center one on the passenger side. That's number one. Number two is gonna be the center one on the driver side. Number three is gonna be on the driver side, the next one back. So number four from the middle one, the next one forward. Number five from the middle one, back one. Number six, on the driver side from the middle, forward one. Number seven is the next one forward. Number eight is the passenger side rear one. Number nine is the driver side rear. And number 10 is passenger side front one. So that was all the first pass. Now you're gonna do the same sequence and you're gonna change your torque wrench to 88-inch-pounds. And do the same exact sequence. Now we'll hook up the fuel line, line that up, lock it in place. Make sure that's good. Make sure you put this lock on, just slides on, and then locks down. It's just gonna prevent it from coming off.
Now hookup this line or hose right here. It goes to the valve cover. And hook this line up over here. Ours is split. This should be replaced, but it'll work for now. And the EVAP line, just make sure it locks in place. And that's good. Now check your throttle body gasket. If it's crushed, normally you have to replace it every time, but if it looks okay, you can probably try to reuse it. This one looks good. And take the studs or just the nuts if the studs didn't come out. Put those back on. And then I'm gonna torque these to 89-inch-pounds. Now reposition that coolant hose, and those clamps, take the electrical connector, line it up, lock it in place, push down on the lock. That's good. Now we wanna plug these injectors back in. Just take the locks, reposition the locks how those go. And plug those in. Make sure they're secure. Do the same with the other seven. Let's disconnect this bungee cord and run the wires same way they came out. This bracket's gonna go right here and those wires are gonna go like that. We can connect this connector right here. That goes to the knock sensor wire right there. And then this connector is gonna go to the MAP sensor in the back right there.
Now take this bracket, line that up. And take the bolts, get those all started. Put the nut on this bracket right here. That's good. Take these connectors, plug in the alternator. And this purge valve, plug that one in. And take the snorkel, line it up over the intake or the throttle body. Line this bracket up right here and over the airbox or mass airflow sensor. Tighten up this worm clamp right here. Just snug. And the same right here. Take the cover, line the cover up in the back, and get the bolt started, and tighten it up. Snug. Now let's reconnect the battery. Put the negative terminal on and snug it up. And then wiggle it, make sure it's not loose, and you're good to go.
Tools used
Let's get this cover off of here using our 8-millimeter socket. What we need to do now is remove this right here. To do that, you would loosen this clamp right there using either a flathead screwdriver or an 8-millimeter. You can come over here, do the same thing, loosen that right up. You don't necessarily need to take them off completely. And then if you were to look right under here, you're gonna see where these hoses should be kind of mounted in and held securely. You would just pop that free. Let's start taking this off. Okay. One's already free. Grab onto this. Slide it off. Slide that up and out of here. Now we're gonna get this out of the way. We're gonna remove these three 10-millimeter bolts. Let's grab this right back here. Grab that tab. Lift it up, and then you should be able to slide it off. Come right over here. Same thing. Lift that tab. Slide this off. Set this side. I'm just gonna get this right off of here. Just grab my small pocket screwdriver right in between here. Give it a little twist, slide that out of there. Now let's remove this 10-millimeter nut.
Grab this, lift it up. Gives us a little bit of slack. Now we're gonna disconnect the wiring for our throttle body assembly. Just come right along here, right in between this area, and give it a little twist. What we wanna do is try to push this gray piece out. That's what's locking this in. Okay. Press right here. Draw that off. Get this hose off of here. Sometimes you can wiggle them around. You might have to twist it. I'm gonna try to press a little bit with my screwdriver. Obviously, I wanna be careful not to damage the hose. Get that off of there. Let's continue on to this area right here. You're gonna notice, this is a little cap. Go ahead and take that off of there.
Behind here, you're gonna see a Schrader valve. It's almost like a little piton that's gonna be sticking out in the center. What we're gonna wanna do is relieve the fuel pressure that's gonna be inside the system. To do that, we're gonna press on that center piece. You just wanna be careful because it's gonna be under pressure. You need to have gloves, eye protection, and it's probably a great idea to have a rag around to try to catch the majority of any fluid that might come out. Okay. So nothing came out of there. That's great. That means that there wasn't any fuel pressure waiting in the system for me. But you definitely wanna make sure that you do that anyways. Now I'm just gonna take that cap, put it right back on there because I don't wanna lose it.
Up along the top of the intake, you're gonna see this rubber hose that leads down to a plastic line. Let's go ahead and get that off of there. Give it a little wiggle. If you need to, try to get underneath and just try to break it free. We need to get this lock off of the fuel line where it connects onto the fuel rail. To do that, try to reach my hand in. We need to come through with our small pocket screwdriver, get underneath right here, lift this up. Once you do that, you can slide it forward. Set this aside. To get the hose or the fuel line off of the rest of the fuel rail here, we're gonna use this tool. I'm gonna use the 3/8 side, which is the bigger side. I'm gonna put it around the line and then it should go through and it's gonna press up against the teeth that you can see inside. I'm gonna press this in and just kind of twist it so it works its way along the teeth.
If it looks as though yours is very rusted up, you probably wanna put some penetrant in there. Now I'm gonna grab that hose. Try to give it a little push at the same time as I do this. All right. I just felt the tool go in quite a bit. At this point, I should be able to draw this off. There we are. A little bit of fuel coming out. That's okay. Now it's gonna be time to get the fuel injector wiring harness off of here. If you were to look at it, you're gonna see a big old plastic piece that's gonna look kind of confusing. Why is it like that? Well, if you just take your small pocket screwdriver and press right in this little piece, you can grab onto this lip where my fingers are and draw this up. It's a lock. Okay. Pull that right up. Now we're gonna go ahead and press on this tab again. Give this a little wiggle and it should wanna separate. We're gonna do the same to all the fuel injectors.
Okay. So I got the four off over on the passenger side there. Now I made my way over to the driver's side. I'm gonna remove the four that are on this side as well. The side might be a little bit harder to get to, but you can do it. We're gonna get the wiring off for this purge valve here. There's a little clip you do. You can grab onto that. Now we're gonna get this hose off of here. If you were to take your small pocket screwdriver and press right here, you should be able to twist and lift, and that comes right out. Now we're gonna remove our throttle body assembly. You're gonna find that there are three mounting nuts, one on top, one on the bottom driver's side, and then one on the bottom passenger side as well. Remove all three.
Looks like it actually pulled out the whole stud for us. It's not necessarily something to worry about. I'll show you how to put it back in. I'm just gonna see if I can work this off of here. Here we are. We'll just set that aside. Next, we're gonna remove the hose that comes over to here. This just goes right to the backside of the intake. I find that this side's easier to get off. Remove that clamp, grab your hose, give it a little twist to break it free, and then draw it right off. Let's just take a nice rag. We're gonna cover the hole for the intake. The next step that we wanna do is grab compressed air with a blow gun and we're gonna blow out the dirt that's in between where the intake connects on to the engine.
Next, we're gonna remove the 10 8-millimeter bolts that hold the intake to the engine. You're gonna notice there are five on the passenger side and then there'll be five more over on the driver's side. I'm just gonna grab onto this. Try to give it a little wiggle. Try to lift it up. If you feel as though it's sticking in the middle, well, check those bolts, see if they're up all the way. Okay. So it's lifting up now. Just wiggle it around. Take a double-check around. Make sure that there isn't anything that you might've happened to miss. You don't wanna have any hoses or wiring connected to this in any way, anything that might pose an issue. Something to remember is as we're starting to lift this up and draw it out, this piece right here has to come through and under this area right here. So as we come up, it might wanna get caught. This is the area it's gonna be stuck. Just go ahead and pull it right through there. Okay. There it is, friends.
Now with that intake out of the way, we have a clear view of a big old mess. Any of this stuff that looks like that could be a contaminant that's gonna make its way down into the engine. We obviously don't want that to happen. I'm gonna grab a vacuum cleaner. You can use whatever you have. Clean this out the best you can. And then, of course, you need to take a peek inside of each of these ports to make sure there's no debris in there. Clean those out as well. Now that we have that out of the way, we have a nice, clear view of the wiring for the NOx sensors, take a nice pry bar. Just get right under there. We're gonna lift this up to take a peek under there. Now I'm gonna use some pliers and I'm gonna grab right onto it length-wise. You're gonna see that this is oblonged. You wanna grab onto the two far ends of it. Give it a little squeeze and then draw it up. There we go. Pull that out. And you can see what goes on. So what I did is I kind of grabbed right here, I squeezed, and it released the little tabs. Do the same to the other one. Okay. Grab onto it and lift it right up.
Before we go ahead and get the wiring on there, we just want to double-check the holes where the caps are going to go on. They need to make a good seal. They need to make sure that no moisture or debris can get in. If you were to look at that one right there, obviously this one needs a little bit of work. You could use some sandpaper or a nice brush, clean it up, vacuum it out, and make it look nice so it makes a good seal. Grab on to that wiring. Just get right out of here. Once you compared your new part to your old, we're going to continue on by installing. I like to add a little bit of dielectrical grease on the connection points where they're gonna connect into the NOx sensor. Just helps keep moisture and everything out of there. Just like that. Hang this over there. If you go like this, you can pull the rubber piece up a little bit. Then you can just take this, put it right down. It should click. Give it a nice tug. Do the same to the other one real quick. Slide it in. Give it a nice tug. Okay. If you want to use a little bit more dielectric grease around the rubber there, it might be helpful to keep dirt and debris, and moisture out of there. But you don't necessarily need to because it should make a good seal.
Now it's gonna be time to clean down the engine where the gaskets are gonna ride. They're gonna be along each one of these ports. Before you go ahead and scrape them down though, take a rag, fold it up, put it inside the port so it'll catch any of the debris that might fall inside. Take a nice flat razor blade. And I always just try to scrape away from the hole. Okay. So this one looks great. Go ahead and grab onto that rag. I always try to drag it along the engine so I can pull out any of the debris that might've tried getting inside. Continue wiping it down. Now do the same to all. We've got the intake over on the bench. The first thing I like to do is make sure no fuel can get out of this line. I'm just gonna use a little bit of electrical tape because that's something that I have on hand, and most likely everybody does. And I'll just kind of tape it up. That's decent enough.
Now, once you tilt it up, you'll be able to see where the gaskets are gonna be. Obviously, we don't want any of this crud getting inside there. So make sure you vacuum it out, get it as cleaned up as possible, and then we'll get the gasket off. Okay. So we've got that cleaned up decently. Now if you just grab onto that gasket area, you can see that it tries to lift up and off of there. Right along here, there's gonna be an area that latches on. Just kind of pry it away. That'll help you along. We got another latch right here. Pull that up. And then, of course, there'll be one at the far end as well. We'll get that out of here. Move along. Now, when I clean this up, I like to use that razor blade. When I do it, I'm gonna kind of tilt this down like that, that way there any crumbs or any debris that I happen to peel off of here will fall away and not in.
Be very careful in this area right here. That's the lower portion of your fuel injector. We wanna make sure that the gasket area on all these ports is nice and clean, and then, of course, we'll do the same to the other side of the intake. Now I'm gonna take a rag with some parts cleaner directly on it and I'm gonna wipe down the mating surface here. Get it nice and clean. Do the same to all, of course. That looks great. Let's go ahead and turn it over and do the same to the other side.
Now that we have this cleaned up, let's go ahead and put on our new gasket here. You can see you've got your little clippies. Got one right there. Set it on here just like that. It should click right in. Make sure it's nice and secure. Do the same to the other one. Let's take the NOx sensor wire. I'm just gonna go straight towards the back of the engine around this bracket right here and then up and over and leave it right there. You wanna make sure that it's not anywhere near any of these ports because obviously we don't wanna put a kink on this and we also don't wanna make an issue for the gasket. I got it right here. We've got our hose coming in down at an angle. Now that we have the intake resting here, we're gonna grab onto this. Make sure we put it through there before we go too much further. There we are. Okay. This looks pretty great.
Now that we have it semi-lined up, the next thing we need to do is make sure that there's no wiring, there's nothing that could have fallen and is stuck underneath the intake before you start tightening anything down or even starting in those bolts. Just kind of wiggle it around. You should almost kind of feel this wanna slide right into place. It's gonna go [Inaudible 00:15:37] and slide right in. If for some reason you notice that it doesn't seem like it's lined up but it doesn't wanna slide forward and back, it's probably because one of your bolts right here maybe fell down into one of those ports a little bit and it's causing it not to move. If that's the case, just go ahead and lift up a little bit, wiggle it around, and you should be able to get it lined up. Before you go ahead and tighten any of them down completely, I always try to make sure that I start them all in at least a few good threads.
Now it's gonna be time to bottom out our bolts for the intake. When we do that, we're gonna be starting from the center two bolts, and then we're gonna work our way out in a crisscross pattern. So I'm gonna start with the center on the passenger side. Okay. Just bottom it out. We're gonna be torquing them, so don't worry about over-tightening it now. On the other side here. Last one, number 10. Okay. Let's torque them to manufacturer specifications. Now we're gonna torque down these bolts to 44-inch pounds in the same sequence, starting from the center on the passenger side. Okay. Three is the one directly behind number two. Let's get number four. It's gonna be the second one from the front here. Number five is gonna be the one immediately behind that center bolt there. Number six is gonna be the second one from the front on the driver's side. Okay. Number seven, just scoot right up to the forward one. Now we're gonna go number eight, which is all the way in the back on the passenger side. Number nine is gonna be directly across to the back bolt on the driver's side. And number 10, all the way in the front, on the passengers aside. Perfect.
Now we're gonna do a second pass. The second pass needs to be torqued to 89-inch pounds. Perfect. Just double-check everything. It looks like we tightened every single bolt, all five on each side of the manifold. This looks great. Let's move along. I like to get the fuel line on ASAP. Give it a nice tug. Make sure you get that lock on there. Slide it through like this. That should slide in. And then you just clip it like this. Give it a nice tug. Make sure it's completely locked in. Grab the wiring for that NOx sensor. Bring this up here. We're gonna put it right up onto there where it's supposed to sit. Make sure it's all the way on and it's nice and secure. Go ahead and connect it in. I always like to give them a tug, make sure that they can't come disconnected. If that comes sliding off, you could try to pinch this down a little bit.
There we go. Now I got it that time. That feels good. This is definitely not coming off. Let's get this sensor plugged in. Connect that in. Let's grab this hose. It's gonna go underneath the wiring harness and then right onto here. Give it a nice tug. Make sure it's secured. Now we can grab onto this. We'll just kind of pull it and we're gonna line up the hole with the piece right here. It should slide down and the wires should fall right into where they need to be. Let's get the nut on for there. Let's get this plate back on there. The two bolt holes go towards the front and the one goes towards the rear. Grab this. Connect it right in. Grab this. It should push right on. Give them a nice tug. Those feel great. Let's get this hose back on here. Make sure you fix that clamp so it's situated properly. A little bit further. Give your hose a nice tug and make sure it's completely secured. Over on the other side, let's go ahead and get this hose back reattached. Awesome.
Let's move along to the fuel injectors now. You have the area with the little piton. That's gonna be facing towards the front if you're on the passenger side and it'll be facing towards the rear on the driver's side. I'm gonna go ahead and put that down and on there. Make sure it clicks in. Give it a nice wiggle and a nice little tug. You have to make sure that these are completely latched in. If they're loose, you're gonna have a runnability issue. Don't forget about the lock. Let's put that back on there as well. You see how this opens up, that's gonna slide right over this area here and then this area is gonna slide right down in between. Push it so it pushes in that tab and push it right by it. That should lock it in. Give it a nice tug one more time. Make sure it's completely latched in. This is super important. Do the same to all four on this side and then do the same to the four on the driver's side.
Now, when it comes time to put your throttle body back on, if for some reason when you tried to remove the nut the stud came out, don't worry too much. What I would do is I would use the proper torx bit that fits on there and then use a 10-millimeter wrench and loosen this up. You don't need to remove the nut fully though. Just loosen it up, a couple of good threads. Let's do that real quick. Carefully. Okay. So I loosened that a couple of threads. I'm gonna do the same to all of them that came out just like this. Once I do, I'm gonna put the throttle body back onto here after I replace the gasket and then we'll go ahead and tighten up the center. We're gonna torque that to manufacturer specifications and then we'll go ahead and torque up the nut afterward. Next, I would take a nice razor blade and I would clean up the area where the seal's gonna ride right on the throttle body. Now I'm just gonna go like that, give it a nice scraping. Obviously, we don't wanna chisel up the metal in any way. We're just trying to get off any of the leftover residue stuff around here. Make sure you clean out any of the gunk that you might've gotten inside the throttle body area.
The next thing we're gonna do is make sure we have all this cleaned out in here. And then something that I always like to mention is it's a great idea and it's highly recommended to replace the gasket that goes between your intake and your throttle body before you re-install. If you don't have access to a new gasket, what you should do is at least make sure you clean it down and inspect it. Make sure that there are no cracks or it's not torn anywhere and give it a little squeeze. Make sure it still feels soft. If it feels dry and brittle and you can't feel any squish, you really should replace the gasket. This one seems fine. So I'm just gonna clean it down. Like I said, I would highly recommend replacing it though.
Now, once you've either replaced, or cleaned, and inspected the seal, we can go ahead and put this back over. Okay. That feels good. Now I'm gonna take my stud with my loosened nut. Start it in there. I'm gonna start in the other one as well. We'll get them both started and then we'll snug them up and torque them to manufacturer specifications. Now we're gonna torque the studs, the ones that got removed, at least, to 53-inch pounds. Gonna be time to go ahead and put these nuts on there. Last one's started on. Once you have them all bottomed out, go ahead and torque those nuts to 89-inch pounds. Let's get this connected back in here to the throttle body. Make sure you press in on your lock. That should lock it in. Give it a nice tug. Make sure it doesn't come free.
Now it's gonna be time to get the air inlet back on here. Just put it down just like this. You can start in the side that goes over to the air filter box if you want. Take this one, slide it down in there, and then push it right onto the throttle body. That feels great. Let's go ahead and tighten these up. Okay. Just take a look. If you have this and you can attach it back in to secure it, it's a great idea. Lock that in. Double-check everything. Make sure that it's nice and secure and it definitely can't come free anywhere. Let's get our engine cover back on. We're gonna slide the backside in so it connects into the hooks and just drop this down. Now you would just tighten up your mounting nut up here. Mounting bolt. Give it a nice wiggle. Perfect. Okay. Double-check everything. All our wiring is in nice and secured. Perfect. The next thing you would wanna do is start up the vehicle, let it run for a little while, take it for a road test. Make sure the engine runs right. If it does, you're doing all right.
Tools used
All right, we want to disconnect the battery, disconnect the negative cable using 8-millimeter ratchet wrench or a wrench. And slide that out of the way.
Take this engine cover off. There's one screw right there, use an 8-millimeter socket. Just raise the cover up and slide it forward.
Now we're gonna take the snorkel off, use an 8-millimeter socket or a straight-blade screw driver, loosen up this worm clamp. And then over here, near the airbox, attach the mass airflow sensor.
And it's gonna be a bracket right here that's attached, this one is actually broken. Just use a trim tool to loosen that up. And you can grab the snorkel, just rock it back and forth. And take that off.
I'm gonna take this plate off, I'm gonna use a 10-millimeter socket, take these 2 bolts up. And for this back one, I'm just gonna use a ratchet wrench because you can't get underneath here. If you had a shorter socket, you could. I'm gonna take that bolt out and just grab the plate.
Take this nut off, there's a bracket right here that's holding this wiring harness on. Just use that 10-millimeter socket, just slide that up.
Now we're gonna disconnect the electrical connectors. You can disconnect the one right here, on the purge valve, just slide this lever up. And then, on the alternator, just push this little lever down. I'm just trying to get slack so that we can move this out of the way. Disconnect this connector right here, this goes to a sensor down below there. Slide that out of the way. And then there's the injector-sensor connectors. There's a little lock on here. You slide the injector lock up a little bit and you can push down on the lock tab and pull it up. Sometimes you just pull this lock completely off.
So, this is how this works. Normally, this is in here. So, normally, this lock is right here. You could just slide this up a little bit. And then you can push on the tab and that should release. But sometimes, if it's too difficult, just slide this lock completely out and it's a lot easier. So, do that for the other injectors. Three more on this side, and then the other side.
So, disconnect the throttle body, just slide this tab out and push down on the connector, slide it off. And then again with the fuel-rail connectors for the injectors, take these off. And disconnect the map sensor, just slide that connector up, disconnect it. That should be all the connectors. You can just slide this harness out of the way, just go to the side. Now I'm just gonna remove this connector, just slide that off and just set that aside.
Now, there's coolant hoses that go through the throttle body. So, you have to take those coolant hoses off. You don't necessarily have to take the throttle body off but you definitely have to take those hoses off. Make sure that the vehicle's cool when you go to take these hoses off. I'm gonna use a couple clamps on the hoses to prevent losing coolant, so then less coolant you have to top off. just crush the hose and you can take them off. Do the same on this hose right here.
I'm gonna use some hose-clamp pliers, just slide these hose clamps down. And then you can try twisting, twist the hose and slide it off. And do the same for the other one. And I'll just use some hose-removing pliers and just slide those off.
So, this hose goes to the valve cover. Just take this hose off here. Just slide it off. Just like that. Set it aside. And we wanna disconnect the purge valve. Just push down on this lock right here, slide it up.
Then this vacuum hose right here goes to this valve cover. Just slide it off the valve cover over here and back. And you can either leave this connected to the intake or just try to slide it off over here. Like this, if it's out of your way, you can use a pick to loosen that up.
I'm gonna slide the pick around here. Just try to twist this off a little bit. There we go, and slide that down, slide that out of the way.
Now, there is some dirt and debris at the bottom of the intake. Before I disconnect the fuel line and have gasoline in that area, you could use a vacuum to try to vacuum that up. Or just use a blow gun and just blow it away.
Now, there is gonna be pressure in the fuel line, so, you wanna release that pressure before you pop the line off. And there's a little cap with a Schrader valve right there, take the cap off. You're gonna take a rag just so the fuel doesn't spray everywhere. And what you wanna do is push on that Schrader valve and just release the pressure. Once you get in that area, pull this up, push the valve. You should wear safety glasses while you're doing this. There's no pressure in this, so, that's good.
The fuel line connects right here, and there's this clip. You just slide it up and slide it out. You might have to use a screwdriver to bend that up, slide that out, set that aside. And then you're gonna need a special tool to take this off. Go around the fuel line, you're gonna press it into the fuel line. And then slide the line off. There's little fingers in there. There we go. See the little fingers right there? And then you can take this tool off.
Now, this vehicle has a hydraulic booster. It doesn't have a vacuum booster. If you have a vehicle with the vacuum booster, you're gonna need to take that hose off either at the booster on the back of the intake.
Now use an 8-millimeter socket. And there's a bolt right here, right here, right here, and then two in the back. So, five bolts per side. Take those bolts, loosen them up. They should be caged, so, they're not gonna come out of the intake. You just gotta loosen them.
With all those bolts loose, you can grab the intake and slide it up. And this hose, you're gonna have to feed it underneath the fuel line right here. You could take the fuel lines off, if it makes it easier, but you don't have to. To make it easier, I'm just gonna pop the line off right here. It's hard to grab that wall, the intake's still on there, but...just push down on the lock and slide it up. Just grab the intake and slide it out.
All right, I'm gonna use a trim tool and just pry up this little grommet right here. You can slide it up on the wire. And then this one as well. If you're reusing these wires, just be careful. Although, a lot of times the plastic, its connector breaks, so, it's a good idea to just replace these together. And just take the tool and just try to squeeze the connector, just squeeze it like that and it spreads. All right, there you go. And there's the wiring harness.
All right, now you take this wiring harness. Now, the green wire, at least on this harness, is gonna go to the back sensor, just line that up, lock it in. And then the blue one's going to the front harness. Just match the wire up the way it goes. That's good. Now we can push the grommet, place, and do the same for the back one. It looks good. Now I'm just gonna move this connector back here for when I put the intake on.
Now I'm just cleaning up the surface area where the intake goes for the intake gasket meets the head. You can use a small razor blade. Just be careful, you don't want to gouge the metal, just use it lightly. Or a small scraper. Just try not to get any of the dirt into the intake ports.
And you can take a rag and a little brake parts cleaner and just clean up the surface.
You wanna replace these gaskets whenever you take the intake off, there's a little clip right here. Just slide that off, and the clip right here, and right here. And just clean up any of this area, get some of that carbon off. Try not to let it go into the intake itself. And just take a new gasket, line it up, lock it down and do the same at the other side.
And right before we put the intake on, just take a blowgun. Just make sure that nothing got into the ports.
All right, take the intake and just line it up. Just make sure none of the wires get in the way. That looks good. I'm gonna take this evap line, just line it up in the back. It'll lock it down. Yeah, that's good. You can lock it down right here as well.
Just so we don't lose this connector, just grab this and just line it. Click this into position right here, we'll connect it later. That's good.
Now we're gonna torque these down. Now, there's two torque sequences that you do. The first pass, you're gonna torque these to 3.7 foot-pounds. And this is number one right here. Now 23.7 is pretty much just snug, so, that's number one. Number two is right here. And number three, you go to the next one in the back...not all the way to the back, just right there. And four is right here, so, from the middle, the next one forward. Number five is on the passenger side, the next one back. And number six right here, on the driver's side. Number seven, the most forward one on the driver's side. Number eight, this one back on the passenger side. Number nine, this one back on the driver's side. And number 10.
All right, so, on the second pass, we're going to torque these two 7.4 foot-pounds in the same routine, same procedure. So, number one right here. Number two right here. Number three, a little further back. Number four, on the other side. Number five, right here. Number six. Number seven. Number eight, back here. Number nine, right here. And then last, number 10, right here.
And now we'll install the fuel line, just line that up, lock it in place. Take that lock, put that back on, snap it down. Take this line that goes over to the valve cover and line that up. And then put that right there. And then take this hose, get that lined up. And then, if you had the hose for the brake booster, you're gonna wanna hook that up.
Now we can hook up these coolant lines under the throttle body, line those up. And move the clamps over. Same with the other one. Pretty much put those where they were when they came off. And you can take the hose clamps off. use the hose pinchers, take those off. And then from the back of the engine, start hooking up the wires. So, the map sensor, line that wire up connector. And then connect this connector right here. And then all the fuel-injector connectors, line those up. Lock those down and then put the lock on as well. Let's see... And push that down. You can wiggle them a little bit, make sure they're on there properly. And just take this bracket, just line that up. That's good. Connect the alternator...and the purge valve.
And connect the injectors on the passenger's side. Same as the driver's side. Just line them up, lock them in place, push down on the lock. And connect the throttle body, line that connector up. Push down on the wall. Take this nut, put that on that bracket and snug that up. And take this bracket, line this up and put the bolts in. And snug these up.
Yeah, put the snorkel on, just line it up over the throttle body and then over the mass-airflow sensor. And then just tighten the one clamp down, just snug. It's good. Reattach that bracket, just slide that through the pinhole right there. It's good. And take the engine cover and line it up. Get the bolt started. And snug it down.
Now we can hook up the battery. Line it up and get it started. And snug it up. Just make sure it's not loose. Good.
877-844-3393
Monday - Friday 8:00am - 9:30pm ET
Saturday - Sunday 8:00am - 4:30pm ET
Specify your vehicle's year, make and model to guarantee fit.
This part doesn’t fit a . Select from parts that fit.
If your vehicle isn't listed, search Knock Sensor