Brought to you by 1AAuto.com, your source for quality replacement parts and the best service on the Internet.
Hi, I'm Mike Green. I'm one of the owners of 1A Auto. I want to help you save time and money repairing or maintaining your vehicle. I'm going to use my 20-plus years experience restoring and repairing cars and trucks like this to show you the correct way to install parts from 1AAuto.com. The right parts installed correctly: that's going to save you time and money. Thank you and enjoy the video.
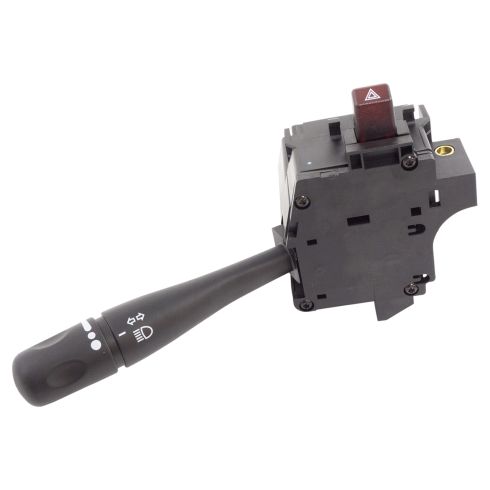
In this video, we're going to show you how to replace the turn signal and wiper switch on the steering column on this '97 Dodge Intrepid. The only tools you'll need are T15 and T30 Torx drivers, as well as an E6 star socket with a ratchet and extension.
Use a 10mm wrench, and disconnect your negative battery cable.
We remove this, first thing. Use a T30 Torx bit and up underneath here, there's a screw to remove the tilt lever. Up and underneath there are two T15 screws there, another one there, there's one way up in that hole there, way up in that hole there, and then way up in that hole there. Even with the tilt lever gone, you can reach in here with your finger and pull, and still tilt. Make sure it's tilted all the way up. We will fast forward as I just remove those six T15 Torx screw. You can see the silver ones that are at the bottom are shorter, and the ones you have to reach up in to the holes of the cavities are longer screws. For the bottom one, you pull down and out. Hang it over the key cylinder. You reach in, pull this down, and this one comes up and out.
With the trim off, the first thing you want to do, is you've got a wire here, I can see it to pull back towards the steering wheel, pull it up out, then forward and back out of your way. There are another two star screws, one right there, and one right here, and these are E6 star screws so you'll need a special socket. When those are out, this will come up.
I am looking at my new one. This is how we're looking at it. The top connector is held in by a couple of little tabs on each side, and then this back connector here, you have to reach in and pinch your connector with this hand. That's the top one. With this finger hopefully you can see it I'm just pulling out on the little tab, then pulling the connector. On the opposite side, pull out on the tab, pull on the connector. The connector's off. Then, down here on the side, here, on this rear one, there's a little button, basically right here back next to the wires. Press that tab on that connector, reaching under the other finger. Push on the connector as well. It's one of those things; once you get it, it comes right out. It takes a little bit of wrangling here. Well, that's my old one out.
The new one, I'm going to put it in, get that back connected first, and then the top connector here, and then put it in place. Push it against here and then down, slide it down. Start one screw, start the other screw, and take our wire, hook it back around, forward and back into place. So, close it down.
Here, a few things are: slot the panel down in it first, lift that back up. This is from the bottom paneling. I'm going to start the small bottom screws first I'm not going to make you watch me put all those screws in in real time; we will fast- forward it here. You start the bottom screws; leave them loose so you can move things around a little bit, and get the top in place. Start those three longer screws, and then once you have them all started, then go back around and tighten them.
They need to be tightened lightly; you want to make sure you don't strip any of the plastic or anything like that. Okay, and then once you've done that, then put the tilt lever back on and reconnect your battery.
We hope this video helps you out. Brought to you by www.1AAuto.com, your source for quality replacement parts and the best service on the Internet. Please feel free to call us toll-free, 888-844-3393. We're the company that's here for you on the Internet and in person.