Replaces
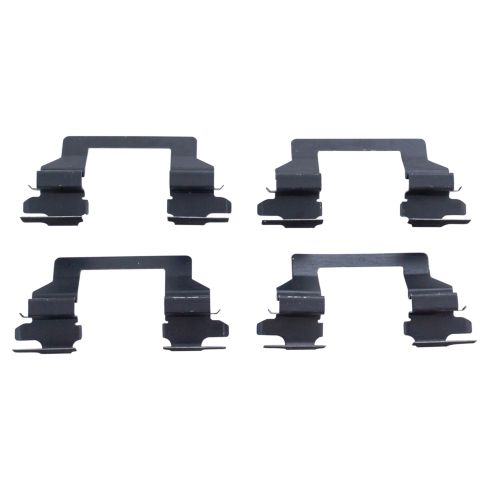
2007 Chevrolet Cobalt SS Front Caliper Hardware Kit DIY Solutions BFS01546

BFS01546
This part doesn’t fit a . Select from parts that fit.
Specify your vehicle's year, make and model to guarantee fit.
This part does not fit a .
Buy in the next and
Get it by: Tuesday, Feb 03 with expedited shipping
Frequently bought together
Specify your vehicle's year, make and model to guarantee fit.
This part does not fit a .
Complete Repair in One Purchase - Stop searching for parts individually and complete your repair with a customized kit or set from DIY Solutions.
High-Quality Parts from Trusted Brands - DIY Solutions' kits and sets are selected from the best automotive brands and include hard-to-find and even obsolete parts you may need for your vehicle.
Guaranteed Fit - DIY Solutions ensures its selected parts are quality-tested to guarantee fit and function.
Attention California Customers:
![]() WARNING: Cancer and Reproductive Harm - www.P65Warnings.ca.gov.
WARNING: Cancer and Reproductive Harm - www.P65Warnings.ca.gov.
Lifetime Warranty
This item is backed by our limited lifetime warranty. In the event that this item should fail due to manufacturing defects during intended use, we will replace the part free of charge. This warranty covers the cost of the part only.
FREE Shipping is standard on Orders shipped to the lower 48 States (Contiguous United States). Standard shipping charges apply to Hawaii, Alaska and US Territories. Shipping is not available to Canada.
Expedited is available on checkout to the United States, excluding Alaska, Hawaii and US Territories as well as P.O. Boxes and APO/FPO/DPO addresses. Final shipping costs are available at checkout.


Created on:
Tools used
- Loosen your lug nuts with a 19 mm socket and breaker bar Raise and secure the vehicle. Remove the lug nuts the rest of the way and set the wheel aside.
- Observe the thickness of your brake pads. Inspect your rotors for excessive wear or deep gouges. Loosen the caliper bolt with a 14 mm socket and ratchet. Use a flat blade screwdriver to compress the caliper pistons some and remove the caliper. Unbolt the 15 mm caliper bracket bolts. Remove the rotor
- Clean your new rotor with brake cleaner (mineral spirits would work just as well) Install the brake rotor onto the vehicle. Mount the caliper bracket and torque the 15 mm bolts to 85-90 ft lbs Use a C-clamp to compress the caliper. Install the brake pads, dabbing a bit of anti-seize grease on the edges to get it in. Push the caliper into place and bolt it down with your 14 mm socket. Torque the 14 mm bolt to 35 ft lbs.
- Put the wheel on the vehicle. Hand-tighten the lug nuts. Lower the vehicle. Torque your lug nuts in a star pattern to 100 ft lbs.
Brought to you by 1AAuto.com, your source for quality replacement parts and the best service on the Internet. Hi, I'm Mike Green. I'm one of the owners of 1A Auto. I want to help you save time and money repairing or maintaining your vehicle. I'm going to use my 20 plus years experience restoring and repairing cars and trucks like this to show you the correct way to install parts from 1AAuto.com. The right parts installed correctly, that's going to save you time and money. Thank you and enjoy the video.
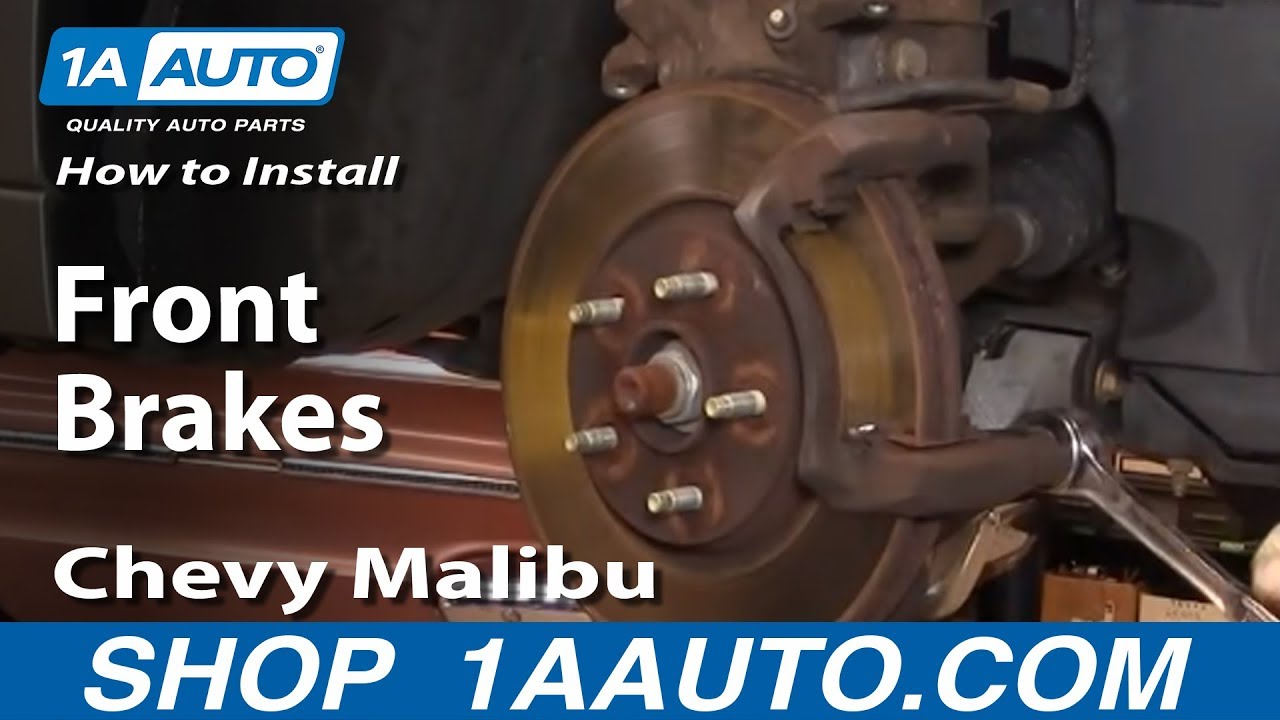
In this video, we're going to show you how to replace the front breaks on this 2006 Malibu. Procedures are the same for a few other GM Vehicles as well, the Malibu's, G5, Cobalt, HHR, Solstice and Saturn Sky as well as others. Tools you'll need are jack and jack stands, 14, 15, and 19mm sockets and that could vary by car. Ratchet with a pipe or breaker bar for some extra leverage, a flat blade screw driver, a large C-clamp, wire brush and a torque wrench. Start out by using a 19mm socket or wrench and loosen the plastic covers and then remove the wheel cover. If you don't have the benefit of air tools, you want to loosen the lug nuts up while it's on the ground then raise and support your vehicle and then remove the lug nuts on the wheel. Grab hold of the steering knuckle and turn it to make it easier to reach the back of the caliper. Now, we want to inspect the condition of the breaks. The rotors are a little crusty. As far as rust, that's not always a bad thing. You want to just take your finger and run up and down the surface of the rotor. I can feel some pretty big ridges here on the edges which indicates that this may be worn down. Also, our pads, it's hard to see but if we look in here, there's very little pad life left. You can actually tell here better. This is the metal or the pad. It's almost right up against the rotor, so this needs new front brakes. First thing we're going to do is remove these two bolts here. These two bolts are 14mm and they should come off pretty easy. I'm just going to speed it up as I remove those two bolts.
Now, this should come off, but it's pretty easy on the ridges here. What you want to do is take a good size screw driver and try out with this hold and that loosens up the caliper and the caliper comes right off, put it right there for an hour and you can just try out your pads. As you can see, here's my pad, they actually is a little wear indicator. It says there's a little bit of life left, but I'd feel better replacing these. Here's my inner pad as well. Now, we need to remove this caliper bracket. We'll remove two 15mm bolts here and here. These are going to be somewhat tighter so I'm going to use my ratchet. If you have a breaker bar, that's the best thing or use a piece of pipe, put it on your ratchet, little extra leverage and it should be apart pretty easily. We'll pop one get it started. And I'm just going to speed it up again here as I remove those bolts. I found that once I turned them, probably three or four turns, they actually came out by hand. Take the rotor, pull it right off. New rotor from 1A Auto. Put it on, take a lug nut. Kind of hold it into place here. We'll cut this off. Now, I have to reset. This piston is working its way out of the caliper, so I'm just going to take my old pad like that and take a big C-clamp and make sure we're not pressing anything lighter on the back there. I'm taking up the C-clamp, the piston goes back in to the caliper. This rubber seal kind of pops out and you just work it right back in there with your fingers. Before we put this caliper bracket, two things, I want to make sure these are sliding in and out nice and freely. Then you also want to take a wire brush and just clean out these stainless steel slide. Now, take your bracket and it goes basically between the knuckle and the disk. Put your bolt in, it will find its way. This bolt, you want to tighten up to 85 foot pounds.
New pads from 1A Auto, quite a bit thicker than what we took off there and the rear one has this rear tab. You want to make sure that's on the upside, so put that one in the back. That little tab is what makes that constant squeaking noise as your breaks wear down when they get low. Put this one up front. You want to make sure that your slides are pushed in here. Bring your caliper down right on top. Two bolts. These two bolts, you want to take into 35 foot pounds. We have the wheel back in place, then you put the lug nuts on by hand and then I'm just using my impact wrench to just tighten them up preliminary. Now with the vehicle on the ground, torque the lug nuts to 100 pounds using a star pattern. Now, put your wheel cover back on. There is a hole for the valve stem, then use a socket to tighten up the retainers. Last but certainly not the least, before you drive your vehicle, make sure you pump the breaks a bunch of times to get the pedal to feel nice and firm. You have to reset those caliper pistons, then do stops from five and ten miles an hour before you road test the vehicle.
We hope this helps you out. Brought to you by www.1AAuto.com, your source for quality replacement parts and the best service on the Internet. Please feel free to call us toll free, 888-844-3393. We're the company that's here for you on the Internet and in person.
Tools used
- Loosen the lug nut covers with a 19mm socket Pry off the center cap with a flat blade screwdriver Loosen the lug nuts with the vehicle on the ground Raise the vehicle with a floor jack Secure the vehicle on jack stands Remove the lug nuts Pull off the wheel
- Turn the rotor by hand or turn the steering wheel to turn the rotor Check the thickness of the brake pads Check the brake pad wear indicator Check for gouges on both sides of the rotor
- Remove 14mm bolts from the brake caliper Pull the caliper aside Pry the brake pads off with a flat blade screwdriver Remove the brake pad brackets If only changing the pads, continue to Step 6 and install the new pads
- Remove the 15mm bolts from the brake caliper bracket Pull off the brake caliper bracket Pull the rotor off
- Slide the rotor on Thread on one lug nut to hold the rotor in place Use a large C-clamp and the old pad to push the pistons back Apply anti-seize fluid or white grease to the slides Push the slides on Remove the brake pad slides Put the bracket back into place Start the 15mm bolts by hand Tighten the bolts to 65 foot-pounds of torque
- Clean the brake pad brackets with a wire brush Push the brackets onto the caliper bracket Apply grease to the brake pad tabs Install the new brake pads into the bracket Put the caliper on Thread bolts the 14mm by hand Tighten bolts to 35 foot-pounds
- Slide the wheel into place Start the lug nuts by hand Tighten the lug nuts preliminarily Lower the vehicle to the ground Tighten the lug nuts to 100 foot-pounds in a crossing or star pattern Reattach the center cap Tighten the lug nut covers with a 19mm socket
- Pump your brakes repeatedly until they feel firm Test your brakes at 5 miles per hour and then 10 miles per hour Road test the vehicle
Brought to you by 1AAuto.com, your source for quality replacement parts and the best service on the Internet.
Hi, I'm Don from 1A Auto. I hope this how-to video helps you out, and the next time you need a part for your vehicle, think of 1AAuto.com. Thanks.
In this video, we're going to show you how to remove, inspect, and replace front brake pads and rotors on a 2007 Pontiac G6. It's fundamentally the same from 2005 to 2010, and from the left side to the right side. The items that you are going to need are jack and jack stands, 19mm, 15mm, and 14mm socket and ratchet, flat blade screwdriver, C-clamp, and some brake grease.
Remove the plastic caps on the lug nuts with a 19mm socket. I'll fast-forward as I take those all off. Use a 19mm socket and socket wrench. If you have an air tool, go ahead and use that. You're going to remove the five lug nuts, and I'll fast-forward through that.
By hand, turn the hub assembly so that you can gain better access behind it. Doing a general front brake inspection, look through the window to see how much thickness is on the inside pad. Check your rotor. Run your finger along and check for any deep grooves or gouges. Then, check the outer pad thickness from where I'm pointing.
Use a 14mm socket and socket wrench, and remove the two bolts that hold the caliper to the caliper bracket. I'll fast-forward through removing those two 14mm bolts. Pull the caliper up and off of the caliper bracket and put it up and to the side.
Take a screwdriver and pry the pad away from the rotor. Do that for both the inner and outer pad. Remove the upper and lower metal brake pad guides. Using a 15mm socket and socket wrench, remove the two bolts that hold the caliper guide to the spindle assembly. I'm going to fast-forward as I take out those two 15mm bolts. Pull the caliper bracket up and out. Remove the brake rotor.
Our brakes were fine, so we're going to reinstall them. Go ahead and put your new rotor on. Then you can use a lug nut to keep it pressed against the hub while you finish up the brake work. I'm positioning the caliper so that I can use a C-clamp to push the piston back into the caliper. You can do this with a C-clamp, or you can do it with a pair of large water pump channel lock style pliers. What you're going to want to do is put the screw clamp onto the piston, tighten it, which forces the piston back into place.
I'm going to reposition the wheel so that I can get that access to the back of it. Before I go ahead and put that caliper bracket back on, I want to make sure that the slides are well greased. I'll pull them out with the boot, and check to make sure that there's grease on them. If there isn't, I will do that, and go ahead and push that boot back onto the caliper bracket. I'm going to do that for both of those just to make sure everything is good. Then, I'm going to go ahead and put that caliper bracket back on with the 15mm bolts. I'm going to fast-forward as I reinstall those two 15mm bolts. I'm going to torque the two 15mm bolts to approximately 65 foot-pounds.
Clean up the metal slides that you took off the caliper bracket with a wire brush. Then reinstall them to both the top and bottom. Take your pads and lube up with a little brake grease the ends that will get in contact with those caliper slide brackets, and then, go ahead and slide them into place. Go ahead and take your caliper and slide it over the brake pads and onto the caliper bracket, lining it up with the two slides, top and bottom.
Reinstall the bolts that hold the caliper to the caliper bracket. I'm going to go ahead and fast-forward through that. Torque the two caliper bolts to roughly 35 foot-pounds.
Reinstall the wheel and tighten up the lug nuts. I'm going to use an air gun, so I will fast-forward through this. I'm going to torque the five lug nuts to roughly 100 foot-pounds, and I'm going to do it in a star pattern. Now, reinstall your hub cap, and I'm going to do that with that 19mm socket, and I'm just going to screw them in by hand.
Also, we want to make sure that you line up the valve stem with the notch in the hub cap for the valve stem. I'm going to fast forward through tightening that up.
We hope this video helps you out. Brought to you by www.1AAuto.com, your source for quality replacement parts and the best service on the Internet. Please feel free to call us toll-free, 888-844-3393. We're the company that's here for you on the Internet and in person.
BFS01546
877-844-3393
Monday - Friday 8:00am - 9:30pm ET
Saturday - Sunday 8:00am - 4:30pm ET
Specify your vehicle's year, make and model to guarantee fit.
This part does not fit a .


