Returns: Parts with electrical components cannot be returned once installed.
Attention California Customers:
WARNING: This product can expose you to chemicals including Di(2-ethylhexyl)phthalate (DEHP), which is known to the State of California to cause cancer, and birth defects or other reproductive harm. For more information, go to www.P65Warnings.ca.gov.
Lifetime Warranty
This item is backed by our limited lifetime warranty. In the event that this item should fail due to manufacturing defects during intended use, we will replace the part free of charge. This warranty covers the cost of the part only.
Returns: Parts with electrical components cannot be returned once installed.
FREE Shipping is standard on orders shipped to the lower 48 States (Contiguous United States). Standard shipping charges apply to Hawaii and Alaska.
Shipping is not available to a P.O. Box, APO/FPO/DPO addresses, US Territories, or Canada for this item.
Expedited is available on checkout to the United States, excluding Alaska, Hawaii.
Final shipping costs are available at checkout.
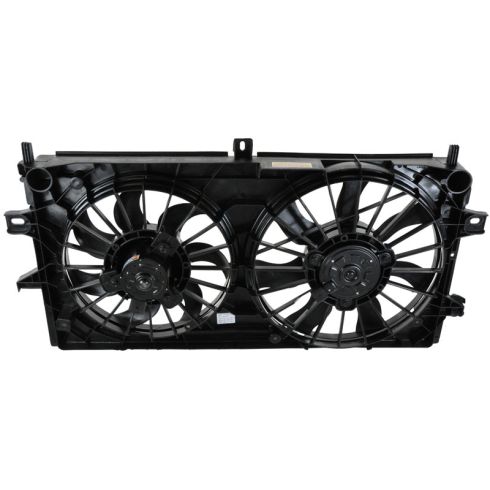
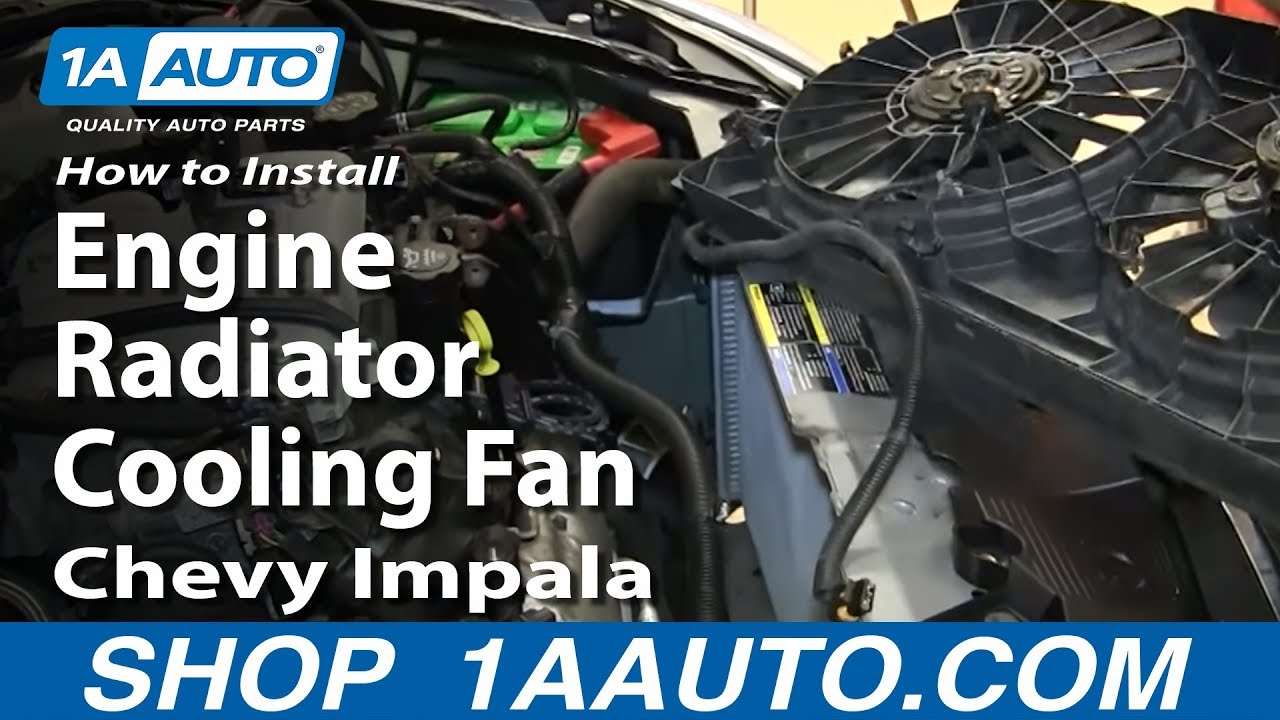
How to Replace Radiator Cooling Fan Assembly 2006-11 Chevy Impala
Created on:
Tools used
13mm Socket
Flat Blade Screwdriver
15mm Socket
Pry Bar
10mm Socket
Ratchet
1. Removing the Engine Mounts
Remove the four 15mm bolts from the engine mounts
Remove the two 13mm bolts from the engine mounts
Twist off the oil filler tube
Pull off the engine cover
Twist on the oil filler tube
Hold one engine mount bolt with a 15mm wrench
Remove the engine mount nut with a 15mm socket and ratchet
Hold the other engine mount bolt with a 15mm wrench
Remove the engine mount nut with a 15mm socket and ratchet
Pull off the engine mounts
2. Removing the Radiator Fan
Unclip the wiring harness from the radiator fan with a flat blade screwdriver
Disconnect the wiring harnesses from the radiator fan
Remove the two 10mm bolts from the radiator fan brackets
Pull off the radiator fan brackets
Remove the three 10mm bolts that hold the radiator fan to the radiator
Pull the radiator fan out, around the coolant hose
3. Installing the New Radiator Fan
Transfer the wiring harness clips from the old radiator fan to the new one
Push the new radiator fan into the engine compartment around the coolant hose
Put the radiator fan into place using the locating tabs
Insert the three 10mm bolts into the radiator fan
Put the fan brackets into place
Insert the two 10mm bolts into the fan bracket
Connect the wiring harnesses to the radiator fan
Clip the wiring harness to the fan
4. Reinstalling the Engine Mounts
Put the engine mounts into place
Insert the 15mm nuts and bolts into the engine mounts
Pull the engine mounts forward with a pry bar
Start the four 15mm bolts into the engine mounts
Start the two 13mm bolts into the engine mounts
Tighten all the engine mount bolts to between 50 to 55 foot-pounds of torque
Twist off the oil filler tube
Put on the engine cover
Twist on the oil filler tube
Brought to you by 1AAuto.com, your source for quality replacement parts and the best service on the Internet.
Hi, I'm Don from 1A Auto. I hope this how-to video helps you out, and next time you need parts for your vehicle, think of 1AAuto.com. Thanks.
In this video, we are going to replace a radiator fan on this 2006 Chevy Impala, pretty much the same as any 2006 to 2012 Impala. One way to test your radiator fan is it should always be on when your air conditioning is on. If it does not work when your air conditioning is worked, check the fuses and relays first. Then, if you figure that you need to replace the radiator fan, it's not too difficult. You'll need10mm, 13mm, and 15mm sockets with a ratchet. You will also need a flat blade screwdriver and a large pry bar.
Four 15mm bolts hold the front part of the upper engine mounts on; you'll need to remove those, and I'll fast forward here as we do that. Then, additionally, there are two more 13mm bolts. Remove your oil fill tube, and that just allows you to take the engine cover off, and then just put that oil cap back on just to keep things out of the engine. Now, there are two more bolts that hold the engine mounts to the engine. Use a 15mm wrench to hold the bolt side, and then a 15mm socket and ratchet to remove both nuts. Once those are removed, take the engine mounts up and out of place.
There are a series of clips holding the harness to the radiator fan assembly: a couple up top, and then a few down at the bottom. What you want to do is either pull the clips from the radiator fan assembly, or just undo the clips and pull the harness out of the clip. Either way, you will want to use those clips and transfer them to your new radiator fan assembly. We'll just fast- forward as Don removes those clips. There are two harness connections. You pull up on a tab with your thumb and pull the connection out. Two 10mm bolts hold the radiator fan at the top. I use a 10mm socket and ratchet. You could actually use just a wrench here as well. You just have to manipulate the radiator fan a little bit and pull those brackets out. There's a 10mm bolt at the top, one on the driver's side, and then one on the passenger side; I need to remove those. Those hold the radiator fan to the radiator. We will fast forward again as we use that 10mm socket and ratchet to remove those bolts. Push the passenger side corner of the radiator fan underneath the coolant hose over there. Slide it over to the passenger side a little bit, and then pull the driver's side up and out.
When you replace the radiator fan, there are two tabs on each side of the radiator, more on the lower side; they go into slots on the radiator itself down there and there. Put your new fan down in. I'm working the passenger side down under the radiator hose first. Make sure nothing binds up or gets caught in there, and then lift it up, and then down into those slots. We will fast forward as we put those three 10mm bolts that secure the fan to the radiator back in place and tighten them up.
Put both the upper brackets back in place. You work them up under the radiator support area and then onto the radiator fan. Again, we're going to fast forward here as we bolt those back in place. Securely reconnect, or, actually, route the wire harness, first, and then securely reconnect both of the leads to the radiator fan. Then make sure you put all the clips back in place so the wiring harness can't get caught anywhere. Remount the upper engine mounts on the engine side. You can see here we use a large pry bar and stick it in behind the engine mount. Just give the engine mount a pull to get the bolts started along the front support. We'll fast forward. Start all the bolts first that go onto the front support and then we will tighten those up nice and firm. You should probably tighten then up to 50 to 55 foot-pounds, and then do the same thing with the mounts that go to the engine; those bolts and nuts are 50 to 55 foot-pounds. Then remove the oil fill. Make sure that the grommets go in the correct places. Push the engine cover down on, and then replace your oil fill cap.
We hope this video helps you out. Brought to you by www.1AAuto.com, your source for quality replacement parts and the best service on the Internet. Please feel free to call us toll-free, 888-844-3393. We're the company that's here for you on the Internet and in person.
RFA83408
In Stock
Product Reviews
Loading reviews
5.00/ 5.08
8 reviews
5 Stars
4 Stars
3 Stars
2 Stars
1 Star
8
0
0
0
0
Great service
C
January 28, 2018
They had exactly what I was look for and the installation video was a big help. The delivery was on time and I could track my package the whole time.
I am very satisfied with this company and i will be using it in the future.
Thank You.
Cooling Fan Assembly
T
October 16, 2018
1A auto is good on parts and videos are very helpful.
Review for ac condenser
Jose
March 3, 2019
Im happy with the part i ordered it fit in my car perfectl and i would recommend 1aauto to my friends and family
Fit as it should
John
April 18, 2019
Awesome customer service and above par quality products I am now a customer for life! Thank You
Good product, as advertised, all put together and running good.
Darrel
August 13, 2021
Great service, thank you.
100%
Akira
October 3, 2023
Excellent exact fit. Definitely recommend
Perfect fit!
Valerie
May 5, 2024
The AC fan broke to pieces on the OEM (16 year old) assembly. This part that I bought from 1A Auto was the same quality (if not better) as the OEM part that was on the car. It was made well, a good price, came quickly, and it fit perfectly!
Thanks for making such quality parts available! ?
Replacement
William
August 31, 2024
Very good fit was easy to install
Customer Q&A
Will this fit a 2008 impala SS with a 5.3 ltr engine?September 29, 2016
Elvyn A
10
no
October 4, 2016
Brian F
Will this fit my 2010 3.5L chevy impala?July 2, 2017
I S
Is it used ?June 22, 2022
Addy V
10
We only sell new parts!
June 22, 2022
T I
Customer service
877-844-3393
Monday - Friday 8:00am - 9:30pm ET Saturday - Sunday 8:00am - 4:30pm ET
Chevrolet is a registered trademark of General Motors Company. 1A Auto is not affiliated with or sponsored by Chevrolet or General Motors Company.See all trademarks.
Enter Vehicle Year Make Model
Specify your vehicle's year, make and model to guarantee fit.
Year
Make
Model
Options
Drivetrain
This part doesn’t fit a . Select from parts that fit.