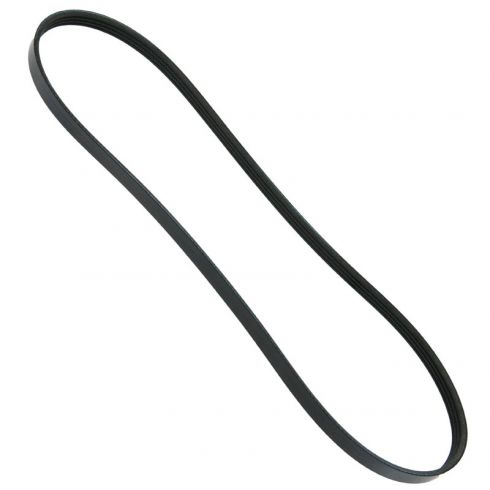
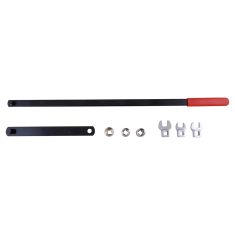
This item is backed by our 1-year warranty. In the event this item should fail during intended use, we will replace the part free of charge. This warranty covers the cost of the part only.
FREE Shipping is standard on Orders shipped to the lower 48 States (Contiguous United States). Standard shipping charges apply to Hawaii, Alaska and US Territories. Shipping is not available to Canada.
Expedited is available on checkout to the United States, excluding Alaska, Hawaii and US Territories as well as P.O. Boxes and APO/FPO/DPO addresses. Final shipping costs are available at checkout.
How to Replace Power Steering Belt 2001-05 Honda Civic
How to Replace Alternator Belt 2001-05 Honda Civic
Created on:
Tools used
12mm Socket
Socket Extensions
Rust Penetrant
Ratchet
Needle nose pliers
12mm Wrench
1. Removing the Power Steering Belt
Loosen the upper 12mm nut behind the steering belt pulley
Loosen the bottom 12mm nut near the power steering belt pulley
Move the reservoir and loosen the 12mm nuts
Loosen the wing nut counterclockwise with a pair of pliers
Remove the power steering belt
2. Installing the Power Steering Belt
Push the belt down in and place it on the steering pulley
Guide the belt onto the crank pulley
Tighten the tensioner with the wing nut
Push down on the belt, should be about 1/4"
Tighten the upper 12mm nut behind the steering belt pulley
Run the engine for five minutes
Check the tension and adjust
Tighten the upper 12mm nut behind the steering belt pulley
Tighten the bottom 12mm nut near the power steering belt pulley
Brought to you by 1AAuto.com, your source for quality replacement parts and the best service on the Internet.
Hi, I'm Mike from 1A Auto. I hope this how-to video helps you out, and next time you need parts for your vehicle, think of 1AAuto.com. Thanks!
Welcome to our how-to video. We're going to be working on a 2003 Honda Civic replacing the power steering belt. We hope this video helps you out, and if you need more parts or information for your vehicle, please visit 1aauto.com and please subscribe as well.
Items you'll need include a new belt from 1aauto.com, 12mm wrench, socket and extension, pliers, and penetrating oil.
Going to loosen this 12mm nut here, which will allow us to loosen up this wing nut and then there's also a bolt right down here that we need to loosen. This 12mm bolt on the front, pull your reservoir up and out of the way, and the bolt is right here. Just get your wrench down in, just loosen that up a little bit. This is your adjusting screw, hit it with a little penetrating oil down on the threads, pliers just to get it to go. And you can turn it counter-clockwise and the pump should pivot down to loosen up the belt.
Okay, here's the new belt. For now, just push it down in - well, actually get it on the crank pulley below, from below. So just put that on and put it on the power steering pulley for now. You don't have to have your vehicle on a lift or the wheel and tire off, we just did it to make it easier to film.
What you want to do is reach up in here and you can see the belt hanging down, and just guide it onto your crank pulley. Okay, now just pull up and you can tighten up your tensioner. So tighten this up, check your tension. When you push down, you should only push down about a quarter of an inch on the belt. Use a pair of pliers on the wing nut if you need to. And then, basically, what you want to do is once you get the tension right, tighten up this upper nut, run the vehicle for about five minutes, check the tension again, adjust it if you need to, and tighten.
Make sure you tighten up this nut and then tighten up the bottom 12mm bolt that holds it. Tighten up the top 12mm nut and tighten up this 12mm bolt. Getting the wrench on there is half the battle. And put your reservoir back in place.
Thanks for tuning in. We hope this video helped you out. Next time you need parts for your car, please visit 1AAuto.com. Also check out our other helpful how-to and diagnosis videos.
Tools used
12mm Socket
Socket Extensions
14mm Socket
Rust Penetrant
Ratchet
Needle nose pliers
1. Removing the Power Steering Pulley
Loosen the negative battery cable
Loosen the upper 12mm nut behind the steering belt pulley
Loosen the bottom 12mm nut near the power steering belt pulley
Move the reservoir and loosen the 12mm nuts
Loosen the wing nut counterclockwise with a pair of pliers
Remove the power steering belt
Remove the loosened bolts
Lift the power steering pulley and reservoir up and out
2. Removing the Alternator Belt
Remove the 12mm adjustment locking bolt
Loosen the 14mm bolt atop the alternator
Loosen the adjustment bolt (wing nut) with a pair of pliers
Press the alternator down and in
Remove the belt
3. Installing the Alternator Belt
Feed the belt down in around the crank pulley
Bring it around the A/C pulley
Bring it around the alternator
Tighten the wing nut so there is 1/4" of play
Tighten the 14mm bolt atop the alternator
Tighten the 12mm adjustment locking bolt
4. Installing the Power Steering Pulley
Insert the power steering pulley into place
Put the upper 12mm bolt into place
Push the belt down in and place it on the steering pulley
Guide the belt onto the crank pulley
Tighten the tensioner with the wing nut
Push down on the belt, should be about 1/4"
Tighten the upper 12mm nut behind the steering belt pulley
Run the engine for five minutes
Check the tension and adjust
Tighten the upper 12mm nut behind the steering belt pulley
Tighten the bottom 12mm nut near the power steering belt pulley
Brought to you by 1AAuto.com, your source for quality replacement parts and the best service on the Internet.
Hi, I'm Mike from 1A Auto. I hope this how-to video helps you out, and next time you need parts for your vehicle, think of 1AAuto.com. Thanks!
Welcome to our how-to video. We're going to be working on a 2003 Honda Civic replacing the power steering belt. We hope this video helps you out, and if you need more parts or information for your vehicle, please visit 1aauto.com and please subscribe as well.
Items you'll need include a new belt from 1aauto.com, 12mm wrench, socket and extension, pliers, and penetrating oil.
We're going to loosen this 12mm nut here, which will allow us to loosen up this wing nut and then there's also a bolt right down here that we need to loosen. This 12mm bolt on the front, pull your reservoir up and out of the way, and the bolt is right here. Just get your wrench down in, just loosen that up a little bit. This is your adjusting screw, hit it with a little penetrating oil down on the threads, pliers just to get it to go. And you can turn it counter-clockwise and the pump should pivot down to loosen up the belt.
Okay, with the new belt, for now, just push it down in - well, actually get it on the crank pulley below, from below. So just put that on and put it on the power steering pulley for now. You don't have to have your vehicle on a lift or the wheel and tire off, we just did it to make it easier to film.
What you want to do is reach up in here and you can see the belt hanging down, and just guide it onto your crank pulley. Okay, now just pull up and you can tighten up your tensioner. So tighten this up, check your tension. When you push down, you should only push down about a quarter of an inch on the belt. Use a pair of pliers on the wing nut if you need to. And then, basically, what you want to do is once you get the tension right, tighten up this upper nut, run the vehicle for about five minutes, check the tension again, adjust it if you need to, and tighten.
Make sure you tighten up this nut and then tighten up the bottom 12mm bolt that holds it. Tighten up the top 12mm nut and tighten up this 12mm bolt. Getting the wrench on there is half the battle. And put your reservoir back in place.
Thanks for tuning in. We hope this video helped you out. Next time you need parts for your car, please visit 1AAuto.com. Also check out our other helpful how-to and diagnosis videos.
4K398
In Stock
Product Reviews
Loading reviews
5.00/ 5.02
2 reviews
5 Stars
4 Stars
3 Stars
2 Stars
1 Star
2
0
0
0
0
Serpentine belt
Jason
February 6, 2019
Had to replace due to squeezing noise, come in on time, fit just like it should
Shipped Same Day
Logan
January 26, 2021
Items shipped same day with competitive pricing through 1A Auto.
Customer Q&A
No questions have been asked about this item.
Customer service
877-844-3393
Monday - Friday 8:00am - 9:30pm ET Saturday - Sunday 8:00am - 4:30pm ET
GMC is a registered trademark of General Motors Company. 1A Auto is not affiliated with or sponsored by GMC or General Motors Company.See all trademarks.
Enter Vehicle Year Make Model
Specify your vehicle's year, make and model to guarantee fit.
Year
Make
Model
Options
Drivetrain
This part doesn’t fit a . Select from parts that fit.