WARNING: This product can expose you to chemicals including Lead and Lead Compounds, which are known to the State of California to cause cancer, and birth defects or other reproductive harm. For more information, go to www.P65Warnings.ca.gov.
Lifetime Warranty
This item is backed by our limited lifetime warranty. In the event that this item should fail due to manufacturing defects during intended use, we will replace the part free of charge. This warranty covers the cost of the part only.
FREE Shipping is standard on Orders shipped to the lower 48 States (Contiguous United States). Standard shipping charges apply to Hawaii, Alaska and US Territories. Shipping is not available to Canada.
Expedited is available on checkout to the United States, excluding Alaska, Hawaii and US Territories as well as P.O. Boxes and APO/FPO/DPO addresses. Final shipping costs are available at checkout.
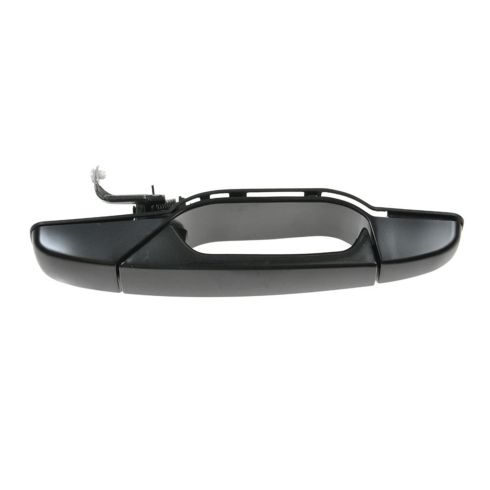
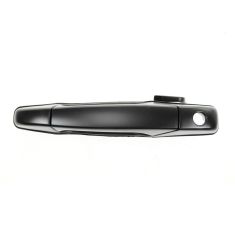
How To Replace Outside Front Door Handle 2007-13 Chevy Silverado
Created on:
Tools used
Socket Extensions
Flat Blade Screwdriver
10mm Socket
Ratchet
Needle nose pliers
1. Removing the Door Panel
Pry off the trim piece inside the door pull with a flat blade screwdriver
Pry off the trim piece inside the door handle with a flat blade screwdriver
Pry off the trim piece at the front top corner of the door panel with a flat blade screwdriver
Remove the two 10mm bolts inside the door pull
Remove the 10mm bolt inside the door handle
Remove the panel under the handle
Remove the two 10mm bolts underneath the handle
Pry up the window switch panel
Disconnect the switch wiring harnesses
Pull the lock up and pry out the panel on the lock
Life the lock up and off
Pry out the door panel with a door panel clip tool or putty knife
Lift the door panel up and off
Disconnect the latch cables from the door handle with pliers
Carefully peel off the water shield
2. Removing the Door Handle
Remove the 10mm bolt in the door
Release the yellow clip on the door rod
Push the door lock rod away from the red clip
Remove the rubber cap
Remove the 10mm bolt in the door
Pull the handle out, forward, and up and down to release it
Remove the lock rod from the handle
Remove the clip holding the lock cylinder
3. Installing the New Door Handle
Insert the lock rod from the handle
Insert the clip holding the lock cylinder
Insert the door handle into place
Insert and tighten the two 10mm bolts in the door
Replace the rubber cap
Insert the door lock rod into place and re-clip it
4. Reinstalling the Door Panel
Put the water shield into place
Connect the latch cables to the door handle
Lift the door panel into place
Push in the door panel clips
Push in the lock and the panel on the lock
Insert and tighten the two 10mm bolts underneath the handle
Insert the two 10mm bolts inside the door pull
Insert the 10mm bolt inside the door handle
Connect the mirror switch wiring harness
Push in the switch panel
Insert the panel under the handle
Push in the trim piece inside the door pull
Push in the trim piece inside the door handle
Push in the trim piece at the front top corner of the door panel
Brought to you by 1AAuto.com, your source for quality replacement parts and the best service on the Internet.
Hi, I'm Mike from 1A Auto. I hope this how-to video helps you out, and next time you need parts for your vehicle, think of 1AAuto.com. Thanks.
In this video, we're going to show you how to replace an exterior door handle on this 2011 Chevy Silverado 1500. It's a similar process on a large variety of GM SUVs and pickup trucks from 2007 to 2012. The tools that you'll need for this is a flat blade screwdriver, a 10mm socket and ratchet with an extension, and a pair of needle nose pliers.
Using a flat blade screwdriver, you want to remove these three panels. The one behind the door handle, this door pull handle panel, and that triangular panel at the top there. Once those are removed, you'll see there are three 10mm bolts here. We'll fast-forward as he removes those. You want to remove this little panel under this handle right here. Pry that out with your flat blade.
Now you want to remove these two 10mm bolts right here. You want to pry up that switch panel and disconnect these harnesses. Just push in the tab on the top and pull back on them. For this lead there's a tab on the back of it. You want to pry out that tab and then the clip will actually pull up and out. Now pull your lock up and there's a little panel right here, just a little clip. You want to pry that out with the flat blade screwdriver. Once you pry that out you can lift that right up and off.
Now you can start prying off the door panel. Reach behind it and give it a sharp pull to release those clips. You want to do this all the way around the panel. Once you do that you can lift it off and then you want to tilt it. Now if you go in behind the door panel here, you'll see this door handle cable door here. Using needle nose pliers, push the clip inward and you can pull that up and out. Carefully remove your water shield. We did speed the video up. You want to remove it nice and slow. Do your best not to rip or tear it.
Now you want to remove this 10mm bolt right here, and you want to release this yellow clip. And then up, further up in the door, there's this little red tab here. You want to push the rod away from it towards the outside of the door. To open that clip, you literally just pop it open. This one, like I said, push it straight back. We'll fast-forward as he removes that bolt. Now remove this cap and that 10mm bolt in there. Pull the handle out. and then push it forward a little bit. and then it's kind of a little bit moving it back and forth, up and down a little bit to get it to release out from the door.
As you can see, there's nothing wrong with our old door handle, so we're just going to show you how to do this. You would remove that rod and then install it in your new door handle, and then remove this clip. This clip holds the lock cylinder in. Use a flat blade screwdriver and pry it out. You could also use a pair of pliers. Pull it out, and then there are two ways to put it back together. You see the lock cylinder comes out. Put the lock cylinder into your new handle.
You could either do it this way, then put the clip in, or you could actually put the clip in first and then snap the lock into the door handle with the clip in it already. To reinstall the door handle, you want to put that rod back down through the door. Slide it back and push it into place. We'll fast-forward as he replaces and tightens up those 10mm bolts. You want to re-clip those rods back into place and replace that rubber cap.
You can put your water shield back. Make sure that the wire harnesses and the door cable are pulled through. You want to make sure that these door panel clips line up in those holes, and that these hooks line up in these slots. Now you want to take that door handle cable, put it back into its clip. Pull back on it and feed it into that little spot there and run all your harnesses up through where the door switch panel is.
You want to make sure that this lock tab goes up through the door panel. You want to align the door panel up on the window sill. Then once it's lined up, you can push in the clips all the way around. Take your lock, slide it back onto the tab there, and reapply that little square clip. We'll fast-forward as he replaces the two 10mm bolts under this handle here, as well as the 10mm bolt behind the door handle. Now reconnect the harnesses to the door switch panel and push it down into place. We'll continue to fast-forward as he replaces that pull handle and the two 10mm bolts to secure it. Now you want to replace those four trim panels.
We hope this video helps you out. Brought to you by www.1AAuto.com, your source for quality replacement parts and the best service on the Internet. Please feel free to call us toll-free, 888-844-3393. We're the company that's here for you on the Internet and in person.
DHA48621
In Stock
Product Reviews
Loading reviews
5.00/ 5.03
3 reviews
5 Stars
4 Stars
3 Stars
2 Stars
1 Star
3
0
0
0
0
Perfect Replacement
Kami
June 4, 2018
This paint to match replacement exterior door handle was exactly as described and a perfect fit for my 2008 GMC Yukon Denali. Being one of the cheapest online and providing extremely fast shipping, Ill continue using 1A Auto for all my auto parts needs. Thanks again and keep up the most helpful how to videos!!! ????
Blair
October 13, 2022
Perfect!
John
April 17, 2023
Excellent fit and mechanical operation. Very prompt service with 1A Auto
Customer Q&A
No questions have been asked about this item.
Customer service
877-844-3393
Monday - Friday 8:00am - 9:30pm ET Saturday - Sunday 8:00am - 4:30pm ET
Chevrolet is a registered trademark of General Motors Company. 1A Auto is not affiliated with or sponsored by Chevrolet or General Motors Company.See all trademarks.
Enter Vehicle Year Make Model
Specify your vehicle's year, make and model to guarantee fit.
Year
Make
Model
Options
Drivetrain
This part doesn’t fit a . Select from parts that fit.