This item is backed by our 1-year warranty. In the event this item should fail during intended use, we will replace the part free of charge. This warranty covers the cost of the part only.
FREE Shipping is standard on Orders shipped to the lower 48 States (Contiguous United States). Standard shipping charges apply to Hawaii, Alaska and US Territories. Shipping is not available to Canada.
Expedited is available on checkout to the United States, excluding Alaska, Hawaii and US Territories as well as P.O. Boxes and APO/FPO/DPO addresses. Final shipping costs are available at checkout.
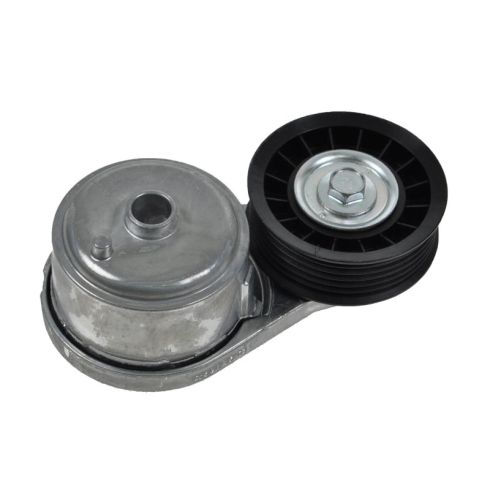
How to Replace Serpentine Belt Tensioner 1996-99 GMC Sierra 5-7L
Created on:
Tools used
13mm Socket
Socket Extensions
Torque Wrench
3/8 Inch Drive Ratchet
13mm Wrench
1. Removing the Serpentine Belt
Familiarize yourself with the route of the serpentine belt
Insert the 3/8 inch drive ratchet into the tensioner
Turn the tensioner clockwise to loosen the belt
Pull the belt off the alternator
Release the tensioner
Pull the belt off by hand
2. Removing the Serpentine Belt Tensioner Pulley
Remove the 13mm bolt from the tensioner pulley
Pop the tensioner straight off of the front of the motor
3. Installing the Serpentine Belt Tensioner Pulley
Pop the tensioner into place
Tighten the 13mm bolt to the tensioner pulley
Torque the bolt to 37 foot-pounds
4. Installing the Serpentine Belt
Loop the belt around the crank pulley
Bring it around the water pump
Bring it under the power steering pulley
Bring it around the A/C Pulley
Bring it around the belt tensioner
Bring it under the idler pulley
Pull the tensioner clockwise with the 3/8 inch ratchet
Pull the belt over the alternator
Release the tensioner
Hi, I'm Mike from 1AAuto. We've been selling auto parts for over 30 years! We're dedicated to delivering quality auto parts, expert customer service, and fast and free shipping, all backed by our 100% satisfaction guarantee. So visit us at 1AAuto.com, your trusted source for quality auto parts.
In this video, we're going to be working with our 1996 GMC Sierra K1500. We're going to show you how to remove and replace your vehicle's serpentine belt tensioner on the 5.7-liter V8.
If you like this video, please click "subscribe". We have a ton more information on this truck, as well as many other makes and models. If you ever need parts for your car, you can follow the link down in the description over to 1AAuto.com.
Here are the items you will need for this repair: 8 to 13mm sockets, 3/8 ratchet, socket extension, 8 to 13mm wrenches, torque wrench
Be sure your vehicle has a belt path diagram somewhere on the cowl or under the hood before removing the belt. If it's missing or unclear, be sure to draw it somewhere under the hood or take a good picture. Put the 3/8 drive of a ratchet into the square on your serpentine belt tensioner and turn it counterclockwise to release tension. Then simply pull the belt off of any one of the pulleys, slowly release the tension from the tensioner. Remove your ratchet, and take the belt off of the pulleys.
Remove the 13mm bolt in the center of the pivot for your serpentine belt tensioner. Remove the bolt. Pop the tensioner off of the front of the motor. Be very careful not to twist when doing this. You saw I just grabbed the end of the pulley and popped out because that little aluminum stud there will get broken off in here and not allow the new tensioner to sit in place so you have to drill it and that just adds a lot of work.
There is nothing wrong with our tensioner so we'll just reinstall it. The process to install a new one is exactly the same. Simply line it up, drop it into place, and start your 13mm bolt. Get that in as far as you can by hand before tightening it down with your 13mm socket and ratchet and torquing it. Torque this bolt to 37 foot-pounds.
Hook the serpentine belt around the crank pulley or harmonic balancer from the passenger side. Be sure that it seats fully into the grooves of the pulley and doesn't lay over the edge on either side. Wrap the driver's side of the belt around the water pump, under the power steering pump on the other side, and up and over the AC compressor. I already have the left side wrapped around the tensioner here just because that's where it falls. Then, from over the AC compressor under the idler pulley, reinstall the ratchet into the tensioner. Turn the ratchet counterclockwise to release the tension, and install your belt over the alternator. Take a second just to look around and make sure that your belt is seated and routed properly before releasing the tension and removing your ratchet.
Thanks for watching. Visit us at 1AAuto.com for quality auto parts, fast and free shipping, and the best customer service in the industry.
38103
In Stock
Product Reviews
Loading reviews
There are no reviews for this item.
Customer Q&A
No questions have been asked about this item.
Customer service
877-844-3393
Monday - Friday 8:00am - 9:30pm ET Saturday - Sunday 8:00am - 4:30pm ET
GMC is a registered trademark of General Motors Company. 1A Auto is not affiliated with or sponsored by GMC or General Motors Company.See all trademarks.
Enter Vehicle Year Make Model
Specify your vehicle's year, make and model to guarantee fit.
Year
Make
Model
Options
Drivetrain
This part doesn’t fit a . Select from parts that fit.