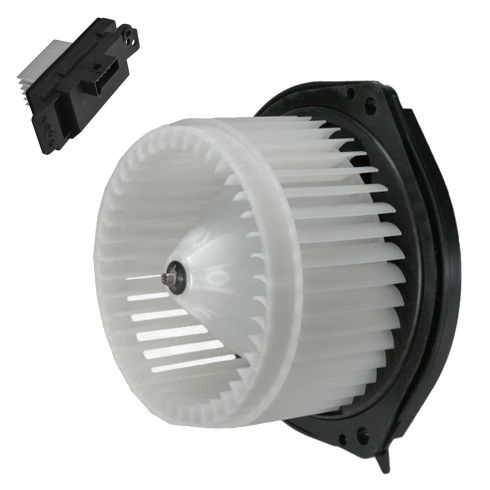
Kit Includes: (1) Heater Blower Motor (1) Heater Blower Motor Resistor
Specification
Vehicle Heating & A/C Option
with Automatic Temperature Control
Highest Quality Materials
Made from highest quality materials that meet or exceed OEM standards
Quality Tested - built to a strict level of product standards.
Item Condition:New
Attention California Customers:
WARNING: This product can expose you to chemicals including Di(2-ethylhexyl)phthalate (DEHP), which is known to the State of California to cause cancer, and birth defects or other reproductive harm. For more information, go to www.P65Warnings.ca.gov.
Lifetime Warranty
This item is backed by our limited lifetime warranty. In the event that this item should fail due to manufacturing defects during intended use, we will replace the part free of charge. This warranty covers the cost of the part only.
Returns: Parts with electrical components cannot be returned once installed.
FREE Shipping is standard on Orders shipped to the lower 48 States (Contiguous United States). Standard shipping charges apply to Hawaii, Alaska and US Territories. Shipping is not available to Canada.
Expedited is available on checkout to the United States, excluding Alaska, Hawaii and US Territories as well as P.O. Boxes and APO/FPO/DPO addresses. Final shipping costs are available at checkout.
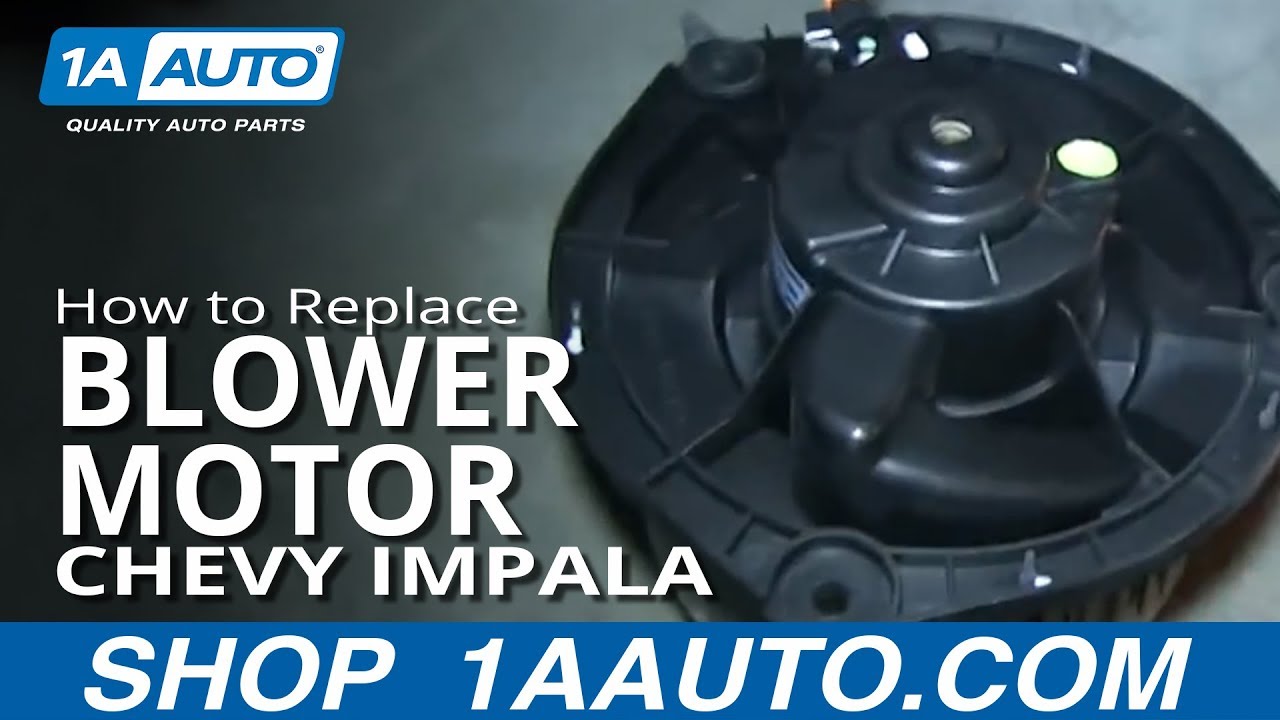
How to Replace Blower Motor 2004-16 Chevy Impala
How to Replace Blower Motor Module 2000-13 Chevy Impala
Created on:
Tools used
Flat Blade Screwdriver
Ratchet
7/32 Inch Socket
1. Removing the Blower Motor
Pry the three plastic clips out of the access panel with a flat blade screwdriver
Pull down the access panel
Twist the light counterclockwise out of the access panel
Remove the three 7/32 inch bolts from the blower motor
Pull the blower motor down and out
Disconnect the blower motor wiring harness
2. Installing the New Blower Motor
Push the new blower motor into place
Insert the three 7/32 inch bolts into the blower motor
Connect the blower motor wiring harness
Twist the light clockwise into the access panel
Push the access panel into place
Push the three plastic clips into the access panel
Brought to you by 1AAuto.com, your source for quality replacement parts and the best service on the Internet.
Hi, I'm Don from 1A Auto. I hope this how-to video helps you out, and next time you need parts for your vehicle, think of 1AAuto.com. Thanks.
In this video, we're going to show you how to replace the A/C or the air conditioning and heater fan blower motor. A lot of times when they go bad on these cars, you'll start hearing the fan groaning or making a higher pitched squealing noise as you increase the speed of the fan. This is a 2006 Impala. It's pretty much the same procedure for any 2006 to 2012. The only tools you'll need are a 7/32 inch socket with a ratchet as well as a small flat-blade screwdriver.
We're working up under the glove box. There are small clips. You pry the middle of the clip out. You can pry it out with the screwdriver, and then, there are two more on the other side. Fast forward as we get those two out. Then the panel comes down and you just twist counter-clockwise on the light and pull it out.
Three 7/32 inch bolts hold the blower motor in and we use a 7/32 inch socket and a ratchet to remove those three bolts. Once the bolts are out, then the motor comes down and you just push on a little tab to disconnect the lead.
Reinstallation is the reverse of the procedure. Put the motor up in, make sure that the holes are lined up and then start your 7/32 inch bolts first by hand. Make sure you get them in, that you don't cross thread them. Then obviously, you tighten them up. Tighten them up nice and firm, careful not to make them too tight. You don't want to strip the plastic holes where the bolts go in. Reconnect the lead; make sure it snaps into place. Put the light back in, twist clockwise to lock. Then we'll speed up as we put the panel back in and the three clips that hold it.
We hope this video helps you out. Brought to you by www.1AAuto.com, your source for quality replacement parts and the best service on the Internet. Please feel free to call us toll-free, 888-844-3393. We're the company that's here for you on the Internet and in person.
Tools used
Flat Blade Screwdriver
Ratchet
7/32 Inch Socket
1. Removing the Lower Glove Panel
Pry out the three clips from underneath the glove box with a flat blade screwdriver
Twist counterclockwise on the light
Remove the bulb
Remove the lower panel
2. Removing the Blower Motor
Remove the three 7/32 bolts from the blower motor
Remove the blower motor
Detach the blower motor lead
3. Removing the Resistor
Remove the two 7/32 bolts holding the blower resistor
Remove the resistor
Press the tab and disconnect the wiring lead
4. Installing the New Resistor
Insert the resistor into place
Insert the 7/32 bolts into the resistor
Connect the wiring lead
5. Reinstalling the Blower Motor
Insert the blower motor into the correct position
Insert the three 7/32 bolts by hand
Tighten the 7/32 bolts
6. Reinstalling the Lower Glove Panel
Twist the bulb clockwise into the panel
Insert the panel into place
Press on the three clips
Brought to you by 1AAuto.com, your source for quality replacement parts and the best service on the Internet.
Hi, I'm Don from 1A Auto. I hope this how-to video helps you out, and the next time you need a part for your vehicle, think of 1AAuto.com. Thanks.
In this video, we're going to show you how to replace the blower motor resistor on this 2006 Chevy Impala. When the blower motor resistor starts going, you'll notice that your fan doesn't work at certain speeds. If you have manual A/C, your fan may work at position one and position four, but not two or three, and that's pretty much the biggest sign that the motor resistor is going or is bad, and this is a pretty straight forward replacement.
You'll need a 7/32 socket with a ratchet, and you also need a small flat blade screwdriver.
Up underneath the glove box there are three clips. You pry out the middle clip, or just pry the clip out and try and pull it. Use small flat blade screwdriver, and we'll fast-forward as we do the other two clips on this side. Just counterclockwise on the light and drop the panel down and out of the way. We're going to remove the three 7/32 bolts that hold the blower motor in place and we'll fast-forward. You don't necessarily have to do this, but it certainly makes it a lot easier to get to the bolts that hold the resistor in place. With those bolts out, the blower motor comes down and you can detach the leads just by pressing on a clip. Then the two 7/32 bolts that hold the resistor in place. You just kind of press your wrench up against the insulation, push it up onto the bolts, and they come out. Once you have the bolts out the resistor comes right out. There's a little tab on it, use a small flat blade screwdriver to help you pry up on the tab, and usually it's just a little sticky so you can work the connector off.
Okay, with a screw and a socket in your hand, work the resistor back up in place and start the screws in. We'll just fast-forward as we get that first screw in, tighten it up some, start the second one, and then tighten that up. Be careful not to make them too tight. You don't want to strip the plastic that the screw goes into. Once you have it tight, reconnect the harness to the resistor, and now put the blower motor back up in place. Make sure you put it in the correct position and everything lines up. Start the three bolts on by hand first, make sure you don't cross thread or damage the plastic threads, and then tighten those up. Again, don't over tighten them, you don't want to damage the plastic. We connect the blower motor harness and then the panel back up clockwise on the light to lock it in place and then secure the panel with the three clips.
We hope this video helps you out. Brought to you by www.1AAuto.com, your source for quality replacement parts and the best service on the Internet. Please feel free to call us toll-free, 888-844-3393. We're the company that's here for you on the Internet and in person.
HMA80225
In Stock
Product Reviews
Loading reviews
3.75/ 5.04
4 reviews
5 Stars
4 Stars
3 Stars
2 Stars
1 Star
2
1
0
0
1
C
April 30, 2020
I have just recently within 2 tears found out about A1. their web site is so easy to use. When I order the blower motor for my car .I had complete confidence I was going to get what I order and within the time they say it would be delivered.
Carlton
November 26, 2022
Great service
Great online service!
Marty
January 13, 2024
I got the right parts at a great price and received them on time,
Thanks 1aauto!
Buy OEM parts
Patrick
June 20, 2024
I gave it 1 star because 0 stars isn't an option. Easy to install. Worked great for 2 weeks but has now failed. Hopefully I can get my money back.
Customer Q&A
No questions have been asked about this item.
Customer service
877-844-3393
Monday - Friday 8:00am - 9:30pm ET Saturday - Sunday 8:00am - 4:30pm ET
Pontiac is a registered trademark of General Motors Company. 1A Auto is not affiliated with or sponsored by Pontiac or General Motors Company.See all trademarks.
Enter Vehicle Year Make Model
Specify your vehicle's year, make and model to guarantee fit.
Year
Make
Model
Options
Drivetrain
This part doesn’t fit a . Select from parts that fit.