Replaces


Recommended for your 2005 Toyota Avalon
Frequently bought together
Part Details
Specifications
About TRQ:
TRQ is a trusted brand dedicated to making every repair a success story by combining premium parts with easy installation. Each TRQ part is engineered by a team of automotive experts to meet or exceed OEM standards, delivering enhanced performance and maximum longevity. With rigorous in-house testing, the brand ensures superior fit and function across every product line. TRQ also provides customers with best-in-class, step-by-step installation videos—so you can complete repairs with confidence, whether you're a first-time DIYer or an industry professional.
Product Features
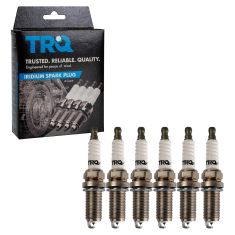
TRQ spark plugs are a perfect modern tune-up. TRQ spark plugs are manufactured to precise heat range specifications to optimize each vehicle’s ignition system. The TRQ iridium line of plugs will ensure 60,000 miles of uncompromised vehicle performance and fuel economy. Every plug includes a resistor to ensure no electromagnetic interference with your other electronics. All products are fit and road-tested in our Massachusetts R&D facility to ensure we deliver on our promise of Trusted Reliable Quality.
Returns: Parts with electrical components cannot be returned once installed.
Attention California Customers:
 WARNING: This product can expose you to chemicals including Chromium (Hexavalent Compounds), which is known to the State of California to cause cancer, and birth defects or other reproductive harm. For more information, go to www.P65Warnings.ca.gov
Lifetime Warranty
This item is backed by our limited lifetime warranty. In the event that this item should fail due to manufacturing defects during intended use, we will replace the part free of charge. This warranty covers the cost of the part only.
Returns: Parts with electrical components cannot be returned once installed.
FREE Shipping is standard on Orders shipped to the lower 48 States (Contiguous United States). Standard shipping charges apply to Hawaii, Alaska and US Territories. Shipping is not available to Canada.
Expedited is available on checkout to the United States, excluding Alaska, Hawaii and US Territories as well as P.O. Boxes and APO/FPO/DPO addresses. Final shipping costs are available at checkout.
Created on:
Tools used
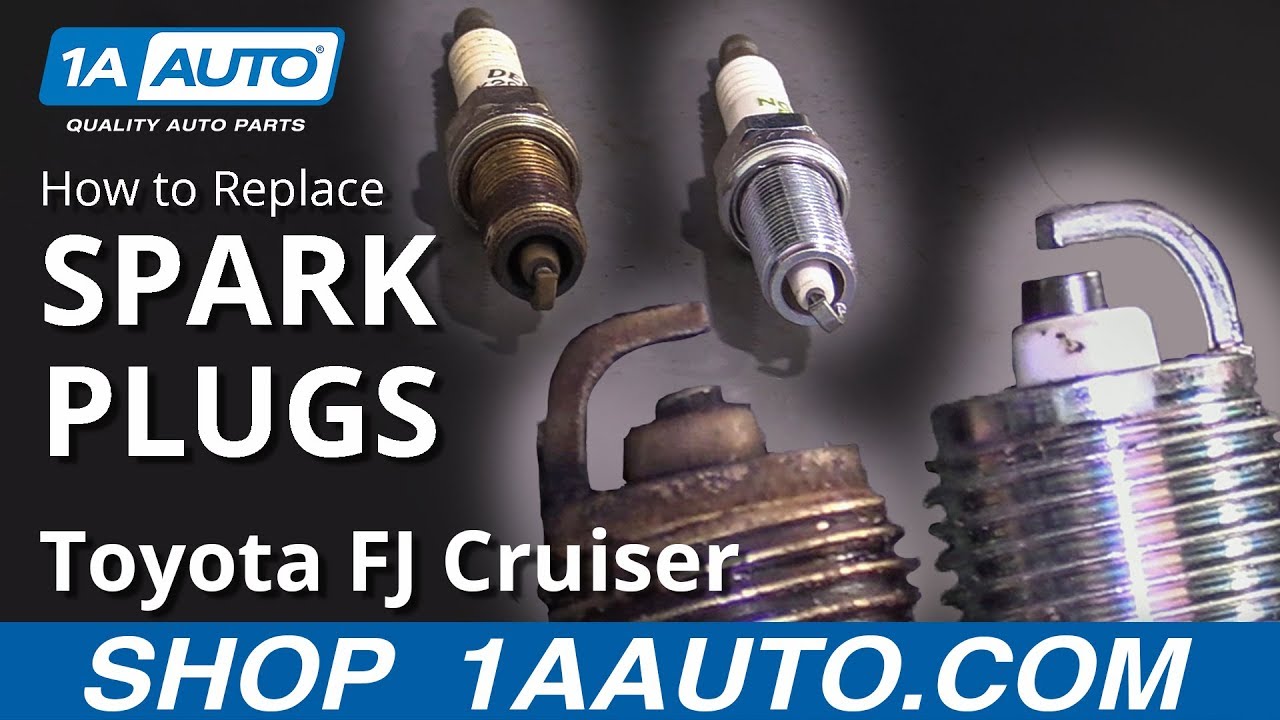
Hey friends, it's Len here at 1A Auto. Today I'm working on 2007 Toyota FJ Cruiser. I'm going to be doing some spark plugs. It's going to be a very easy job. I want to be the guy that shows you how to do it. If you need these or any other part, you can always check us out at 1AAuto.com. Thanks.
So here we are friends. We're under the hood. All we're going to do, unclip this, unclip this, get this out of the way. This is our air filter by the way. We can take a peek. Looks pretty great. I could show you how to replace that if you need. I just did.
There we are. So here we are. You've got some coils under here. Underneath these are the spark plugs. To disconnect the coils, there's a little tab right here. Give it a little squeeze. I squeeze it. I twist it. I pull it. I check it. I don't see any funny colors. No rainbows. Green's bad obviously. Blue's bad under there. Rust, no good. This looks really great. Let's set it aside.
So right here's a 10 mm, so you can use whatever you want. I don't recommend using an airgun for anything like this. I'll just use a ratchet. It's easy enough. Break her free. There's our bolt. We'll set that aside. Put our ratchet aside. Grab the coil. Give it a nice little twist. This right here, it's just a little boot. Should be right up on there just like that.
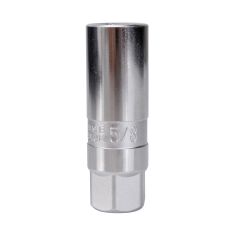
So now it's time to go ahead and remove the spark plug. We're going to use a 5/8 socket, an extension, and a ratchet. You can get any tool you need to do this job at 1AAuto.com by the way. We sell everything you'll need, including the parts. Just going to get this completely out of here. I'll show you what it looks like. Oh, okay I'm exhausted. Go for some cookies, some milk, and a nap.
So there's our spark plug. As you can tell, it's looking pretty nasty. I would say it's definitely time to go ahead and replace that. Let's go ahead and compare it to a new one.
We have our original plugs that we just pulled out of our 2007 Toyota FJ Cruiser. Over here we have our brand new quality 1A Auto part. What you want to do is you want to compare the two of them next to each other. Make sure that the length of the threaded area is the same. If your new one's like this and your old one's like that, you're going to have a big issue. Vice versa, doesn't matter. Even if it's just the tiniest bit, you want to make sure that they're both exactly the same, okay. Also you want to check the top, make sure that the ceramic area's the same. Comes up to the same height. It's very important. We'll set this aside.
Your new spark plug from 1A Auto comes with a brand new crush washer on it, which is also very important. It's got an electrode in there. Creates the spark for you. And these are NGK, which is one of the best quality spark plugs you can get. I don't see any reason why this wouldn't be a great spark plug to go ahead and put into this vehicle, so I'm going to do it. If you need this or any other part, you can always check us out at 1AAuto.com.
So one thing that's very important to do when you get new spark plugs, you want to make sure you check the gap on it. I know they're brand new. They should come where they're supposed to be gapped to, mistakes happen. Maybe it got dropped along the way. The electrode area got bounced down. So just grab a little gapper, the gap on these should be between .040 and .043. I'm going to take a gapper, just going to stick it in here. A little bit of gap, that's the .040. Feels pretty great. If it was to the point where I could take something, let's see if I can find something here. Well this one doesn't go small enough. But anyway, let's say I had quite a bit of movement there. Right. Let me show you on the old plug. Let me grab the old plug.
So I've got my new plug and my old plug. Just wanted to show you. We've got our gap on the new plug, .043. This fits in nice and snug. Set that aside so it can't fall down. This is our old plug. I'm going to do the same thing, .043. I haven't moved it. That's how worn this is. You can pretty much see the gap. I could almost probably fit another .043 in-between there with it. So this plug's very worn. It's a good thing we're doing a tune up on this, or replacing the spark plugs I should say.
So with that said, let's move along. I'm not sure if you can see the difference in the gap there? It's huge. That means the old plugs were very worn. The spark had to jump quite a bit, so you were losing fuel economy that way.
So right along here is the crush washer I was mentioning before. So when you tighten it down, it might feel like it bottoms out. But you have to make sure that you keep tightening a little bit there and crush down that washer, okay. Super important. Now do you need to use a 1/2 in long breaker bar to try to tighten it down from this far out? No. But you do have to make sure that it's snug, okay. So I'm going to take my ratchet off of it, get it on my socket. It doesn't fall off a 5/8 socket like I told you before. If I can get it on there. Okay.
Now at that point, I can tell that I just bottomed out the crush washer to the engine. Tell it just by feeling it. It got a little stiff. I'm just going to go a little bit. Now if feels like it's getting even stiffer. That feels pretty good. I didn't go ahead and put any real pressure on it and come out here with a big, long ratchet and try to keep turning. You know what I mean? That feel good.
You don't want to-
Okay, we're going to torque down the spark plug to 13 foot pounds. There we are. See that one more time. There we go. We'll do the same to all the spark plugs as we continue.
We've got our brand new coil. I like to use a little bit of dielectric grease, specialty grease that allows electric current to travel through it. Put a little bit here. Little bit there. Little bit along here, okay. You can go right along there if you want. That's where your electrical connector is going to be. It'll help keep moisture out of there. You don't want any corrosion in there.
Bring this down into its hole. I can feel it touching up against the top of the spark plug. I'm just going to keep going. All right there. The gasket's going to hit up against the engine right there. And grab our bolt. Start it in here. Okay. Bottomed out a little bit. I like it. My socket off of there. We've got our connector. We're going to push it in, we're going to listen for a click. There it is. We'll give it a little tug. It's holding in strong. It's not coming off.
If for some reason you grabbed it and it does just, let's see if I can even get it to do it? Let's say you've pushed it on, well whatever it's going to just lock back in. It just want's to be locked. But anyway, you push it on, it's supposed to be locked. You give it a tug, it comes right off, there could be something wrong with your lock right there. You need to make sure it's locked. This one works so good, that it just wanted to lock back in on its own again. Am I going to go through taking it off again, nah. I'll move along. I know this one's clipped in. We'll move along to the next one. We'll do the rest on this side and we'll go over to that side.
Okay feels pretty good. All new. Looking great. Take our air filter, it's going to slide right in here, the air filter housing. Clip in on the front. Lock these puppies in. Give her a little shake, make sure the back doesn't come unclipped. Feels good. Let's move alone to the driver's side of the vehicle.
So this side's the messy side. We've got all sorts of stuff that might be in the way. This bracket right here, more likely going to be in the way. We've got a 12 mm right here. A 12 mm located on the bottom. You'll remove a pair of those. Take this bracket out and set it aside.
These hoses and things, they can move around. Just come right out right here. Let's see, slides right out of these little clips. Gives you some room. You're going to remove your 10. Unclip your coil, well unclip your coil, then remove your 10. Pull the coil out of there. Take out the spark plug. Put in your new spark plug, new coil. Off you go. Do the same for the other two. We'll put the bracket back on. Easy peasy.
Well we've got this coil ready to come out. It's the center one. It's the reason why I told you we've got to take off that bracket. You can turn it any way you want. And it just won't come out of here. Okay. Turn it around if you want. Try whatever you want to do. Does not come out. So we're going to remove this 12, bottom 12, and then it should give us plenty of room to move along.
A little bonk. Leave that on there for a little bit. Come down here. If I can grab this bottom bolt. Just use the socket for something to hold onto here. Get the bolt out of here. I'll show you what it looks like. Lower bolt. Put that aside so I can't lose it. Holding the bracket, come on baby. There it is. Got our bracket out of here. That's the way it sits. Curvy ends down. Second bolt. Easy peasy. Now let's see if we can get this coil out of here. Cool. Let's go ahead and replace it.
This hose right here is in the way of getting out this coil. It's pretty easy to take care of. There's a little squeezie clamp right back there. You can do it by hand. There's one right here. Do it by hand. You want to give it a little squeeze. Not much tension there. Pull the clamp down. I'm going to take my hose, pull it right off. Take a peek at it. It's pretty cracked. I'm going to see about trying to replace that at some point. For the purpose of this video, I'm not going to worry about it yet. I'm going to squeeze that back one, give my hose a tug. There's our hose. I'll set this aside. Now we have a clear view of our coil back there. We can get to this easy peasy at this point.
We're going to go ahead and install our hose now. I've got all coils in. Give the clamp a little squeeze. It's easy. Just slide it in. Love it. Give this one a squeeze. Slide it up. Line it back up with the way it came off. I liked it there, it was there for a long time. It want's to stay there.
We got our bracket and with the little bump coming out on the lower end. It wasn't like this. It was like this, the rusty end was down. And grab one bolt. I'm going to start in on the top because it's easier to reach. Not going to tighten it down until I get the other bolt started. I'm just going to use my socket, it gives me a little something to grab onto. Start it in the whole down here. Okay. At this point, I can go ahead and tighten this up if I want. And I do want to. Grab my ratchet. All right. I'll get this one so it's close. Jsut easier to do this than with the ratchet. Cool. Let's tighten these puppies up. Have my ratchet in the on position. Feels pretty good. I don't want to break my plastic intake. This one down here, this is just using our 12 mm socket that we used to take them off obviously. Feels great. Bracket's nice and tight. Hose is on there. Want to make sure that we push our hoses that we might have pushed off of these clamps back in. Everything's secured. Perfect.
We'll get all our tools out of here and we'll spark it up. All right friends, here we go. Let's get ready to start this up.
Feels like it's purring like a kitten. RPMs are good. I don't feel any shutter inside the vehicle. No misfire. No check engine light. I'd say we're good to go.
So let's say you're inside your vehicle just after you completed your work. Right, you started it up. Everything felt fine for a second. Maybe your check engine light came on or maybe you're inside the vehicle and you can feel a shuttering a little bit. Shaking. Your RPMs jumping around. You could have a misfire. At that point, you could have one of your coils, maybe wasn't plugged in all the way. Okay. So that would be the first thing that I would check. I would just grab all my coil wires, give them a little squeeze. Maybe it didn't clip in. It's possible. Human error. Okay. If all those were good, you can try starting it up again, double check it. If it's still doing the same thing, you might have a spark plug issue. Okay.
If you have a spark plug issue, it could be something as simple as a cracked plug. Can happen in shipping. Maybe you used the wrong socket. You used a 16 mm instead of the 5/8 spark plug socket you should be using. Anything can happen.
If your check engine light's on, of course you can pull a scanner out or go some place that has a scanner and have it checked. That'll give you a proper diagnosis of what to start looking for. But those would be where I would start.
So with all that said, this engine ran perfectly for me. So I don't have anything to worry about. So you can always check us out for any parts or instructional videos. Thanks.
Thanks for watching. Visit 1AAuto.com for quality auto parts shipped to your door. The place for DIY auto repair. And if you enjoyed this video, please click the subscribe button.
Tools used
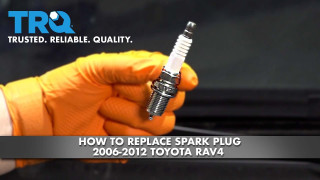
What's up, guys? I'm Andy from 1A Auto. In this video, I'm going to show you how to replace the spark plugs in this 2010 Toyota RAV4. If you need parts for your vehicle, click the link in the description and head over to 1aauto.com.
Just want to pull this cover off. Just grab underneath the cover, slide up, and that up there and there. These retainers that hold it in, just push on little grommets right on those locations. This is where your coils are. There's four of them on this particular engine, so I'm going to show you how to do this one. Just disconnect the connector right here. Just push down on the lock tab and slide it out just like that. Take a 10mm socket extension and ratchet, loosen up this bolt right here. Take that bolt out. We can grab the coil. Sometimes you just twist it a little bit and slide it out. Now, this seal got stuck on there, so you want to take the seal off. Just put it back on the coil, and there's the coil.
Before I pull the spark plug out, if there's any dirt or anything in there, it's a good idea to just take a blow gun and blow out anything in there. Get any dust or dirt out of there. You don't want any of that going down into the cylinder. Now, you want to take a spark plug socket. The reason you want a spark plug socket is because normally inside there there's a rubber grommet that's going to hold the spark plug from falling out, so once it's loose you can pull the spark plug out. Sometimes there's a magnet on there, depending on the socket. Use that plus an extension and a ratchet, and you don't want to do this with any power tools because you could strip stuff out. It's better off just doing it by hand.
Once that's loose, you can slip it up and see the spark plug comes right out with the socket. Here's the old part. Here's the new spark plug from 1aauto.com. This is made by NGK. The plug lengths are the same. The important thing you want to keep in mind is the depth of the threaded part of the plug, which it's the same. These plugs come pre-gapped, so you don't have to gap them. Get yours at 1aauto.com and you'll be ready to rock and roll.
Take the spark plug, put it in your spark plug socket so it doesn't fall out, and then carefully lower it down. Remember, you don't have to gap them, they come pre-gapped, and start threading it. Now, if you dropped it, then obviously you need a new spark plug because the electrode is probably going to be touching, so just keep that in mind. Don't drop them. Snug it up just a little bit with the ratchet, and then I'll take a torque wrench and torque to this 18 foot-pounds.
Now, there is a crush washer on there, so it might move a little more than you would think it would. That's good. Pull that out. Sometimes the spark plug socket gets stuck in there, so just wiggle it around and you're good. Just make sure the rubber grommet didn't come out. I'm going to take the coil, I'm just going to take a little bit of dielectric grease, just put a little bit in there. It's always a good idea. You don't necessarily have to, but it helps. Take the coil, slide that in position. That's good.
Take the 10mm bolt, get that started. Just take a 10mm socket and ratchet and just snug this down. It's good. Take the connector and line it up and lock it in place, and then you're going to do the same with the other ones.
Take this cover and we want to line these little tabs up with these little pins right there. There's three of them. Just push it down and then you're good to go.
Thanks for watching. Visit 1aauto.com for quality auto parts shipped to your door. The place for DIY auto repair, and if you enjoyed this video, please click the subscribe button.
Tools used
Use a 5mm Allen key to remove the plastic engine cover. There are one, two, three, four bolts holding it on. Lift that off and put it aside.
These are your four ignition coils. I'm going to show you how to remove this one, procedure will be exactly the same for the other three. Start by pushing this clip in and wiggle the connector out. Use a 10mm socket and ratchet and use a retaining bolt. Put that bolt aside. Grab it on both sides, and kind of wiggle it, because there is a boot that goes down over the spark plug. It's got a little suction to it. Pull it out and that's how you remove the coil.
Your spark plugs are located down in the head through these access holes. Before you remove the spark plugs from the holes, to make sure there's no debris in there, if you've got access to compressed air with a blow gun, you should blow the holes and blow out any debris so you don't have any fall into the cylinder with the spark plug pulled out of there. These ones are actually pretty clean, so we're in good shape.
We can use a 5/8 spark plug socket. It has the little rubber holder in here that's going to grab onto the electrode end. It'll allow me to pull the spark plug out of the cylinder head once it's loose. We can just do these one at a time. Pull one out, replace it with the new one, move on down the line. Your old spark plug we pulled out, it's pretty dirty and sooty and it's got a bit of a fuel odor. The car actually had a check engine light for a random misfire. So it seems like it's time for a tune-up.
This is our new spark plug from 1AAuto.com. It is an exact match for the one that came out of the vehicle. It's ready to go and be installed. The electrode is nice and fresh and it's not worn out. This will really help the car out and basically be like driving a new car again.
Take our new spark plug, place it into the spark plug socket. That's why it has the little rubber holder in there so it doesn't fall out while you're trying to install it. Just going to install it by hand so it doesn't get cross threaded. Once I've swapped out all of them, I'll come back and torque these. Thread it down until it stops. Move to the next one. With the plugs threaded in just hand-tight until they stopped, I'll now torque them. The torque is 15 to 21 foot-pounds. I'm going to set my torque wrench at 17. We'll torque them down.
This bolt hole is just a metal insert into this plastic valve cover, so we're not going to over-tighten those. We'll tighten them very carefully so slide the coil down, push it over the spark plug, and let it sit in there. Get the bolt started. Just using my wrist to tighten it. Right when I feel it get tight, I'm going to stop because I don't want to pull the serrated insert out of the plastic valve cover.
Reinstall the connector, and repeat this procedure for the rest of the coils. Reinstall the engine cover, reinstall your four bolts. These bolts are just going into aluminum, just holding on a plastic cover. Not a lot of torque on these. Job is complete.
Thanks for watching. Visit us at 1AAuto.com for quality auto parts, fast and free shipping, and the best customer service in the industry.
Tools used
Brought to you by 1AAuto.com, your source for quality replacement parts and the best service on the Internet.
Hi, I'm Don from 1A Auto. I hope this how-to video helps you out, and next time you need parts for your vehicle, think of 1AAuto.com. Thanks.
In this video, we're going to show you how to replace the spark plug on this 2003 Nissan Altima with the 2.5 liter, 4-cylinder engine. The items you'll need for this are new spark plugs from 1AAuto.com, 10mm socket and ratchet, 5mm Allen bit, and a 5/8 inch spark plug socket, as well as a gap tool.
To access the ignition coils, you first have to remove this engine cover. It's held in by these four 5mm Allen bolts. We'll just fast forward as Don removes these. Now, the cover just lifts right off. Here are your four ignition coils. It's held in with one 10mm bolt and the harness right here. Just push the tab and pull that harness off, and then remove that 10mm bolt. The ignition coil just lifts right up and out. With the ignition coil removed, you can see the spark plug right down in there. Using an extension and your 5/8 inch socket, you want to just remove that spark plug. If the plug doesn't come right out, then you can use a magnet or pliers to reach down and grab it.
You'll want to set the gap between the center electrode and the ground electrode. On this, it should be .044. Set it by sliding the spark plug tool in between there and make sure there's a little resistance when you pull it in and out.
Carefully, put the spark plug back down in and thread it in by hand to make sure you don't cross-thread it. Once it's seated, you want to tighten it between 18 and 20 foot pounds. Now, put your coil back down in and replace the 10mm bolt. You'll want to reconnect it and repeat these steps for the rest of the spark plugs.
We hope this video helps you out. Brought to you by www.1AAuto.com, your source for quality replacement parts and the best service on the Internet. Please feel free to call us toll-free, 888-844-3393. We're the company that's here for you on the Internet and in person.

SPA02135