Replaces


Recommended for your 2000 Isuzu Rodeo
Frequently bought together
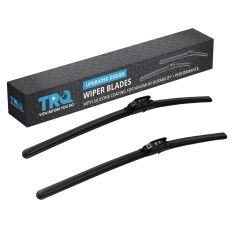
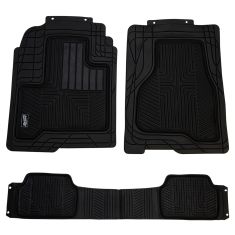
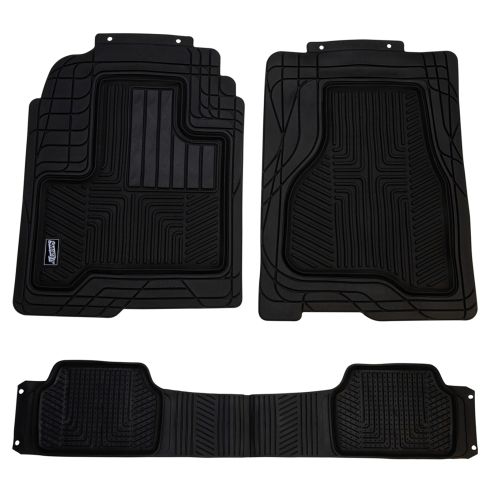
Part Details
Attention California Customers:
 WARNING: Cancer and Reproductive Harm - www.P65Warnings.ca.gov.
1 Year Warranty
This item is backed by our 1-year warranty. In the event this item should fail during intended use, we will replace the part free of charge. This warranty covers the cost of the part only.
FREE Shipping is standard on orders shipped to the lower 48 States (Contiguous United States). Standard shipping charges apply to Hawaii and Alaska.
Shipping is not available to a P.O. Box, APO/FPO/DPO addresses, US Territories, or Canada for this item.
Expedited is available on checkout to the United States, excluding Alaska, Hawaii.
Final shipping costs are available at checkout.

Created on:
Tools used
Hi. I'm Mike from 1A Auto. We've been selling auto parts for over 30 years.
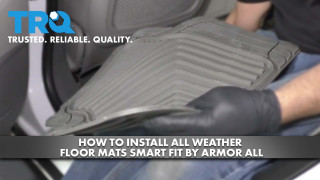
Hi, everyone. Sue here at 1A Auto, and today I'm going to talk about floor mats for our 2011 Ford F150. These floor mats come from 1A Auto, they are OE designed. They come right from Ford and they're a manufactured Motorcraft product. Probably a fraction of the cost of going straight to the dealer so they're direct fit for this vehicle.
The fronts have a bit of a cut out so if you have a manual shift, a four wheel drive shift on the floor there is a pre-cut. You take a razor blade and cut that off and discard it. Then this one has a push button that's electric, so it is molded and fits perfectly right in.
To put the rear mat in, it's one bit piece. It's kind of cumbersome because it's large but best way to do it is to put the back seats up and, I think I have to go to the other side, no I can get it from here. So once those back seats are up, I'll grab the one piece mat and then I can lay it right down. It's nice because it has the little rubber grips so it'll grip right into that carpet once it settles itself down from the packaging fold. That's really good because the water will run underneath the seat instead of on the carpet. It's got half of a rubber for the passengers in the back.
Once that's in, all you got to do is put your seat back down and you're ready to roll.
For the drivers side, make sure your seat is all the way back and you're going to fish it up under the pedals first. You have the two anchor dots here--they're little plastic. Push it down. This stops it from hitting the brake pedal or the gas pedal, and they lock into place. Molded right to the factory floor because they are OE floor mats from 1A Auto.
Thanks for watching. Visit us at 1aauto.com for quality auto parts, fast and free shipping and the best customer service in the industry.
Tools used
What's up, guys? I'm Andy from 1A Auto. In this video, I'm going to show you how to install these floor mats in this 2010 Toyota RAV4. If you need these parts or other parts for your vehicle, click the link in the description and head over to 1aauto.com. These floor mats go in the back. There's a difference between the right side and left side. And you don't want to put them on other floor mats. There is grippers on the bottom. They grip to the carpet. This one goes right here. This one goes right here. So, the shape of this is the difference right here, and then it's a little bit longer over here. That's how the back ones go in. This is the driver's mat. Now the drivers and the passengers are different. There is two little holes right here that these hooks go into.
Now, it comes with these hooks. If your hooks are missing, then you can install these. This goes through the carpet, and then you push down on this little tab, and that's going to lock it in place. This vehicle has the hooks there, so I'm just going to reuse the old hooks. Just slide this in position. Again, you don't want to put a mat underneath here. And then slide it onto the hooks just like that. Same with this hook just like that.
Now, this last one is the passenger side. Again, you don't want to put it on another mat. It does have these little nubs to keep it from moving around, but you do not have those little tabs that hold it in place. It's not as crucial on the passenger side as it is on the driver's side. There you go.
Thanks for watching. Visit 1aauto.com. Your place for DIY auto repairs for great parts, great service, and more content.
Tools used
Hey friends, it's Len here from 1A Auto. Today, we're gonna be working on our 2006 Toyota 4Runner, and I wanna show you how to install your floor mats. Let's get right into it. You're gonna notice in your kit. It comes with these nice little clips. Those are gonna be great because you'll notice that where your carpet is inside your vehicle, you just have these holes. All right, so you need these clips. The way that these work, this part right here is gonna press right into the hole. Once it's in, you put this in, and it locks it. Once it's locked, it's pretty much in there for a long time.
You could try to pull this out of there and more than likely get it out. But once it's in, it's kinda just in, so take it, start from one side. Work it in. There it is. Awesome. It can pivot around. It doesn't pop up and out of there. Perfect. We're gonna do the same thing for this one. Just get it like that, like that. Awesome. You're gonna grab your left front floor mat, which is the one that has the holes. None of your other floor mats have any of these holes. So it's easy to distinguish which ones which. It also, of course, says so on the bottom.
The reason why the driver side floor mat has these is for safety. Because as you step on the brake or step on the gas and you're moving your foot around, last thing you want is this thing sliding around and potentially getting caught up and inside here and causing a safety issue. Nobody wants that. Safety is the number one priority here at 1A Auto, so we provide you with everything that you need. Just gonna take this clip, slide away through that hole, same thing right here. Perfect. You're driving. You're stepping on this thing. It slides around. You know, you know what? It really doesn't slide around at all. That's awesome.
Let's move along to one of the other ones. Okay, so we're in the rear, you're gonna notice that you have a cut out that looks something like this. This part is gonna go up and under the seat a little bit. And then this area right here is gonna come along the edge, just like that. No clips that you have to worry about. Let's move along. Come right over here. Take this one. Same thing slides right in. Perfect. We got our last mat here. Slide it in. That's perfect, even says 4Runner right on it. I love it.
Thanks for watching. Visit 1aauto.com. Your place for DIY auto repairs, for great parts, great service, and more content.

79930