About TRQ: TRQ is a trusted brand dedicated to making every repair a success story by combining premium parts with easy installation. Each TRQ part is engineered by a team of automotive experts to meet or exceed OEM standards, delivering enhanced performance and maximum longevity. With rigorous in-house testing, the brand ensures superior fit and function across every product line. TRQ also provides customers with best-in-class, step-by-step installation videos—so you can complete repairs with confidence, whether you're a first-time DIYer or an industry professional.
Product Features
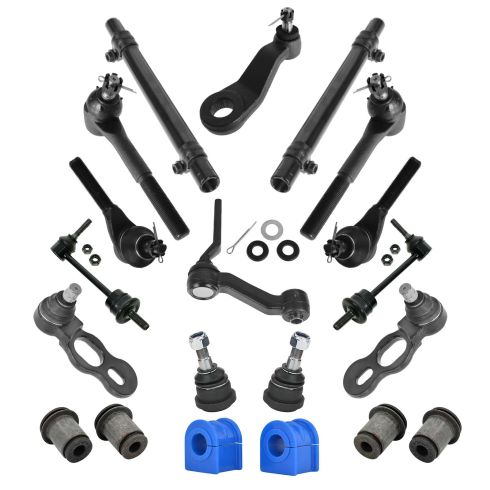
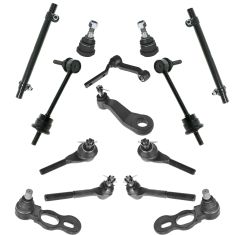
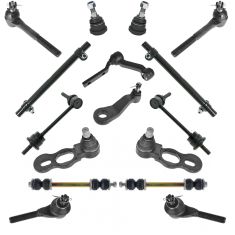
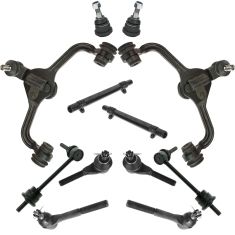
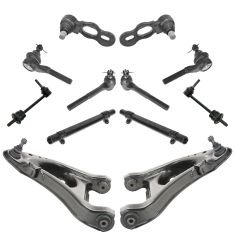
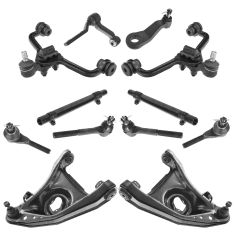
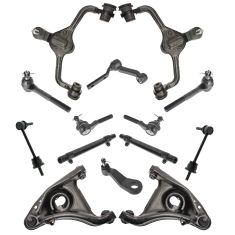
Application Specific Design: No modifications necessary
Anti-Corrosion Coated: Enhanced surface life
Pre-greased: No additional maintenance required
Kitted for Restored Performance: Improved road-feel and handling
Description
TRQ suspension kits are manufactured using premium raw materials and coatings for extended service life. Each TRQ suspension component is designed to be a direct, maintenance-free replacement to the stock unit. To extend the life of your steering and suspension components, TRQ recommends replacing components in pairs, sets, or kits. All products are fit and road-tested in our Massachusetts R&D facility to ensure we deliver on our promise of Trusted Reliable Quality.
Install Tip: When replacing steering components, have a professional alignment performed afterwards. This ensures proper tracking and even tire wear.
Our steering and suspension components are pre-greased and sealed for long life and do not require the extra maintenance typically required by greaseable versions.
Attention California Customers:
WARNING: This product can expose you to chemicals including Lead and Lead Compounds, which are known to the State of California to cause cancer, and birth defects or other reproductive harm. For more information, go to www.P65Warnings.ca.gov.
This part fits
3 vehicles spanning 1998-2002.
Fits these Makes
Select vehicle
Year
Make
Model
Description
1998-2002
Ford
Crown Victoria
Ford Crown Victoria with 25mm to 26mm Diameter Front Sway Bar Front 20 Piece Steering & Suspension Kit TRQ PSA56118
1998-2002
Lincoln
Town Car
Lincoln Town Car with 25mm to 26mm Diameter Front Sway Bar Front 20 Piece Steering & Suspension Kit TRQ PSA56118
1998-2002
Mercury
Grand Marquis
Mercury Grand Marquis with 25mm to 26mm Diameter Front Sway Bar Front 20 Piece Steering & Suspension Kit TRQ PSA56118
Part Interchange
Brand Label
Part Number
Dorman
531-346
ACDelco
45G8060
MOOG Chassis Products
K8688
MOOG Chassis Products
K8685
Ford
F5AC3068BA
MAS Industries
BB8703
Mcquay-Norris
FB733
MOOG Chassis Products
ES3495
MOOG Chassis Products
K8678
MOOG Chassis Products
K8953
Mevotech
MK8703
MOOG Chassis Products
K200165
MOOG Chassis Products
ES3311S
MOOG Chassis Products
K8283
Duralast
FB733
Autospecialty
04-81016
NAPA
267-1382
MOOG Chassis Products
ES3494
MOOG Chassis Products
K8703
DIY Solutions
SUS00106
DIY Solutions
SUS00092
DIY Solutions
SUS06666
DIY Solutions
SUS06228
DIY Solutions
SUS07341
DIY Solutions
SUS06227
DIY Solutions
SUS06687
DIY Solutions
SUS07389
DIY Solutions
SUS05315
DIY Solutions
SUS06357
Ford
F8AC3B438AB
Ford
F8AZ5K484AA
Ford
YW7Z5493AA
Mevotech
MK8731
MOOG Chassis Products
ES2057
MOOG Chassis Products
K8731
Motorcraft
MCS104225
Motorcraft
MCS104226
Mevotech
MES3494
Mevotech
MK8688
Mevotech
MES3311S
Mevotech
MK8678
Mevotech
MK8283
Mevotech
MES2057RL
Mevotech
MK8953
Mevotech
MK8685
Ford
2W7Z3A130AA
Ford
2W7Z3A131A
Ford
2W7Z3A130A
Ford
F8AZ3590AA
Ford
F3AZ3A130A
Ford
D9AZ3A130A
Ford
F5AZ3590A
Ford
2W7Z3A131AA
Ford
D9AZ3A131A
QuickSteer
K8731
Motorcraft
F3AZ3A131A
Motorcraft
F5AZ3A130A
Mevotech Supreme
MK8283
Mevotech Supreme
MES2057RL
Mevotech Supreme
MES3494
Mevotech Supreme
MK8731
Mevotech Supreme
MK8703
Mevotech Supreme
MK8685
Mevotech Supreme
MK8678
Mevotech Supreme
MK8953
Mevotech Supreme
MK8688
Mevotech Supreme
MES3311S
This item may be interchangeable with parts from other brands with the above part numbers.
This information is provided only for reference and does not guarantee that the item you are
purchasing is identical to parts with part numbers from the brands listed above.
To confirm that this item fits your vehicle, use the above "Check Vehicle Fit" option.
Lifetime Warranty
This item is backed by our limited lifetime warranty. In the event that this item should fail due to manufacturing defects during intended use, we will replace the part free of charge. This warranty covers the cost of the part only.
FREE Shipping is standard on orders shipped to the lower 48 States (Contiguous United States). Standard shipping charges apply to Hawaii and Alaska.
Shipping is not available to a P.O. Box, APO/FPO/DPO addresses, US Territories, or Canada for this item.
Expedited is available on checkout to the United States, excluding Alaska, Hawaii.
Final shipping costs are available at checkout.
How to Replace Upper Ball Joint 1995-2002 Ford Crown Victoria
Created on:
Tools used
20mm Socket
Adjustable Wrench
Socket Extensions
Torque Wrench
Jack Stands
18mm Socket
19mm Socket
Grease Gun
21mm Socket
Flat Blade Screwdriver
Phillips Head Screwdriver
Lug Wrench
Ratchet
Floor Jack
1/2 Inch Breaker Bar
Marker / Writing Utensil
22mm Socket
1. Remove the wheel
Loosen the lug nuts with a lug wrench or 19 mm socket and ratchet.
Raise and secure the vehicle.
Remove the lug nuts and wheel.
2. Remove the cams
Secure the frame of the vehicle.
Jack up the control arm/suspension of the car.
Mark your inner and outer cams to help align your vehicle during assembly.
Remove the 22 mm bolts and remove the inner and outer cams.
3. Remove the upper ball joint
Remove the 18 mm nut and remove bolt.
Remove the upper ball joint.
4. Install the new upper ball joint.
Fit the ball joint into the steering knuckle and over the control arm studs.
Work the upper ball joint into place.
Bolt down with the 18 mm ball joint locking nut.
Put your cams down on the control arm studs and thread on the locking nuts.
Line up your marks on the cams and tighten down the lock nuts the rest of the way.
Tighten up the pinch bolt to 90 ft lbs.
Torque the control arm nuts to 118 ft lbs.
Insert your grease fitting and fill with the grease gun.
5. put your wheel back on
Hand tighten your lug nuts
Lower the suspension and the vehicle.
Torque your lug nuts in a star pattern to 100-110 ft lbs.
Brought to you by 1AAuto.com, your source for quality auto replacement parts and the bets service on the internet. Hi, this is Mike from 1A Auto. I hope this how to video helps you out. Next time you need parts for your vehicle, think of 1AAuto.com. Thanks.
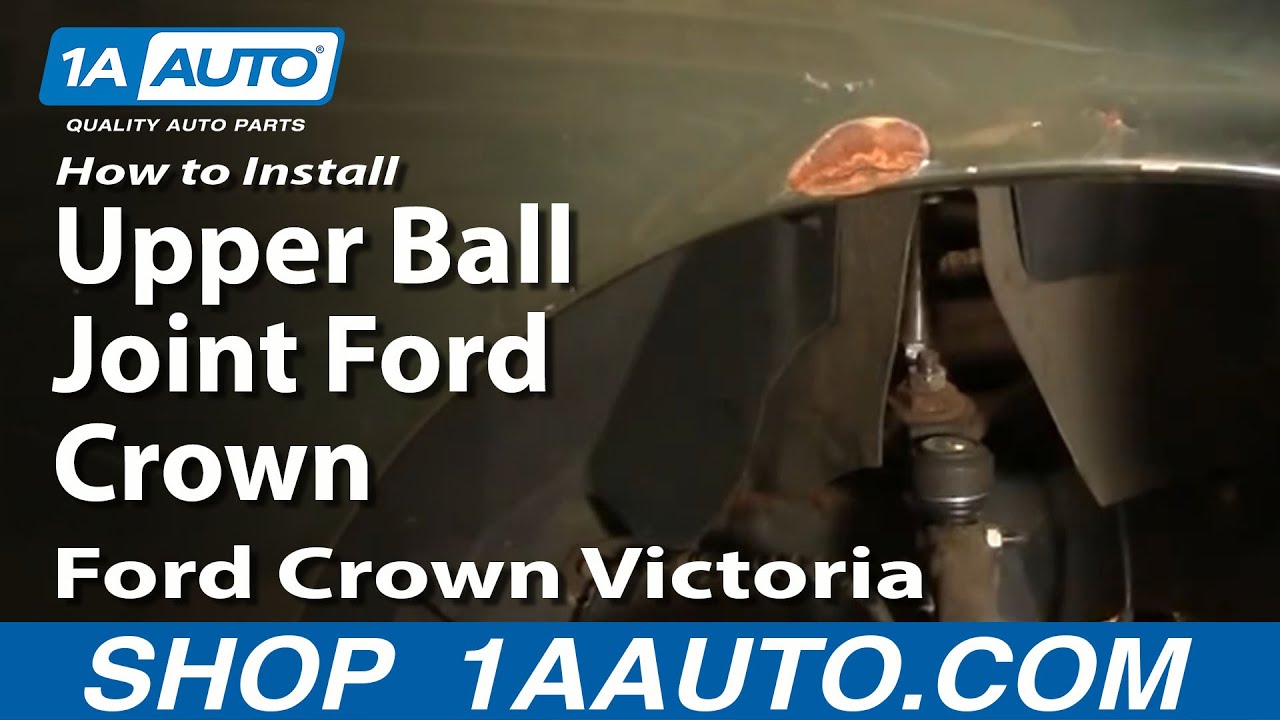
In this video, we're going to show you how to replace an upper ball joint on this 2000 Ford Crown Victoria. This process is the same for any '95 to '02 Crown Victoria or Lincoln Town Car. You'll know if your ball joint is getting loose, what you do is you jack up the front of the vehicle and you'll feel some play in the top of the wheel, if you try and shake the top of the wheel back and forth, you'll feel it give a little bit and the bottom doesn't give. That's the indication that your upper ball joint is bad. Tools you'll need for this repair are jack and jack stands, 18 to 22 millimeter sockets with a ratchet and extension. You'll need a breaker bar or pipe for some extra leverage for some of these bolts, a screwdriver, a tool to mark the alignment cams, you'll see what I mean, I use a hammer and a cold chisel then you'll need a large adjustable or 34 millimeter wrench, a grease gun and grease, and a torque wrench. Start by removing the front wheel.
Pry the cap off and then if you don't have air tools, you want to loosen the log nuts then raise and support the vehicle and remove the lug nuts the rest of the way and remove the wheel and tire. Make sure you support the vehicle onto the frame just like the lift is there. Put a jack stand there. Now, use a fore jack to support the vehicle under the front suspension. Your ball joint is mounted right here. You'll see the large nuts on top and then these here are tall alignment cams and if you turn them; that's how you align the vehicle. What you want to do is mark your alignment cams with the suspension so that you can put it back together the same. What I basically do is take this ad on and then mark it right here right along the center of my ball joint. Just take a chisel and hammer I. Okay, make a pretty good divot in my alignment cams so I know where it is. Here, I'm going to do the same thing to the inner alignment cams. I generally point the mark towards the shock, just a good reference point, just make a mark that again points towards the shock and that's how you can put that cam in correctly again. These bolts are 22 millimeter and I'm using impact wrench.
They actually come apart fairly easily so you'll need a pretty good sized ratchet and an extension. So as you're removing these with the cams come right up and out, that's good. Just make sure which cam goes in which spot. What I do is I generally take the inner cam out first, put that kind of close to the middle of the vehicle on the radiator support and then I take the outer cam off and kind of put that towards the side of the vehicle. Next is a pinch bolt down lower, its 18 millimeter. You remove the nut off of one side and then use a hammer and you'll actually want to take and pull the ABS wire out of the way and just use the hammer and drive the pinch bolt out. Once that's out, then you can remove the ball joint. Mine comes out pretty easy. You may need a hammer or a pry bar or something to help you get it out. Here's the upper ball joint from 1A Auto. It's just like the original. Put it on. Basically, what I'm doing here is I'm trying to put the stud end of the ball joint down into the steering knuckle the same time that you're putting it over the control arm studs, the two control arm studs and then just kind of use a little bit of muscle and forcing it back and forth to force it down in.
Once you have it down in, you take your pinch bolt and slide it in from the back. Make sure it goes in. It actually is square headed so it locks into place so it won't turn when you put the nut on. I'm just using the hammer to drive it in all the way. It should drive in there pretty easily. Then I'll start the nut on it. Make sure you use the locking side. For now, just start that on and then we'll go up the top. Again, make sure that your cams don't get mixed up. Put one in. It's not so important that they line up perfectly when you first put it together. What you want to do is put both cams on and line them up best you can then tighten down the locking nuts and then what you do is after you tighten them down is you loosen them back up and move one of the cams and tighten that one down just so it's snug then move the other cam with a large wrench and tighten it down. I'll kind of show you the whole process here. Kind of in fast motion here. Like I said, just kind of snug up the nuts. You can see I use a large adjustable wrench to turn the cam and align it to where it was before and then tighten them up. You don't want to tighten one up all the way first.
You'll have to be able to move the other one because when you move it, you move the ball joint as well. Then just make sure that you get both aligned where they were. All installed. There's my mark pointing straight ahead. Here's my mark here pointing right at the feel for the grease. I preliminarily tighten up that pinch bolt and nut. Tighten this to 90 foot pounds. Tighten these to 118 foot pounds. Now, insert this grease fitting. Use a 10 millimeter wrench. Speed it up here as we tighten up that grease fitting. Then we'll use a grease gun and you basically want to squirt grease in there. Watch the boot on the ball joint and you'll see it start expanding. Once it start expanding, it's probably enough grease. Put that harness back into its clip. Get the jack down and move it out of the way and put your tire back on. Start the log nuts by hand. Make sure you don't cross thread them. Use your wrench while the vehicle is in the air just to kind of tighten them preliminarily. Once the vehicle is down on the ground, you want to torque the log nuts to 100 to 110 foot pounds. I use a star pattern, basically kind of draw a star with your wrench as you're tightening them and then put your cap back on. You should be all set.
We hope this helps you out. Brought to you by www.1AAuto.com, your source for quality auto replacement parts and the bets service on the internet. Please feel free to call us toll-free, 888-844-3393. We're the company that serves you on the internet, and in person.
PSA56118
In Stock
Product Reviews
4.3/ 5
★★★★★★★★★★
25 reviews
5★
52%
4★
32%
3★
12%
2★
0%
1★
4%
Customer photos
★★★★★March 30, 2024
Good enough to get most of the job done.
It was good enough to get the job done. One of the nuts to the upper control arm ball joint was crushed into an oval shape and couldn't be used. I had to use existing hardware from the vehicle. Not the biggest of deals, but worth noting to keep existing hardware until the job is complete.
OEM Swaybar diameter is 29.5mm, so you can't use the 25-26mm swaybar bushing. I don't know why they couldn't include the correct size in the kit... this was a big deal because the correct size was "order only" from Autozone, so I could not complete this part of the repair.
Otherwise, it all was direct replacement, I had no other installation issues and the vehicle had an alignment within spec. Good enough.
★★★★★February 7, 2024
The kit came with everything, fast shipping. Only problem with the product is no zerc fittings or spots for them to be placed.
★★★★★August 1, 2023
So far so good .
So this is the second time I've replaced my entire front end on my 2002 crown Victoria within a year. My first one was Detroit axle brand from eBay . After one year it would no longer hold alignment. Now . I do unfortunately live on and drive some of the worst roads in the u.s. so there's that . But some of the components that failed shouldn't have . I replaced it again with a TRQ brand from 1A. So far , so good . I don't expect it to last forever , but it has held alignment longer than the destroy axle, and my front end is still tight . For not that much more money . I'm pleased with it thus far. I bought a new front end for my 2014 gmc Sierra as well from 1A and have been pleased with it as well. I'm only giving it 3 stars because it hasn't been a year yet, so it's hard to really give it a higher rating at this point , but don't let the 3 stars fool you into thinking I dislike it . I plan to update the review after the 1 year mark if it has held alignment within reason compared to m
★★★★★March 1, 2023
I have zero complaints with your company, everything I ordered was reasonable in price, and delivered rather quickly,
★★★★★May 23, 2022
Easy to install great product.????
★★★★★March 2, 2022
Great
★★★★★January 10, 2022
Good company good product
All parts arrived in good shape. The sway bar bushings are poly and really stiff but functionally work fine.
★★★★★November 13, 2021
Ritchierich
Fast shipping. When it arrived I was short one part so I contacted them and they sent the part the same day. Very nice and quick. Thanks
★★★★★August 21, 2021
Perfect
Quick delivery easy install quality products
★★★★★August 18, 2021
1st and Last experience here .
Do not purchase this because IF you have a defective part like a ball joint they will only replace you for 11$ or so which is the discounted "kit" price of the part.
Common sense from a business with such crucial products that people place their lives on SHOULD account for the fact that If a part is defective and a customer is forced to endure extraordinary circumstances like having your car sitting in a dangerous intersection for an hour and a half, missing work as well as having to come out of pocket for a NEW part which is much more than the one you bought from them that was DEFECTIVE.
Only request was to be reimbursed for the unnecessary out of pocket expense. Customer service was rude and dismissive. No one I know will buy anything from them . And I know a whole lot of folks. Thank you for causing me so much trouble, putting lives at risk and offering nothing to make up for it !
Showing 1–10 of 25 reviews
Customer Q&A
Got a question about this part? Post it and get answers from our team.
LarryDecember 8, 2021
When I order this kit can I get it with 1 1/8 sway bar bushings?
We are unable to customize the kit. All parts will be direct replacements of the original equipment.
Jessica · December 8, 2021
SSeptember 2, 2019
Do you have these part with greace zirks?
Thanks for your inquiry! Our parts do not have grease fittings; they will come pre-greased. Please let us know if we can be of any further assistance.
Peter · September 3, 2019
Showing 1–2 of 2 questions
Customer service
877-844-3393
Monday - Friday 8:00am - 9:30pm ET Saturday - Sunday 8:00am - 4:30pm ET
Ask a Question
Check Your Email
We sent a verification email to .
Click the Verify Email button in the email to submit your question.
This extra step helps prevent spam.
Ford is a registered trademark of Ford Motor Company. 1A Auto is not affiliated with or sponsored by Ford or Ford Motor Company.See all trademarks.
Select Your Vehicle
Specify your vehicle's year, make and model to guarantee fit.











 WARNING: This product can expose you to chemicals including Lead and Lead Compounds, which are known to the State of California to cause cancer, and birth defects or other reproductive harm. For more information, go to www.P65Warnings.ca.gov.