Replaces
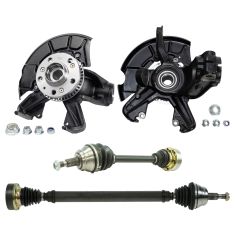
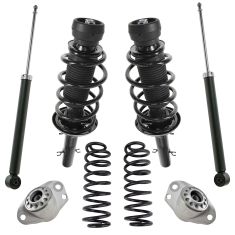
Replaces VW Beetle Jetta Front 4 Piece Drivetrain Kit TRQ PSA27197
$404.95
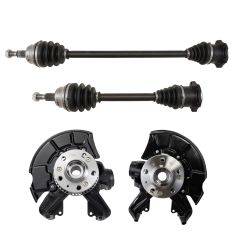
Replaces VW Beetle Golf Jetta Front 4 Piece Drivetrain Kit TRQ PSA27168
$394.95
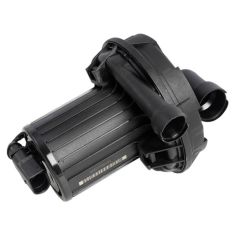
Replaces VW Audi Electric Air Pump Pierburg 7.22738.08.0
$384.95
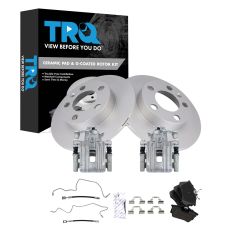
Replaces VW Jetta Audi TT TT Quattro Rear Ceramic Premium G-Coated Brake Pad & Rotor Kit TRQ BKA01881
$353.95

Replaces VW Jetta Audi TT TT Quattro Rear Ceramic Brake Pad & Rotor Kit TRQ BKA01882
$351.95
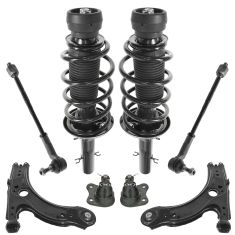
Replaces VW Beetle Golf Jetta Front 8 Piece Steering & Suspension Kit TRQ PSA58772
$310.95
Replaces VW Golf Jetta Front & Rear 8 Piece Suspension Kit TRQ PSA69647
$309.95

Replaces VW Eurovan Golf Jetta 6 Piece Fuel Injector Set TRQ FIA58859
$284.95
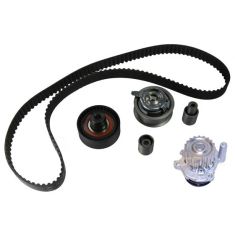
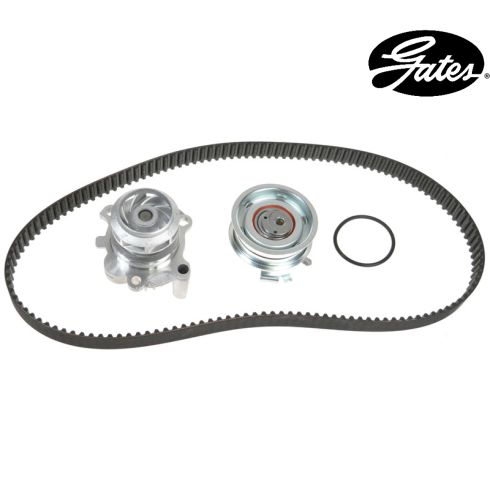
Replaces VW Beetle Golf Jetta Timing Belt Kit with Water Pump DIY Solutions ETS00012
$274.95
Part Details
Specifications
This Gates timing belt component kit, tensioner with water pump is just what you need to keep your vehicle in good running order.
Our timing belt sets come from a company that is committed to supplying components that are engineered and manufactured under strict quality control procedures. They are leaders in timing component quality which provides you with the highest quality parts available on the market.
This high quality, water pump and timing belt kit, contains the following pieces and has the following specifications:
Most car manufacturers recommend changing your timing belt between 50,000 and 70,000 miles (consult your owner's manual to see what your specific manufacturer suggests).
These parts are authentic Gates brand products that are supplied and packaged by Gates. Some of the components included in this kit may be sourced by Gates from other high quality suppliers such as Aisin, GMB, Koyo & other OEM suppliers. These parts are subjected to the very same testing and quality standards as all Gates products.
Attention California Customers:
 WARNING: This product can expose you to chemicals including 1,3-Butadiene, which is known to the State of California to cause cancer, and birth defects or other reproductive harm. For more information, go to www.P65Warnings.ca.gov.
Lifetime Warranty
This item is backed by our limited lifetime warranty. In the event this item should fail due to manufacturing defects during intended use, we will replace the part free of charge. This warranty covers the cost of the part only.
FREE Shipping is standard on orders shipped to the lower 48 States (Contiguous United States). Standard shipping charges apply to Hawaii and Alaska.
Shipping is not available to a P.O. Box, APO/FPO/DPO addresses, US Territories, or Canada for this item.
Expedited is available on checkout to the United States, excluding Alaska, Hawaii.
Final shipping costs are available at checkout.

Created on:
Tools used
Brought to you by 1AAuto.com, your source for quality replacement parts and the best service on the Internet.
Hi, I'm Mike from 1A Auto. I hope this how-to video helps you out, and next time you need parts for your vehicle, think of 1AAuto.com. Thanks.
In this video, we're going to show you how to replace the AC belt tensioner on this 2005 Volkswagen Jetta. The items you'll need for this is a 15 and 17 millimeter socket and ratchet, T25 Torx bit, an M10 12-point bit, flat blade screwdriver, torque wrench, and jack and jack stands.
Using your pick, remove these caps. For one of these lug nuts, you're going to have to use a key. The key can be found in your trunk with the spare tire. It just inserts into that special lug nut and then removes the same as the other lug nuts, using a 17 millimeter socket. If you have air powered tools, you can raise your vehicle then remove the lug nuts. If you don't, loosen the lug nuts while the vehicle is on the ground, then raise and support the vehicle and remove them the rest of the way. Your wheel will pull free.
Next, you want to remove this panel. It's held in with a series of T25 screws. There's also a few of them down here. We'll fast-forward as Mike removes those. Now you can pull this panel down. Pull down the front first and then it slides out.
Using a 15 millimeter socket and ratchet, just put it on the tensioner and pull back. Pull the belt up this front pulley. Release the tensioner and pull the belt off this pulley. Remove the 15 millimeter bolt on the tensioner. Now, you can remove that pulley.
Then, using your M10 12-point bit and the appropriate socket size, in this case, I think we used a 13, you just want to loosen up and remove that bolt. Now, your tensioner will pull free.
There's a wider tab and smaller tab. The wider tab goes up here, smaller tab down here. We'll fast-forward as Mike replaces that M10 bolt and tightens it up.
Then, replace the pulley and the bolt that holds the pulley in place, and just tighten that up. Put your ratchet back on the tensioner, tuck the belt onto that larger pulley, and pull the tensioner back, and put it onto the front pulley. Release the tensioner. Then, just replace that panel and all the screws and tighten them up.
Replace your wheel, and you'll realize here that lug nuts are a bit easier than lug bolts. You have to try to hold the wheel in place while you put a lug bolt through. You want to balance it on the hub, and eventually the bolt will line up and push in. Then you want to tighten those preliminarily, and replace and tighten up each of those. Then lower the vehicle and tighten them up the rest of the way. Torque each of these to 100 foot-pounds in a crossing pattern, and replace your lug nut caps.
We hope this video helps you out. Brought to you by www.1AAuto.com, your source for quality replacement parts and the best service on the Internet. Please feel free to call us toll-free, 888-844-3393. We're the company that's here for you on the Internet and in person.