
★★★★★
May 25, 2023
So far have been happy with parts

Replaces







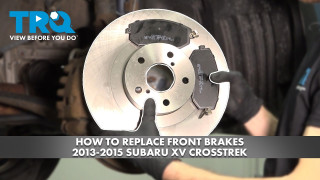
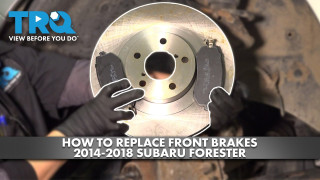
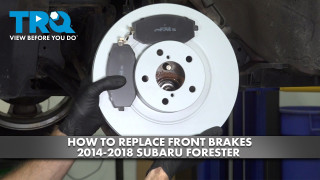
About TRQ:
TRQ is a trusted brand dedicated to making every repair a success story by combining premium parts with easy installation. Each TRQ part is engineered by a team of automotive experts to meet or exceed OEM standards, delivering enhanced performance and maximum longevity. With rigorous in-house testing, the brand ensures superior fit and function across every product line. TRQ also provides customers with best-in-class, step-by-step installation videos—so you can complete repairs with confidence, whether you're a first-time DIYer or an industry professional.
Product Features
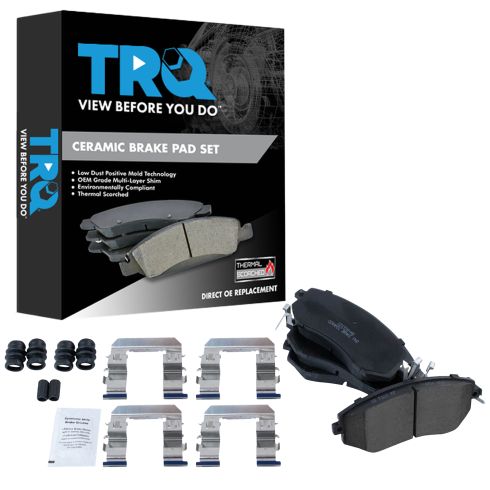
TRQ brake pads are manufactured using premium raw materials and design standards to restore original performance. TRQ brake pads are positive molded and utilize a multi-layer shim for enhanced performance and service life. TRQ’s combination of materials and design ensures a low dust and low noise braking experience. TRQ recommends replacing your brake rotors when you replace your brake pads to ensure even wear of components and improved braking comfort. All products are fit and road-tested in our Massachusetts R&D facility to ensure we deliver on our promise of Trusted Reliable Quality.
Attention California Customers:
 WARNING: This product can expose you to chemicals including Lead and Lead Compounds, which are known to the State of California to cause cancer, and birth defects or other reproductive harm. For more information, go to www.P65Warnings.ca.gov.
This part fits 44 vehicles spanning 2010-2024.
| Year | Make | Model | Description |
|---|---|---|---|
| 2013-2016 | Scion | FR-S | Scion FR-S Front Ceramic Brake Pads TRQ BFA73445 |
| 2013-2016 | Subaru | BRZ | Subaru BRZ Front Ceramic Brake Pads TRQ BFA73445 |
| 2017-2020 | Subaru | BRZ | Subaru BRZ Front without Brembo brakes Ceramic Brake Pads TRQ BFA73445 |
| 2022-2023 | Subaru | BRZ | Subaru BRZ Front Ceramic Brake Pads TRQ BFA73445 |
| 2016-2017 | Subaru | Crosstrek | Subaru Crosstrek Front Ceramic Brake Pads TRQ BFA73445 |
| 2011-2013 | Subaru | Forester | Subaru Forester Front Ceramic Brake Pads TRQ BFA73445 |
| 2014-2018 | Subaru | Forester | Subaru Forester 2.5i Limited Front Ceramic Brake Pads TRQ BFA73445 |
| 2014-2018 | Subaru | Forester | Subaru Forester 2.5i Touring Front Ceramic Brake Pads TRQ BFA73445 |
| 2014-2018 | Subaru | Forester | Subaru Forester 2.5i Premium Front Ceramic Brake Pads TRQ BFA73445 |
| 2014-2018 | Subaru | Forester | Subaru Forester 2.5i Front Ceramic Brake Pads TRQ BFA73445 |
| 2010 | Subaru | Impreza | Subaru Impreza 2.5i Premium From 4/01/10 Production Date Front Ceramic Brake Pads TRQ BFA73445 |
| 2010 | Subaru | Impreza | Subaru Impreza WRX Premium From 4/01/10 Production Date Front Ceramic Brake Pads TRQ BFA73445 |
| 2010 | Subaru | Impreza | Subaru Impreza WRX Limited From 4/01/10 Production Date Front Ceramic Brake Pads TRQ BFA73445 |
| 2010 | Subaru | Impreza | Subaru Impreza 2.5 GT From 4/01/10 Production Date Front Ceramic Brake Pads TRQ BFA73445 |
| 2010 | Subaru | Impreza | Subaru Impreza 2.5i From 4/01/10 Production Date Front Ceramic Brake Pads TRQ BFA73445 |
| 2010 | Subaru | Impreza | Subaru Impreza Outback Sport From 4/01/10 Production Date Front Ceramic Brake Pads TRQ BFA73445 |
| 2010 | Subaru | Impreza | Subaru Impreza WRX From 4/01/10 Production Date Front Ceramic Brake Pads TRQ BFA73445 |
| 2011 | Subaru | Impreza | Subaru Impreza 2.5i Front Ceramic Brake Pads TRQ BFA73445 |
| 2011 | Subaru | Impreza | Subaru Impreza 2.5i Premium Front Ceramic Brake Pads TRQ BFA73445 |
| 2011 | Subaru | Impreza | Subaru Impreza Outback Sport Front Ceramic Brake Pads TRQ BFA73445 |
| 2011-2014 | Subaru | Impreza | Subaru Impreza WRX Front Ceramic Brake Pads TRQ BFA73445 |
| 2011-2014 | Subaru | Impreza | Subaru Impreza WRX Premium Front Ceramic Brake Pads TRQ BFA73445 |
| 2011-2014 | Subaru | Impreza | Subaru Impreza WRX Limited Front Ceramic Brake Pads TRQ BFA73445 |
| 2012-2014 | Subaru | Impreza | Subaru Impreza Sport Limited Front Ceramic Brake Pads TRQ BFA73445 |
| 2012-2014 | Subaru | Impreza | Subaru Impreza Sport Premium Front Ceramic Brake Pads TRQ BFA73445 |
| 2012-2014 | Subaru | Impreza | Subaru Impreza Base Model Front Ceramic Brake Pads TRQ BFA73445 |
| 2012-2014 | Subaru | Impreza | Subaru Impreza Limited Front Ceramic Brake Pads TRQ BFA73445 |
| 2012-2014 | Subaru | Impreza | Subaru Impreza Premium Front Ceramic Brake Pads TRQ BFA73445 |
| 2015-2016 | Subaru | Impreza | Subaru Impreza Front Ceramic Brake Pads TRQ BFA73445 |
| 2013-2014 | Subaru | Legacy | Subaru Legacy 2.5i Front Ceramic Brake Pads TRQ BFA73445 |
| 2013-2014 | Subaru | Legacy | Subaru Legacy 2.5i Limited Front Ceramic Brake Pads TRQ BFA73445 |
| 2013-2014 | Subaru | Legacy | Subaru Legacy 2.5i Premium Front Ceramic Brake Pads TRQ BFA73445 |
| 2013 | Subaru | Legacy | Subaru Legacy 3.6R Front Ceramic Brake Pads TRQ BFA73445 |
| 2014 | Subaru | Legacy | Subaru Legacy 2.5i Sport Front Ceramic Brake Pads TRQ BFA73445 |
| 2013-2014 | Subaru | Outback | Subaru Outback 2.5i Limited Front Ceramic Brake Pads TRQ BFA73445 |
| 2013-2014 | Subaru | Outback | Subaru Outback 2.5i Premium Front Ceramic Brake Pads TRQ BFA73445 |
| 2013-2014 | Subaru | Outback | Subaru Outback 2.5i Front Ceramic Brake Pads TRQ BFA73445 |
| 2013-2015 | Subaru | XV Crosstrek | Subaru XV Crosstrek Front Ceramic Brake Pads TRQ BFA73445 |
| 2017-2018 | Toyota | 86 | Toyota 86 Front Ceramic Brake Pads TRQ BFA73445 |
| 2019 | Toyota | 86 | Toyota 86 Base Model Front Ceramic Brake Pads TRQ BFA73445 |
| 2019 | Toyota | 86 | Toyota 86 GT Front Ceramic Brake Pads TRQ BFA73445 |
| 2020 | Toyota | 86 | Toyota 86 GT Front without Brembo brakes Ceramic Brake Pads TRQ BFA73445 |
| 2020 | Toyota | 86 | Toyota 86 Base Model Front without Brembo brakes Ceramic Brake Pads TRQ BFA73445 |
| 2022-2024 | Toyota | GR86 | Toyota GR86 Front Ceramic Brake Pads TRQ BFA73445 |
| Brand Label | Part Number |
|---|---|
| Raybestos Brakes | MGD1539CH |
| Raybestos Brakes | SGD1539C |
| Raybestos Brakes | EHT1539H |
| Subaru | 26296AJ02A |
| Subaru | 26296FJ020 |
| Scion | SU00304678 |
| Toyota | SU00304089 |
| Subaru | 26296FJ030 |
| Subaru | 26296SC000 |
| Scion | SU00304089 |
| Subaru | 26296SC010 |
| Subaru | 26296SC011 |
| FMSI | CD1539 |
| FMSI | D1539 |
| FMSI | 7880-D1539 |
| Sangsin Brake | SP1553 |
This item may be interchangeable with parts from other brands with the above part numbers. This information is provided only for reference and does not guarantee that the item you are purchasing is identical to parts with part numbers from the brands listed above. To confirm that this item fits your vehicle, use the above "Check Vehicle Fit" option.
Lifetime Warranty
This item is backed by our limited lifetime warranty. In the event that this item should fail due to manufacturing defects during intended use, we will replace the part free of charge. This warranty covers the cost of the part only.
FREE Shipping is standard on Orders shipped to the lower 48 States (Contiguous United States). Standard shipping charges apply to Hawaii, Alaska and US Territories. Shipping is not available to Canada.
Expedited is available on checkout to the United States, excluding Alaska, Hawaii and US Territories as well as P.O. Boxes and APO/FPO/DPO addresses. Final shipping costs are available at checkout.
Created on:
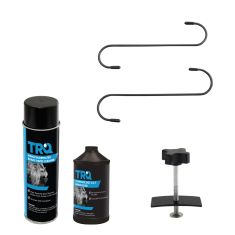
Tools used
Brought to you by 1AAuto.com, your source for quality replacement parts and the best service on the Internet.
Hi, I'm Mike Green. I'm one of the owners of 1A Auto. I want to help you save time and money repairing or maintaining your vehicle. I'm going to use my 20-plus years experience restoring and repairing cars and trucks like this to show you the correct way to install parts from 1AAuto.com. The right parts installed correctly: that's going to save you time and money. Thank you and enjoy the video.
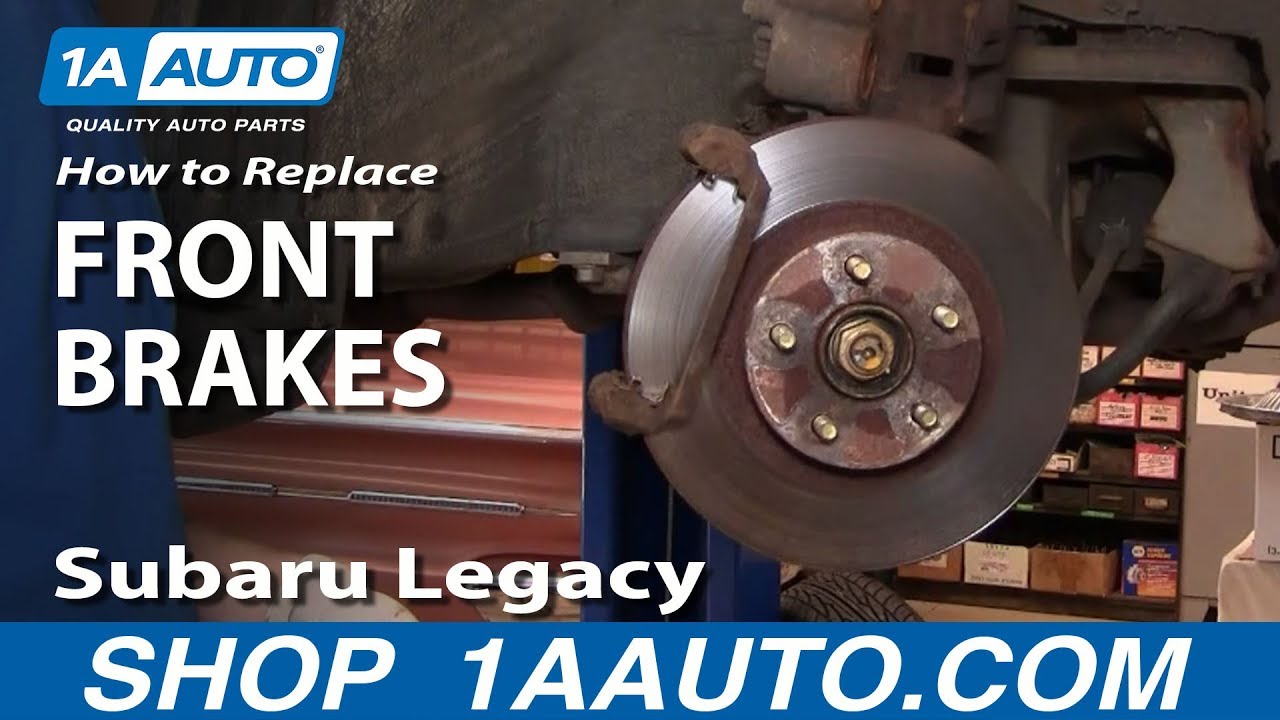
In this video, I'm going to inspect and then show you how to replace the front rotors and pads on this '99 Subaru Legacy same as '96 to '99. It turns out that this vehicle, the brakes are actually in fine shape so I just removed them and put them back on to show you the process. Obviously, I only do one side whenever you do brakes, you always replace them in pairs. The tools you'll need for the job are jack and jack stands. 14, 17, and 19 millimeters sockets with a ratchet and an extension. You'll need a breaker bar or a piece of pipe to use with your ratchet because some of the bolts or a couple of bolts can be a little difficult, and you'll need a wire brush and a large C-clamp.
Okay, start by removing one of the front tires. I'm using impact tools. If you have just regular hand tools, you're going to want to lose lug nuts with the wheel in the ground and jack up and secure the vehicle. Take the lug nuts the rest away off and remove the tire. Either grab the rotor and turn it or turn your steering wheel.
With our wheel off, we can inspect the brakes. One thing you want to look at is the condition of the rotors and what we'll do is take the back of your finger nail, just kind of run it on the surface. You'll feel small grooves but you want to watch out for any deep gauges or anything. Then you can also kind of check the back side as well. It feels very good on this car. Inside here you can see ... let me spin this a little bit. There's the rotor. Just to the left of where it's spinning, that's the inner pad so you can see there's quite a bit of life left on that. Then the outer pad, you can see out here and then there's good life on that. The brakes on this vehicle are in good shape. The only exception would be is, if when you drove it, it vibrated or pulsated, then you might want to do some work, replace the rotors or maybe even just replace the whole rotors and pads but these are working fine. I'm just going to do an inspection and I'll show you how to take all part and put them back together.
The next step you're going to want to do is to remove the caliper and you do that by removing a bolt here, a bolt here. These bolts are 14 millimeters. They should come apart relatively easily. Fast forward here as I remove those two bolts. You want to remove those bolts and you might . there's little boots here that you'll see. You might want to slide those in some and then you should just pull your caliper right off and we can flip that up here for right now. Okay so, here are your pads. They just are in the retainers, so they'll just slide right out. Okay and the inner one will slide out too as well. Okay, now this bracket here is your caliber bracket and you'll need to remove that if you want to replace your rotor. Before we do that, just one thing to check is these slides here. They will pull out. Let's see if we can pull the plug just like that.
You want to make sure that they're nice and free and if they're not, take them out. Wire brush them. Put some grease back on them and replace them. Mine are working fine. Let's push it back in. Another thing: many pads come with new retainers here. Use the new ones. If the pads you buy don't have new retainers, you can pull these out. Use a wire brush, clean them up. Remove these caliper brackets so we can get the rotor off. There are two 17 millimeter bolts from there and one here. Before I do those bolts, just looking at here I can see some pretty good corrosion here. I'm just going to throw a little bit of penetrating oil. Hopefully that will do. Okay, for these bolts, I use the extension because there's kind of the, strut gets in the way a little bit. Let me make sure that I've got the socket on there well. Use a piece of pipe, giving you this extra leverage.
I'll fast forward as I remove both those 17 millimeter bolts. If you have a breaker bar, that's great. That's the right tool but if you have a ratchet or a smaller ratchet, just use a piece of pipe like that. It gives you the extra leverage and these bolts sometimes can be a little bit of a challenge to get out. Once these bolts are out, you can take that bracket off, and then, work the rotor off.
Here's the installation. Put the rotor back on. You want to put your caliper between the rotor and the steering knuckle and then put the bolt through. Just kind of move it around a little until the bolt starts in and another one, the same thing. You might find still this part takes a little bit convincing to get through there.
I'll just fast forward. I'm just using my ratchet and socket to preliminarily tighten those bolts. Next stop is, I'll use a torque wrench. Now, you want to torque these to 85 foot-pounds. As your brakes wear, the pistons in your caliper may come out and that's how they adjust so before you put your new pads in, you'll need to push your caliper pistons back in. What you do is take your old pad and put it right in. Let's take a nice big C-clamp.
I didn't do a very good job of talking while I was doing that but you use that C-clamp and the pad and you tighten the C clamp and it forces the pistons back into the caliper.
Now, I'll put the pads back in. This is your inner pad which has a wear tab. You want to have that at the bottom. Then, put the pad back in there and back on there. Do the same thing for the outer pad. You can see I cleaned out the slides so put that down there. Sometimes you're going to have to take your pad, slide it in. Make sure it's all in place correctly. Put our caliper down on. Start one bolt in. Torque these to 20 foot-pounds.
Pick up the pace here. Straighten out the steering knuckle and put the tire on, thread, the lug nuts on by hand first. Okay here, I'm just preliminary tightening the lug nuts with my impact wrench. Now with the car in ground I'll torque the lug nuts to 100 foot-pounds using a star pattern. Most important of all, make sure you pump your brakes a bunch of times. Make sure the brake pedal is nice and firm before you road test then do a stop from 5 miles an hour and 10 miles an hour when you take the car out on the road.
We hope this helps you out. Brought to you by www.1AAuto.com, your source for quality replacement parts and the best service on the Internet. Please feel free to call us toll-free, 888-844-3393. We're the company that's here for you on the Internet and in person.
Tools used
Hi, I’m Mike from 1A Auto. We’ve been selling auto parts for over 30 years!
Use a breaker bar, 19 millimeter deep socket to loosen the lug nuts of the vehicle on the ground. This way the wheel's not turning on you. Get them nice and loose. Raise and support the vehicle. With the lug nuts loose, I'm just going to use the socket and take them off the rest of the way and remove the tire and wheel. Take the entire wheel off and put this aside. Just going to turn the wheel so the brake caliper is facing out and I can get to it easier.
Use a flat-bladed screwdriver. Just going to slide it in here. Just pry the caliper outwards. It's going to compress the piston. And do it to both, because this is a double piston caliper. So we just want to loosen it just enough. It'll make it easier to slide this off of the pads. And you remove the top and bottom caliper slide pin bolts. 14 millimeter, we'll start with the top one. Get that loose, same for the bottom one. Get that loose and take them both out. Slide the caliper off. Take our bungee cord, and let's see. That should work. Up and around the coil spring. Came undone. Hang right there. Pull our pads out. Can wedge a flat-bladed screwdriver in there and help you pry it out.
We're not reusing these. There's an upper and lower caliper bracket bolt. They are 17 millimeter. We'll start with the lower one. It's on there pretty tight, so I'll readjust the wrench here. We'll use a dead blow mallet and break it free. Do the same to the top one. Going to switch to a 17 millimeter socket and ratchet, make this go quicker. Put the bracket aside. Let's place some rust penetrate in here. And hit these threaded openings here and down the studs. Thread a lug nut on here because we're going to tap the rotor with a dead blow to break it free. Alright, doesn't want to move. I'm going to use these pusher holes here. It's an 8x1.0 thread pitch. Just find some appropriately sized bolts to thread in there. They're metric. Just going to use the socket that fits them and just evenly tighten them. And this is just going to push the rotor right off the hub. Easy.
Here's our original brake rotor from our vehicle. These are the original pads. The brand new pads from 1AAuto.com. And you can see on these, take our brake pad measurement tool. The new ones have 10 millimeter, and the worn ones have 5 millimeter. They're roughly half worn. Not too bad, but we're going to replace them anyways. These are an exact match. I've got inside and outside here. Take these, they're an exact match for the wear indicators on them. Those will fit great and work great.
We look at our rotors. The original rotor has a black coating on the hub to prevent rust. It does wear off as brakes do get hot. So the paint does eventually wear down and it will begin to rust. However, we've got these E-coated rotors from 1AAuto.com. So they do paint the hub. They paint the edge, to prevent rust. Off course, this will always rust because it's bare metal where your brake pads ride. But that is an exact match for the factory rotor, it'll fit great and work great for you. Then we also have available these drilled and slotted rotors. These have a zinc coating so they don't rust. You can kind of see the difference.
Zinc coating right now is over the entire surface. It will wear off where the brake pads ride, so these will flash rust, but you can kind of see the difference in a raw metal and a zinc coated here. So this also is to prevent rust and these will look cooler on a vehicle. But everything will fit exactly the same as factory and work great. Just going to check the slide pins. These move and out real nicely, I'm not going to mess with them. They're working perfectly. If they were sticking, you could pull them out of the rubber boots and clean and lubricate them, but since these are working great, I'm going to leave them alone.
Caliper hardware is stainless. And to be re-used, we're just going to clean it, put some brake parts cleaner and a wire brush. And just do the same for both sides of the caliper bracket. We're going to use our drilled and slotted rotors. These can go on in either direction. The veins inside are straight. They are not left and right. But you can pick which direction you want these to go. We're going to put them towards the front. I'm going to put it on backwards first. Just make sure the braking surface is clean. I'm using brake parts cleaner. Wipe down anything with a rag. Any packaging oil that might be on these. Take them off for a second. I'm just going to clean this hub up—it's not too rusty. Spray a little bit of brake parts cleaner and wipe it down. I'm going to take some copper anti-seize, just put it on the hub surface here where the rotor will touch and could potentially rust on.
So just for future service, we'll make sure the rotor can come off easily. Install the rotor the proper way, take the lug nut, and thread that down so it can't fall off. I'm using brake parts cleaner, make sure the surface stays nice and clean, free of grease and dirt. You can also buy new caliper bracket bolts from 1A Auto. This one here is really rusty and gross and the top one wasn't too bad, but we've got two brand new ones and we're going to install those. I'll put a little bit of copper never seize on these bolts, prevent corrosion. Do the top one first. So the rotor is kind of out of place, I'm going to have to push it in. I'll just slide the bracket over first and get that lined up. I'm going to reach over, move the bracket around, find where it bolts in. Do the same for the bottom one, and I have the top bolt started. Get those threaded down. Tighten these down with my socket and ratchet.
There is a lock washer that will start to compress. Go down evenly and we'll put the box wrench on here and they're already pretty tight. Put them down. Nice and tight and a quarter turn more, like that. These do have a lock washer, so once that lock washer's compressed, it won't back out. Going to make sure that these pads stay nice and clean, you don't get any grease or oil or dirt on them. Just give them a quick spray with brake parts cleaner, you don't need to soak the pad, put a little bit of caliper grease on the gears. This will help them slide on the hardware. Brake pads are curved, so that outer is going to match the outer curve on the brake rotor. You don't want to try to install them backwards. The wear indicators go towards the bottom.
Install the rear pad, the inside pad. Push it in place. Going to take our old pad, put it inside the caliper. We'll take our c-clamp, look at the set up, and you're gently compressed the pistons back into the caliper. Press these in. Get this in the middle. Those are compressed in and should slide right over our pads. Slide pin bolts do have flat sides to them, they have curved and flat. The flat's going to sit like that, same for both upper and lower.
Reinstall the slide pin bolts. Just tighten these down. Get them tight, give them a little bit more, don't want to break them, they're just small bolts. So that moves nice, in and out on the slides. Used the lug nut to keep this rotor from falling off, just make sure you take it off before you try to put the wheel and tire on.
Wheel and tire on. Start lug nuts by hand. Just going to use the socket, thread these all down, then I'll put the vehicle on the ground and torque them. Going to torque the lug nuts to 89 foot pounds and in a cross pattern. Now we need to gently pump the brakes to move the pistons out to meet the pads, not going to press it all the way to the floor. Press it about a quarter of the way, build it up. They'll start to get harder. That's perfect. Now the brake job is done.
Thanks for watching. Visit us at 1AAuto.com for quality auto parts, fast and free shipping, and the best customer service in the industry
So far have been happy with parts
Good. They work.
Parts fit my Subaru Forester perfectly great that I got hardware for changing the grease boots on the slides
They came with hardware and grease. Overall great quality pads. I'm going to get a set for my other car but with rotors included.
Smooth and easy installation. Great tutorial video on installation. Product exceeded my expectations. Thanks again 1AAuto

BFA73445
Hello, yes this kit would include all four of the brake pads that you would need for the front of the vehicle. Thank you!
