
★★★★★
July 3, 2025
Very good item

Replaces





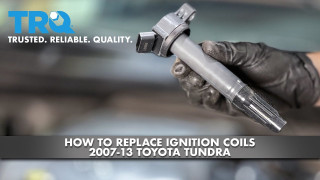
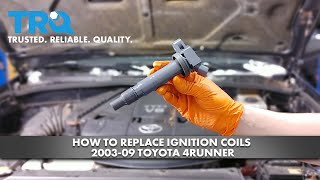
About TRQ:
TRQ is a trusted brand dedicated to making every repair a success story by combining premium parts with easy installation. Each TRQ part is engineered by a team of automotive experts to meet or exceed OEM standards, delivering enhanced performance and maximum longevity. With rigorous in-house testing, the brand ensures superior fit and function across every product line. TRQ also provides customers with best-in-class, step-by-step installation videos—so you can complete repairs with confidence, whether you're a first-time DIYer or an industry professional.
Product Features
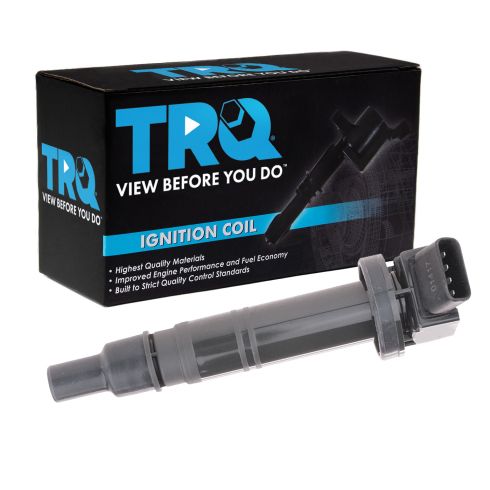
TRQ ignition coils will have your engine running like new. TRQ ignition coils are manufactured to precise specifications using premium raw materials to optimize each vehicle's ignition system. To ensure peak performance, TRQ recommends replacing ignition coils in sets to prevent electrical output imbalances. All products are fit and road-tested in our Massachusetts R&D facility to ensure we deliver on our promise of Trusted Reliable Quality.
Returns: Parts with electrical components cannot be returned once installed.
Attention California Customers:
 WARNING: This product can expose you to chemicals including Lead and Lead Compounds, which are known to the State of California to cause cancer, and birth defects or other reproductive harm. For more information, go to www.P65Warnings.ca.gov.
This part fits 15 vehicles spanning 2003-2023.
| Year | Make | Model | Description |
|---|---|---|---|
| 2010-2015 | Scion | xB | Scion xB L4 2.4L with 4.25 Inch Coil Stem US Built Models Ignition Coil TRQ ICA61760 |
| 2003-2009 | Toyota | 4Runner | Toyota 4Runner V6 4.0L Ignition Coil TRQ ICA61760 |
| 2010 | Toyota | 4Runner | Toyota 4Runner L4 2.7L Ignition Coil TRQ ICA61760 |
| 2006-2011 | Toyota | Camry | Toyota Camry L4 2.4L US Built Models Ignition Coil TRQ ICA61760 |
| 2009-2010 | Toyota | Corolla | Toyota Corolla L4 2.4L US Built Models Ignition Coil TRQ ICA61760 |
| 2009-2012 | Toyota | Matrix | Toyota Matrix L4 2.4L US Built Models Ignition Coil TRQ ICA61760 |
| 2007-2008 | Toyota | Solara | Toyota Solara L4 2.4L US Built Models Ignition Coil TRQ ICA61760 |
| 2005-2015 | Toyota | Tacoma | Toyota Tacoma V6 4.0L Ignition Coil TRQ ICA61760 |
| 2005 | Toyota | Tacoma | Toyota Tacoma L4 2.7L Ignition Coil TRQ ICA61760 |
| 2006-2014 | Toyota | Tacoma | Toyota Tacoma L4 2.7L US Built Models Ignition Coil TRQ ICA61760 |
| 2015 | Toyota | Tacoma | Toyota Tacoma L4 2.7L Ignition Coil TRQ ICA61760 |
| 2016 | Toyota | Tacoma | Toyota Tacoma L4 2.7L US Built Models Ignition Coil TRQ ICA61760 |
| 2017-2018 | Toyota | Tacoma | Toyota Tacoma L4 2.7L Ignition Coil TRQ ICA61760 |
| 2019-2023 | Toyota | Tacoma | Toyota Tacoma L4 2.7L US Built Models Ignition Coil TRQ ICA61760 |
| 2005-2011 | Toyota | Tundra | Toyota Tundra V6 4.0L US Built Models Ignition Coil TRQ ICA61760 |
| Brand Label | Part Number |
|---|---|
| Standard Motor Products | UF-495 |
| Airtex | 5C1419 |
| Delphi | GN10323 |
| Standard Motor Products | 9091902248 |
| Walker Products | 921-2056 |
| BWD | E995 |
| Richporter | C-666 |
| DENSO Auto Parts | 673-1308 |
| Wells | C1426 |
| Toyota | 9091902260 |
| Toyota | 90919A2006 |
| NAPA Mileage Plus | IC575SB |
| Toyota | 9091902248 |
| Toyota | 90919A2001 |
| IMC | CLS1058 |
| Echlin | IC575 |
| Spectra Premium | C-666 |
| Spectra Premium | C-748 |
| Toyota | 90919T2005 |
| Beck/Arnley | 178-8339 |
| BorgWarner | E995 |
| Toyota | 90919-02260 |
| Toyota | 90919-A2006 |
| Standard Import | E995 |
| SMP | UF495 |
| Toyota | 90919-02247 |
| Toyota | 90919-02248 |
| Carquest | 52-1765 |
| Standard Ignition | UF-495 |
| Hollander | 610-58651 |
This item may be interchangeable with parts from other brands with the above part numbers. This information is provided only for reference and does not guarantee that the item you are purchasing is identical to parts with part numbers from the brands listed above. To confirm that this item fits your vehicle, use the above "Check Vehicle Fit" option.
Lifetime Warranty
This item is backed by our limited lifetime warranty. In the event that this item should fail due to manufacturing defects during intended use, we will replace the part free of charge. This warranty covers the cost of the part only.
Returns: Parts with electrical components cannot be returned once installed.
FREE Shipping is standard on Orders shipped to the lower 48 States (Contiguous United States). Standard shipping charges apply to Hawaii, Alaska and US Territories. Shipping is not available to Canada.
Expedited is available on checkout to the United States, excluding Alaska, Hawaii and US Territories as well as P.O. Boxes and APO/FPO/DPO addresses. Final shipping costs are available at checkout.
Created on:
Tools used
Hey friends. It's Len here at 1A Auto. Today I'm working on a 2007 Toyota FJ Cruiser and I want to show you how to remove the coils. It's going to be a very easy job. I want to be the guy that shows you how to do it. If you need these or any other parts, you can always check us out 1aauto.com. Thanks.
So here we are friends, we're under the hood. All we're going to do, unclip this, unclip this, get this out of the way. This is our air filter by the way, you can take a peek. Looks pretty great. I could show you how to replace that if you need. I just did. There we are. So here we are. We've got some coils under here. Underneath these, are the spark plugs. To disconnect the coils, there's a little tab right here. Give it a little squeeze. I squeeze it, I twist it, I pull it, I check it. I don't see any funny colors. No rainbows. Green's bad obviously. Blue's bad under there. Rust, no good. This looks really great. Let's set it aside. So right here's a 10 millimeter, so you can use whatever you want. I don't recommend using an air gun for anything like this. Just use a ratchet. It's easy enough, break her free. Here's our bolt. We'll set that aside. Put our ratchet aside, grab the coil, give it a nice little twist. This right here, just a little boot. It should be right up on there. Just like that.
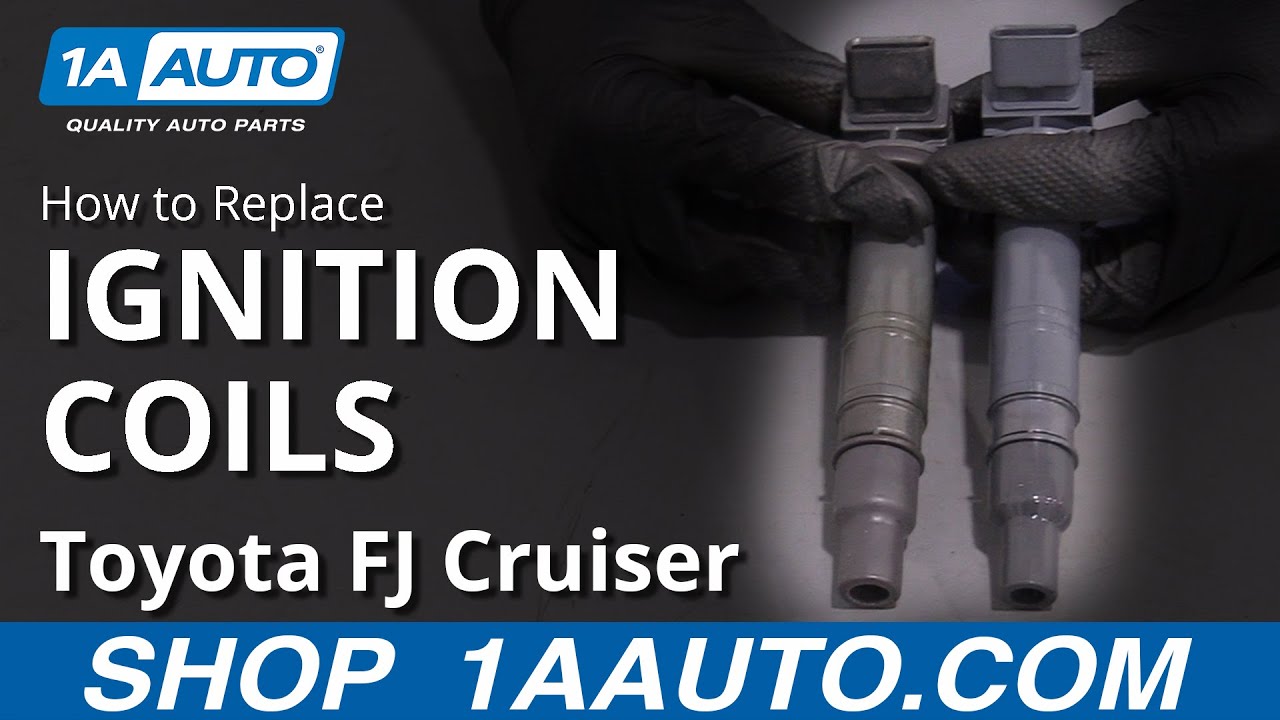
Here we are friends. A quick product comparison for you. Over here we have our original coil from our 2007 Toyota FJ Cruiser. We just removed it. Over here, we have our brand new quality 1A Auto part. We'll put them right next to each other. As you can tell, they're both the same length. It's very important. You don't want one that's sitting like this or one that's sitting like that height wise, okay. The exact same. They've got the same connector area, same mounting point. It comes with a brand new gasket. Super important. Keep the moisture out of there. Brand new in here. It looks great. I don't see any reason why this wouldn't be a quality part to install into the vehicle, so I'm going to go ahead and do it. I'm going to recycle this. If you need this or any other part, you can always check us out 1aauto.com.
We've got our brand new coil. I like to use a little bit of a dielectric grease, specialty grease that allows a electric current to travel through. Put a little bit here, a little bit there, a little bit along here. Okay. You can go right along there if you want. That's where your electrical connector's going to be. It'll help keep moisture out of there. You don't want any corrosion in there. Bring this down into its hole. You can feel it touching up against the top of the spark plug. It's going to keep going, right there. The gasket's going to hit up against the engine right there. Grab our bolt, start it in here. Okay, it's bottomed out a little bit. I like it. My socket off of there. We've got our connector. We're going to push it in and we're going to listen for a click. There it is.
We'll give it a little tug. It's holding in strong. It's not coming off. If for some reason you grabbed it and it does ... Just see if I can even get it to do it. Let's say you pushed it on. Whatever it's going to lock back in. Just wants to be locked, but anyway, you push it on. It's supposed to be locked. You give it a tug, it comes right off. There could be something wrong with your lock right there. You need to make sure it's locked. This one works so good that it just wanted to lock back in on its own again. Am I going to go through taking it off again? Nah, I'll move along. I know this one is clipped in. We'll move along to the next one. We'll do the rest on this side and we'll go over to that side.
Okay feels pretty good. All new, looking great. Take our air filter, it's going to slide right in here, the air filter housing. Come in on the front, lock these puppies in, give her a little shake, make sure the back doesn't come unclipped. It feels good. Let's move along to the driver's side of the vehicle. So this side is the messy side. We've got all sorts of stuff that might be in the way. This bracket right here, more than likely going to be in the way. You've got a 12 millimeter right here, a 12 millimeter located on the bottom. You'll remove the pair of those. Take this bracket out, set it aside. These hoses and things, they can move around. Just come right out right here. Let's see. Slides right out of those little clips. It gives you some room. You're going to remove your 10, unclip your coil, [inaudible 00:05:17] unclip your coil, then remove your 10, pull the coil out of there. Take out the spark plug, put in your new spark plug, new coil, off you go. Do the same for the other two. We'll put the bracket back on. Easy peasy.
But we've got this coil ready to come out. It's the center one. It's the reason why I told you we got to take off that bracket. You can turn it any way you want and it just won't come out of here. Okay, turn it around if you want, try whatever you want to do, it does not come out. So we're going to remove this 12, bottom 12, and then it should give us plenty of room to move along. A little bonk, leave that on there for a little bit. Come down here, see if I can grab this bottom bolt. Let's use the socket for something to hold onto here. Get the bolt out of here. I'll show you what it looks like. Lower bolt, that aside so I can't lose it. Holding the bracket. Come on baby. There it is. [inaudible 00:06:28] bracket out of here. That's the way it sits. Curvy end down. Second bolt, easy peasy. Now let's see if we can get this coil out of here.
Cool. Let's go ahead and replace it. This hose right here is in the way of getting out this coil. It's pretty easy to take care of. There's a little squeezy clamp right back there. You can do it by hand. There's one right here. Do it by hand. I'm going to give it a little squeeze, not much tension there. Pull the clamp down. I'm going to take my hose, pull it right off. Take a peek at it. It's pretty cracked. I'm going to see about trying to replace that at some point. For the purpose of this video, I'm not going to worry about it yet. I'm going to squeeze that back one. Give my hose a tug. Here's our hose. We'll set this aside. Now we have a clear view of our coil back there. We can get to this easy peasy at this point.
We're going to go ahead and install our hose now. I've got all coils in. Give the clamp a little squeeze. It's easy. Slide it in. Love it. Give this one a squeeze, slide it up, line it back up with the way it came off. I liked it there. It was there for a long time, it wants to stay there. We've got our bracket, the one with a little bump coming out on the lower end. It wasn't like this. It was like this. The rusty end was down. Now grab one bolt, I'm going to start it on the top because it's easier to reach. Not going to tighten it down until I get the other bolts started. I'm just going to use my socket. This gives me a little something to grab onto. Start it in the hole down here. Okay. At this point I can go ahead and tighten this up if I want and I do want to. Grab my ratchet.
All right, we'll get this one so it's close. It's easier to do this than with the ratchet. Cool. Let's tighten these puppies up. Put my ratchet in the on position. It feels pretty good. I don't want to break my plastic intake. This one down here, this is just using our 12 millimeter socket that we used to take them off obviously. That feels great. Brackets, nice and tight, hoses on there. We'll make sure that we push our hoses that we might've pushed off of these clamps back in. Everything's secured. Perfect. We'll get all our tools out of here and we'll spark it up.
All right, friends, here we go. Let's get ready to start this up. Feels like it's purring like a kitten. RPMs are good. I don't feel any shudder inside the vehicle. No misfire, no check engine light. I'd say we're good to go.
So let's say that you were inside your vehicle after you just completed your work, right. You started it up, everything felt fine for a second. Maybe your check engine light came on or maybe you're inside the vehicle and you can feel it's shuddering a little bit, shaking. Your RPMs are jumping around. You could have a misfire. At that point, you could have one of your coils, maybe it wasn't plugged in all the way. Okay, so that will be the first thing I would check. I would just grab all my coil wires, give them a little squeeze. Maybe it didn't clip in. It's possible, human error. Okay. If all those were good, you can try starting it up again. Double check it. If it's still doing the same thing, you might have a spark plug issue. Okay. If you have a spark plug issue, it can be something as simple as a cracked plug. Can happen in shipping.
Maybe you used the wrong socket, you used the 16 millimeter instead of the five eighths spark plug socket you should be using. Anything can happen. If your check engine lights on, of course you can pull the scanner out or go someplace that has a scanner and have it checked. That'll give you a proper diagnosis on what to start looking for. But those would be where I would start. So with all that said, this engine ran perfectly for me, so I don't have anything to worry about. So you can always check us out for any parts or instructional videos. Thanks.
Thanks for watching. Visit 1aauto.com for quality auto parts shipped to your door, the place for DIY auto repair. And if you enjoyed this video, please click the subscribe button.
Tools used
Hi, I’m Mike from 1A Auto. We’ve been selling auto parts for over 30 years!
Disconnect the negative battery terminal, it's a 10 millimeter nut.
Remove the plastic engine cover, two 10 millimeter nuts on the top. Cover should just slip off, let me put that aside. These are your four ignition coil packs, right on top of the engine. To remove them, well this tab is broken, but if the tab is not broken you push the tab in, pull it out. Push the lock in and pull it off.
To remove the coil pack, loosen the 10 millimeter bolt that's holding it into the head. This procedure's the same for the other three coils. Pull it straight up, and it'll come right off the spark plug. Repeat the procedure for the other three coils.
Install the new coil, and put it down over the spark plug. Until that gets tight, I'm just going to stop. Reconnect the modular connectors. Reinstall the plastic engine cover. The spark plugs and coils have been changed.
Thanks for watching. Visit us at 1AAuto.com for quality auto parts, fast and free shipping, and the best customer service in the industry.
Tools used
Very good item
Good and easily to change it, I Take five minutes and finish the problem
It works great
Its good for the value
No problems. Parts fit exactly as promised. Shipping was on time. Will and have already ordered from 1Aauto again

ICA61760
