About TRQ: TRQ is a trusted brand dedicated to making every repair a success story by combining premium parts with easy installation. Each TRQ part is engineered by a team of automotive experts to meet or exceed OEM standards, delivering enhanced performance and maximum longevity. With rigorous in-house testing, the brand ensures superior fit and function across every product line. TRQ also provides customers with best-in-class, step-by-step installation videos—so you can complete repairs with confidence, whether you're a first-time DIYer or an industry professional.
Product Features
Application Specific Design: No modifications necessary
Anti-Corrosion Coated: Enhanced surface life
Pre-greased: No additional maintenance required
Kitted for Restored Performance: Improved road-feel and handling
Description
TRQ suspension kits are manufactured using premium raw materials and coatings for extended service life. Each TRQ suspension component is designed to be a direct, maintenance-free replacement to the stock unit. To extend the life of your steering and suspension components, TRQ recommends replacing components in pairs, sets, or kits. All products are fit and road-tested in our Massachusetts R&D facility to ensure we deliver on our promise of Trusted Reliable Quality.
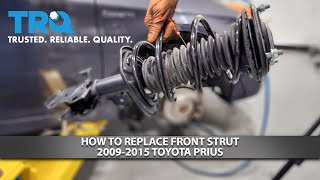
Replacing struts used to require specialized tools to compress, remove, and transfer the old spring and mount. Our Pre-assembled, complete strut & spring assemblies come with all new parts and make the job much quicker and easier for the do-it-yourself mechanic.
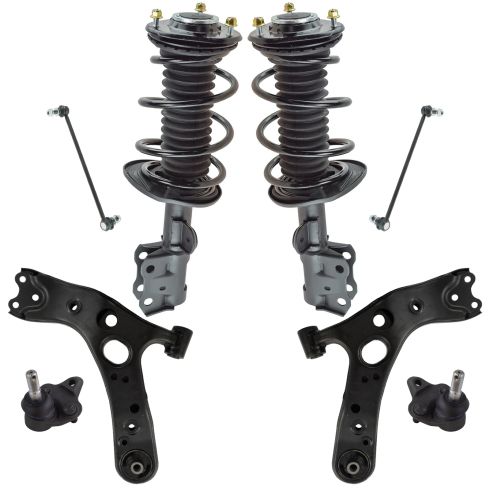
Strut & spring assembly contains:
Upper Strut Mount
Strut Bearing
Coil Spring
Boot & Bumper Kit
Gas-charged Strut
Our steering and suspension components are pre-greased and sealed for long life and do not require the extra maintenance typically required by greaseable versions.
Attention California Customers:
WARNING: This product can expose you to chemicals including Chromium (Hexavalent Compounds), which is known to the State of California to cause cancer, and birth defects or other reproductive harm. For more information, go to www.P65Warnings.ca.gov
This part fits
2 vehicles spanning 2010-2015.
Fits these Makes
Select vehicle
Year
Make
Model
Description
2010-2015
Toyota
Prius
Toyota Prius Front 8 Piece Suspension Kit TRQ PSA63673
2012-2015
Toyota
Prius Plug-In
Toyota Prius Plug-In Front 8 Piece Suspension Kit TRQ PSA63673
Part Interchange
Brand Label
Part Number
KYB
SR4246
KYB
SR4245
Monroe Shocks & Struts
172688
Monroe Shocks & Struts
172689
Dorman - OE Solutions
532-145
Beck/Arnley
102-7736
Beck/Arnley
102-7737
MOOG Chassis Products
K500207
Beck/Arnley
101-7654
MOOG Chassis Products
K750043
DIY Solutions
SUS06090
DIY Solutions
SUS06091
DIY Solutions
SUS06979
DIY Solutions
SUS00402
Unity Automotive
11107
Unity Automotive
11106
Beck/Arnley
101-5228
Mevotech
MS86803
Mevotech
MS86521
NAPA Proformer
18750043
MasterPro Chassis
K750043
Import Direct Chassis
LS13020
MAS Industries
SL74485
Mevotech
MS60822
Duralast
18750043
Toyota
488200R010
Mevotech
TXMS86803
Raybestos Brakes
5451646B
MAS Industries
SL74135
Toyota
4882047030
NAPA Chassis Parts
2651854
ACDelco
46G20646A
Centric Parts
606.44032
Driveworks
DW-K750043
AutoZone
18750043
Dorman
SL74485XL
ACDelco
45G20646
Delphi
TC1920
TRW Steering and Suspension Parts
18750043
Firestone
K750043
Precision Chassis
LS13020
Raybestos Brakes
545-1646
Toyota
4882042030
AutoZone
DG5451646
Mevotech
MS86883
AutoZone
V18750043
TRW Steering and Suspension Parts
JTS1144
Dorman
536-014
Carquest Premium Chassis Parts
644-233795
NAPA Chassis Parts
265-1854
Mevotech
MS86873
NAPA Chassis Parts
18750043
Toyota
4882047020
Parts Master
K750043
Mcquay-Norris
SL748
Dorman
SL74135XL
Valucraft
V18750043
Toyota
48820-47030
Import Direct
LS13020
Dorman
SL74485
Toyota
48820-42030
Toyota
48820-47020
Toyota
48820-0R010
TRW
JTS1144
Toyota
48820-02070
Dorman - OE Solutions
522-361
Delphi
TC5207
Dorman - OE Solutions
522-362
Delphi
TC5206
Dorman - OE Solutions
536-014
Dorman - Premium
SL74135XL
Dorman - Premium
SL74485XL
Hollander
512-50522L
Hollander
512-50521R
MOOG Chassis Products
RK622203
MOOG Chassis Products
RK622202
Mevotech
CMS861031
Mevotech
CMS861030
Mevotech Supreme
TXMS86803
Mevotech Supreme
MS86873
Mevotech Supreme
MS60822
Mevotech Supreme
MS86521
Mevotech Supreme
MS86883
Mevotech Supreme
MS86803
PRT
810408
PRT
810407
Toyota
48068-47050
Toyota
48069-47050
This item may be interchangeable with parts from other brands with the above part numbers.
This information is provided only for reference and does not guarantee that the item you are
purchasing is identical to parts with part numbers from the brands listed above.
To confirm that this item fits your vehicle, use the above "Check Vehicle Fit" option.
Lifetime Warranty
This item is backed by our limited lifetime warranty. In the event that this item should fail due to manufacturing defects during intended use, we will replace the part free of charge. This warranty covers the cost of the part only.
FREE Shipping is standard on orders shipped to the lower 48 States (Contiguous United States). Standard shipping charges apply to Hawaii and Alaska.
Shipping is not available to a P.O. Box, APO/FPO/DPO addresses, US Territories, or Canada for this item.
Expedited is available on checkout to the United States, excluding Alaska, Hawaii.
Final shipping costs are available at checkout.
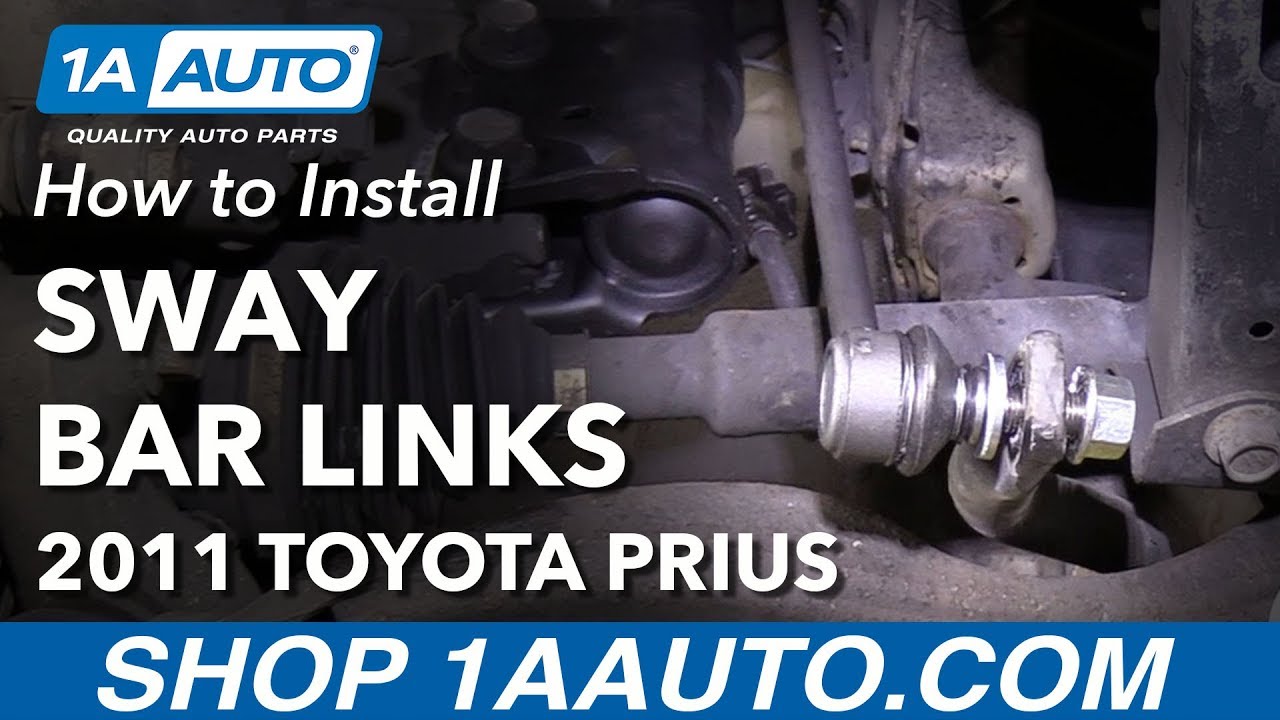
How to Replace Front Sway Bar Links 2010-15 Toyota Prius
Created on:
Tools used
21mm wrench
6mm Hex Wrench
Flat Blade Screwdriver
Torque Wrench
17mm Wrench
17mm Socket
Jack Stands
Ratchet
Floor Jack
1/2 Inch Breaker Bar
1. Removing the Wheel
Pry off the wheel cover with a flat blade screwdriver
Loosen the 21mm lug nuts with the vehicle on the ground
Raise the vehicle with a floor jack
Secure the vehicle on jack stands
Remove the lug nuts
Pull off the wheel
2. Removing the Front Sway Bar Links
Loosen the upper sway bar link bolt with a 6mm allen key bit and breaker bar and a 14mm wrench, or vise grip pliers and a 17mm wrench
Remove the upper portion of the sway bar link
Insert the upper portion and gently tighten the nut
Loosen the lower sway bar link bolt with a 6mm allen key bit and breaker bar and a 14mm wrench, or vise grip pliers and a 17mm wrench
3. Installing the Front Sway Bar Links
Insert the upper portion of the sway bar link in place
Insert the lower portion of the sway bar link in place
Counter hold the upper portion with an 18mm wrench
Tighten the upper nut with an 18mm socket and ratchet
Repeat for the lower portion
Tighten the nuts 55 foot-pounds of torque
4. Reattaching the Wheel
Slide the wheel into place
Start the lug nuts by hand
Tighten the lug nuts preliminarily
Lower the vehicle to the ground
Tighten the lug nuts to 76 foot-pounds in a crossing or star pattern
Hi, I’m Mike from 1A Auto. We’ve been selling auto parts for over 30 years!
You can use a small pry bar, or you can use a large flat-bladed screwdriver. We're going to pop the wheel cover off. Going to use a 21 millimeter socket, a large breaker bar. Loosen the lug nuts with the vehicle on the ground, so the wheel doesn't turn. Raise this sporty vehicle with a jack and jack stands, or we're going to use our two post lift. The vehicle in the air, the lug nuts are loose, I'm going to use the socket to finish taking the wheel and tire off.
Remove the sway bar link. Spray some rust penetrant on the top nut. It's a 17 millimeter nut. Try to break it free first. It might want to spin on the ball joint part. There is a way to counterhold it. Typically, before I try to counterhold it, I like to try to break it free a little bit. It started to move, and then, now it's spinning on the ball joint part, but I did free it up a bit.
We're going to take a 6 millimeter hex drive on the breaker bar. Put it in here to counterhold it. Now, loosen the nut. It's possible that these could be so rusted together that you may have to cut the sway bar links off. If you're replacing the strut, you should have a new sway bar link on hand, in case you destroy it while you're removing it. This one came off really nicely. Pull it right out.
Spray some rust penetrant on the lower sway bar link nut. Wipe it so it doesn't drip all over the floor. Using the 17 millimeter wrench, break it free first. There you go. This one, I actually got lucky, I didn't have to counterhold it like the top one, and it spun right off.
Here's the original sway bar link we pulled from the vehicle, and the brand new one from 1AAuto.com. Comes with new hardware. Similar in design, this will work great and fit great in your vehicle. This can be installed in either direction. They're reversible. I'm going to start with the bottom one. Put it through. Use the new nut that was included. It is a locking nut, so it's going to get to a point and then stop. Take the one off here, and we'll install it here. Bend it a little bit. Nut installed here.
Now, we'll work on tightening the bottom one first. Nuts that come on this new one were 18 millimeter. Hold the bolt in place and tighten them up. It's starting to turn the ball joint. The stud's turning with it, so now I'm going to have to counterhold this. Use our 6 millimeter hex drive with our breaker bar. I can counterhold it and tighten it up. Get it tightened down, come back and torque it. Torque the sway bar link upper nut and lower nut to 55 foot-pounds. Once it clicks, you're all set. Do the same for both.
Reinstall the wheel. Start the lug nuts by hand. These lug nuts do have a shoulder on them. The opening in the wheel is a little bit bigger, so you might have to line it up, and just fiddle with the wheel a little bit while you're tightening these down. Just going to use the socket to snug these down. When I'm done, we'll lower the vehicle to the ground and torque them to spec. Torque the lug nuts in a cross pattern to 76 foot-pounds. To reinstall the wheel cover, line up the hole for the valve stem, and then snap it in place.
Thanks for watching. Visit us at 1AAuto.com for quality auto parts, fast and free shipping, and the best customer service in the industry.
PSA63673
In Stock
Product Reviews
4.3/ 5
★★★★★★★★★★
3 reviews
5★
67%
4★
0%
3★
33%
2★
0%
1★
0%
★★★★★June 18, 2025
Every part except the control arms has gone bad after 2 years / 10,000 miles.
I purchased this in 2023. The prices were excellent, and I have relied on 1A Auto's videos to learn about car maintenance. However, I am extremely disappointed with these parts. My car now makes terrible noises when going over bumps. I suspect my struts have sagged since I frequently hit my bumper now. I know there's a warranty that might cover this issue, but I'm uncertain about reinstalling these poor-quality parts in my car. I should have invested more in KYB struts.
Despite this, I'm giving 3 stars because the customer service is replacing this for me via warranty. I'll report back if my replacement fails me, too.
The warranty is decent. They send out the new parts free of charge. I don't have to pay for shipping. However, they ask for the broken parts back. If I don't, then the warranty on the replacement parts is voided.
★★★★★May 21, 2024
Excellent
★★★★★October 8, 2023
Great product
Showing 1–3 of 3 reviews
Customer Q&A
Got a question about this part? Post it and get answers from our team.
JohnOctober 4, 2021
Will this kit fit a 2005 Prius?
This part will not fit your vehicle, but we may have a part that is listed to fit.
Please enter your vehicle's year make and model in the search bar at the top of the page. This will display parts guaranteed to fit your vehicle. Just be sure to verify all of the information shown in the Vehicle Fit tab before ordering.
Jessica · October 4, 2021
Showing 1–1 of 1 question
Customer service
877-844-3393
Monday - Friday 8:00am - 9:30pm ET Saturday - Sunday 8:00am - 4:30pm ET
Ask a Question
Check Your Email
We sent a verification email to .
Click the Verify Email button in the email to submit your question.
This extra step helps prevent spam.
Toyota is a registered trademark of Toyota Motor Corporation. 1A Auto is not affiliated with or sponsored by Toyota or Toyota Motor Corporation.See all trademarks.
Select Your Vehicle
Specify your vehicle's year, make and model to guarantee fit.









 WARNING: This product can expose you to chemicals including Chromium (Hexavalent Compounds), which is known to the State of California to cause cancer, and birth defects or other reproductive harm. For more information, go to www.P65Warnings.ca.gov