

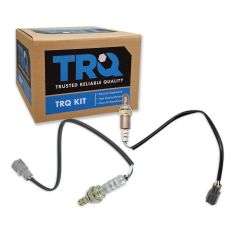
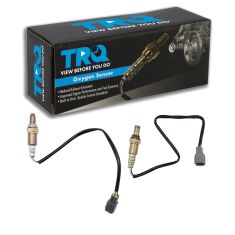
★★★★★
January 1, 2026
02 sensor
Good product, check engine light all cleared w no issues..,would recommend

Replaces




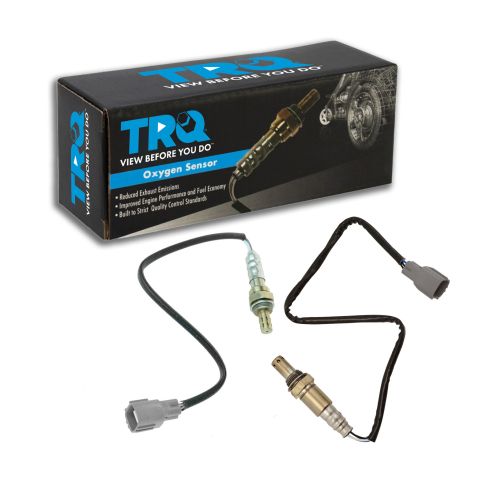



Part Details
Specifications
About TRQ:
TRQ is a trusted brand dedicated to making every repair a success story by combining premium parts with easy installation. Each TRQ part is engineered by a team of automotive experts to meet or exceed OEM standards, delivering enhanced performance and maximum longevity. With rigorous in-house testing, the brand ensures superior fit and function across every product line. TRQ also provides customers with best-in-class, step-by-step installation videos—so you can complete repairs with confidence, whether you're a first-time DIYer or an industry professional.
Product Features
TRQ oxygen sensors are manufactured to precise specifications using premium raw materials to optimize your vehicle’s emission system. Each sensor is isostatically-pressed for improved strength and durability, and plasma-sprayed to improve sensitivity and prolong the service life of the sensors. Oxygen sensors wear out over time and should be replaced every 60,000 miles to prevent poor engine performance. TRQ recommends replacing the oxygen sensors in sets to optimize fuel economy and reduce overall emissions. All products are fit and road-tested in our Massachusetts R&D facility to ensure we deliver on our promise of Trusted Reliable Quality.
What is Upstream vs. Downstream?
Install Tip: You may be required to reset the vehicle computer after installation of this part.
Returns: Parts with electrical components cannot be returned once installed.
Attention California Customers:
 WARNING: This product can expose you to chemicals including Lead and Lead Compounds, which are known to the State of California to cause cancer, and birth defects or other reproductive harm. For more information, go to www.P65Warnings.ca.gov.
This part fits 10 vehicles spanning 2003-2013.
| Year | Make | Model | Description |
|---|---|---|---|
| 2009-2010 | Pontiac | Vibe | Pontiac Vibe GT L4 2.4L 2 Piece O2 Oxygen Sensor Set TRQ OSA61647 |
| 2009-2010 | Pontiac | Vibe | Pontiac Vibe Base Model L4 2.4L 2 Piece O2 Oxygen Sensor Set TRQ OSA61647 |
| 2003 | Toyota | Camry | Toyota Camry L4 2.4L with California Emissions 2 Piece O2 Oxygen Sensor Set TRQ OSA61647 |
| 2007-2008 | Toyota | Camry | Toyota Camry L4 2.4L Full Hybrid EV-Gas (FHEV) 2 Piece O2 Oxygen Sensor Set TRQ OSA61647 |
| 2009-2011 | Toyota | Camry | Toyota Camry L4 2.4L 2 Piece O2 Oxygen Sensor Set TRQ OSA61647 |
| 2009-2010 | Toyota | Corolla | Toyota Corolla L4 2.4L 2 Piece O2 Oxygen Sensor Set TRQ OSA61647 |
| 2009-2013 | Toyota | Matrix | Toyota Matrix L4 2.4L Front Wheel Drive 2 Piece O2 Oxygen Sensor Set TRQ OSA61647 |
| 2006-2008 | Toyota | Rav4 | Toyota Rav4 L4 2.4L 2 Piece O2 Oxygen Sensor Set TRQ OSA61647 |
| 2004 | Toyota | Solara | Toyota Solara L4 2.4L 2 Piece O2 Oxygen Sensor Set TRQ OSA61647 |
| 2008 | Toyota | Solara | Toyota Solara L4 2.4L 2 Piece O2 Oxygen Sensor Set TRQ OSA61647 |
| Brand Label | Part Number |
|---|---|
| Walker Products | 250-54007 |
| Walker Products | 250-24360 |
| Standard Motor Products | 430 SG368 |
| Standard Motor Products | SG811 |
| Omnicraft | QDY25 |
| Toyota | 894670E090 |
| Wells | SU6780 |
| Niehoff | FE80856 |
| Toyota | 8946521060 |
| Standard Motor Products | SG1478 |
| Toyota | 8946506120 |
| Niehoff | FE80073 |
| Wells | SU6590 |
| DENSO | 234-9050 |
| Standard Motor Products | SG804 |
| DENSO | 234-9049 |
| Toyota | 894650R020 |
| Toyota | 8946533080 |
| Toyota | 8946560200 |
| Wells | SU7214 |
| Toyota | 89465-06030 |
| Wells | SU6589 |
| Toyota | 8946533470 |
| Niehoff | FE80614 |
| Toyota | 8946748160 |
| Toyota | 89465-42150 |
| Toyota | 894650C180 |
| Standard Motor Products | SG820 |
| Toyota | 8946535570 |
| Bosch | 15960 |
| Toyota | 8946706070 |
| Standard Motor Products | SG1754 |
| Wells | SU7798 |
| Toyota | 894650T030 |
| Toyota | 8946552050 |
| Toyota | 8946758030 |
| Wells | SU4883 |
| Bosch | 15571 |
| Toyota | 8946536040 |
| Toyota | 8946560300 |
| Wells | SU4877 |
| Standard Motor Products | SG1377 |
| DENSO | 234-4909 |
| Niehoff | FE8885 |
| Niehoff | FE8900 |
| Toyota | 8946506200 |
| Toyota | 8946533321 |
| Niehoff | FE8902 |
| Toyota | 89467-42050 |
| OMNIPARTS | 19060250 |
| Toyota | 8946541060 |
| Toyota | 8946533440 |
| Toyota | 894650C160 |
| Toyota | 8946742040 |
| Toyota | 89465B4020 |
| Wells | SU6244 |
| Toyota | 8946505100 |
| Toyota | 8946516050 |
| Wells | SU4808 |
| Toyota | 8946748090 |
| Bosch | 15486 |
| Toyota | 8946535580 |
| Toyota | 8946578010 |
| Niehoff | FE80559 |
| Wells | SU4886 |
| Delphi | ES20118 |
| Beck/Arnley | 156-6009 |
| Niehoff | FE6262 |
| Standard Motor Products | SG1374 |
| Toyota | 8946520430 |
| Toyota | 8946560330 |
| Niehoff | FE6272 |
| Toyota | 8946597403 |
| Toyota | 8946587402 |
| Toyota | 8946552180 |
| Toyota | 8946533410 |
| Toyota | 8946533450 |
| Toyota | 89465-33320 |
| Wells | SU6214 |
| Toyota | 8946733170 |
| Wells | SU7794 |
| Toyota | 8946512680 |
| DENSO | 234-4758 |
| ACDelco | 213-2846 |
| Toyota | 8946533310 |
| Niehoff | FE6261 |
| Delphi | ES20327 |
| Wells | SU6778 |
| Toyota | 8946504270 |
| Standard Motor Products | SG759 |
| Beck/Arnley | 156-6003 |
| Standard Motor Products | SG1378 |
| DENSO | DOX0261 |
| DENSO | 234-9158 |
| Bosch | 13355 |
| ACDelco | 213-1483 |
| Toyota | 8946530180 |
| Standard Motor Products | SG1477 |
| Wells | SU6239 |
| Toyota | 8946502340 |
| Toyota | 89467-06060 |
| Toyota | 8946520270 |
| Toyota | 8946506140 |
| Toyota | 8946580048 |
| Toyota | 8946552040 |
| Toyota | 8946533380 |
| Toyota | 89467-08030 |
| Toyota | 8946504090 |
| DENSO | 234-4557 |
| Toyota | 8946526140 |
| Toyota | 8946587401 |
| Delphi | ES20325 |
| Wells | SU5641 |
| Toyota | 8946504290 |
| Toyota | 8946707010 |
| Wells | SU7213 |
| Toyota | 8946748070 |
| Lexus | 8946530180 |
| Toyota | 89467-33160 |
| DENSO | 234-9044 |
| Toyota | 8946558060 |
| Wells | SU7217 |
| Toyota | 8946504350 |
| DENSO | 234-4261 |
| Toyota | 8946517180 |
| Toyota | 8946560290 |
| Wells | SU7811 |
| Wells | SU5637 |
| Wells | SU7218 |
| Niehoff | FE80658 |
| Omnicraft | QDY3 |
| Standard Motor Products | SG1433 |
| Toyota | 8946507070 |
| Toyota | 89465B1060 |
| Wells | SU4885 |
| DENSO | 234-4556 |
| Toyota | 8946533520 |
| Toyota | 8946506260 |
| Toyota | 8946542170 |
| Toyota | 8946507050 |
| Toyota | 894650D040 |
| Toyota | 8946510070 |
| Wells | SU5643 |
| Toyota | 89467-42080 |
| Niehoff | FE80615 |
| Beck/Arnley | 156-4267 |
| Toyota | 8946708070 |
| DENSO | 234-4622 |
| DENSO | 234-4624 |
| Standard Motor Products | SG787 |
| Toyota | 89465-0R010 |
| DENSO | DOX0204 |
| Toyota | 89465-06190 |
| Bosch | 15562 |
| Toyota | 8946748280 |
| Toyota | 8946702060 |
| Standard Motor Products | SG1671 |
| Wells | SU6250 |
| DENSO | 234-9041 |
| Wells | SU6986 |
| Toyota | 8946504300 |
| Toyota | 8946560250 |
| Toyota | 8946520750 |
| Toyota | 8946535670 |
| Toyota | 8946516080 |
| Wells | SU4870 |
| DENSO | 234-9008 |
| Beck/Arnley | 156-4050 |
| Toyota | 89467-08050 |
| Wells | SU4836 |
| DENSO | 234-9043 |
| OMNIPARTS | 19060215 |
| Toyota | 8946706030 |
| Toyota | 8946504340 |
| Lexus | 8946535690 |
| Toyota | 8946506150 |
| DENSO | DOX0547 |
| Wells | SU7215 |
| Standard Motor Products | SG763 |
| Scion | 8946521050 |
| Toyota | 89467-33080 |
| DENSO | 234-4757 |
| DENSO | 234-4260 |
| Wells | SU7815 |
| Bosch | 15672 |
| DENSO | 234-9054 |
| Standard Motor Products | SG1672 |
| Delphi | ES10934 |
| Toyota | 8946520490 |
| DENSO | 234-9045 |
| Wells | SU5667 |
| Bosch | 13735 |
| Wells | SU6213 |
| Toyota | 8946504320 |
| Toyota | 8946533350 |
| Niehoff | FE80659 |
| Toyota | 894650C170 |
| Toyota | 89465-06080 |
| Toyota | 894650R040 |
| Toyota | 8946512A50 |
| Toyota | 8946526130 |
| Toyota | 8946733190 |
| Toyota | 8946506060 |
| Standard Motor Products | SG973 |
| Toyota | 8946533360 |
| Wells | SU6985 |
| Niehoff | FE80536 |
| Toyota | 8946535680 |
| Toyota | 8946535690 |
| Niehoff | FE8855 |
| Toyota | 894670R010 |
| Toyota | 8946580041 |
| Toyota | 89467-0E110 |
| Beck/Arnley | 156-4266 |
| DENSO | DOX0505 |
| Standard Motor Products | SG368 |
| Toyota | 8946558050 |
| Toyota | 8946542200 |
| Wells | SU7220 |
| Wells | SU7813 |
| Wells | SU7209 |
| Delphi | ES20326 |
| Toyota | 8946506250 |
| Toyota | 89467-48120 |
| Toyota | 8946506100 |
| Niehoff | FE80555 |
| Wells | SU4785 |
| Toyota | 8946733090 |
| Toyota | 8946706110 |
| Toyota | 89467-28010 |
| Standard Motor Products | SG1434 |
| Niehoff | FE8918 |
| Wells | SU6779 |
| Toyota | 8946560320 |
| Wells | SU5654 |
| Niehoff | FE80857 |
| Toyota | 89465-33250 |
| Toyota | 8946506230 |
| Toyota | 8946712070 |
| Toyota | 8946547050 |
| Toyota | 8946733140 |
| Standard Motor Products | SG1355 |
| Toyota | 8946748020 |
| Toyota | 89465-33180 |
| Toyota | 8946707030 |
| Wells | SU7216 |
| Toyota | 8946506290 |
This item may be interchangeable with parts from other brands with the above part numbers. This information is provided only for reference and does not guarantee that the item you are purchasing is identical to parts with part numbers from the brands listed above. To confirm that this item fits your vehicle, use the above "Check Vehicle Fit" option.
Lifetime Warranty
This item is backed by our limited lifetime warranty. In the event that this item should fail due to manufacturing defects during intended use, we will replace the part free of charge. This warranty covers the cost of the part only.
Returns: Parts with electrical components cannot be returned once installed.
FREE Shipping is standard on Orders shipped to the lower 48 States (Contiguous United States). Standard shipping charges apply to Hawaii, Alaska and US Territories. Shipping is not available to Canada.
Expedited is available on checkout to the United States, excluding Alaska, Hawaii and US Territories as well as P.O. Boxes and APO/FPO/DPO addresses. Final shipping costs are available at checkout.

Created on:
Tools used
Hi. I'm Mike from 1AAuto. We've been selling auto parts for over 30 years!
The front O2 sensor is located here before the cat and the wire for the connector followed up here to the side of the engine. We've removed the engine cover. You could do this without removing the engine cover. This just makes it easier to see.
It is clipped to the radiator hose. We'll squeeze these tabs. Just using a flat bladed screwdriver, try to pry this apart. It's kind of stuck. Usually, these come apart pretty easily. So I'll squeeze the two tabs together and then pry it on this. Squeeze them together. We'll keep prying. That will come apart. You can see how it works. So it clips together and you just squeeze these tabs together. It's just filled with dirt. It's hard to get apart. Put that aside to reuse it.
You need to unlock the O2 sensor connector up here. So you can either push in on this lock. See, it's going to move that tab up. You might not move it up enough. Take a small flat bladed screwdriver. Sort of pry it up and at the same time, pull the connector out just like that.
Our oxygen sensor socket is too wide to fit in this shielded oxygen sensor. You can get a thin walled oxygen sensor socket if you need to remove this oxygen sensor and reuse it if you are replacing the cat. I plan on using the same size socket but in a thin walled, just a regular version. However, the wires are in the way. So again, if you want to reuse your O2 sensor, this would not be the way to remove it, but if you need to just get it out because it's failed and you got to replace it with a new one, you can do this. So I'm going to cut the wires. Take that harness out of there. I'm using a 7/8” extra deep socket and a breaker bar. Put into place. Break it free. Spin it out. You can see this had a shield on it.
Here's the original O2 sensor. Had a shield on it. There's a brand new one from 1AAuto.com. Doesn't have a shield on it. Not a big deal. You don't 100% need that. Obviously, I cut this to get it off. The harness is the same length with the same style connector. This'll thread right in and work great for us. So it already comes with anti-seize applied to the threads.
Thread it in by hand. Now we can use our actual oxygen sensor socket and I will tighten it down. Basically, just feel the crush ring that's on the end of it. It'll start to crush and right there, that's perfect.
Run the wire back up underneath the upper radiator hose. Then well plug the connector back in. That's keyed. It can only go in one way. I'm going to hold it from the back. It'll click when it locks into place. Take our little wire holder. Get the wire up and away from the exhaust and just clip it in place just like the original. The O2 sensor's replaced.
Thanks for watching. Visit us at 1AAuto.com for quality auto parts, fast and free shipping, and the best customer service in the industry.
Tools used
Hi, I’m Mike from 1A Auto. We’ve been selling auto parts for over 30 years!
Open the hood. Pull the release handle down here above your knee. Release the safety, which is right here. This hood had hood struts. On this PZEV Camry, bank one sensor one is at the top of the exhaust manifold here. The wire goes over here to the connector. And can just see the connector. And you can just get to the lock port, it's kind of difficult. I'm going to remove the air box, just slightly out-of-the-way so I can get to this connector better and undo it before I remote the O2 sensor from the manifold.
Use a 10 millimeter socket and ratchet to loosen this up. There's a second one on the backside. Unplug this electrical connector here. Unplug this one here. This harness is actually connected to the air box, so can't pop it off. I'm just going to leave it here and move it to the side. Loosen this clamp, the intake tube. Lift up the air box. Make sure those are fully released. Take our air filter out of here so it doesn't get damaged. This harness here has a little push connector. I'm going to take these needle nosed pliers and just push them together. And just pop it out and put it aside. Put this aside so it doesn't get damaged.
Can see the sensor connector here for the O2 sensor. Push in the lock. Need a flat bladed screwdriver to push the lock open. Push the lock open with a flat bladed screwdriver and work the O2 sensor out, just like that. To un-clip it from this clamp that's holding around the upper radiator hose, going to squeeze these little tabs together. Just kind of unlock it. Just leave that in place. Lift this up. Pull it out of this clamp, this metal clamp. It keeps the wire from touching the hot exhaust and melting, so you'll want to keep that and use it. It should pop right off of the O2 sensor. We'll just put that over here.
I'm ready to remove the O2 sensor from the exhaust manifold. This is a 22 millimeter on the O2 sensor. Luckily, it's actually big enough for the connector to go through, so you can slide the box into the wrench on there. Get it seated. Give it a nice pull. There's the O2 sensor.
Here's the old O2 sensor and our brand new one from 1AAuto.com. The same length of wire. The same style connector. This should fit in the vehicle and work great for you.
The O2 sensor does come with anti-seize on it. I'm going to add a little extra copper anti-seize to it just before I install it. Make sure you keep it on the threads and away from the sensor tip. Hold the wire up. Thread it in by hand. You have to spin the wire around with it. Make sure the thread's in nice. Take a 22 millimeter wrench and just tighten it up until I feel the gasket crush. I'm going to clip this little bracket back on to place. Snaps over just like that. Clip my wire into it. Keeps it away from the exhaust manifold. Run the wire down over the plastic clamp, just like the original. Clip it back together. The connector is here. I'm going to line it back up just like the original and hold the back of this connector and push together so it clicks.
Reinstall the air filter. Take the upper air box. Connect those tabs underneath that lock it into place. Push it down. There's an alignment tab or opening here on the rubber hose that matches up with this tab here. I'm going to push this down. It should slide right over. Make sure that this claim is seated in the grooves. Tighten it back down. Reinstall the bolts that are holding the air box cover down. Don't forget the one in the back. Finally, don't forget this harness. Plug it back into the air box where I pulled it out of. Put it back into the mass airflow meter. Plug it back into this connector here. The air box is reinstalled.
Thanks for watching. Visit us at 1AAuto.com for quality auto parts, fast and free shipping, and the best customer service in the industry.
Tools used
Tools used
Brought to you by 1AAuto.com, your source for quality replacement parts and the best service on the Internet.
Hi, I'm Mike from 1A Auto. I hope this how-to video helps you out, and next time you need parts for your vehicle, think of 1AAuto.com. Thanks.
In this video, we're going to remove and install the forward oxygen sensor. This is a 1998 Toyota Camry with 2.2L 4-cylinder engine. The only items you'll need are an O2 sensor socket which is available at 1AAuto.com, a ratchet, and a torque wrench.
Open the hood and secure the hood prop. Locate your up-stream O2 sensor and the connector. Squeeze the tab in, remove the electrical connector, undo the keeper to the wire, and allow it to hang. We'll be using our O2 sensor socket, available from 1AAuto.com. If you don't have one, you can purchase one from our website or use a 22mm wrench.
Install your O2 sensor socket over the sensor. We're using a 3/8" drive ratchet on ours. Break the sensor loose and remove it from the exhaust. If you're reusing the sensor, be sure that the wire for the pigtail doesn't get caught anywhere and tear.
Once the sensor's loose, you can finish removing it by hand. Start the sensor in by hand, into the exhaust, then using your O2 sensor socket, tighten the sensor down. Be sure to watch for the harness to make sure it doesn't get caught and tear any of the wires. Torque the sensor to 32 foot-pounds.
Reinstall the connector. Make sure that it clicks in and locks fully. Now, we'll use this retainer to hang the wire off the upper radiator hose. It's got all the teeth that lock together. Tighten it up.
To remove it, just release the tabs.
Reinstall the retainer to hang the sensor wires form the upper radiator hose.
Thanks for tuning in. We hope this video helped you out. Next time you need parts for your car, please visit 1AAuto.com. Also check out our other helpful how-to and diagnosis videos.
Tools used
Hi, I'm Mike from 1A Auto. We've been selling auto parts for over 30 years. We're dedicated to delivering quality auto parts, expert customer service, fast and free shipping, all backed by our 100% satisfaction guarantee. Visit us at 1AAuto.com, your trusted source for quality auto parts.
In this video I have a couple of oxygen sensors with me. While there are some aesthetic differences here, the wire lengths are a little different, the actual body and tip of the sensor are a little different, the threads and gasket are the same, and on the other end the connections are actually the same. I can plug these into either position on our vehicle. But if I had to ask you which one's upstream and which one's downstream, you probably can't tell just from looking at them. That's true of most oxygen sensors. The way you determine whether or not an O2 sensor is upstream or downstream is all done visually.
Your oxygen sensor position can be determined relative to your catalytic convertor. As the name suggests, upstream sensors will be located upstream or ahead of, in front of, above, closer to the engine than your catalytic convertors. This means that they see the exhaust gasses first. They then go through the catalytic convertor and to the downstream oxygen sensor, which will either be located in the catalytic convertor like our vehicle here, or after the catalytic convertor to monitor the gasses coming out of the cat and make sure that it's being efficient relative to the readings of the upstream O2 sensor.
The other determination you need to make is bank one versus bank two. Determining which bank is which can be done by looking at a picture of your vehicle's firing order. Whichever bank contains cylinder one is going to be bank one, and the other one, regardless of whether or not cylinder two is in it, is going to be bank two by default. These banks are true of V engines like V8s, V6s, and flat engines like Porsches and Subarus that have individual banks.
On inline four-cylinder engines, as long as they have one exhaust manifold like a Jeep four-liter or a four-cylinder Honda engine, you'll only have one bank with an upstream and downstream O2 sensor. There will be no bank two on the engine.
On our vehicle here, this is the passenger side, which we've already determined from the firing order is bank one. We have our upstream sensor here closest to the engine ahead of the cat. Then we have our downstream or sensor two here inside of the catalytic convertor. This could also be located somewhere after the cat. Here I have my two sensors for the vehicle. While they are aesthetically different, we can now tell this is my upstream sensor because it looks just like the upstream sensor I have up there. This is my downstream sensor. Now that we know which one's which, we can order the right part, correct the problem, and fix you up right.
Thanks for watching. Visit us at 1AAuto.com for quality auto parts, fast and free shipping, and the best customer service in the industry.

OSA61647
Good product, check engine light all cleared w no issues..,would recommend
The connector was not compatible with 1 O2 sensor. Bank 1 Sensor 2. Had to splice them together. Bank 2 Sensor 2, connectors looked identical, however, the grooves and ridges that permit specific insertion were not allowing my OE connector connect. So, I made it work in the end.
Part good quality but there was no video on how to replace the O1 S1 on a 2006 Toyota Camry V6, Near the firewall.
Exactly what I needed, when I needed them, at the price I needed. They even came with anti-seize already on the threads. Like others, I wish they were labeled, but I figured it out based on cord length. Cleared the codes and I'm off! Hoping to get better performance, but not banking on it. Another nice touch is the set of comprehensive videos, which brought me to the website many years ago. Definitely going to be my go-to for parts.
Fast shipping good quality I recommend it replaced it and my coats when awayFive stars
Fast delivery and product shipped in very good condition
Came on time.??
I would give a higher rating but, I just installed the sensors.
The 02 sensors worked well for about a week now my car won't start
Priced this part at dealership and 3 local auto parts store. Their price 161.00 Plus tax, plus shipping or labor over est 200.00 for 1 sensor. Got 2 sensors for 128.05 tax included. Free shipping! I replaced 1 sensor on top and my son replaced the 1 on bottom of engine. Gas milage improved from 24.5 city/ highway to 30 mph. Mom-n- son ready to do next project!
Yes, this part will fit your 2009 Toyota Camry L4 2.4L.
No, this set will not fit. Please confirm which sensors you need and if your vehicle has an automatic or manual transmission. We can then check to see if we carry the right parts.
Actual Measurements are not listed or available. Our parts are exact replacements for your vehicle's OEM parts. As long as your year, make, and model match up with our listing, these parts will directly fit and function like the originals.
Hello, You can search our youtube channel for that video. We may have a video for your vehicle. Thanks!
1A Auto's house brand parts are manufactured by various aftermarket companies specifically for us and built to your vehicle's exact OEM specifications. Please let us know if you have any other questions.
Unfortunately, no, John. I recommend either buying directly from Denso, or shopping Amazon. I had to return the downstream sensor because it was not for my vehicle. I only received a partial refund.
