
★★★★★
February 21, 2026
Everything is great
Everything is great

Replaces





About TRQ:
TRQ is a trusted brand dedicated to making every repair a success story by combining premium parts with easy installation. Each TRQ part is engineered by a team of automotive experts to meet or exceed OEM standards, delivering enhanced performance and maximum longevity. With rigorous in-house testing, the brand ensures superior fit and function across every product line. TRQ also provides customers with best-in-class, step-by-step installation videos—so you can complete repairs with confidence, whether you're a first-time DIYer or an industry professional.
Product Features
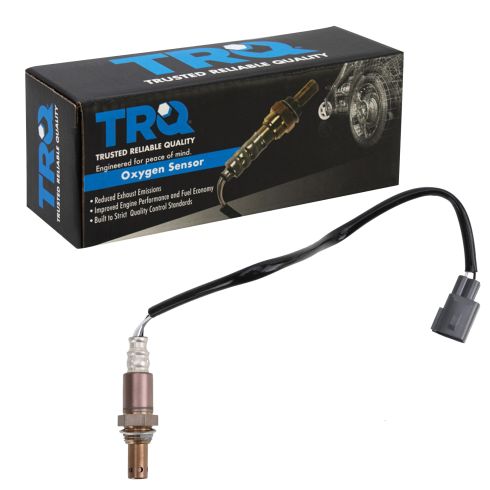
TRQ oxygen sensors are manufactured to precise specifications using premium raw materials to optimize your vehicle’s emission system. Each sensor is isostatically-pressed for improved strength and durability, and plasma-sprayed to improve sensitivity and prolong the service life of the sensors. Oxygen sensors wear out over time and should be replaced every 60,000 miles to prevent poor engine performance. TRQ recommends replacing the oxygen sensors in sets to optimize fuel economy and reduce overall emissions. All products are fit and road-tested in our Massachusetts R&D facility to ensure we deliver on our promise of Trusted Reliable Quality.
What is Upstream vs. Downstream?
Install Tip: You may be required to reset the vehicle computer after installation of this part.
Returns: Parts with electrical components cannot be returned once installed.
Attention California Customers:
 WARNING: This product can expose you to chemicals including Lead and Lead Compounds, which are known to the State of California to cause cancer, and birth defects or other reproductive harm. For more information, go to www.P65Warnings.ca.gov.
This part fits 27 vehicles spanning 2001-2023.
| Year | Make | Model | Description |
|---|---|---|---|
| 2022 | Lexus | ES350 | Lexus ES350 V6 3.5L Japan Built Models (1st VIN Digit J) Upstream Left O2 Oxygen Sensor TRQ OSA61201 |
| 2008-2012 | Lexus | IS-F | Lexus IS-F V8 5.0L Upstream Left O2 Oxygen Sensor TRQ OSA61201 |
| 2008-2012 | Lexus | IS-F | Lexus IS-F V8 5.0L Upstream Right O2 Oxygen Sensor TRQ OSA61201 |
| 2007-2008 | Lexus | LS460 | Lexus LS460 V8 4.6L Upstream Left O2 Oxygen Sensor TRQ OSA61201 |
| 2009-2014 | Lexus | LS460 | Lexus LS460 V8 4.6L Rear Wheel Drive Upstream Left O2 Oxygen Sensor TRQ OSA61201 |
| 2005-2006 | Pontiac | Vibe | Pontiac Vibe L4 1.8L Front Wheel Drive Upstream Bank 1 Sensor 1 O2 Oxygen Sensor TRQ OSA61201 |
| 2007-2010 | Pontiac | Vibe | Pontiac Vibe L4 1.8L Upstream Bank 1 Sensor 1 O2 Oxygen Sensor TRQ OSA61201 |
| 2016 | Scion | iM | Scion iM L4 1.8L Upstream O2 Oxygen Sensor TRQ OSA61201 |
| 2008-2009 | Scion | xD | Scion xD L4 1.8L Upstream Bank 1 Sensor 1 O2 Oxygen Sensor TRQ OSA61201 |
| 2018-2021 | Toyota | C-HR | Toyota C-HR L4 2.0L Upstream Bank 1 Sensor 1 O2 Oxygen Sensor TRQ OSA61201 |
| 2022 | Toyota | C-HR | Toyota C-HR L4 2.0L Upstream O2 Oxygen Sensor TRQ OSA61201 |
| 2005-2010 | Toyota | Corolla | Toyota Corolla L4 1.8L Upstream Bank 1 Sensor 1 O2 Oxygen Sensor TRQ OSA61201 |
| 2017-2018 | Toyota | Corolla iM | Toyota Corolla iM L4 1.8L Upstream Bank 1 Sensor 1 O2 Oxygen Sensor TRQ OSA61201 |
| 2001-2003 | Toyota | Highlander | Toyota Highlander L4 2.4L Upstream Cylinders 2 & 3 O2 Oxygen Sensor TRQ OSA61201 |
| 2008-2010 | Toyota | Highlander | Toyota Highlander V6 3.3L Upstream Front O2 Oxygen Sensor TRQ OSA61201 |
| 2004 | Toyota | Matrix | Toyota Matrix XR L4 1.8L Front Wheel Drive Upstream Bank 1 Sensor 1 O2 Oxygen Sensor TRQ OSA61201 |
| 2005-2006 | Toyota | Matrix | Toyota Matrix L4 1.8L Front Wheel Drive Upstream Bank 1 Sensor 1 O2 Oxygen Sensor TRQ OSA61201 |
| 2007-2010 | Toyota | Matrix | Toyota Matrix L4 1.8L Upstream Bank 1 Sensor 1 O2 Oxygen Sensor TRQ OSA61201 |
| 2004-2009 | Toyota | Prius | Toyota Prius L4 1.5L Upstream Bank 1 Sensor 1 O2 Oxygen Sensor TRQ OSA61201 |
| 2010-2011 | Toyota | Prius | Toyota Prius L4 1.8L Upstream Bank 1 Sensor 1 O2 Oxygen Sensor TRQ OSA61201 |
| 2010-2011 | Toyota | Sequoia | Toyota Sequoia V8 5.7L Upstream Right O2 Oxygen Sensor TRQ OSA61201 |
| 2009-2011 | Toyota | Tacoma | Toyota Tacoma V6 4.0L Upstream Right O2 Oxygen Sensor TRQ OSA61201 |
| 2009-2011 | Toyota | Tacoma | Toyota Tacoma V6 4.0L Upstream Left O2 Oxygen Sensor TRQ OSA61201 |
| 2016-2023 | Toyota | Tacoma | Toyota Tacoma V6 3.5L Upstream Left O2 Oxygen Sensor TRQ OSA61201 |
| 2016-2023 | Toyota | Tacoma | Toyota Tacoma V6 3.5L Upstream Right O2 Oxygen Sensor TRQ OSA61201 |
| 2010-2012 | Toyota | Tundra | Toyota Tundra V8 5.7L Upstream Right O2 Oxygen Sensor TRQ OSA61201 |
| 2007-2012 | Toyota | Yaris | Toyota Yaris L4 1.5L Upstream Bank 1 Sensor 1 O2 Oxygen Sensor TRQ OSA61201 |
| Brand Label | Part Number |
|---|---|
| Walker Products | 250-54006 |
| OMNIPARTS | 19060251 |
| DENSO | DOX0260 |
| Wells | SU7795 |
| Standard Motor Products | SG1583 |
| ACDelco | 88974015 |
| Bosch | 15974 |
| Toyota | 8946726020 |
| Toyota | 89467-48140 |
| Toyota | 8946704040 |
| Toyota | 8946774030 |
| ACDelco | 88974383 |
| Wells | SU5672 |
| Toyota | 8946712260 |
| DENSO | 234-9056 |
| Niehoff | FE80095 |
| Toyota | 8946753040 |
| Toyota | 8946720030 |
| Toyota | 8946712010 |
| Herko Automotive | AF5.15.80 |
| DENSO | 234-9084 |
| Toyota | 8946702040 |
| Standard Motor Products | SG1673 |
| Wells | SU7797 |
| Niehoff | FE80660 |
| DENSO | 234-9067 |
| Beck/Arnley | 156-6010 |
| DENSO | DOX0503 |
| ACDelco | 88975491 |
| Toyota | 8946704050 |
| Toyota | 8946747020 |
| Wells | SU7212 |
| DENSO | 234-9100 |
| Wells | SU7785 |
| DENSO | 234-9052 |
| Niehoff | FE80858 |
| DENSO | 234-9058 |
| Toyota | 8946712030 |
| ACDelco | 213-2845 |
| Toyota | 89467-48030 |
| Niehoff | FE80764 |
| DENSO | DOX0504 |
| Wells | SU7793 |
| Toyota | 89467-28090 |
| Omnicraft | QDY23 |
| Toyota | 8946750050 |
| Toyota | 8946702020 |
| ACDelco | 213-2825 |
| Toyota | 894670C030 |
| Niehoff | FE80855 |
| Toyota | 8946750010 |
| Delphi | ES10933 |
| Toyota | 8946712100 |
| DENSO | DOX0510 |
| DENSO | DOX0262 |
| Standard Motor Products | SG995 |
| ACDelco | 213-3546 |
| DENSO | 234-9053 |
| Toyota | 8946747010 |
| Standard Motor Products | SG1479 |
| Toyota | 8946752020 |
| Standard Motor Products | SG1670 |
| DENSO | 234-9051 |
| Toyota | 8946753020 |
| Beck/Arnley | 156-6005 |
| Standard Motor Products | SG1753 |
| Bosch | 15988 |
| DENSO | 234-9090 |
| TRQ | OSA61201 |
This item may be interchangeable with parts from other brands with the above part numbers. This information is provided only for reference and does not guarantee that the item you are purchasing is identical to parts with part numbers from the brands listed above. To confirm that this item fits your vehicle, use the above "Check Vehicle Fit" option.
Lifetime Warranty
This item is backed by our limited lifetime warranty. In the event that this item should fail due to manufacturing defects during intended use, we will replace the part free of charge. This warranty covers the cost of the part only.
Returns: Parts with electrical components cannot be returned once installed.
FREE Shipping is standard on Orders shipped to the lower 48 States (Contiguous United States). Standard shipping charges apply to Hawaii, Alaska and US Territories. Shipping is not available to Canada.
Expedited is available on checkout to the United States, excluding Alaska, Hawaii and US Territories as well as P.O. Boxes and APO/FPO/DPO addresses. Final shipping costs are available at checkout.
Created on:
Tools used
Hi, I'm Mike from 1A Auto. We've been selling auto parts for over 30 years. We're dedicated to delivering quality auto parts, expert customer service, fast and free shipping, all backed by our 100% satisfaction guarantee. Visit us at 1AAuto.com, your trusted source for quality auto parts.
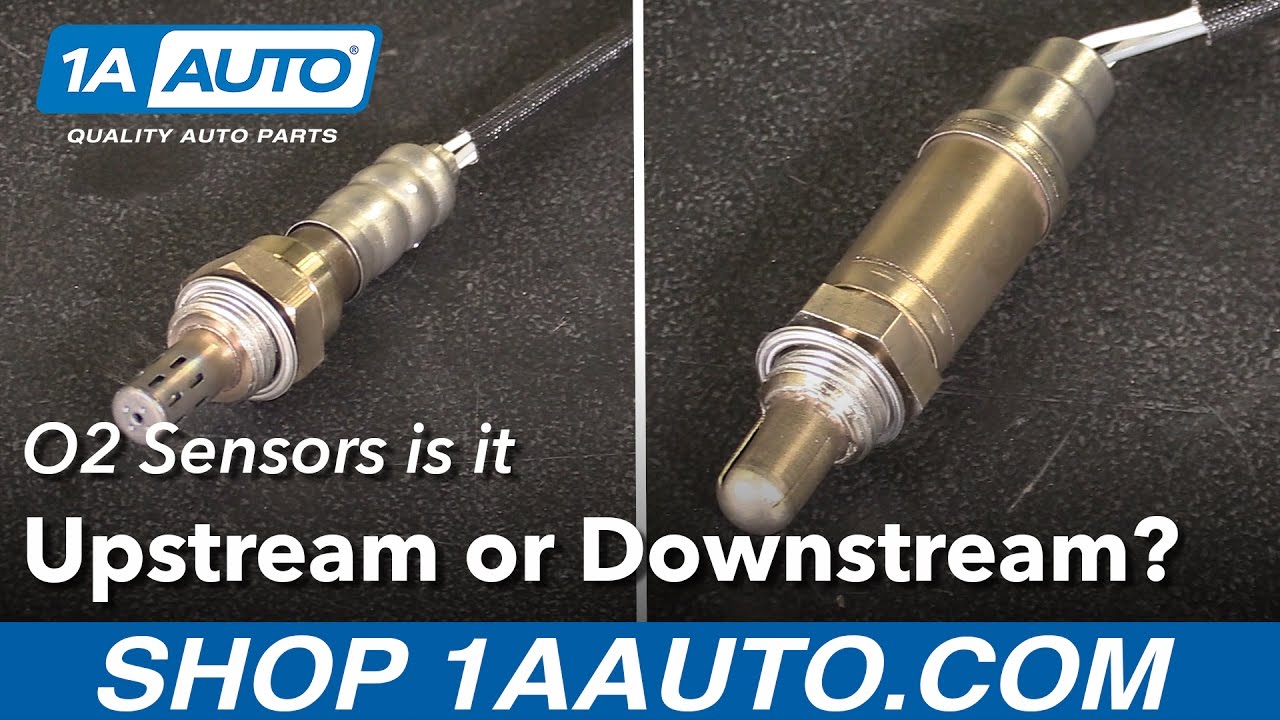
In this video I have a couple of oxygen sensors with me. While there are some aesthetic differences here, the wire lengths are a little different, the actual body and tip of the sensor are a little different, the threads and gasket are the same, and on the other end the connections are actually the same. I can plug these into either position on our vehicle. But if I had to ask you which one's upstream and which one's downstream, you probably can't tell just from looking at them. That's true of most oxygen sensors. The way you determine whether or not an O2 sensor is upstream or downstream is all done visually.
Your oxygen sensor position can be determined relative to your catalytic convertor. As the name suggests, upstream sensors will be located upstream or ahead of, in front of, above, closer to the engine than your catalytic convertors. This means that they see the exhaust gasses first. They then go through the catalytic convertor and to the downstream oxygen sensor, which will either be located in the catalytic convertor like our vehicle here, or after the catalytic convertor to monitor the gasses coming out of the cat and make sure that it's being efficient relative to the readings of the upstream O2 sensor.
The other determination you need to make is bank one versus bank two. Determining which bank is which can be done by looking at a picture of your vehicle's firing order. Whichever bank contains cylinder one is going to be bank one, and the other one, regardless of whether or not cylinder two is in it, is going to be bank two by default. These banks are true of V engines like V8s, V6s, and flat engines like Porsches and Subarus that have individual banks.
On inline four-cylinder engines, as long as they have one exhaust manifold like a Jeep four-liter or a four-cylinder Honda engine, you'll only have one bank with an upstream and downstream O2 sensor. There will be no bank two on the engine.
On our vehicle here, this is the passenger side, which we've already determined from the firing order is bank one. We have our upstream sensor here closest to the engine ahead of the cat. Then we have our downstream or sensor two here inside of the catalytic convertor. This could also be located somewhere after the cat. Here I have my two sensors for the vehicle. While they are aesthetically different, we can now tell this is my upstream sensor because it looks just like the upstream sensor I have up there. This is my downstream sensor. Now that we know which one's which, we can order the right part, correct the problem, and fix you up right.
Thanks for watching. Visit us at 1AAuto.com for quality auto parts, fast and free shipping, and the best customer service in the industry.
Tools used
Hi, I’m Mike from 1A Auto. We’ve been selling auto parts for over 30 years!
To remove the driver's side wiper arm, you leave the hood down, use a small flat blade screwdriver, and gently pry up in this plastic cap. Find the edge and pull it off. There’s a 14mm nut under here. Use a 14mm socket extension and ratchet. Loosen this up. Pull that off. We're going to lift up on the arm and now I'll wiggle it back and forth and it should come right off the wiper arm shaft.
Open the hood. We'll go inside. Pull the release. Find the safety latch. Release that. The prop rod is under the hood. It's got two positions: one position here and then a service position here. It opens further. Passenger side wiper arm has two mounting nuts. They're 14mm. I'm going to use a 14mm socket ratchet again. Loosen that one up and loosen this one up. You might need to hold the wiper arm. Thread it off. It popped right off with just the spring action of the wiper arm. Lift it off the windshield and put it aside.
To remove the side corner trim, this'll be the same on both sides, pry it up with a plastic prying tool. You can buy this at 1AAuto.com. Once it's up, you can slide it out. Put it aside.
There's two push clips on both sides that need to be removed. Use a small flat bladed screw driver. Pry it up. Pull the clip out. If the center part comes out, that's okay. Just push it back in to reuse it.
The center cowl piece is clipped along the edges, and then it slides up under the window glass. We're going to unclip it and slide it out this way. Go underneath and push the clips in. That one's loose. Go ahead and find all the clips. It might be easier to use the plastic trim tool to push the clip in. Push it up. Slide it from underneath the windshield. I think this one clipped back in. Yep. It did. Make sure these stay clipped out. Put that aside.
Unplug the wiper motor. The lock, the clip, is underneath the bottom. Squeeze it up. Pull the connector off. Wiring harness should be clipped into here. Somebody's had it apart before, so the clips are a little bit broken, but you'll have to pry this clip out of here. You'll have to either slide this off, or cut the electrical tape. Be careful not to cut the wires. Somebody's already had this apart. It'll come off here. There should be a clip here. It's missing, and then there's this clip here. And we just get the wiring harness out of the way.
There's a ten millimeter bolt here, one here, and then one here and here. That's holding the wiper transmission to the car. We'll use a ten millimeter socket, extension and ratchet. Remove these bolts. We'll lift the wiper transmission out of the car. It's sitting on a stud, just under here. So, we'll pull that off.
We need to remove the lower cowl panel. There's nine 10 millimeter bolts holding it in place. We'll need to remove all these bolts and then slide it out of the engine compartment. Use a 10 millimeter socket, extension, and ratchet. We'll need clearance, so we need to remove this bracket. It's two 10 millimeter bolts. Life it out of the engine compartment. Flop these down and over. Myself clearance.
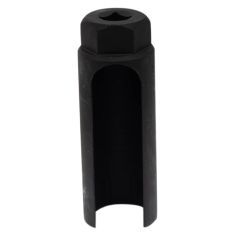
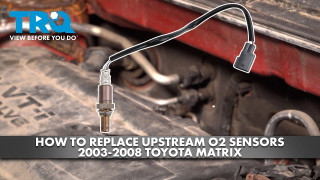
Front O2 sensor is located at the read of the engine at the bottom of the exhaust manifold just before the catalytic converted. Follow the wire over. Connector is located right there at the back of the engine. Before we remove the O2 sensor from the exhaust we need to unplug it from the harness, so we're going to follow the wire from it sitting in this little guide to keep it away from things. We'll pop it out. Follow it over to the connector. It's hard to see because it's down behind the engine, but you can just make it out where it is. You're going to have to push the lock to the body side of the connector and then separate it out. Going to bend this wire guide out of the way so we have more room to work and I'll just bend it back when I'm done. There it is. We'll spray some rust penetrant to try to help remove the O2 sensor. Again, this O2 sensor socket, you can put a 3/8ths drive. Slide over the O2 sensor. I got it loose but I need to keep moving it so we can see. There it is. There's our O2 sensor.
We're going to reuse our O2 sensor, since it was working fine. We just wanted to show you how to take it out, but you do want to make sure you put some anti-seize on here. Copper works the best for exhaust stuff, it's high heat. Don't get it on the sensor tip. Try to get it just on the threads. Sometimes a brand new oxygen sensor will come with anti-seize already on it. If it doesn't, just add your own. Reinstall this into the exhaust. Thread it in as far as I can go by hand. Tighten this up. We'll tighten it just enough you'll feel the gasket crush on a new one. Since this one is used it'll go in a little bit. Make it tight. That should be good there. Just don't want it to leak exhaust. Then we can plug the connector back in. So we'll plug the connector back in. Keyed, it'll only go in one way. Click when it locks into place, and that wire holder that I bent out of the way, will bend back roughly where it was before. Clip the wire into there. The O2 sensor is replaced.
We've got our lower part of the cowl panel, the steel piece. These little air guides are folded over so they'll fit under the wind shield. Slide it into place. Start reinstalling the bolts. I'll just go along and start them all by hand, and then I can go back with a socket and ratchet and tighten them all. Shut that door. Snap it in place. When they get tight I'll stop. Clip this little door back. Tighten this one up. To install the support bracket, see the little tab that fits in there. This bolt caught here first.
Reinstall the wiper transmission. So, this little pin here, is going to go into this rubber grommet up here. Push it up into place, push it into that rubber grommet. Oops. That wants to pop out, so, let's see. Take it off and then push it on to here. Then, we can hook it in this way, just like that. Line it up with the mounting holes. Get our bolts. Get this one started. Start the other ones. Tighten these all up. Feel them get tight and then I'll stop.
Reinstall the harness for the wiper motor. So, this clip was kind of broken, but it does go in here. There's a missing clip here. You'd clip it back into place. This goes through this opening here. This is normally clipped into here. Then, there's a final clip here. And then, of course, you plug it in. It's keyed, will only go in one way. It'll click when it locks in place.
The plastic upper cowl cover, it's got some little tabs here. They're going to slide underneath of the windshield, the edge of it. Then, clips in the front that will clip down in the middle. Get it in position. Put it over the wiper arms. You want to slide it up. Push it along the edge and slide it over the glass like that. Then, it will clip down into place. Place the push clips. Do that for both sides.
Clip these little corner pieces back in place. So that part will go underneath the windshield, and these will clip into the plastic here. Slide underneath, clip them in place. Do the same for both sides.
Put the passenger side wiper arm in place. There was a little dust line here where the wiper blade was, so I'll use that as a reference point. Right about there. There's some spring tension to this that's pushing it back up. I'll install the nuts. I'll just tighten these down until they get tight. I don't want to break off the studs off the wiper transmission.
I'll reinstall the driver's side wiper arm and blade. You could do this with the hood down or the hood up. It's all right. Just get it in place. Reinstall the nut. Tighten it up. If I feel it get tight, I'll stop. I don't want to break the stud off. And reinstall the cap. It just pushes into place.
Thanks for watching. Visit us at 1AAuto.com for quality auto parts, fast and free shipping, and the best customer service in the industry.
Everything is great
I would give these TRQ 02 sensors 0 stars if I could. Trash straight out of the box did not work. All 4 of them.
perfect fit, problem solved!
Part worked great once I got it in works as should
This item was great the check engine light is gone. Thanks!
Good
So far it has been good
Working great.
Perfect item great quality
Great

OSA61201
Thank you for your inquiry! Yes, after installing oxygen sensor 1AEOS00052, its recommended to reset your vehicles computer (ECU/PCM). This ensures the system recognizes the new sensor and clears any stored fault codes.
Hello, The fitment is based on year, make, model and engine size.
Thanks for your inquiry. This part is specific to vehicles with a particular set of options. We will need more information about your vehicle to confirm the fit. The information we will need in order to assist you is: Year, make, model, and engine size Upstream or Downstream sensor
This O2 sensor will exactly as shown in the listing image and made to the same specifications as your OE part.
