
Replaces




About TRQ:
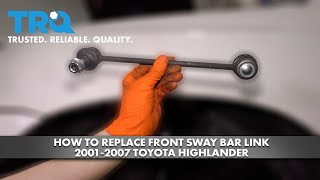
TRQ is a trusted brand dedicated to making every repair a success story by combining premium parts with easy installation. Each TRQ part is engineered by a team of automotive experts to meet or exceed OEM standards, delivering enhanced performance and maximum longevity. With rigorous in-house testing, the brand ensures superior fit and function across every product line. TRQ also provides customers with best-in-class, step-by-step installation videos—so you can complete repairs with confidence, whether you're a first-time DIYer or an industry professional.
Our steering and suspension components are pre-greased and sealed for long life and do not require the extra maintenance typically required by greaseable versions.
Attention California Customers:
 WARNING: This product can expose you to chemicals including Lead and Lead Compounds, which are known to the State of California to cause cancer, and birth defects or other reproductive harm. For more information, go to www.P65Warnings.ca.gov.
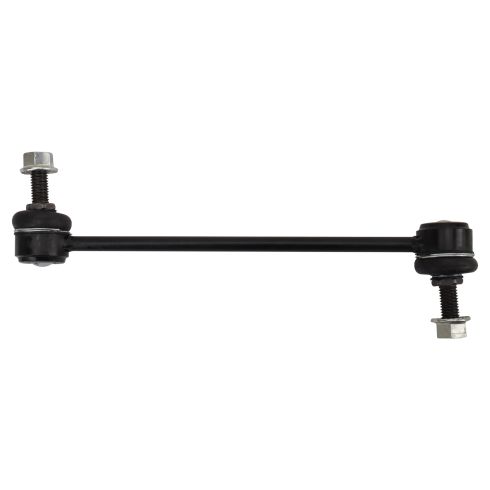
This part fits 32 vehicles spanning 2001-2025.
| Year | Make | Model | Description |
|---|---|---|---|
| 2002-2003 | Lexus | ES300 | Lexus ES300 Front Driver Side Sway Bar Link TRQ PSA67762 |
| 2002-2003 | Lexus | ES300 | Lexus ES300 Front Passenger Side Sway Bar Link TRQ PSA67762 |
| 2004-2006 | Lexus | ES330 | Lexus ES330 Front Driver Side Sway Bar Link TRQ PSA67762 |
| 2004-2006 | Lexus | ES330 | Lexus ES330 Front Passenger Side Sway Bar Link TRQ PSA67762 |
| 2004-2006 | Lexus | RX330 | Lexus RX330 Front Passenger Side Sway Bar Link TRQ PSA67762 |
| 2004-2006 | Lexus | RX330 | Lexus RX330 Front Driver Side Sway Bar Link TRQ PSA67762 |
| 2007-2025 | Lexus | RX350 | Lexus RX350 Front Driver Side Sway Bar Link TRQ PSA67762 |
| 2007-2025 | Lexus | RX350 | Lexus RX350 Front Passenger Side Sway Bar Link TRQ PSA67762 |
| 2018-2022 | Lexus | RX350L | Lexus RX350L Front Passenger Side Sway Bar Link TRQ PSA67762 |
| 2018-2022 | Lexus | RX350L | Lexus RX350L Front Driver Side Sway Bar Link TRQ PSA67762 |
| 2006-2008 | Lexus | RX400h | Lexus RX400h Front Driver Side Sway Bar Link TRQ PSA67762 |
| 2006-2008 | Lexus | RX400h | Lexus RX400h Front Passenger Side Sway Bar Link TRQ PSA67762 |
| 2010-2022 | Lexus | RX450h | Lexus RX450h Front Passenger Side Sway Bar Link TRQ PSA67762 |
| 2010-2022 | Lexus | RX450h | Lexus RX450h Front Driver Side Sway Bar Link TRQ PSA67762 |
| 2018-2022 | Lexus | RX450hL | Lexus RX450hL Front Passenger Side Sway Bar Link TRQ PSA67762 |
| 2018-2022 | Lexus | RX450hL | Lexus RX450hL Front Driver Side Sway Bar Link TRQ PSA67762 |
| 2005-2012 | Toyota | Avalon | Toyota Avalon Front Passenger Side Sway Bar Link TRQ PSA67762 |
| 2005-2012 | Toyota | Avalon | Toyota Avalon Front Driver Side Sway Bar Link TRQ PSA67762 |
| 2019-2022 | Toyota | Avalon | Toyota Avalon Front Passenger Side Sway Bar Link TRQ PSA67762 |
| 2019-2022 | Toyota | Avalon | Toyota Avalon Front Driver Side Sway Bar Link TRQ PSA67762 |
| 2002-2006 | Toyota | Camry | Toyota Camry Front Passenger Side Sway Bar Link TRQ PSA67762 |
| 2002-2006 | Toyota | Camry | Toyota Camry Front Driver Side Sway Bar Link TRQ PSA67762 |
| 2018-2025 | Toyota | Camry | Toyota Camry Front Driver Side Sway Bar Link TRQ PSA67762 |
| 2018-2025 | Toyota | Camry | Toyota Camry Front Passenger Side Sway Bar Link TRQ PSA67762 |
| 2001-2025 | Toyota | Highlander | Toyota Highlander Front Passenger Side Sway Bar Link TRQ PSA67762 |
| 2001-2025 | Toyota | Highlander | Toyota Highlander Front Driver Side Sway Bar Link TRQ PSA67762 |
| 2004-2008 | Toyota | Solara | Toyota Solara Front Driver Side Sway Bar Link TRQ PSA67762 |
| 2004-2008 | Toyota | Solara | Toyota Solara Front Passenger Side Sway Bar Link TRQ PSA67762 |
| 2009-2015 | Toyota | Venza | Toyota Venza Front Passenger Side Sway Bar Link TRQ PSA67762 |
| 2009-2015 | Toyota | Venza | Toyota Venza Front Driver Side Sway Bar Link TRQ PSA67762 |
| 2021-2024 | Toyota | Venza | Toyota Venza Front Passenger Side Sway Bar Link TRQ PSA67762 |
| 2021-2024 | Toyota | Venza | Toyota Venza Front Driver Side Sway Bar Link TRQ PSA67762 |
| Brand Label | Part Number |
|---|---|
| Toyota | 4882006040 |
| DIY Solutions | SUS06679 |
| Toyota | 48820-28050 |
| Mevotech | MK90344 |
| MOOG Chassis Products | K90344 |
| Beck/Arnley | 101-4907 |
| Dorman - OE Solutions | 541-708 |
| Delphi | TC1513 |
| Mevotech Supreme | MK90344 |
This item may be interchangeable with parts from other brands with the above part numbers. This information is provided only for reference and does not guarantee that the item you are purchasing is identical to parts with part numbers from the brands listed above. To confirm that this item fits your vehicle, use the above "Check Vehicle Fit" option.
Lifetime Warranty
This item is backed by our limited lifetime warranty. In the event that this item should fail due to manufacturing defects during intended use, we will replace the part free of charge. This warranty covers the cost of the part only.
FREE Shipping is standard on Orders shipped to the lower 48 States (Contiguous United States). Standard shipping charges apply to Hawaii, Alaska and US Territories. Shipping is not available to Canada.
Expedited is available on checkout to the United States, excluding Alaska, Hawaii and US Territories as well as P.O. Boxes and APO/FPO/DPO addresses. Final shipping costs are available at checkout.
Created on:
Tools used
Hi, I’m Mike from 1A Auto. We’ve been selling auto parts for over 30 years!
Use the 21 millimeter deep socket and a breaker bar. Loosen the lug nuts with the vehicle on the ground. This way, the vehicle doesn't move on you. Raise and support the vehicle, remove the lug nuts, and take the tire and wheel off. We're using our lift, but you can use a jack and jack stands. Use the socket to remove the rest of the lug nuts.
See if this wheel comes free. It is a steel wheel. Of course, the rotor that is touching is also steel, so it's a good possibility that these have rusted together. Yeah, it's on there pretty good. What I'm going to do is pop this center cap off, take a large flat-bladed screwdriver, there's a little slot right here, and it'll pop right out.
This is the hub. Obviously, these are the wheel studs. There's a lot of corrosion and rust in here. That's basically where it's seized up. I will take some rust penetrant. I'm going to spray it along the edge here. I'm going to spray some into these lug openings to try and get some, hopefully, between the wheel and the brake rotor. Take two lug nuts. You can use one. I like to use two. Just thread them on real lightly, because now to get this free, I'm going take a large mallet, a dead blow mallet, and I'm going to hit on the tire and try to pop this wheel free. The lug nuts are on there so the wheel doesn't fall off. Sometimes it takes one hit, sometimes it takes 10 hits. You just got to hit it till it breaks free. Now, you take the wheel off and put this aside.
Now remove the sway bar link. It's attached to the strut and then to the sway bar down here. The way it's mounted up here with a nut and through to the ball joint part is the same exact thing here at the sway bar. It's just facing away. Once we remove this one, we'll do the same thing to this one. It'll just be harder to see. This is pretty rusty. I'm going to spray some rust penetrant on here. If you're trying to remove these to reuse them, that might be very difficult. You should have a new set of sway bar links on hand to replace, especially if you're doing the strut. You're most likely going to break them taking them off. It's just very common. You can get these from 1AAuto.com.
Spray some rust penetrant on here. Take a wire brush and just clean up the threads. Sometimes they have dirt on them. You might get some of the rust off. I just want to make it easier for this nut to spin off. This part in the middle to kind of hold it, it's really hard to tell, it looks almost rounded off, because this one is so rusted. It should be a 6 millimeter Allen key or a hex drive. I'm going to slide it in there the best I can. All right, now I'm going to counterhold it and try to remove the nut. It is coming loose.
What I'm going to do—it's starting to get tight, because it's filled up with rust and junk from the threads—I'm going to spray some more rust penetrant on it. I'm actually going to tighten it now. I'm just going to work it back and forth to try to get it over the rusty parts. This is pretty common. I'm trying to tighten this back down to work it back and forth and it's stripped. There's not much to this to try to put this hex drive in here and get it to not spin. It just doesn't fit that tight. It's real rusty. The metal's thin. Now, what I'm going to do—this is pretty loose. I could cut this off. If you had access to reciprocating saw, you could cut this off.
What I'm going to do is put some locking pliers back here and finish taking the nut off. There's a metal collar back here. Once I get this set to the tension I want, it should grip around it. It's starting to come loose. Just keep working at it. There it comes. There it is. Pull it out of the strut.
At this point, if you've had to use vice grips, it's pretty good chance you've destroyed this metal collar and possibly damaged this boot, and ripped it, and had grease come out of it. This one's not too bad, but it's pretty chewed up. These should be replaced. If you can get it out without damaging it, you can absolutely reuse it. If not, you'll have to replace it with new ones. The other one will be the same procedure. It's just difficult to see, because it's facing away from us.
Spray some rust penetrant on it and proceed to remove it. I can't get the hex bit on the other side of this. It's too rusty. I'm going right for the locking pliers. We'll get them on here, lock the end of the sway bar link, then proceed to remove the nut. It's starting to come loose. See if I can get it off with my fingers. Yep. There it is. It just takes time. You got to work at them. Pull it out with the locking pliers still attached. Again, this one's not too, too, bad, but if you've gotten to this point and you had to use locking pliers, they're pretty much destroyed and you should replace them.
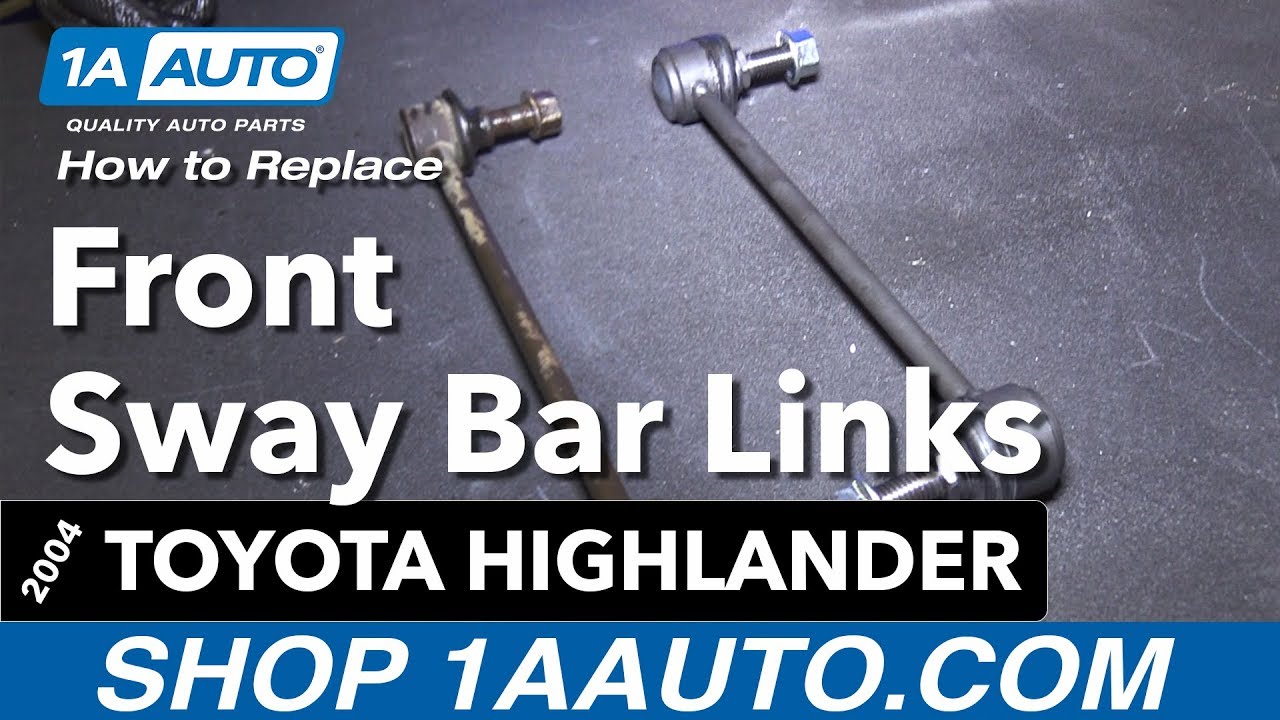
Here's our original sway bar link from our vehicle and our brand new one from 1A Auto. Comes with new locking nuts. The nice thing about the new ones from 1A Auto is they do have a six-point end here, so that, instead of trying to put locking pliers on here, if you need to remove it, you can actually put a wrench on here and counterhold it while you remove it. It does not have a counterhold in here, because that can be pretty weak, and this is a lot easier over here. This will work great and fit great in your vehicle.
To reinstall this, we'll take off the supplied nuts. I'm going to put it back on in the same direction. It wasn't like this. It's not going to fit if you try to go that way. It was like this. It went in from the side, and then it went into the bottom part. You can start it in the bottom if that's easier. Let me do that, because you can see it better. Then, these do have a bit of flex to them, because it's a ball joint. You can push it down through the opening.
We've got the nut started. It's not perfectly round. It's oblong. It's a locking nut. You can thread it down, and then when it gets to the very, very, end, it'll start to get tight, because it's in the locking part. I'm going to get the bottom one started. The six-point part that's in the backside, and 18 millimeter wrench will fit it. Put that over here. The nuts on these is 18 millimeter. I'm going to use 18 millimeter socket and ratchet, and I will tighten it down. At the same time, I'll counterhold it so it doesn't spin. Hold this.
Add a little extension to give me some extra space. This can be hard to turn, but it because we're going over the locking part. We'll just tighten it up till it gets snug and come back and torque it. Switch to an 18 millimeter deep socket. You can always start with one of those. That's feeling tight, so I'll stop there, and tighten up the other one. The same for this one: counterhold it. Go in here and tighten up. Okay.
Get our wrench back on here to counterhold it. Use our torque wrench. Torque these to 55 foot-pounds. Once it clicks, it's all set. Do the same for the bottom one. Figure out the right way to get it in here.
To prevent the wheel from seizing to the rotor again, I can see the outline of where it was rusty, I'll put some copper anti-seize there, around the inside of the hub. I'm going to take this lug nut off. Reinstall the wheel. Thread the lug nuts on by hand. They do have a cone seat to line up the wheel. Tighten them down with a socket to seat them. Now you lower the vehicle to the ground and torque the lug nuts. I'm going to torque the lug nuts in a cross pattern to 76 foot-pounds. Now, you can reinstall the center cap, just clips into place.
Thanks for watching. Visit us at 1AAuto.com for quality auto parts, fast and free shipping, and the best customer service in the industry.

PSA67762


