

★★★★★
September 21, 2025
4Runner
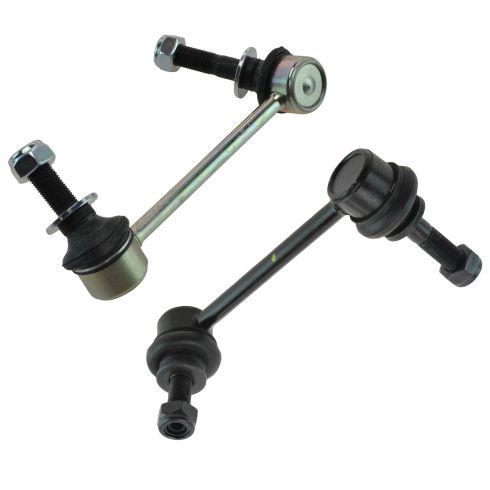
Direct fit, good quality at an affordable price.

Replaces







About TRQ:
TRQ is a trusted brand dedicated to making every repair a success story by combining premium parts with easy installation. Each TRQ part is engineered by a team of automotive experts to meet or exceed OEM standards, delivering enhanced performance and maximum longevity. With rigorous in-house testing, the brand ensures superior fit and function across every product line. TRQ also provides customers with best-in-class, step-by-step installation videos—so you can complete repairs with confidence, whether you're a first-time DIYer or an industry professional.
Our steering and suspension components are pre-greased and sealed for long life and do not require the extra maintenance typically required by greaseable versions.
Attention California Customers:
 WARNING: This product can expose you to chemicals including Lead and Lead Compounds, which are known to the State of California to cause cancer, and birth defects or other reproductive harm. For more information, go to www.P65Warnings.ca.gov.
This part fits 5 vehicles spanning 2003-2024.
| Year | Make | Model | Description |
|---|---|---|---|
| 2003 | Lexus | GX470 | Lexus GX470 Front Driver & Passenger Side 2 Piece Sway Bar Link Set TRQ PSA55921 |
| 2004-2009 | Lexus | GX470 | Lexus GX470 without Kinetic Dynamic Suspension (KDSS) Front Driver & Passenger Side 2 Piece Sway Bar Link Set TRQ PSA55921 |
| 2003-2009 | Toyota | 4Runner | Toyota 4Runner Front Driver & Passenger Side 2 Piece Sway Bar Link Set TRQ PSA55921 |
| 2010-2024 | Toyota | 4Runner | Toyota 4Runner without Kinetic Dynamic Suspension (KDSS) Front Driver & Passenger Side 2 Piece Sway Bar Link Set TRQ PSA55921 |
| 2007-2014 | Toyota | FJ Cruiser | Toyota FJ Cruiser Front Driver & Passenger Side 2 Piece Sway Bar Link Set TRQ PSA55921 |
| Brand Label | Part Number |
|---|---|
| MOOG Chassis Products | K90677 |
| MOOG Chassis Products | K90683 |
| DIY Solutions | SUS02820 |
| DIY Solutions | SUS07006 |
| DIY Solutions | SUS07005 |
| Mevotech | MK90683 |
| Mevotech | MK90677 |
| Toyota | 4882060050 |
| Toyota | 4881060040 |
| Quinton Hazell | QLS3583S |
| TRW Steering and Suspension Parts | 18423 |
| MAS Industries | SL74022 |
| Import Direct Chassis | LS06009 |
| Parts Master | K90677 |
| TRW Steering and Suspension Parts | JTS7564 |
| Mcquay-Norris | SL675 |
| Delphi | TC1826 |
| Raybestos Brakes | 545-1582 |
| TRW Steering and Suspension Parts | 18417 |
| Parts Master | K90683 |
| Raybestos Brakes | 545-1581 |
| TRW Steering and Suspension Parts | JTS7565 |
| Carquest Premium Chassis Parts | 510-96808 |
| Delphi | TC1825 |
| Centric Parts | 606.4404 |
| Mcquay-Norris | SL676 |
| Firestone | K90683 |
| Firestone | K90677 |
| Carquest Premium Chassis Parts | 510-96807 |
| Import Direct Chassis | LS06008 |
| Beck/Arnley | 101-5181 |
| Centric Parts | 606.44024 |
| Beck/Arnley | 101-5180 |
| MAS Industries | SL74021 |
| Dorman - Premium | SL74022XL |
| Dorman - Premium | SL74021XL |
| Dorman - OE Solutions | 536-762 |
| Mevotech Supreme | MK90677 |
| Mevotech Supreme | MK90683 |
| febi bilstein | 27335 |
| febi bilstein | 42970 |
| febi bilstein | 27336 |
This item may be interchangeable with parts from other brands with the above part numbers. This information is provided only for reference and does not guarantee that the item you are purchasing is identical to parts with part numbers from the brands listed above. To confirm that this item fits your vehicle, use the above "Check Vehicle Fit" option.
Lifetime Warranty
This item is backed by our limited lifetime warranty. In the event that this item should fail due to manufacturing defects during intended use, we will replace the part free of charge. This warranty covers the cost of the part only.
FREE Shipping is standard on Orders shipped to the lower 48 States (Contiguous United States). Standard shipping charges apply to Hawaii, Alaska and US Territories. Shipping is not available to Canada.
Expedited is available on checkout to the United States, excluding Alaska, Hawaii and US Territories as well as P.O. Boxes and APO/FPO/DPO addresses. Final shipping costs are available at checkout.
Created on:
Tools used
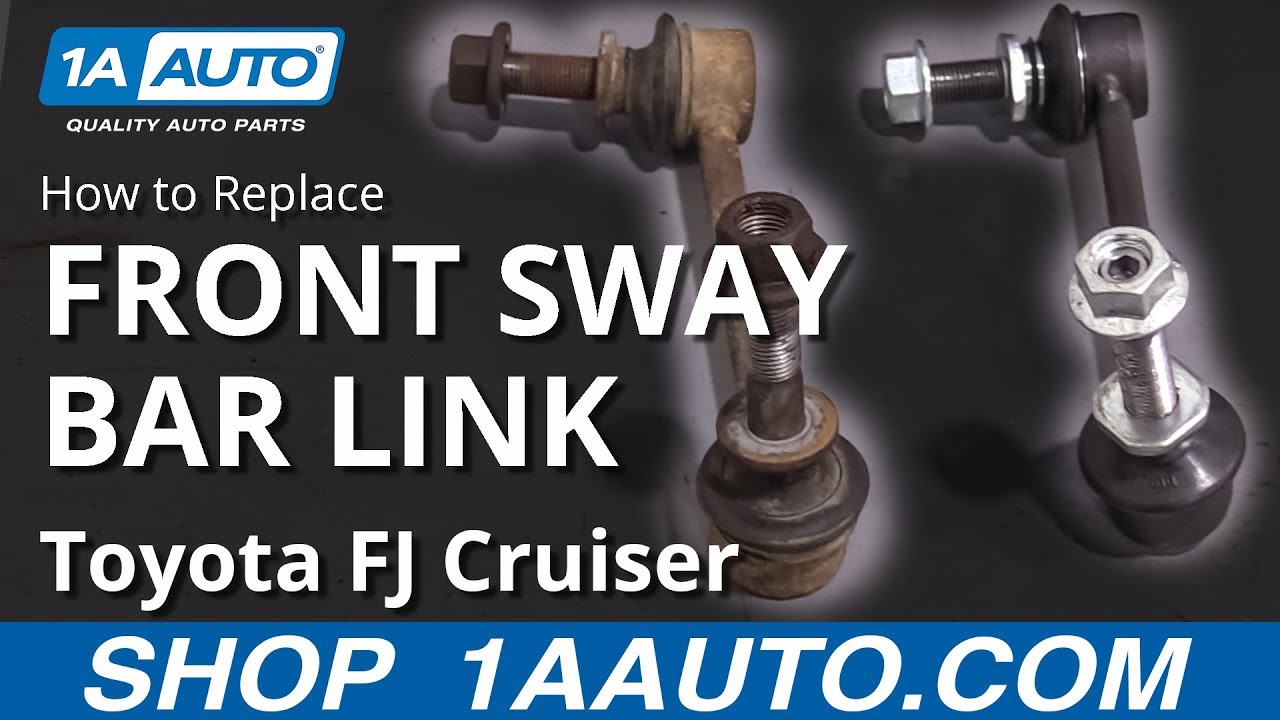
Hey, friends. It's Len here at 1A Auto. Today, I'm working on a 2007 Toyota FJ Cruiser, and I'm going to show you how to do a front sway bar link. It's going to be a very easy job and I want to be the guy that shows you how to do it. If you need these or any other parts, you can always check us out at 1aauto.com. Thanks.
Here we go, friends. I've got the vehicle supported off the ground, the wheel is just barely touching, so the majority of the weight is off of the wheel. I'm going to use my 21 millimeter socket and a long breaker bar. I'm just going to break all six of these lug nuts free. I don't want to loosen them up too much. I don't want to damage my studs by the wheel cocking off to the side or anything. Here we are, all six. Now, we can raise the vehicle. We'll make sure it's safely supported. We'll take off all the lug nuts and remove the wheel.
One lug nut left. We're going to hold the wheel so it can't move around. Come on, baby. There it is. Set these aside. Remove our wheel. Set it aside so it's safe. We've got our new link. Let's just hold it up next to our old one. They look as though they are about the same length. We've got a long shaft. That comes through the knuckle. Looks good, and the shorter shaft goes through the sway bar. I would say that'll work fine. Let's get to removing this.
I'm just going to put a little bit of penetrant. Use my 17 millimeter. You can use a ratchet, or a wrench, or whatever you have access to. Sometimes the whole shaft will spin. We'll keep an eye on it. Looks like it is, so what I'm going to do, grab some locking pliers. I'm going to try to grip onto it as tight as I can. Get this so it's nice and hopefully broken free here. Try with my ratchet wrench. There's our nut. Let's do the other one. Right down here, we've got another 17 millimeter, so I'm going to put on my locking pliers. Make sure it's as tight as I can get it. Cool.
I want to be careful not to pinch our axle boot, of course. Just work it like this, get my penetrant worked in there, and then I'm going to grab my ratchet wrench. That feels pretty good.
Let's see what we can do here. I'm going to try to just see if I can bonk this out.
There's our old link. Let's go ahead and match it up to the new one. Here we go, a quick product comparison for you. This is our old sway bar link out of our 2007 Toyota FJ. We just removed it, very simple. Over here, we have our brand new quality 1A Auto part. As you can tell, they're both the exact same length. They both have a long shaft, right here, that goes to the knuckle. They both have a short shaft, over here. It comes with a brand new locking nut. You don't want to reuse the old one, another one over here. It's got everything you need, sealed boots, don't see any reason why this wouldn't be a quality part to install, so I'm going to go ahead and do it.
If you need this, or any other quality part, you can always check us out at 1aauto.com. Thanks.
Here's our brand new quality 1A Auto part. When you take it out of the packaging, you might realize it has this on it. It's just this little washer. You just turn it all the way down to the end, so it's bottomed out there, and you might notice the same down here, and we do the same exact thing. This is going to give a nice gripping plate to go up against the sway bar. Then this is going to press up against that and the sway bar, as well. Then this is going to go against the knuckle and the knuckle. Okay? We've got those locked down.
I'm just going to put it into the sway bar down here. I'm not going to go all the way, yet. I'm just going to try to get this lined up with the knuckle. Let's see if we can get it in. Both of them are in. We're going to take our locking nuts, put it on there. We got our other one, put it on the backside, here. Very nice. Now, we'll just tighten these down. Here we go, we're going to go ahead and tighten these up. The new nuts are 18 millimeter. You can use your ratchet, or your air gun, whatever you want to use. You do you, Boo-Boo. I'm just go ahead and tighten it. Give it a little bit more here. I'm going to do this one down here, make sure I turn it the right way. Tight. Tight.
Here we go, we're going to grab our wheel. Going to roll it right up our leg, lift with our abs. Nice and easy. Get that on there. Hold the wheel so it can't fall. Here we are. We've got a few good threads. We can let go, now, and grab the other five lug nuts. We'll bottom them out and we'll bring it down, torque it up. We're going to take our 21 millimeter socket. We're going to torque down our six lug nuts. You're going to try to make like a star or a snowflake pattern, basically, crisscross. You don't want to go around in a circle. All right. If you want to go around again, go around again. 85 foot-pounds.
Speaker 2: Thanks for watching. Visit 1aauto.com for quality auto parts shipped to your door. The place for DIY auto repair. If you enjoyed this video, please click the subscribe button.
Tools used
Hey, friends. It's Lynn here from 1A Auto. Today, we're going to be working on our 2006 Toyota 4Runner, and I want to show you how to remove and install a front sway bar link. If you need this or any other part, check us out, 1aauto.com. Thanks.
Okay, friends, so it's time to remove our wheel. To do that, you're going to remove all of your lug nuts. I'm going to use a 21-millimeter socket. If you're going to be using a ratchet, it might be easier to do this while the wheel's still on the ground so it can't spin while you try to loosen up your lug nuts. I'm using an air gun, so I've got my eye protection, my hand protection. Here we go.
This one, I'm going to leave on a few threads. Put my lug nuts up there. Now I have a spare hand. I'm going to try to wiggle this around. A lot of times on Toyotas, they don't want to break free right away. That's not really that big of a deal. You could use something as simple as a rubber mallet or if you have a pry bar, either way. What you want to do is make sure you have a lug nut on, at least a couple of threads, but it's still nice and loose. I'm going to grab a rubber mallet. Okay, got my rubber mallet. Going to come right under here. I'm going to bonk right on the edge of the rim. Okay? If you're using a real hammer that's not a rubber mallet, definitely don't hit your rim. You'll mar it up, cause issues. You could try bonking on the tire. You just have to be careful because when you bonk it's going to want to come back. Rubber mallet right on the rim. Here we are.
That lug nut did its job, made it so the wheel didn't come falling off and hurt anybody. That's super important. Safety is number one. Take our wheel off, and we'll roll it out of the way. Okay, so we have our sway bar link. We're going to use some locking pliers. We're going to try to hold onto this portion of the stud. So when we try to remove this nut right here, hopefully, the stud won't spin on us and we'll be able to get the nut off. So grab it with some locking pliers as tight as you can. For the backside or the nut side, you're going to use a 17-millimeter socket. You can use a ratchet, or impact, whatever you got. Here we go, safety glasses and on of course.
Got our nut off of there. Set this aside. Awesome. Do the same thing for this one down here. This one's going to be a little bit harder to get a impact gun into, so I'm just going to use a regular old ratchet. Obviously, you want to be careful when you go to loosen this that the pliers don't come down and put a pinch on your boot. Let's see. Turn this. Oh, yeah. All right, I'm not going to go ahead and touch this nut because I know that it's hot, but it's in there. Set that aside. This out of here. Awesome. Here's our sway bar link.
So here we are, friends, a quick product comparison for you. Right here, we have our original front sway bar link out of our 2006 Toyota 4Runner. And over here, we have our brand new, quality 1A Auto part. As you can tell, these parts are created equal. You've got the same length, which is very important. You've got the studs facing in the same direction, which is also very important. If you happen to get one and the studs are facing in the opposite direction than what you were looking for, odds are you're just holding the one for the opposite side of the vehicle. The installation for that would be the same as the other side, so you don't really have to worry about it.
Aside from that, you have brand new sealed boots, super important. You want to make sure you keep that grease in there and the moisture out. Comes with brand new locking nuts, also very important. It comes with everything you need to install. With that said, I don't see any reason why this wouldn't be a quality part to install onto the vehicle so I want to go ahead and do it. As always, if you need this or any other part, check us out, 1aauto.com. Thanks.
You'll notice you have a long stud and a shorter stud. The longer stud is obviously going to go through the deep hole and then you've got the shorter stud, which is just going to go through the sway bar there and it's a much thinner area. Start with whichever side you like, bottom or the top. Grab one of your locking nuts. Oops, get it on there. Awesome. I'll put this up in here just like that. Other locking nut. Also awesome.
Okay, so to tighten this up, we're going to use an 18-millimeter socket for the nut. We're going to use a 24-millimeter wrench to hold this area. I don't know, maybe you can see this one easier. It's kind of like a square, squared-off area. Just going to grab right onto it with your 24-millimeter wrench. As you tighten up the nut, this is going to hold it still. So start with whichever one you want. That feels nice and snug. Going to do the same to the other one. Awesome. So we've got that tight and this tight down here. That completes our sway bar link replacement.
Now, you would just put your wheel back on. Make sure you torque that down to manufacturer's specifications. Down the road you go. Now, we're going to grab our wheel. These wheels can be heavy, and I don't want you to hurt yourself. So instead of grabbing your wheel like this and trying to lift with your back and potentially hurting yourself, show you a little secret. You take your leg, assuming you're not worried about your pants getting a little dirty, just going to grab it like this, roll it right up your leg. Now, you can use your leg/ab muscles to lift it right up. Use your leg to hold it. Balance it. See, that works pretty good. I'm going to take my lug nut, my socket, put it right on here.
Now that we know we've got one locked in, we can release it, grab the rest of our lug nuts. We're going to start all these on. We'll bottom them out, and then we'll torque them down. All right, so let's bottom out these lug nuts. Perfect. We'll get this down on the ground, and we'll torque them down to manufacturer's specifications. Okay, friends, let's get our torque down. We've got our 21-millimeter socket. We've got our torque wrench set to 83 foot-pounds. We're going to go on a crisscross manner. Okay, I'm just going to go around one more time. It's a small price to pay for safety. Awesome.
Thanks for watching. Visit 1aauto.com, your place for DIY auto repairs, for great parts, great service, and more content.


Direct fit, good quality at an affordable price.
Good part
Parts were exaact fit as promised. Look like good quality, installed like OEM.
I'm a first time purchaser and had no frame of reference for 1AAuto. I thought the prices were great and figured I would take a chance. The order was correct and the quality was great. Everything was packed with care and with the pricing, I'll definitely be ordering in the future.
These were easy to install and appear to be of good quality, the only pain point was the spinning lock washer, which worked perfectly on one of the parts and I used it to tighten the nut. The washer spun on the other part and I could not repeat. I had to tighten the nut by gripping onto the actual threaded shaft that passes through the sway bar.
Received these end links in a suspension parts kit from 1A (2007 Toyota FJ Cruiser Front 8 Piece Steering & Suspension Kit TRQ PSA71498) and installed all of the components at the same time. After driving on them for a couple weeks and re-checking torque where applicable I relaxed with the piece of mind one attains after taking care of their front suspension for the next decade! Or so I thought. Looked behind my front tire today while doing an oil change (mostly to ensure the new cv axle boots were still okay...) and to my dismay the boots on my new sway end links had ALL disintegrated! Less than 4k miles and 12 months ~ with how they look atm, I bet they were already cracking after 6 months. I was a full supporter of 1A parts until this, now I am very very concerned I will need to redo cv axles, tie rod ends, upper and lower ball joints before long.
Perfect fit. Four stars because the first one sent to me had bad threads. I contacted customer service and a replacement was sent immediately.
Easy install, quality part
Very happy with these. Packaged very well and were high quality. Seemed nicer than the orginial ones.
Sway bar links for perfect. Happy with purchase. Arrived quickly and price was right.

PSA55921
