The parts are heavier built than the original Toyota parts. Everything fit perfectly. I find the videos associated with each part made the replacement much easier.
Replaces
PSA59557
This part doesn’t fit a . Select from parts that fit.
Specify your vehicle's year, make and model to guarantee fit.
This part does not fit a .
About TRQ:
TRQ is a trusted brand dedicated to making every repair a success story by combining premium parts with easy installation. Each TRQ part is engineered by a team of automotive experts to meet or exceed OEM standards, delivering enhanced performance and maximum longevity. With rigorous in-house testing, the brand ensures superior fit and function across every product line. TRQ also provides customers with best-in-class, step-by-step installation videos—so you can complete repairs with confidence, whether you're a first-time DIYer or an industry professional.
Product Features
TRQ suspension kits are manufactured using premium raw materials and coatings for extended service life. Each TRQ suspension component is designed to be a direct, maintenance-free replacement to the stock unit. To extend the life of your steering and suspension components, TRQ recommends replacing components in pairs, sets, or kits. All products are fit and road-tested in our Massachusetts R&D facility to ensure we deliver on our promise of Trusted Reliable Quality.
Install Tip: When replacing steering components, have a professional alignment performed afterwards. This ensures proper tracking and even tire wear.
Our steering and suspension components are pre-greased and sealed for long life and do not require the extra maintenance typically required by greaseable versions.
Attention California Customers:
WARNING: This product can expose you to chemicals including Lead and Lead Compounds, which are known to the State of California to cause cancer, and birth defects or other reproductive harm. For more information, go to www.P65Warnings.ca.gov.
This part fits 4 vehicles spanning 2006-2019.
| Year | Make | Model | Description |
|---|---|---|---|
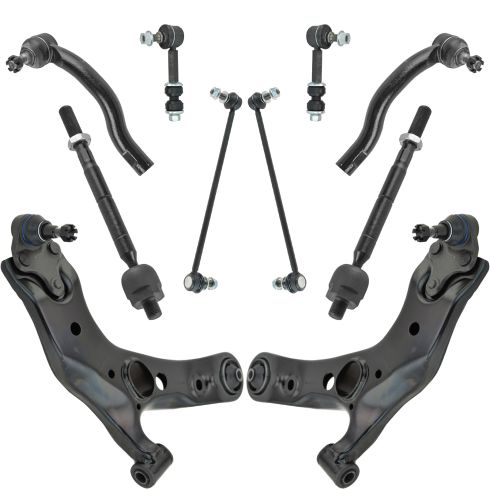
| 2015-2017 | Lexus | NX200t | Lexus NX200t Front & Rear 10 Piece Steering & Suspension Kit TRQ PSA59557 |
| 2018-2019 | Lexus | NX300 | Lexus NX300 Front & Rear 10 Piece Steering & Suspension Kit TRQ PSA59557 |
| 2015-2019 | Lexus | NX300h | Lexus NX300h Front & Rear 10 Piece Steering & Suspension Kit TRQ PSA59557 |
| 2006-2018 | Toyota | Rav4 | Toyota Rav4 Front & Rear 10 Piece Steering & Suspension Kit TRQ PSA59557 |
| Brand Label | Part Number |
|---|---|
| Dorman | 521-250 |
| Dorman | 521-249 |
| Dorman | 524-477 |
| Dorman | 524-478 |
| MOOG Chassis Products | RK620586 |
| Mevotech | CMS86164 |
| Toyota | 4806942051 |
| Toyota | 48069R010 |
| Mevotech | CMS86163 |
| Toyota | 480680R010 |
| Beck/Arnley | 101-5737 |
| MOOG Chassis Products | RK620587 |
| MAS Industries | CB74213PR |
| MAS Industries | CB74213 |
| MOOG Chassis Products | K750043 |
| MOOG Chassis Products | K750257 |
| Precision Driveline | 5CB86130 |
| Beck/Arnley | 101-6851 |
| Mevotech | CMS86197 |
| Toyota | 4806842060 |
| MOOG Chassis Products | ES800053 |
| Toyota | 4806842050 |
| Toyota | 48068R010 |
| Mevotech | CMS86198 |
| NAPA Premium | 2608127 |
| Toyota | 480680R030 |
| Mcquay-Norris | FA3383 |
| Toyota | 4806942060 |
| Beck/Arnley | 102-6850 |
| MOOG Chassis Products | ES800054 |
| NAPA | 2606390 |
| MAS Industries | CB74214 |
| NAPA Premium | 2608126 |
| Dorman - OE Solutions | 524-478 |
| NAPA | 2606389 |
| Mevotech | MS86163 |
| Toyota | 480690R010 |
| MOOG Chassis Products | EV800328 |
| Dorman - OE Solutions | 524-477 |
| MAS Industries | CB74214PR |
| Mevotech | MS86164 |
| Toyota | 4806842051 |
| Mevotech | MS86198 |
| Mevotech | MS86197 |
| Toyota | 480690R030 |
| Toyota | 4806942050 |
| Mcquay-Norris | FA3384 |
| Precision Driveline | 11CB86129 |
| Mevotech | MS86729 |
| Mevotech | MS86854 |
| DIY Solutions | SUS06979 |
| DIY Solutions | SUS05739 |
| DIY Solutions | SUS07974 |
| DIY Solutions | SUS05738 |
| DIY Solutions | SUS06933 |
| DIY Solutions | SUS07972 |
| DIY Solutions | SUS07973 |
| Mevotech | MS86803 |
| Beck/Arnley | 101-5228 |
| Mevotech | MES800053 |
| Mevotech | MES800054 |
| Firestone | K750043 |
| Mevotech | MS60822 |
| Driveworks | DW-K750043 |
| Raybestos Brakes | 5451646B |
| Duralast | 18750043 |
| TRW Steering and Suspension Parts | JTS1144 |
| Centric Parts | 606.44032 |
| ACDelco | 45G20646 |
| TRW Steering and Suspension Parts | 18750043 |
| Import Direct Chassis | LS13020 |
| Mevotech | MS86873 |
| Valucraft | V18750043 |
| Mevotech | TXMS86803 |
| NAPA Chassis Parts | 265-1854 |
| Dorman | SL74135XL |
| Carquest Premium Chassis Parts | 644-233795 |
| MAS Industries | SL74485 |
| AutoZone | DG5451646 |
| NAPA Chassis Parts | 18750043 |
| MasterPro Chassis | K750043 |
| NAPA Chassis Parts | 2651854 |
| Mevotech | MS86883 |
| Precision Chassis | LS13020 |
| Dorman | 536-014 |
| Delphi | TC1920 |
| MAS Industries | SL74135 |
| Parts Master | K750043 |
| NAPA Proformer | 18750043 |
| Toyota | 4882042030 |
| Dorman | SL74485XL |
| AutoZone | V18750043 |
| Toyota | 488200R010 |
| Toyota | 4882047030 |
| Raybestos Brakes | 545-1646 |
| ACDelco | 46G20646A |
| Toyota | 4882047020 |
| AutoZone | 18750043 |
| Mcquay-Norris | SL748 |
| TRW | JTS1144 |
| Dorman | SL74485 |
| Import Direct | LS13020 |
| Toyota | 48820-0R010 |
| Toyota | 48820-42030 |
| Toyota | 48820-47020 |
| Toyota | 48820-47030 |
| Toyota | 48820-02070 |
| Toyota | 4551042030 |
| Toyota | 4504709310 |
| Toyota | 4883042021 |
| Toyota | 4504749135 |
| Toyota | 4551042090 |
| Toyota | 4883042022 |
| Toyota | 4551042110 |
| Toyota | 4883042020 |
| Toyota | 488300R010 |
| Toyota | 4551042240 |
| Datsun/Nissan | 4504649195 |
| Carquest | CA1690B |
| Centric Parts | 612.44111 |
| Beck/Arnley | 101-5485 |
| AutoZone | ES800053 |
| Carquest Premium Chassis Parts | 310-233787 |
| Import Direct Chassis | ER06019 |
| Delphi | TA2626 |
| Raybestos Brakes | 4012088B |
| Raybestos Brakes | 4012088 |
| MAS Industries | TO74062 |
| Centric Parts | 61344111 |
| Toyota | 4504649195 |
| ACDelco | 45A1088 |
| ACDelco | 46A1088A |
| Mcquay-Norris | ES4297 |
| TRW Steering and Suspension Parts | ES800053 |
| Delphi | TA2627 |
| Toyota | 4504609650 |
| NAPA Chassis Parts | ES800053 |
| Beck/Arnley | 101-5486 |
| TRW Steering and Suspension Parts | JTE7630 |
| NAPA Chassis Parts | 269-3425 |
| AutoZone | DG4012088 |
| Dorman - OE Solutions | 521-249 |
| Dorman - OE Solutions | 521-250 |
| Dorman - Premium | SL74485XL |
| Dorman - OE Solutions | 534-820 |
| Dorman - Premium | CB74214PR |
| Dorman - Premium | CB74213PR |
| Dorman - Premium | TO74062XL |
| Dorman - OE Solutions | 536-014 |
| Dorman - Premium | SL74135XL |
| Hollander | 512-50152R |
| Hollander | 512-50153L |
| Delphi | TA3088 |
| Dorman - Premium | TI74390XL |
| Dorman - OE Solutions | 543-690 |
| Beck/Arnley | 101-5838 |
| Mevotech Supreme | MS86197 |
| Mevotech Supreme | MS86198 |
| Mevotech Supreme | MS86163 |
| Mevotech Supreme | MS86729 |
| Mevotech Supreme | TXMS86803 |
| Mevotech Supreme | MS86803 |
| Mevotech Supreme | MES800054 |
| Mevotech Supreme | CMS86164 |
| Mevotech Supreme | MS60822 |
| Mevotech Supreme | MES800053 |
| Mevotech Supreme | MS86164 |
| Mevotech Supreme | MS86873 |
| Mevotech Supreme | MS86854 |
| Mevotech Supreme | CMS86197 |
| Mevotech Supreme | CMS86163 |
| Mevotech Supreme | CMS86198 |
| Mevotech Supreme | MS86883 |
| Toyota | 48068-0R010-101 |
| Toyota | 48069-0R010-101 |
This item may be interchangeable with parts from other brands with the above part numbers. This information is provided only for reference and does not guarantee that the item you are purchasing is identical to parts with part numbers from the brands listed above. To confirm that this item fits your vehicle, use the above "Check Vehicle Fit" option.
Lifetime Warranty
This item is backed by our limited lifetime warranty. In the event that this item should fail due to manufacturing defects during intended use, we will replace the part free of charge. This warranty covers the cost of the part only.
FREE Shipping is standard on orders shipped to the lower 48 States (Contiguous United States). Standard shipping charges apply to Hawaii and Alaska.
Shipping is not available to a P.O. Box, APO/FPO/DPO addresses, US Territories, or Canada for this item.
Expedited is available on checkout to the United States, excluding Alaska, Hawaii.
Final shipping costs are available at checkout.

Created on:
Tools used
Hi, I’m Mike from 1A Auto. We’ve been selling auto parts for over 30 years!
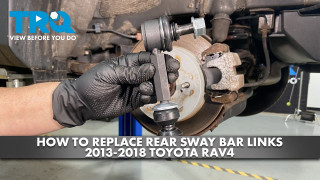
You can use a small pry bar, or you can use a large flat-bladed screwdriver. We're going to pop the wheel cover off. Going to use a 21 millimeter socket, a large breaker bar. Loosen the lug nuts with the vehicle on the ground, so the wheel doesn't turn. Raise this sporty vehicle with a jack and jack stands, or we're going to use our two post lift. The vehicle in the air, the lug nuts are loose, I'm going to use the socket to finish taking the wheel and tire off.
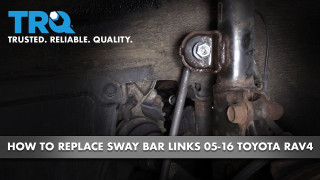
Remove the sway bar link. Spray some rust penetrant on the top nut. It's a 17 millimeter nut. Try to break it free first. It might want to spin on the ball joint part. There is a way to counterhold it. Typically, before I try to counterhold it, I like to try to break it free a little bit. It started to move, and then, now it's spinning on the ball joint part, but I did free it up a bit.
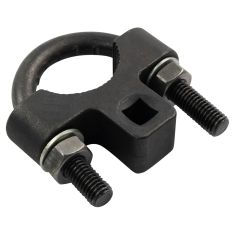
We're going to take a 6 millimeter hex drive on the breaker bar. Put it in here to counterhold it. Now, loosen the nut. It's possible that these could be so rusted together that you may have to cut the sway bar links off. If you're replacing the strut, you should have a new sway bar link on hand, in case you destroy it while you're removing it. This one came off really nicely. Pull it right out.
Spray some rust penetrant on the lower sway bar link nut. Wipe it so it doesn't drip all over the floor. Using the 17 millimeter wrench, break it free first. There you go. This one, I actually got lucky, I didn't have to counterhold it like the top one, and it spun right off.
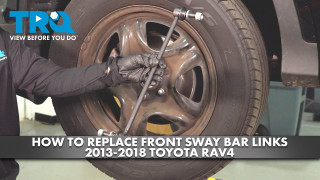
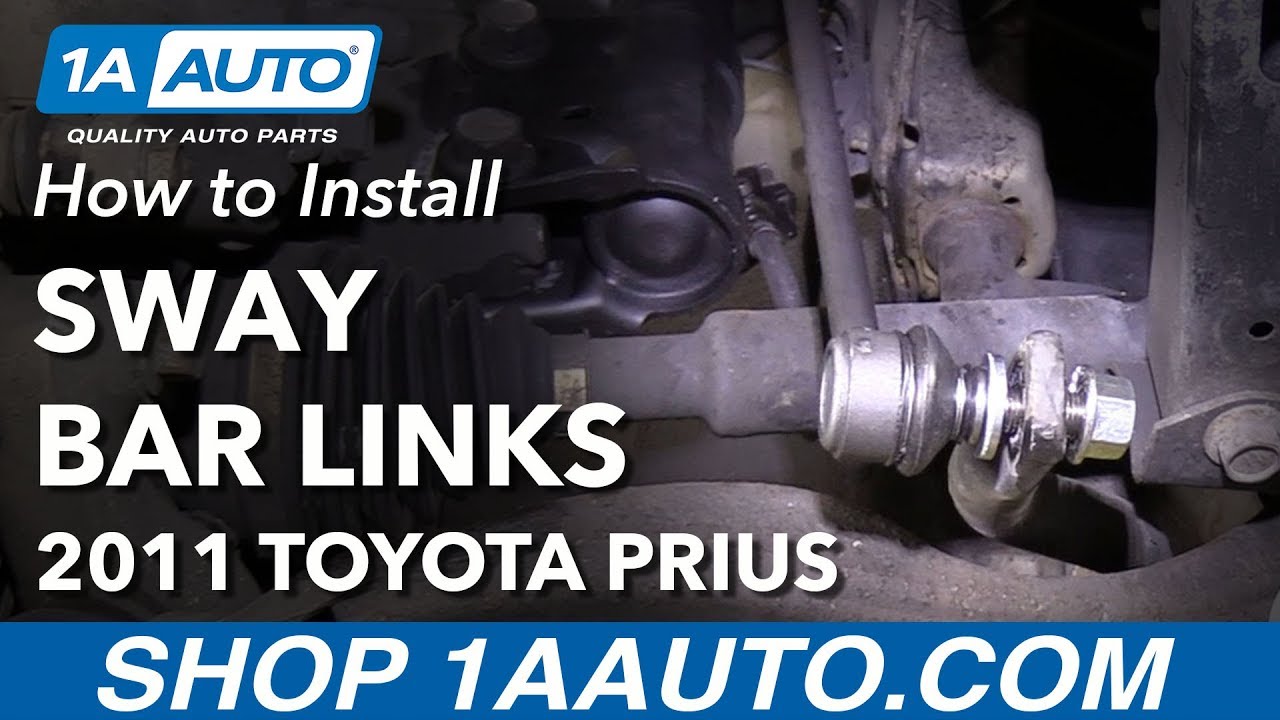
Here's the original sway bar link we pulled from the vehicle, and the brand new one from 1AAuto.com. Comes with new hardware. Similar in design, this will work great and fit great in your vehicle. This can be installed in either direction. They're reversible. I'm going to start with the bottom one. Put it through. Use the new nut that was included. It is a locking nut, so it's going to get to a point and then stop. Take the one off here, and we'll install it here. Bend it a little bit. Nut installed here.
Now, we'll work on tightening the bottom one first. Nuts that come on this new one were 18 millimeter. Hold the bolt in place and tighten them up. It's starting to turn the ball joint. The stud's turning with it, so now I'm going to have to counterhold this. Use our 6 millimeter hex drive with our breaker bar. I can counterhold it and tighten it up. Get it tightened down, come back and torque it. Torque the sway bar link upper nut and lower nut to 55 foot-pounds. Once it clicks, you're all set. Do the same for both.
Reinstall the wheel. Start the lug nuts by hand. These lug nuts do have a shoulder on them. The opening in the wheel is a little bit bigger, so you might have to line it up, and just fiddle with the wheel a little bit while you're tightening these down. Just going to use the socket to snug these down. When I'm done, we'll lower the vehicle to the ground and torque them to spec. Torque the lug nuts in a cross pattern to 76 foot-pounds. To reinstall the wheel cover, line up the hole for the valve stem, and then snap it in place.
Thanks for watching. Visit us at 1AAuto.com for quality auto parts, fast and free shipping, and the best customer service in the industry.
Tools used
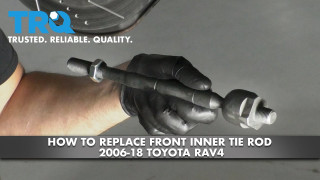
What's up guys? I'm Andy from 1A Auto. In this video I'm going to show you how to replace the inner tie rod end on his 2010 Toyota Rav4. If you need this part or other parts for your vehicle, click the link in the description and head over to 1aauto.com.
All right, I raised and supported the vehicle. I'm going to remove the wheel. I'm using a 21 millimeter socket and an air gun. If you don't have an air gun, you can use a breaker bar. Just crack the lug nuts free while the vehicle is still on the ground.
All right, now I want to take the tire off. This one is stuck on there pretty good, so I'm going to put one lug nut on so the tire doesn't go flying, and just hit it on the back side of the tire with a hammer. Break it free. Reason you leave the lug nut is so the tire doesn't go flying.
Take the lug nut off. Pull the tire off. First, I want to loosen up this jam nut. I'm going to use a 22 millimeter wrench. Loosen this up. Might have to put a pipe on this wrench.
Here we go. Loosen that up, and there's a cotter pin holding this castle nut on, or at least retaining the castle nut. I'll just take the cotter pin off. Just use some straight cutters. Sometimes you can't get in there. Sometimes you use a pick. Let's try to start it with a small pick and then sometimes using a cotter pin style pick can get that out.
Slide that cotter pin out. There we go. You don't ever want to reuse a cotter pin. You always want to replace it, so put a new one in. Take a 17 millimeter socket and a ratchet, loosen up this castle nut. It's a little bit rusty. I'm going to spray some rust penetrant on there. There we go, and loosen it up.
All right, before I take that nut all the way off, I am going to use a punch and a hammer and just hammer down on the stud part of the tie rod. You could use a fork or there's other type tools that you could use to press this out, but this will work.
The reason why you leave the nut on there is so that you don't mush from the end in case you had to replace it. If you don't have to replace, it doesn't matter. Take the nut off. You can slide the outer tie rod off there. Now we can take this off. I like to count the threads so that when you put the new one back in, the alignment is at least going to be kind of close. So one, two, three, four, five, six, 13, 14. 14. All right, then I'm just going to write the number somewhere, 14, just so I remember. You could write it anywhere you want.
I need to take this nut off of the inner tie rod, so I'm just going to soak this down with some rust penetrant. Let that soak a little bit. I'm going to use some locking pliers just so I can hold this from spinning. Take the 22 millimeter wrench and loosen this up.
Once I loosen it up a little bit, like it's easily to turn by hand so I can take that off. There you go. I can take the locking pliers off. Now this hose clamp or this clip, take this clip off. Just use some pliers. Slide that off. There's a clamp on the inside of this boot for the steering rack boot. Take a straight blade screwdriver, you kind of want to get in underneath the clamp. Now, if you can try to salvage this clamp, you might be able to reuse it. Generally you can't. Generally you have to replace the clamp.
There we go. And if you didn't break it too much, you can try it, but generally just replace this. Just grab the boot, give it a twist, pop off the end, and then just pull it out. I might need to release it right there. Just take a pick, get underneath here. I'm just going to use a hose pick or a coolant hose pick. Just try to slide this off just like that. Take the boot off.
Now to take this tie rod end off, you're going to need a tie rod tool. You can try to get a wrench in there, but it's not that easy. Take this adapter, this is a 33.6 millimeter adapter. Slide that on there, take the tie rod tool, install this, and I'll just lock that on. That's good right there.
Now, before I loosen it up with the tool, I am just going to take some locking pliers. I just want to lock on the steering shaft itself because it's a good idea not to put too much tension on that pinion in the middle of the shaft, so we'll do that and then take a breaker bar, attach it to the tool. While you loosen this, hold the pliers or have a buddy hold the pliers and just loosen. Once it breaks free, generally they come apart really easily. Take those pliers off. Take this tool off.
I should be able to take this off pretty easily. There we go. Here's the old part. Here's the new inner tie rod from a 1aauto.com. As you can see, the length is the same. Part has the same thread on the end of it. It comes with a new nut, a new jam nut. Comes with this protective sleeve. You could take that off when you get the part. Get yours at 1aauto.com, and you'll be ready to rock and roll.
You're going to take this jam nut off. We'll set that aside. We'll reuse that later. On the top I'm just going to take a little bit of thread locker. Put that on. Just use medium strength thread locker, and slide this in position.
All right, I want to tighten this up. This, I'm going to use the same tie rod tool, but I'm going to use a different adapter. I'm going to use a one and one quarter to tighten this up. Put the tie rod tool on, lock it in place, and then I'm going to do the same with the locking pliers. Just hold the steering shaft with the locking pliers, and then I'm going to use a torque wrench on the tool as I hold the pliers and torque this to 44 foot pounds.
That's good. Take that off. Take the locking pliers off. Now we're going to be ready to put the boot back on. I did get a new clamp, and how this clamp works is I'm going to need a special pliers like this, and when you squeeze this, it's going to tighten the clamp right there and push it down. You need these special pliers to get these to tighten up.
They do have a couple other types of tools that will work on these, and if you do not have one of these clamps, worst case, you could use a wire tie and just get it as tight as you possibly can get it. That's just worst case, but it's best to get a new clamp. That's good. Good down there. Try and get the pliers in here.
Just like that, and tighten it up. That pinches it nice and tight. That's good. Now on the outside, I'll reuse this clamp. I'll just use some pliers. It's just a spring clamp. That's good. Now, there is a groove for that end of it to fit into the inner tie rod for the end of the bellow boot. That looks good. Take the jam nut, install the jam nut. Take the outer tie rod in, and I'm going to count how many turns I go. I want 14 total. One, two, three, 13, 14. All right, and take the nut off.
Let me just slide this in position. That's good right there. Take the nut, get that started. Now this tie rod, the new nut that comes with this happens to be a 19 millimeter nut, so I'll use a 19 millimeter socket and a ratchet. Tighten it up. Now, if the stud starts spinning, what you're going to have to do, and it looks like it's not spinning, so that's good. But if this stud does start spinning, now what you want to do is have a friend hold this, take some big pliers and just hold this tight, and that'll keep it tight up against the knuckle. Then you can tighten it up. That's good.
Snug that up, and then I'm going to torque it. I'm going to torque this to 36 foot pounds. I want to take the jam nut, tighten that up against the rod end. Now this jam nut is a different size. I'm going to use a 15/16 or you can use a 24 millimeter. Snug this up. You're supposed to tighten this jam nut up to 65 foot pounds. If you have the ability to do that with a torque wrench, you can do that. I'm just going to snug it up with a wrench.
Now, install the tire. Take the lug nuts, install the lug nuts. Now I load the vehicle down to the ground so that the tire is just touching the ground. I'm going to torque these with a 21 millimeter socket and a torque wrench to 76 foot pounds. I'm going to do this in a star pattern. The reason you do it in a star pattern is so that the wheel gets tightened down evenly.
Then I always like to go around again just to double check. Whenever you do a job like the one we did today, you're going to want to go to a local shop and have your alignment adjusted, because you don't want to end up with premature tire wear. Whenever you change components or even remove them and reinstall them, things change, and you want to make sure everything is lined up so you're good to go.
Thanks for watching. Visit 1aauto.com for quality auto parts shipped to your door, the place for DIY auto repair. If you enjoyed this video, please click the subscribe button.

Tools used
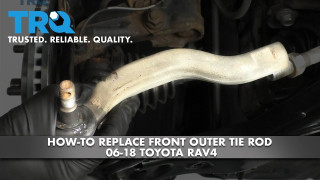
What's up guys? I'm Andy from 1A Auto. In this video, I'm going to show you how to replace the front outer tie rod ends on this 2010 Toyota Rav4. If you need this part or other parts for your vehicle, click the link in the description and head over to 1AAuto.com.
All right, I raised and supported the vehicle. I'm going to remove the wheel. I'm using a 21 millimeter socket and an air gun. If you don't have an air gun, you can use a breaker bar. Just crack the lug nuts free while the vehicle is still on the ground.
All right. Now I want to take the tire off. This one's stuck on there pretty good, so I'm going to put one lug nut on so the tire doesn't go flying and just hit it on the backside of the tire with a hammer. Break it free. The reason you leave the lug nut is so the tire doesn't go flying. Now take the lug nut off and pull the tire off.
First I want to loosen up this jam nut. I'm going to use a 22 millimeter wrench. Loosen this up. You might have to put a pipe on this wrench. There we go, just loosen that up. And there's a cotter pin on this over holding this castle nut on, or at least retaining the castle nut. So I'll just take the cotter pin off. Just use some straight cutters. Sometimes you can't get in there, sometimes you use a pick. Let's try to start it with a small pick and then sometimes using a cotter pin style pick can get that out. Slide that cotter pin out. There we go.
You don't ever want to reuse a cotter pin. You always want to replace it, so put a new one in. Take a 17 millimeter socket and a ratchet, loosen up this castle nut. It's a little bit rusty. I'm going to spray some rust penetrant on there. There we go, and loosen it up.
All right, before I take that nut all the way off, I am going to use a punch and a hammer, and just hammer down on the stud part of the tie rod. You could use a fork or there's other type of tools that you could use to press this out, but this will work. ... The reason why you leave the nut on there is so that you don't mush from the end in case you had to replace it. If you don't have to replace it, it doesn't matter. Take the nut off. You can slide the outer tie rod off there.
Now we can take this off. I like to count the threads so that when you put the new one back in, the alignment is at least going to be kind of close. So one, two three, four, five, six, 13, 14. 14. All right, then I'm just going to write the number somewhere, 14, just so I remember. You can write it anywhere you want.
Here's the old part. Here's The new outer tie rod from 1AAuto.com. It's the same shape as the old one, has the same ball stud, and it comes with a new nut. It actually comes with a locking nut with a nylon locker. Get yours at 1AAuto.com and you'll be ready to rock and roll.
Take the outer tie rod in, and I'm going to count how many turns I go. So I want 14 total and one, two, three, 13, 14. All right, and take the nut off. We'll just slide this in position, ... and that's good right there. Take the nut, get that started.
Now this tie rod, the new nut that comes with this happens to be in 19 millimeter nut, so I'll use a 19 millimeter socket and a ratchet. Tighten it up. Now if the studs start spinning, what you're going to have to do ... and it looks like it's not spinning, so that's good. But if the stud does start spinning, what you want to do is have a friend hold this, take some big pliers and just hold this tight. That'll keep it tight up against the knuckle and then you can tighten it up. That's good. Snug that up and then I'm going to torque it. I'm going to torque this to 36 foot pounds.
I want to take the jam nut, tighten that up against the tire rod end. Now this jam nut's a different size. I'm going to use a 15/16, or you can use a 24 millimeter, snug this up. So you're supposed to tighten this jam nut up to 65 foot pounds. If you have the ability to do that with a torque wrench, you can do that. I'm just going to snug it up with a wrench.
Now install the tire. Take the lug nuts, install the lug nuts. Now, I lowered the vehicle down to the ground so that the tire's just touching the ground. I'm going to torque these with a 21 millimeter socket and a torque wrench to 76 foot pounds, and I'm going to do this in a star pattern. The reason you do it in the star pattern is so that the wheel gets tightened down evenly. ... Then I always like to go around again just to double check.
Whenever you do a job like the one we did today, you're going to want to go to a local shop and have your alignment adjusted because you don't want to end up with premature tire wear whenever you change components or even remove them and reinstall them. Things change, and you want to make sure everything is lined up so you're good to go.
Thanks for watching. If you want the parts to do it yourself, check out 1AAuto.com, the place for DIY auto repair.
Tools used
What's up guys. I'm Andy from 1AAuto. In this video I'm going to show you how to replace the front lower control arm on this 2010 Toyota Rav4. If you need this part or other parts for your vehicle click the link in the description and head over to 1AAuto.com.
All right. I raised and supported the vehicle. I'm going to remove the wheel. I'm using a 21 millimeter socket and an air gun. If you don't have an air gun you can use a breaker bar just crack the lug nuts free while the vehicle is still on the ground. All right. Now I want to take the tire off. This one is stuck on there pretty good so I'm going to put one lug nut on so the tire doesn't go flying. And just hit it on the backside of the tire where a hammer, break it free. The reason you leave the lug nut so the tire doesn't go flying.
Now take the lug nut off and pull the tire off. All right. I'm going to take this cotter pin out. Now this one is somewhat of a reusable one so I'm going to use some needle nose and a pic right here and just try to slide this little lock out and then slide the cotter pin out. So, as long as it doesn't break and it doesn't look too bad you can reuse it. Now I'll take a 19 millimeter wrench and I'm going to take this nut off, oh actually slide it on this way. Actually I am going to need a pipe because it's on there pretty good. All right. I'm just going to put a pipe on the end, loosed this up. It makes it a little easier, get a little more leverage. Now I'll just take the nut off. There we go.
Now, I'm going to use a fork to, sometimes they call this a pickle fork, I'm going to use a pickle fork to remove this ball joint because I'm not saving it. If you were saving it there's other tools you can use that won't ruin the boot but generally these pickup forks ruin the boot. So I'll just put that in there and just hit it with a hammer. There we go. Released it. All right. So that's loose. I don't have to worry about that right this second. I want to take this bolt out and then there is another bolt right here.
I'm just going to use a little rust penetrant. Just squirt that bolt down right there. There's a nut right on top. I'm going to take a 22 millimeter wrench and put it on the nut on the top and a 22 millimeter socket with my air gun on the bottom. Take this bolt out. If you don't have an air gun you can use a breaker bar. And then I'm going to loosen this bolt up. I'm going to use a 22 millimeter socket and a breaker bar to loosen it up. This one is really tight. All right. I just switched to a ratchet.
Be careful because the oil pan is right here. One, you don't want to ant damaged or dent the oil pan and two you don't want your ratchet to get stuck. If you have a ratchet that switches right here you could get stuck. Just go a little bit further. See, I got stuck. Luckily my switch is down here. A little bit more. All right. I'll just have to do it by hand or with a wrench. If I had a a 22 millimeter ratchet wrench that would be ideal but I don't so it's just going to take a little bit of time. Okay.
So this bolt is loose but there's a problem if you can't get it past the oil pan. Now certain oil pans have a notch in them and then you can get this bolt out and it's no big deal. Now one option you could take the oil pan down so then you can slide this bolt out but that's a lot of work just to get this bolt out. So what we're going to do is take these bolts out here. I'm going to take this plate off back here, take this bolt out, and then there's one more bolt up here. I'll take that bolt out. I'm going to support this frame while I do that and we're going to pry this down and try to get this bolt out.
So I'm just going to use a screw jack and support this right here and I'm going to start taking those bolts out. Take these two bolts out using a 17 millimeter socket and a air gun then I'll take this bracket off. I'll use a 19 millimeter socket and the air gun. That bolt is a little bit longer. Now I'm going to take a 19 millimeter socket and extension in the air gun. I have to go through the lower control arm right here and the bolts right there. Take that bolt out. Little rusty. Just like that.
Now on the opposite side I'm not going to take these bolts out. I am just going to loosen them up. Just loosen this one up right here. Use the 19 millimeter socket extension and the air gun. Just enough. That's good right there. Now I'm going to loosen this one up with the 19 millimeter socket and the air gun. I don't have to listen to it that much, just a little bit. I don't want this to completely fall I just want to get a little, just be able to drop it down a little. I'll take these two bolts out. Use the 19 just like that, just let that hang, get those loose. Now I can just drop this cradle down a little bit.
What I'm going to do is take a pry bar just get in between the sub frame and the body of the vehicle and just pry down right there. And then you can take the bolt and just slide it out, get just enough room, or you could even try prying in between the sub frame and the engine. Although you don't want to ruin the engine so don't do that. So with that out now we can grab the control arm and just slide it down. You might have to push this in a little bit and then slide it out. Take a pry bar, just get in here, right out there. So let's pry it out. Then you can pry it out from there. That's not going to work. You can get a bigger pry bar and just pry it out. There you go.
Here is the old part, here is the new lower control arm from 1AAuto.com. It comes with the same bushings right there and there. It comes with a new ball joint. It comes with a new castle nut. Take this castle nut off and there's just a protector on that. Take that off before you install it. And it comes with a new Cotter pin as well. Get yours at 1AAuto.com and you'll be ready to rock and roll.
So if you happen to be doing the driver's side the procedure is going to be the same. You're going to have to loosen up those sub frame bolts and stuff. One thing to keep in mind, there is two nuts right here and then if you take this panel off there's two bolts right there. If you're struggling with that you can loosen up this mount right here. That's going to support the engine. So then you might be able to tip it down a little bit more or even put a block of wood and a floor jack underneath the transmission just Jack it up. Very carefully though you don't want to bend the pan or anything or even on the engine side. So that's if you're struggling a little bit with this, try that.
So, the easiest way to install this is put the back part in first. Get this lined up. And I'm just going to get this back bolt started. Might have to remove it but for the most part I'll get this started. Right there. Put the nut on top. Let me just slide this over here, get that lined up there. I'm just going to use my pry bar on the sub frame. Just get in between there. Try to get that bolt lined up. It's not going to line up too well. This is somewhat where you need a helper. You could have someone over here prying, get this started. All right. Let's try this. All right, that's started right there. Now use the pry bar over here. Pry this down and get that started. It's good. Just want to make sure this gets started though and we'll leave those loose. We'll torque those last and we can raise this up. Just use the screw jack.
Then I'm going to take these bolts. These are the 17 millimeter bolts. Use a 17 millimeter socket to get these started. Get these back bolts in, these too. Take this bolt, get that to fold back in. All right good. And then these two back ones over here. Now I'm just going to snug thse all up with the gun first and then I'm going to go around and torque them. Now I'm going to tighten these two with a 17 millimeter socket and a torque wrench to 73 foot pounds. Now I only did these two on this side I did not take the ones out on the other side but if you did then torque those at this time.
Next I'm going to torque these four bolts, there, there, there and there. I'm going to torque that with the 19 millimeter socket and torque wrench to 69 foot pounds. Next I'm going to torque these to that side and the driver's side because I loosened it up to 101 foot pounds. And that's a 19 millimeter socket. And for the body I'm going to torque these to 101 foot pounds both sides. Yep. I can remove the screw jack. All right, I'm going to tighten this bolt up.
Now what they want you to do is put this all back together, put the tire on, and then put this on the ground and have this at ride height and then torque this but that's very difficult to do. So, what I'm going to do is just try to get the control arm as close as I can to ride height so maybe a little lower then that about right there and then I'm going to torque that bolt. The reason why you want to torque it with the lower control arm at right height angle is to keep less tension on that bushing. If you torqued it with the control arm way down then you're going to have a lot of stress in that bushing. It'll just make the bushing last longer.
So, I'm going to use a 22 millimeter socket and a torque wrench. I'm going to torque this to 172 foot pounds. There you go. Go to the gym. Now I'm going to put a 22 millimeter wrench on the top nut on the back control arm bolt. Just snug this up first and then I'm going to torque that. Then I'm going to torque this to the same 172 foot pounds with a 22 millimeter socket. Now it's a little bit difficult because you have to hold the wrench on top while you are doing this. Now they say to torque the bolt not the nut. I'm going to do it from over here. I don't want to smash that rotor. There we go, that's all set. Get the knuckle lined up with the ball joint, pry the ball joint out a little bit. Just wiggle this a little. Take the castle nut, get that started.
Take a 22 millimeter wrench, start to tighten this down. To get the proper torque on this nut if you're going to use a torque wrench you're going to want to talk that to 98 foot pounds which is actually a lot for a ball joint. But what we can do is take a wrench and take a pipe, get a pipe on the end of it and try to tighten it up the best you can. So, I did this pretty good. I think it's all right. And then what you want to do is line up the hole for the cotter pin so you might have to tighten it up even a little bit more. And then we're going to install the new cotter pin that comes with this and slide it through the hole that way. We can try to get it through the back side. All right. It's not going to go in through the back side so let's go through the front side
And then, I'm just going to take some straight cutters and bend over one end at a time. It is a good idea to replace the cotter pin whenever you're doing that. You really shouldn't reuse it even though we said we were going to reuse it. There we go, fold one of those over. Then you can either fold the other one down or just trim it off and that's going to prevent the nut from loosening up. Just make sure it's not hitting the CV boot at all. You don't want to rip the CV boot. You should be good right there.
Now install the tire. Take the lug nuts, install the lug nuts. Now I low the vehicle down to the ground so that the tire's just touching the ground. And I'm going to torque these with a 21 millimeter socket and a torque wrench to 76 foot pounds and I'm going to do this in a star pattern. The reason you do it in a star pattern is so that the wheel gets tightened down evenly. And then, I always like to go around again just to double check. Whenever you do a job like the one we did today you're going to want to go to a local shop and have your alignment adjusted because you don't want to end up with premature tire wear. Whenever you change components or even remove them and reinstall them things change and you want to make sure everything's lined up so you're good to go.
Thanks for watching. Visit 1AAuto.com for quality auto parts shipped to your door, the place for DIY auto repair. And if you enjoyed this video, please click the subscribe button.
The parts are heavier built than the original Toyota parts. Everything fit perfectly. I find the videos associated with each part made the replacement much easier.
Good quality parts, they matched OEM specs. Will buy again for future projects.
Good
Parts fit perfectly, exact replacement for my daughter's vehicle. With the addition of new front struts, her RAV4 now handles like new.
Great job well done 1A auto.
PSA59557
There could be multiple reasons why you're having this particular problem. We suggest taking your vehicle to a nearby reputable shop to identify the cause. Once you know the cause, we'll be happy to see if we carry the parts and how-to videos needed for your repair.
877-844-3393
Monday - Friday 8:00am - 9:30pm ET
Saturday - Sunday 8:00am - 4:30pm ET
Check Your Email
We sent a verification email to .
Click the Verify Email button in the email to submit your question.
This extra step helps prevent spam.
Specify your vehicle's year, make and model to guarantee fit.
This part does not fit a .
Before proceeding,
select your Vehicle, to verify this Part will fit.
If your vehicle isn't listed, search Steering & Suspension Kits
This part will only fit a vehicle with these options.