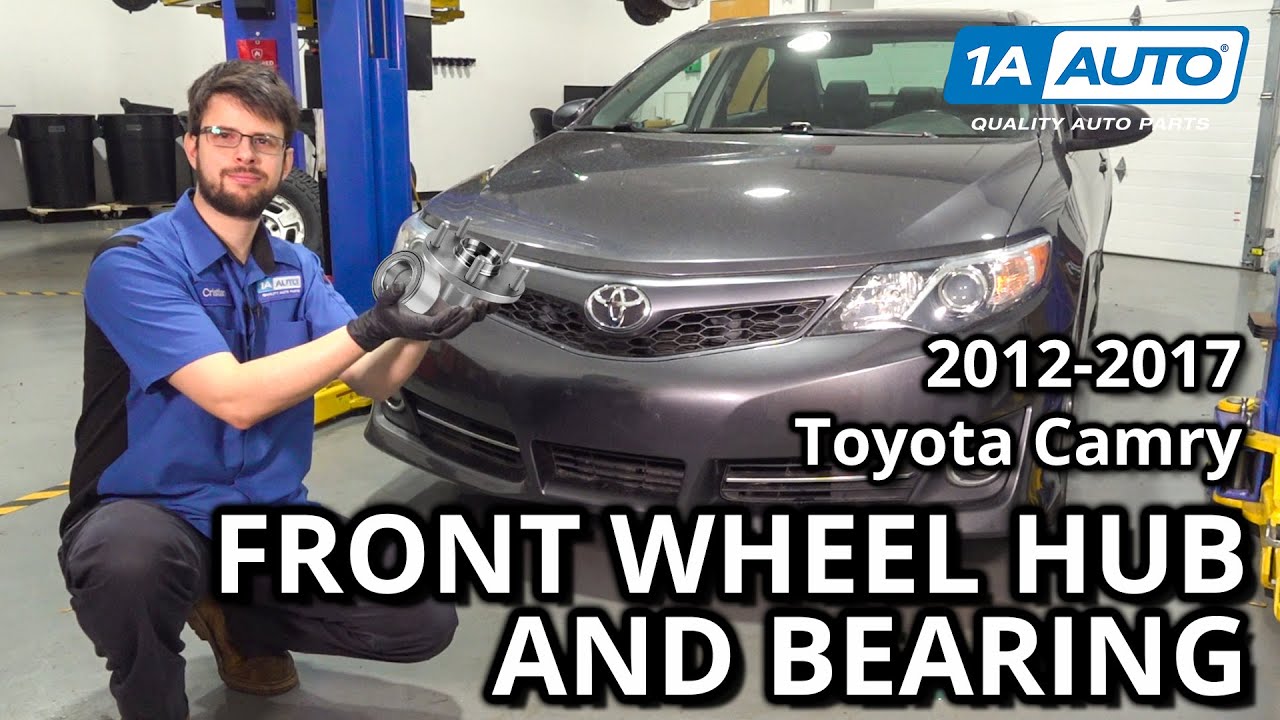
Everyone, it's Len here from 1A Auto, and today I'm going to show you on our 2013 Toyota Camry how to replace a front wheel bearing in the front suspension. If you need that part or any other part for your car, click on the link below and head on over to 1AAuto.com.
So take the tire off, you need a 19mm socket. Take your tire off.
Now I can just unbolt the caliper, 14mm socket, and we'll disconnect the caliper from the bracket. As you can see, that inner slider pin's spinning on me, so it's a 17mm wrench and a 14 socket. 40mm port those free and get the top bolt, to take that bolt out. Now we can slide the caliper off the bracket, there we go.
Now we can get that bracket off the caliper knuckle, that should be two seventeen millimeter sockets. There's two bolts, one on the bottom and one looks up. Gonna use a brake caliper hook, get that caliper up out of the way.
Thank you. Someone put a lot of red thread locker. Get the top bolt, take the bracket right out. See then get this bolt out of this knuckle. They just kept using a lot of the thread locker, it's really kicked in there.
Now the rotor is stuck on the hub, it's pretty normal for that, so you just take a hammer. I'm not going to reuse my rotor, so I can hit it right here on the hub or on the surface, I'm just gonna keep the hob though. No we can take that off and set it aside.
Now we're gonna take the old cotter pin out of the lower ball joint, because we're gonna have to discard that. The new ball's rent will come with one, and go from there. I just use a pair of cutters, get it to line up, wake it, make itself a little free in there. Sometimes there's a little ear you can grab from the other side. This one's gonna be, it's probably been in there original equipment.
Yeah, I got it to move good. You feel the other end with my hand and I can feel it moving.
You'll see the other end now have a little bit more of a flip to it. I can just grab it with the cutters and then pull it out. Perfect, there you go.
The nuts on that spindle part of the falls aren't pretty good, so I can only fit a open end wrench on there. So I'm just gonna do it a quick tap, see if I can get it to jolt itself a little free. No, so I keep my hand on that. You take your hand off of it and try to hit that with a wrench, you just bounce off and hit you. Let's go to the other side. There we go. So it's most of the vibration of the hammer, not so much the effort or trying to spin the wrench around.
It we'll get this off as far as we can go before it hits the axle, and then I'll take the bolts off on the control arm side, and we'll take a pickle fork because we're not going to reuse it, so we can use a pickle fork and break that down.
I'm gonna take these three bolts, two nuts in one bolt out. 17mm socket, use my half-inch breaker box. You can use their tools if you have air tools at home. I'm going to show you if you don't have air tools how to do it, and it can be relatively easy.
You see the pressure as the control arm's going up, that's where the pressure point is, that ball joint pushes it down. No one get that pickle fork, I'll just pull down on this, get that out of the way. You take a hammer, actually, before you get the pickle fork, if you hit right in here, you might be able to jump that that free. Yeah, look at that, pickle fork go that way. This might not work, it might be the wrong size. There you go.
Now if you're using that ball joint, you want to try to not use the pickle fork because you can rip the boot, just like that. So if you're reusing the ball joint, you need to take it out for some reason, I don't recommend doing it that way. In this case we're replacing it so we can just destroy it.
Oh, there we go, we have a jam nut and a castle nut with an old cotter pin. So we're gonna take the old cotter pin out and the castle nut off. No, it's like someone never completed that job. The castle nut's a 17mm socket, I'm just gonna put my half inch breaker bar on that.
Take a hammer and now we're gonna hit the knuckle part with that, pirate and spindles those on there, gulp it free. I'm gonna take a pocket screwdriver and I'm gonna take the ABS line off of the strut because you know you've got to take it out in order to get the knuckle out to do the bearing. So we have to take the ABS off because I've to take it out of the knuckle housing here and I get take the wire off the strut. So I'm just gonna use like a body tool to get underneath this clip and see if I can slide it, just attach it, can we use it, sweet.
It's now if I turn it this way, you'll see it looks like it could be a 10mm bolt. I gotta get a 10mm and disconnect that ABS sensor where it mounts on the knuckle. Let's hope it comes right out. Wonderful. Gonna put the bolt back in the ABS mounting hole, I just like to do that so it doesn't get lost, with the whole knuckle being out just easier.
So now on a Toyota, the axle nut or spindle nut is a special socket, it has to be a 12-point 30mm, so you can, it's just you know, you have to, you have to order it or make sure you have one before you do a Toyota axle for the spin. Over set that aside, and I'm gonna spray a little bit kind of training spray in there so that I can hopefully hammer that's axle out of the knuckle.
Now we got to take the sway bar link and detach it from the strut. Now I'm gonna take the strut away from the knuckle, and these at 22mm wrench, and suck it. You can do this by hand or use an air tool. I'm gonna leave the lower bolt in holding that knuckle in so that I can hit the spindle part and get the CV axle shaft out. Now I can grab this, make sure you get a good hold on that knuckle and take the, yeah.
First thing we're gonna do before we stop taking the bearing out and pressing it out, we're gonna take the backing plate off, that's a 10mm wrench, and I'll just break this free, it's four bolts holding it on. When I tip that upside down like that, just rock that back and forth, once we depress the hub off, we'll get that out.
You gotta get this tin shield out of the way, noting that how it lines up with the ABS ring. So I'll just take a little hook that I have and I'll just pry all the way around it, will pop right off. I want to don't want to dent it too much, it's going to happen, but I'm just saying be as careful as you can, use a pry bar, whatever tool takes it off without bending it.
It's magic. Now we have this lock ring in here, we need to get that out of the way, and I'm gonna use a pair of long needlenose pliers. I like to use needle nose because they seem to really get in there. Without the ring, ring fires sometimes work, I don't have great success with them, actually I gotta get my pocket screwdriver. So with a pair of needle nose pliers I like to squeeze that tool, just snap ring, and I just put up pocket screwdriver behind there and hold it there while I, that way I can actually work it around.
Now we're gonna reuse that if you can, if you need to get a new one do so, if it bends away too much or is rusted and rotted, it has an important job so get a new one. The hub housing is in good shape, we're gonna leave it.
Now I'm gonna use the press. First thing I'm going to do is press out the center hub, and that is this piece right here, this big steel piece, that's the bushing, the actual, that's the bearing, and this little piece right in here, that's that hub. So we're gonna push that straight through.
So I've got this set up, we like to save old rotors and stuff like that to help us with leverage, so this is a neat way to use this because it just, it takes no effort to push that hub out, and I've got the actual press bracket holding the knuckle piece, and I'm just going to use a socket and just push the actual hub right out of the bearing.
Like I said, it doesn't think much effort to get the spindle, up the hub, the actual knuckle, and me and the backing plate always gets bent, that's just the story. So here we have the spindle which we're replacing, because our kit has the option to get a new spindle with lug nuts. I recommend it for the small change that it is, I'd rather put a new hub into a new bearing with new lug nuts then try to heat this up and force it off. It is an option, but we sell both parts, so that's the right way I'm going to go.
So now with this lock ring out of here, on the inside we're gonna press the bearing out this way. Sometimes you're just gonna use what you have available, and here I have just some, the bearing has already pushed out of the knuckle, I just got to get down the final rest of the way. And so I'm just going to use some seal pushers, it's a little seal kit, and just push it right through, just take my Leaning Tower of Pisa out.
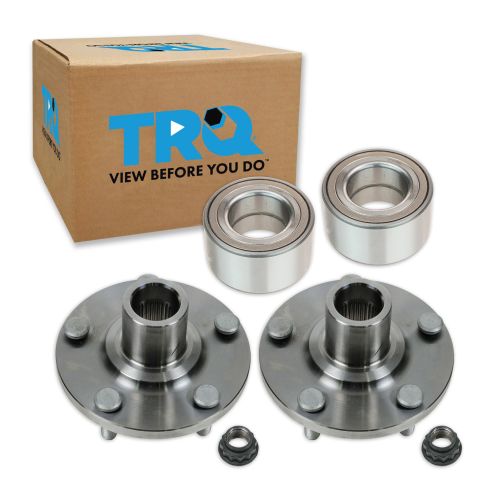
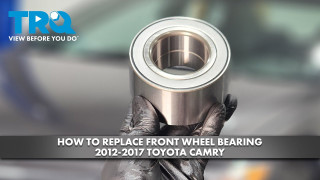
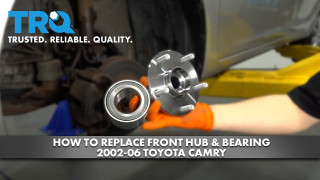
That is a sealed bearing that gets pressed into a knuckle. Here we have our new bearing from 1A Auto and the old bearing and hub that we just took out of our 2013 Camry. So is your sealed bearing, and here is the new one. See, they're the same diameter. You don't want to clank them together, just in case it's a magnetic bearing, because it has an ABS, there is a magnetic ring in there, and you don't want to zero it out by hitting metal on it. So that's a little tip it there for you.
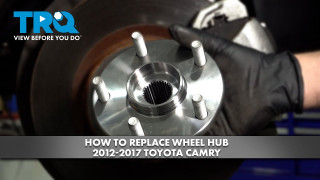
And here is the new hub. You can see the old race set got stuck on the hubs. Now, if you wanted to use that and not buy this separately, you'd have to put this in a vise, heat this up, and it when it gets hot in contracts, you can actually hit it and it pops right off. It's a little bit of, you can watch us do that on you YouTube, also on another Camry that we've done. But this kit comes with a new axle nut, which is a one-time use only, you're not supposed to reuse the old ones, so it's nice enough that they supply you with it.
And if you need this part or any other part for your car, click on the link below and head on over to 1AAuto.com.
So first thing I'm gonna do before I press my new bearing into this knuckle, I like to take a clean rag and I'm just gonna gently go around and make sure there's no burs and no no metal inhibiting the new bearing from the abortion, trust in and a smooth. Plus I'd like to clean some of the old grease out of there. I could just place it on a nice flat surface, I get my new bearing, please sit down in now.
I need a item that is gonna be the same diameter. I want to press on the outside, not on the center and not on this flat piece, that's the magnetic piece. So we're going to press on just the outside edge, so that's why we save old bearings. Just like that, take up the aluminum block, balance it out, sure it's centered. You'll know when to stop because it just basically bottoms out, but you can always stop and raise it up and make sure that you have the the lip is completely open for the lock ring.
All right, right about there. I can feel that it just seated, basically, a little bit more. Maybe we get bottled right out. Take that ring right out of the way. I bet you thought that was gonna freeze it, got ours pressing that in, didn't you?
Now you can clearly see the nice space for that lock ring is in there. That will tip it around, you can see that it is definitely seated nice all the way around in there. I'm gonna clean this up, have any grease, you know, old residue.
I like to say that I have a trick for these, but I don't, just a squeeze and hope, hope one side gets in, that's it, in the other, there you go. Okay, let's say that it fell right in, and sometimes they take, I like to take a punch, in this case I'll just use my little pry bar, make sure that that's seated all the way in. Yeah, I'm gonna go get a punch, so I want that to see it in a little bit more.
So now that the bearing's in and the lock clip is in, we can actually put the backing plate back on, and you'll see how it's got some, just give it a good tap with your hammer if it's raised up, and we'll straighten it out once it's all bolted in.
You can put the hub on, and then you can put your rotor on, put some lug nuts on, and make sure when you spin it, it doesn't hit in any spot. Tighten up all of them, make sure they're snug.
Okay, now it's ready to put the hub in. So there's many ways to do this. I usually like to hold this piece down flat, so you want to make sure that you, the center part of the bearing here, just the center piece right here, you want to make sure that's locked in. So I'll use a holder like that, just hold the center piece, and usually at that point I'll flip it over this way and press the hub down in. But unfortunately, I'm running out of options here of things that I have to do this with, so I'm going to try it this way.
Now it's gonna go in with ease. Make sure your backing plate's on, which it is, we're all set there. And now we've got something holding the center of the bearing in place, and I've got an old bearing casing holding the studs up against so that they don't get pushed out. It's up against the front of the hub, and it's just, it literally just slides right in. I have done this with a hammer and a socket.
I'm gonna raise it up, see we're at, I'm not gonna let it go all the way up, case I have to push it down some more. Perfect, that's it, you're all set.
That felt fabulous. Now we're gonna put this little tin shield back on, obviously lining up the hole for the ABS ring, and I'm just going to tap it down, work my way around and hope for the best. There we go.
Now we're gonna install our, that go with a new bearing, lining it up on the actual CV shaft spindle. Get the bolts right here, in handy. I know that when I took it out, but the nuts are in the back, the bolts went this way. I'm gonna put the top one in. There is no camber slot or cutout, so I know that when I want to do an alignment, I want this strut pushed in as far as I can. It's pretty much there, because there is no oval or nice round cutout, so that's, it's gonna be pretty close. I'll put the two nuts back on.
So now we're going to tighten the strut to the knuckle, the two bolts that mount it here. It's 22mm wrench and socket. I'm gonna use my half inch air gun. The torque specs is 214 foot-pounds, and frankly I don't think everybody wants to see me try to do that, so I'll use my judgment in the sense I'm not gonna refund the airgun. I know what the airgun can do for foot-pounds, so I just gave it, I know it's tight. The middle squeeze knuckles, good.
I'm gonna put the new lower ball joint in now. I think it's gonna be easier for me to fish it up into the knuckle and then put it into the lower control arm, so I want this spindle piece turned in as far as the kin, that way. So I've got it at this angle so that way I can hopefully work this in the backing plate. Probably won't hurt to bend it a little bit, we'll just have to bend it back. There we go, get that castle nut.
Now I'm gonna try to torque this down before I put the axle, because then I can use an actual socket. So the new nut on the ball joint is a 21mm, the old one was a 19. Now the torque specs for this is 91 foot-pounds.
So do I want to put the, leave the CV shaft in and tight, and like I would if I was just doing the ball joint? You could, but at the same time you're not going to get a 91 foot-pounds out of that. So it's just as easy to take the axle nut out, whether you're doing the wheel bearing or not, just take the axle out, slide it out. It helps you do the whole job probably a little easier, and you can actually, as a socket, take the old one out.
So I'm gonna be able to talk that now till 91 foot-pounds. So I'm gonna tighten this little ball joint castle nut, it's a 21mm socket, and I put my half-inch breaker bar on there, because the torque is 91 foot-pounds, which is really high. And I'm going to use a pry bar and put it right through where the axle would go through, it's not gonna do any damage to it, and that way I can get some good leverage on this and torque this right down.
Let's see if the cotter pin lines up, so it's pretty close, I lucked out on that one. Now I'll just put that into cotter pin through, grab my pull the top one over, cut off the excess, spin side around, and I'll get this side over here.
Now we're clear to put the axle back through the center of the bearing, bring up the spindles, and at the same time I'm going to line up the little ball joint to the control arm. Get a pry bar, or the pry bar, I can pull down on the control arm. We have the two new lock nuts, they've got the lock washers on, let's get a reverse, little grooves in them, then once it's torqued down, tightened, it doesn't back off, and then our one bolts that go through the top. One make sure you start everything by hand so you don't cross thread it.
So we're going to tighten the lower bolt, ball joint to control on, with the two nuts in the one bolt. The two nuts are at 18mm socket. When torquing down the ball joint to the control arm, the manufacturer gives you two choices of replacement nuts, and it's a wider nut or a thinner nut. The thinner Wildmutt is 55 foot-pounds, in the wider based knot is 68 foot-pounds. We have the wider base here, so I'm gonna go with 68. Put my 18mm socket on there and torque this to 68 foot-pounds. And then this one bolt is a 15mm socket.
Now we're gonna put the outer tie rod end onto the knuckle. I'm gonna put the stud right through the knuckle housing, let it seat all the way down on that cone, the Newcastle not on. I'm gonna torque that, it's a 17mm socket. Once I snug it up, I'm going to torque it to the specs, with just 36 foot-pounds. Let's see if they caught up in lines up. It does. Now I'll put the new cotter pin through.
So before we put our new axle nut on that came with the hub, apparently I hit it a little too hard, that's why you really should use a center punch, but sometimes you just use a hammer, and I just knurled over the end thread just a hair. So I want to show you how to take care of that.
I have a triangle file here, there's a three-sided file, and I'm gonna find that where it's flattened over. I'm gonna put it right in that groove and I'm just gonna file forward, and it just takes it enough off of it. So that's the new thread correct it.
So now that we corrected out threads in the beginning here, we can put the new nut on. I'm gonna use an air gun to get it down just before the hub, because I have to torque this to the manufacturer's specs with a torque wrench. You don't want to over tighten it with an air gun, because that's a Preston bearing, you'll actually compress the housing and the bearing will get wasted real fast. And you don't want to leave it too loose, because in the bearing has play and you'll end up defeating the whole point of it.
Now I'm gonna put the flex hose bracket with the ABS wire to it back on the strut tower. I'm gonna take our caliper angle down for a second, straight and that close out. Now this has nice little divots in it of where it's indicated, see the metal tab, how it's off center, has an angle. It's gonna go right in that spot right there and mount me like that.
Now I can take my flex hose and set it up just like that, take the bolt, we hang it back. Now I love my strut, 12mm socket, tighten that down.
Now we have the ABS wire with the sensor on it, there's that little plastic clip that I took out of the old one. So this plastic clip goes right into that pre-made slot, clips right in. Bring it around the back and now you can line it up in the actual hole in the knuckle for the ABS sensor. That fits right in there, make sure it's flush, and then put the mounting bolt in. This is a 10mm socket.
Before I put the new rotor on, I'm gonna spray the actual hub surface. Even though it's brand new and the road is new, I'm gonna put a little copper anti-seize on that to stop any corrosion from building up. I'm gonna put a couple of lug nuts on here to hold this flush against my hub, so when I put my caliper together and bracket on, I don't have to worry about it wobbling around.
So now I can mount my caliper bracket to knuckle. I've took a wire brush to all the bolts to get make sure there's no grease or less the dirt in there. Now these caliper bolts, bracket to knuckle, is a 17mm socket and the torque is 79 foot-pounds, so I'm going to snug them up and then I'll talk them down to 79 foot-pounds.
Now to install these I like to put them in at an angle, and then I just bring around and snap it right into place just like that. Now holding that from them, to take my caliper, slide it right over, nice, push in the sliders, get my mounting bolts. These are 14mm socket. Once you get them bottom out, we're going to talk them to the factory spec. 14mm socket, and the torque specs from caliper pin to bracket is 25 foot-pounds. I'm gonna get a wrench to hold that inner pin from spinning, that should be a 17mm, so 14 bolt head and 17 on the inside. Do the same to the top.
So in order to put enough torque on this, spin on that, I need to stop the wheel from turning, so I'm taking my longest pry bar and I'm putting it through the lug nuts. I'm gonna take my 12.30mm socket. Now that tells me that when I used my air gun earlier I didn't even come close to bottom, you know, which makes me happy because I didn't want to.
So Rob wrote to me, I did it. You jump, and torque specs, it's 217 foot-pounds. So before you torque the axle nut, you want to make sure your car is still in neutral, not in park, because in park you're actually putting strain on the axle, makes sense, and it goes into the gear section of the transmission. In 217 foot-pounds it could be too much and you could might actually do some gear damage to chipping here, so make sure it's in neutral, so that the pry bar takes the initial pull of the 217 foot-pounds.
Now take your lug nuts off so you can remount your tire. Last step before you put your wheel on, you're gonna take a punch and a hammer and push down on this, it's a little tin piece out here, and it stops it from backing off. Just wanted enough so it sits right in that groove and stops it from moving.
19mm socket. I'm gonna hand tighten all the lug nuts, then I'll lower it down and torque it just at the bottom, and I'm gonna go in a star pattern, and the wheel torque for this Camry is 76 foot-pounds.
Thanks for watching. Visit 1AAuto.com for quality auto parts shipped to your door, the place for DIY auto repair. And if you enjoyed this video, please click the subscribe button.











 WARNING: This product can expose you to chemicals including Lead and Lead Compounds, which are known to the State of California to cause cancer, and birth defects or other reproductive harm. For more information, go to www.P65Warnings.ca.gov.