
★★★★★
April 2, 2024
Everything was perfect and arrived on time, it was the perfect fit very satisfying with everything.

Replaces







About TRQ:
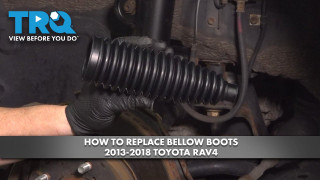
TRQ is a trusted brand dedicated to making every repair a success story by combining premium parts with easy installation. Each TRQ part is engineered by a team of automotive experts to meet or exceed OEM standards, delivering enhanced performance and maximum longevity. With rigorous in-house testing, the brand ensures superior fit and function across every product line. TRQ also provides customers with best-in-class, step-by-step installation videos—so you can complete repairs with confidence, whether you're a first-time DIYer or an industry professional.
Product Features
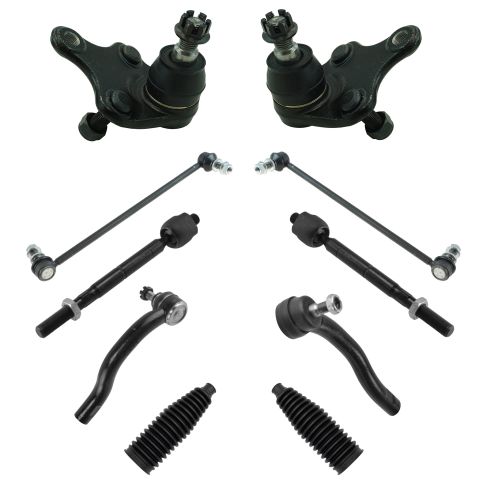
TRQ suspension kits are manufactured using premium raw materials and coatings for extended service life. Each TRQ suspension component is designed to be a direct, maintenance-free replacement to the stock unit. To extend the life of your steering and suspension components, TRQ recommends replacing components in pairs, sets, or kits. All products are fit and road-tested in our Massachusetts R&D facility to ensure we deliver on our promise of Trusted Reliable Quality.
Install Tip: When replacing steering components, have a professional alignment performed afterwards. This ensures proper tracking and even tire wear.
Our steering and suspension components are pre-greased and sealed for long life and do not require the extra maintenance typically required by greaseable versions.
Attention California Customers:
 WARNING: This product can expose you to chemicals including Lead and Lead Compounds, which are known to the State of California to cause cancer, and birth defects or other reproductive harm. For more information, go to www.P65Warnings.ca.gov.
This part fits 4 vehicles spanning 2006-2020.
| Year | Make | Model | Description |
|---|---|---|---|
| 2015-2017 | Lexus | NX200t | Lexus NX200t Front 10 Piece Steering & Suspension Kit TRQ PSA60108 |
| 2018-2020 | Lexus | NX300 | Lexus NX300 Front 10 Piece Steering & Suspension Kit TRQ PSA60108 |
| 2018-2019 | Lexus | NX300h | Lexus NX300h Front 10 Piece Steering & Suspension Kit TRQ PSA60108 |
| 2006-2018 | Toyota | Rav4 | Toyota Rav4 Front 10 Piece Steering & Suspension Kit TRQ PSA60108 |
| Brand Label | Part Number |
|---|---|
| DIY Solutions | SUS07974 |
| DIY Solutions | SUS07973 |
| DIY Solutions | SUS07972 |
| DIY Solutions | SUS00398 |
| MOOG Chassis Products | K750043 |
| MOOG Chassis Products | K500062 |
| Dorman - OE Solutions | 535-610 |
| MOOG Chassis Products | EV800328 |
| DIY Solutions | SUS06979 |
| MOOG Chassis Products | ES800054 |
| Mevotech | MS86729 |
| MOOG Chassis Products | ES800053 |
| MOOG Chassis Products | K500322 |
| Mevotech | MS86803 |
| Beck/Arnley | 101-5228 |
| Beck/Arnley | 101-6935 |
| Beck/Arnley | 101-5777 |
| Mevotech | MS86531 |
| Toyota | 488200R010 |
| Toyota | 4551042030 |
| Toyota | 4504709310 |
| Mevotech | MES800054 |
| Mevotech | MES800053 |
| EMPI | 88-1669-K |
| Centric Parts | 606.44032 |
| Import Direct Chassis | LS13020 |
| AutoZone | 18750043 |
| Precision Chassis | LS13020 |
| Raybestos Brakes | 5451646B |
| Dorman | 536-014 |
| MAS Industries | SL74135 |
| Toyota | 4882047030 |
| NAPA Proformer | 18750043 |
| TRW Steering and Suspension Parts | JTS1144 |
| Dorman | SL74485XL |
| Mevotech | MS86883 |
| Delphi | TC1920 |
| Driveworks | DW-K750043 |
| Carquest Premium Chassis Parts | 644-233795 |
| AutoZone | DG5451646 |
| ACDelco | 46G20646A |
| Duralast | 18750043 |
| NAPA Chassis Parts | 18750043 |
| Toyota | 4882047020 |
| Mcquay-Norris | SL748 |
| AutoZone | V18750043 |
| ACDelco | 45G20646 |
| NAPA Chassis Parts | 2651854 |
| NAPA Chassis Parts | 265-1854 |
| TRW Steering and Suspension Parts | 18750043 |
| Firestone | K750043 |
| MAS Industries | SL74485 |
| MasterPro Chassis | K750043 |
| Mevotech | MS86873 |
| Toyota | 4882042030 |
| Mevotech | TXMS86803 |
| Mevotech | MS60822 |
| Valucraft | V18750043 |
| Parts Master | K750043 |
| Raybestos Brakes | 545-1646 |
| Dorman | SL74135XL |
| Delphi | TC1994 |
| Toyota | 4333009631 |
| Toyota | 43330-49095 |
| Deeza | TY-F218 |
| Toyota | 48820-47030 |
| Toyota | 48820-0R010 |
| Import Direct | LS13020 |
| Mcquay-Norris | FA2320 |
| Toyota | 48820-42030 |
| Toyota | 43330-09A30 |
| Toyota | 43330-19245 |
| Dorman | SL74485 |
| Toyota | 4333049215 |
| TRW | JBJ1072 |
| MAS Industries | BJ74335 |
| Toyota | 43330-09630 |
| TRW | JTS1144 |
| Toyota | 48820-02070 |
| Toyota | 48820-47020 |
| Raybestos Chassis | 505-1384 |
| Toyota | 4333019275 |
| MAS Industries | BJ71015 |
| Import Direct | BJ14081 |
| Import Direct | BJ11010 |
| Mevotech | MS86505 |
| Datsun/Nissan | 4504649195 |
| Toyota | 4551042110 |
| Toyota | 4504749135 |
| Toyota | 4551042240 |
| Toyota | 4551042090 |
| ACDelco | 46A1088A |
| Raybestos Brakes | 4012088 |
| Beck/Arnley | 101-5486 |
| Delphi | TA2626 |
| Beck/Arnley | 101-5485 |
| ACDelco | 45A1088 |
| Toyota | 4504649195 |
| AutoZone | DG4012088 |
| TRW Steering and Suspension Parts | ES800053 |
| Mcquay-Norris | ES4297 |
| Centric Parts | 61344111 |
| Import Direct Chassis | ER06019 |
| NAPA Chassis Parts | ES800053 |
| Raybestos Brakes | 4012088B |
| TRW Steering and Suspension Parts | JTE7630 |
| Toyota | 4504609650 |
| NAPA Chassis Parts | 269-3425 |
| Carquest Premium Chassis Parts | 310-233787 |
| AutoZone | ES800053 |
| MAS Industries | TO74062 |
| Centric Parts | 612.44111 |
| Delphi | TA2627 |
| Dorman - Premium | SL74135XL |
| Dorman - OE Solutions | 536-014 |
| Dorman - Premium | TO74062XL |
| Dorman - OE Solutions | 534-820 |
| Dorman - Premium | SL74485XL |
| Toyota | 4333009720 |
| Dorman - OE Solutions | 543-690 |
| Beck/Arnley | 101-5838 |
| Dorman - Premium | TI74390XL |
| Delphi | TA3088 |
| Mevotech Supreme | MS86505 |
| Mevotech Supreme | MS60822 |
| Mevotech Supreme | MS86803 |
| Mevotech Supreme | MES800054 |
| Mevotech Supreme | TXMS86803 |
| Mevotech Supreme | MS86883 |
| Mevotech Supreme | MS86531 |
| Mevotech Supreme | MS86729 |
| Mevotech Supreme | MES800053 |
| Mevotech Supreme | MS86873 |
This item may be interchangeable with parts from other brands with the above part numbers. This information is provided only for reference and does not guarantee that the item you are purchasing is identical to parts with part numbers from the brands listed above. To confirm that this item fits your vehicle, use the above "Check Vehicle Fit" option.
Lifetime Warranty
This item is backed by our limited lifetime warranty. In the event that this item should fail due to manufacturing defects during intended use, we will replace the part free of charge. This warranty covers the cost of the part only.
FREE Shipping is standard on orders shipped to the lower 48 States (Contiguous United States). Standard shipping charges apply to Hawaii and Alaska.
Shipping is not available to a P.O. Box, APO/FPO/DPO addresses, US Territories, or Canada for this item.
Expedited is available on checkout to the United States, excluding Alaska, Hawaii.
Final shipping costs are available at checkout.
Created on:
Tools used
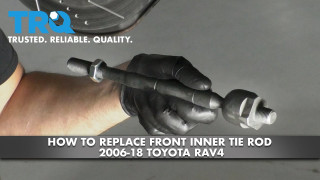
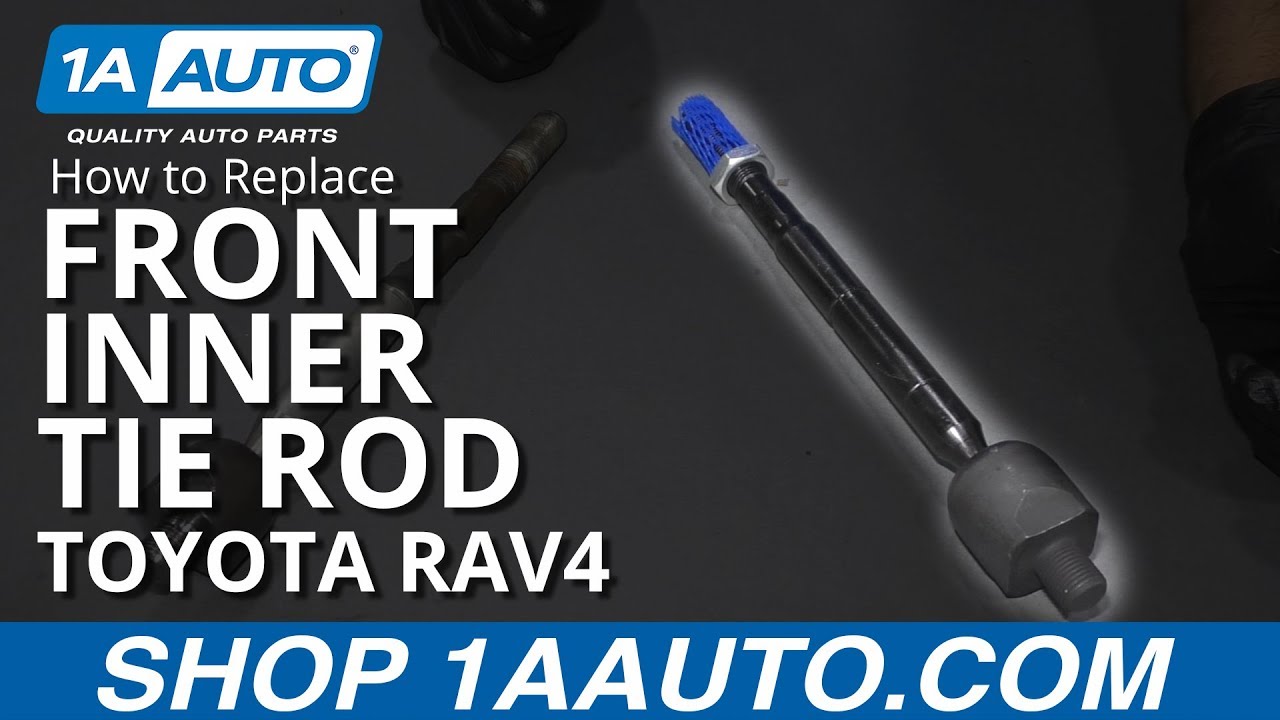
What's up guys? I'm Andy from 1A Auto. In this video I'm going to show you how to replace the inner tie rod end on his 2010 Toyota Rav4. If you need this part or other parts for your vehicle, click the link in the description and head over to 1aauto.com.
All right, I raised and supported the vehicle. I'm going to remove the wheel. I'm using a 21 millimeter socket and an air gun. If you don't have an air gun, you can use a breaker bar. Just crack the lug nuts free while the vehicle is still on the ground.
All right, now I want to take the tire off. This one is stuck on there pretty good, so I'm going to put one lug nut on so the tire doesn't go flying, and just hit it on the back side of the tire with a hammer. Break it free. Reason you leave the lug nut is so the tire doesn't go flying.
Take the lug nut off. Pull the tire off. First, I want to loosen up this jam nut. I'm going to use a 22 millimeter wrench. Loosen this up. Might have to put a pipe on this wrench.
Here we go. Loosen that up, and there's a cotter pin holding this castle nut on, or at least retaining the castle nut. I'll just take the cotter pin off. Just use some straight cutters. Sometimes you can't get in there. Sometimes you use a pick. Let's try to start it with a small pick and then sometimes using a cotter pin style pick can get that out.
Slide that cotter pin out. There we go. You don't ever want to reuse a cotter pin. You always want to replace it, so put a new one in. Take a 17 millimeter socket and a ratchet, loosen up this castle nut. It's a little bit rusty. I'm going to spray some rust penetrant on there. There we go, and loosen it up.
All right, before I take that nut all the way off, I am going to use a punch and a hammer and just hammer down on the stud part of the tie rod. You could use a fork or there's other type tools that you could use to press this out, but this will work.
The reason why you leave the nut on there is so that you don't mush from the end in case you had to replace it. If you don't have to replace, it doesn't matter. Take the nut off. You can slide the outer tie rod off there. Now we can take this off. I like to count the threads so that when you put the new one back in, the alignment is at least going to be kind of close. So one, two, three, four, five, six, 13, 14. 14. All right, then I'm just going to write the number somewhere, 14, just so I remember. You could write it anywhere you want.
I need to take this nut off of the inner tie rod, so I'm just going to soak this down with some rust penetrant. Let that soak a little bit. I'm going to use some locking pliers just so I can hold this from spinning. Take the 22 millimeter wrench and loosen this up.
Once I loosen it up a little bit, like it's easily to turn by hand so I can take that off. There you go. I can take the locking pliers off. Now this hose clamp or this clip, take this clip off. Just use some pliers. Slide that off. There's a clamp on the inside of this boot for the steering rack boot. Take a straight blade screwdriver, you kind of want to get in underneath the clamp. Now, if you can try to salvage this clamp, you might be able to reuse it. Generally you can't. Generally you have to replace the clamp.
There we go. And if you didn't break it too much, you can try it, but generally just replace this. Just grab the boot, give it a twist, pop off the end, and then just pull it out. I might need to release it right there. Just take a pick, get underneath here. I'm just going to use a hose pick or a coolant hose pick. Just try to slide this off just like that. Take the boot off.
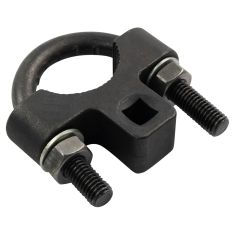
Now to take this tie rod end off, you're going to need a tie rod tool. You can try to get a wrench in there, but it's not that easy. Take this adapter, this is a 33.6 millimeter adapter. Slide that on there, take the tie rod tool, install this, and I'll just lock that on. That's good right there.
Now, before I loosen it up with the tool, I am just going to take some locking pliers. I just want to lock on the steering shaft itself because it's a good idea not to put too much tension on that pinion in the middle of the shaft, so we'll do that and then take a breaker bar, attach it to the tool. While you loosen this, hold the pliers or have a buddy hold the pliers and just loosen. Once it breaks free, generally they come apart really easily. Take those pliers off. Take this tool off.
I should be able to take this off pretty easily. There we go. Here's the old part. Here's the new inner tie rod from a 1aauto.com. As you can see, the length is the same. Part has the same thread on the end of it. It comes with a new nut, a new jam nut. Comes with this protective sleeve. You could take that off when you get the part. Get yours at 1aauto.com, and you'll be ready to rock and roll.
You're going to take this jam nut off. We'll set that aside. We'll reuse that later. On the top I'm just going to take a little bit of thread locker. Put that on. Just use medium strength thread locker, and slide this in position.
All right, I want to tighten this up. This, I'm going to use the same tie rod tool, but I'm going to use a different adapter. I'm going to use a one and one quarter to tighten this up. Put the tie rod tool on, lock it in place, and then I'm going to do the same with the locking pliers. Just hold the steering shaft with the locking pliers, and then I'm going to use a torque wrench on the tool as I hold the pliers and torque this to 44 foot pounds.
That's good. Take that off. Take the locking pliers off. Now we're going to be ready to put the boot back on. I did get a new clamp, and how this clamp works is I'm going to need a special pliers like this, and when you squeeze this, it's going to tighten the clamp right there and push it down. You need these special pliers to get these to tighten up.
They do have a couple other types of tools that will work on these, and if you do not have one of these clamps, worst case, you could use a wire tie and just get it as tight as you possibly can get it. That's just worst case, but it's best to get a new clamp. That's good. Good down there. Try and get the pliers in here.
Just like that, and tighten it up. That pinches it nice and tight. That's good. Now on the outside, I'll reuse this clamp. I'll just use some pliers. It's just a spring clamp. That's good. Now, there is a groove for that end of it to fit into the inner tie rod for the end of the bellow boot. That looks good. Take the jam nut, install the jam nut. Take the outer tie rod in, and I'm going to count how many turns I go. I want 14 total. One, two, three, 13, 14. All right, and take the nut off.
Let me just slide this in position. That's good right there. Take the nut, get that started. Now this tie rod, the new nut that comes with this happens to be a 19 millimeter nut, so I'll use a 19 millimeter socket and a ratchet. Tighten it up. Now, if the stud starts spinning, what you're going to have to do, and it looks like it's not spinning, so that's good. But if this stud does start spinning, now what you want to do is have a friend hold this, take some big pliers and just hold this tight, and that'll keep it tight up against the knuckle. Then you can tighten it up. That's good.
Snug that up, and then I'm going to torque it. I'm going to torque this to 36 foot pounds. I want to take the jam nut, tighten that up against the rod end. Now this jam nut is a different size. I'm going to use a 15/16 or you can use a 24 millimeter. Snug this up. You're supposed to tighten this jam nut up to 65 foot pounds. If you have the ability to do that with a torque wrench, you can do that. I'm just going to snug it up with a wrench.
Now, install the tire. Take the lug nuts, install the lug nuts. Now I load the vehicle down to the ground so that the tire is just touching the ground. I'm going to torque these with a 21 millimeter socket and a torque wrench to 76 foot pounds. I'm going to do this in a star pattern. The reason you do it in a star pattern is so that the wheel gets tightened down evenly.
Then I always like to go around again just to double check. Whenever you do a job like the one we did today, you're going to want to go to a local shop and have your alignment adjusted, because you don't want to end up with premature tire wear. Whenever you change components or even remove them and reinstall them, things change, and you want to make sure everything is lined up so you're good to go.
Thanks for watching. Visit 1aauto.com for quality auto parts shipped to your door, the place for DIY auto repair. If you enjoyed this video, please click the subscribe button.
Tools used
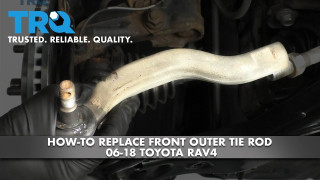
What's up guys? I'm Andy from 1A Auto. In this video, I'm going to show you how to replace the front outer tie rod ends on this 2010 Toyota Rav4. If you need this part or other parts for your vehicle, click the link in the description and head over to 1AAuto.com.
All right, I raised and supported the vehicle. I'm going to remove the wheel. I'm using a 21 millimeter socket and an air gun. If you don't have an air gun, you can use a breaker bar. Just crack the lug nuts free while the vehicle is still on the ground.
All right. Now I want to take the tire off. This one's stuck on there pretty good, so I'm going to put one lug nut on so the tire doesn't go flying and just hit it on the backside of the tire with a hammer. Break it free. The reason you leave the lug nut is so the tire doesn't go flying. Now take the lug nut off and pull the tire off.
First I want to loosen up this jam nut. I'm going to use a 22 millimeter wrench. Loosen this up. You might have to put a pipe on this wrench. There we go, just loosen that up. And there's a cotter pin on this over holding this castle nut on, or at least retaining the castle nut. So I'll just take the cotter pin off. Just use some straight cutters. Sometimes you can't get in there, sometimes you use a pick. Let's try to start it with a small pick and then sometimes using a cotter pin style pick can get that out. Slide that cotter pin out. There we go.
You don't ever want to reuse a cotter pin. You always want to replace it, so put a new one in. Take a 17 millimeter socket and a ratchet, loosen up this castle nut. It's a little bit rusty. I'm going to spray some rust penetrant on there. There we go, and loosen it up.
All right, before I take that nut all the way off, I am going to use a punch and a hammer, and just hammer down on the stud part of the tie rod. You could use a fork or there's other type of tools that you could use to press this out, but this will work. ... The reason why you leave the nut on there is so that you don't mush from the end in case you had to replace it. If you don't have to replace it, it doesn't matter. Take the nut off. You can slide the outer tie rod off there.
Now we can take this off. I like to count the threads so that when you put the new one back in, the alignment is at least going to be kind of close. So one, two three, four, five, six, 13, 14. 14. All right, then I'm just going to write the number somewhere, 14, just so I remember. You can write it anywhere you want.
Here's the old part. Here's The new outer tie rod from 1AAuto.com. It's the same shape as the old one, has the same ball stud, and it comes with a new nut. It actually comes with a locking nut with a nylon locker. Get yours at 1AAuto.com and you'll be ready to rock and roll.
Take the outer tie rod in, and I'm going to count how many turns I go. So I want 14 total and one, two, three, 13, 14. All right, and take the nut off. We'll just slide this in position, ... and that's good right there. Take the nut, get that started.
Now this tie rod, the new nut that comes with this happens to be in 19 millimeter nut, so I'll use a 19 millimeter socket and a ratchet. Tighten it up. Now if the studs start spinning, what you're going to have to do ... and it looks like it's not spinning, so that's good. But if the stud does start spinning, what you want to do is have a friend hold this, take some big pliers and just hold this tight. That'll keep it tight up against the knuckle and then you can tighten it up. That's good. Snug that up and then I'm going to torque it. I'm going to torque this to 36 foot pounds.
I want to take the jam nut, tighten that up against the tire rod end. Now this jam nut's a different size. I'm going to use a 15/16, or you can use a 24 millimeter, snug this up. So you're supposed to tighten this jam nut up to 65 foot pounds. If you have the ability to do that with a torque wrench, you can do that. I'm just going to snug it up with a wrench.
Now install the tire. Take the lug nuts, install the lug nuts. Now, I lowered the vehicle down to the ground so that the tire's just touching the ground. I'm going to torque these with a 21 millimeter socket and a torque wrench to 76 foot pounds, and I'm going to do this in a star pattern. The reason you do it in the star pattern is so that the wheel gets tightened down evenly. ... Then I always like to go around again just to double check.
Whenever you do a job like the one we did today, you're going to want to go to a local shop and have your alignment adjusted because you don't want to end up with premature tire wear whenever you change components or even remove them and reinstall them. Things change, and you want to make sure everything is lined up so you're good to go.
Thanks for watching. If you want the parts to do it yourself, check out 1AAuto.com, the place for DIY auto repair.
Everything was perfect and arrived on time, it was the perfect fit very satisfying with everything.
Excelente

PSA60108
