

★★★★★
February 13, 2024
Great prize
Great prize with quality parts.

Replaces







Part Details
Specifications
About TRQ:
TRQ is a trusted brand dedicated to making every repair a success story by combining premium parts with easy installation. Each TRQ part is engineered by a team of automotive experts to meet or exceed OEM standards, delivering enhanced performance and maximum longevity. With rigorous in-house testing, the brand ensures superior fit and function across every product line. TRQ also provides customers with best-in-class, step-by-step installation videos—so you can complete repairs with confidence, whether you're a first-time DIYer or an industry professional.
Product Features
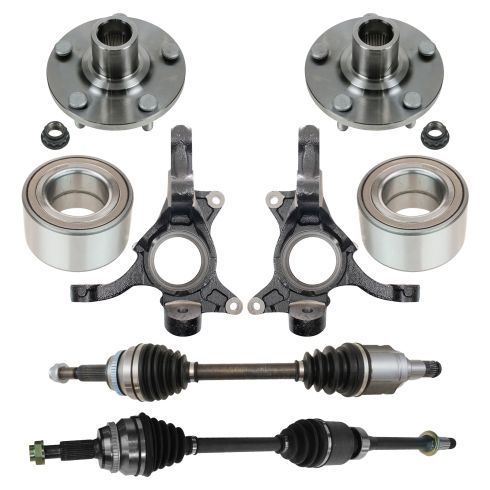
TRQ drivetrain kits are manufactured using premium raw materials to restore original performance. Each TRQ drivetrain component is designed to be a direct, maintenance-free replacement to the stock unit. To extend the service life of your drivetrain, TRQ recommends replacing wheel hubs, bearings, and constant velocity (CV) drive axles at the same time to ensure even wear of components and improved ride comfort. All products are fit and road-tested in our Massachusetts R&D facility to ensure we deliver on our promise of Trusted Reliable Quality.
Our steering and suspension components are pre-greased and sealed for long life and do not require the extra maintenance typically required by greaseable versions.
Attention California Customers:
 WARNING: This product can expose you to chemicals including Chromium (Hexavalent Compounds), which is known to the State of California to cause cancer, and birth defects or other reproductive harm. For more information, go to www.P65Warnings.ca.gov
This part fits 13 vehicles spanning 2007-2018.
| Year | Make | Model | Description |
|---|---|---|---|
| 2007-2011 | Lexus | ES350 | Lexus ES350 Front 8 Piece Drivetrain Kit TRQ PSA75001 |
| 2013-2015 | Toyota | Avalon | Toyota Avalon XLE Front 8 Piece Drivetrain Kit TRQ PSA75001 |
| 2013-2015 | Toyota | Avalon | Toyota Avalon XLE Premium Front 8 Piece Drivetrain Kit TRQ PSA75001 |
| 2016 | Toyota | Avalon | Toyota Avalon XLE To 10/31/15 Production Date Front 8 Piece Drivetrain Kit TRQ PSA75001 |
| 2016 | Toyota | Avalon | Toyota Avalon XLE Plus To 10/31/15 Production Date Front 8 Piece Drivetrain Kit TRQ PSA75001 |
| 2016 | Toyota | Avalon | Toyota Avalon XLE Premium To 10/31/15 Production Date Front 8 Piece Drivetrain Kit TRQ PSA75001 |
| 2017-2018 | Toyota | Avalon | Toyota Avalon XLE Front 8 Piece Drivetrain Kit TRQ PSA75001 |
| 2017-2018 | Toyota | Avalon | Toyota Avalon XLE Plus Front 8 Piece Drivetrain Kit TRQ PSA75001 |
| 2017-2018 | Toyota | Avalon | Toyota Avalon XLE Premium Front 8 Piece Drivetrain Kit TRQ PSA75001 |
| 2010-2011 | Toyota | Camry | Toyota Camry LE L4 2.5L Automatic Transmission US Built Models Front 8 Piece Drivetrain Kit TRQ PSA75001 |
| 2010-2011 | Toyota | Camry | Toyota Camry SE L4 2.5L Automatic Transmission US Built Models Front 8 Piece Drivetrain Kit TRQ PSA75001 |
| 2010-2011 | Toyota | Camry | Toyota Camry XLE L4 2.5L Automatic Transmission US Built Models Front 8 Piece Drivetrain Kit TRQ PSA75001 |
| 2012-2017 | Toyota | Camry | Toyota Camry XLE V6 3.5L Front 8 Piece Drivetrain Kit TRQ PSA75001 |
| Brand Label | Part Number |
|---|---|
| Toyota | 434100W150 |
| Lexus | 434200W210 |
| DIY Solutions | HUB00156 |
| Timken | 510063 |
| Lexus | 434100W180 |
| Toyota | 4342006510 |
| DIY Solutions | HUB00035 |
| CARDONE New | 66-5279 |
| Toyota | 4342006770 |
| GSP | NCV69527 |
| Toyota | 4341006450 |
| Toyota | 4341006560 |
| Toyota | 4341006690 |
| Toyota | 434100W180 |
| Toyota | 434100W110 |
| Toyota | 4341006200 |
| Lexus | 4341033280 |
| Toyota | 4321158010 |
| Toyota | 4321258010 |
| GSP | NCV69453 |
| Toyota | 4342033290 |
| Toyota | 4341006480 |
| Toyota | 434200W210 |
| Toyota | 43211AA010 |
| Toyota | 43212AA010 |
| CARDONE New | 66-5265 |
| Toyota | 434100W100 |
| Toyota | 434100W140 |
| Lexus | 434100E020 |
| Dorman - OE Solutions | 698-082 |
| Dorman - OE Solutions | 698-083 |
| CARDONE | 665265 |
| CARDONE | 665279 |
| Toyota | 4342006B00 |
| Toyota | 43420-06B00 |
| Toyota | 4341006A50 |
| Ford | BT4Z1104A |
| SKF | BR930876K |
| BCA | WE61926 |
| Toyota | 4342006830 |
| Lexus | 4342006B00 |
| Toyota | 4342006A90 |
| Lexus | 4342006860 |
| Toyota | 43502-06080 |
| Toyota | 90080-36193 |
| Hollander | 447-50699L |
| Hollander | 538-58862 |
| Hollander | 447-50386L |
| TrakMotive | TO8246 |
| GSP | NCV69531 |
| ODM | TO-8-8670A |
| ODM | TO-8-8649A |
| OEM Part Number | 4341006A50 |
| GSP | 690042 |
| Dorman - OE Solutions | 930-400 |
| National | 510063 |
This item may be interchangeable with parts from other brands with the above part numbers. This information is provided only for reference and does not guarantee that the item you are purchasing is identical to parts with part numbers from the brands listed above. To confirm that this item fits your vehicle, use the above "Check Vehicle Fit" option.
Lifetime Warranty
This item is backed by our limited lifetime warranty. In the event that this item should fail due to manufacturing defects during intended use, we will replace the part free of charge. This warranty covers the cost of the part only.
FREE Shipping is standard on orders shipped to the lower 48 States (Contiguous United States). Standard shipping charges apply to Hawaii and Alaska.
Shipping is not available to a P.O. Box, APO/FPO/DPO addresses, US Territories, or Canada for this item.
Expedited is available on checkout to the United States, excluding Alaska, Hawaii.
Final shipping costs are available at checkout.
Created on:
Tools used
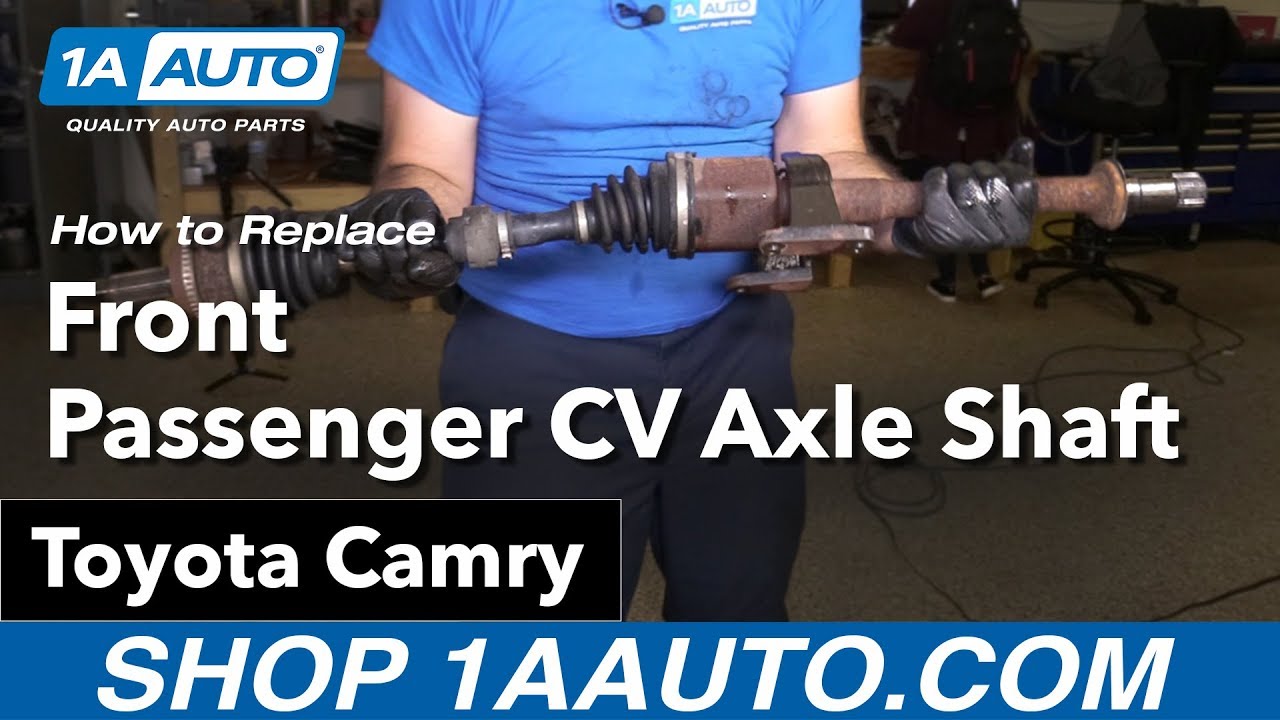
Hi, I'm Mike from 1A Auto. We've been selling auto parts for over 30 years.
With the wheel off and the vehicle on jack stands and supported, need to punch out the part where the axle nut has been staked into the axle. This way the axle nut can be removed. There's no cotter pin. It's actually, once it's installed, it's been peened in, or staked. So I need to take another punch and work it underneath.
All right, let's spray some rust penetrant on the end of the axle. It needs a 30 millimeter 12-point deep socket to remove this axle nut. You're going to want to have an assistant step on the brake and then use a really long breaker bar to break this free. I broke it free with the breaker bar. I'm going to use a ratchet to bring the rest of the way off. I'll just leave it threaded on there for now.
Disconnect the sway bar link from the strut. Then you can lay the sway bar link over to the side. Disconnect the tie rod end to the ball joint and pull it off the knuckle. That way I can turn the knuckle freely, push the axle out of the back of the knuckle, and the axle out in this direction and then work on freeing it from the transmission and the bearing mount that's here on the side of the engine. Once those are released, you should be able to pull the axle straight out of the engine compartment.
Spray some rust penetrant on this upper sway bar mount. Use a wire brush to clean off some of the rusty bits. These can be difficult to take off. They get rusty and then the ball joint spins. It does have a hex spot here to put in a six millimeter hex drive. A lot of times that strips almost instantly as soon as you try to break it free, and you end up having to put vise grips behind to grab onto the ball joint because there's no point here for a wrench. We'll do our best to get this one off without having to cut it off.
This is 17 millimeter nut. Break it free first. See it's turning. It's turning the whole ball joint with it. It's really tight. Try and do clean out any rust and dirt that's in this hex drive, so I can get the hex drive to sit as far possible inside here so it doesn't strip. Use some brake parts cleaner. I've sprayed some oil in there, and I've been working the Hicks drive-in to try to clean it out. I can see it's going in a little deeper, try to get to sit as best I can. Think that's as far as it will go. Spray some more rust penetrant on there.
I'm going to try to counter hold this with the hex drive while I free it with the 17 millimeter box wrench. We'll see how this goes. Sometimes you have to brace that against like the strut. That needs just have so much See, it's moving. That's good. It's really tight though, so I'm going to I'm just going to put that there. I'm going to spray some more rust penetrant. These are typically self-locking nuts so they're a little bit They're not perfectly round. They're kind of oblong. That can make removing them difficult. Also, the rust gets gummed up in the threads. I'm trying to spin this on and off to try to work the rust penetrant into the threads.
As I kind of expected, working these back and forth, this hex drive, they basically always strip. It's nearly impossible to remove them without these stripping, no matter what you do. The next step I'm going to get some vise grips and try to hold the ball joint back here and use a 17 millimeter socket and ratchet and continue to remove this nut. Going to try to slide these locking pliers behind the ball joint on the sway bar link, got a 17 millimeter deep socket on this longer ratchet and try to remove these.
It feels like it's turning. One thing to mention: if you're going to have to remove sway bar links for any reason or think you're going to have to remove them for any reason, you should have new ones on hand. They're almost a one-time use part. But we carry them at 1aauto.com. If you're as lucky as us, you'll have to resort to power tools or a hacksaw to cut these sway bar links free. I'll do my best to avoid the strut. I don't want to damage that. I just want to kind of cut on the going to try to find the narrowest part of the ball joint in the sway bar link. I think I'm on there.
I need to separate the outer tie rod end with the ball joint from the knuckle. There's a cotter pin in the castle nut. I'm going to spray some rust penetrant in here. Take some needle-nose pliers and bend the cotter pin over so it's straight. You can use side cutting pliers to get a better grip on it. Pry it out. Try not to squeeze too hard. You don't want to cut the cotter pin if you don't have to. Easier to remove it in one piece. There we go. I'm going to use a 17 millimeter box wrench and break the castle nut free. It doesn't want to budge. Take a dead blow mallet, tap the end of the wrench. I'm just going to put that nut just on the end. Can hit right here in the knuckle with a metal hammer to try to free this ball joint from here.
You do run the risk of cracking this knuckle and damaging it. It's preferred to use a ball joint separator tool. I'm just going to slide that in, thread it down. Use the appropriate size wrench for the tool and keep threading it. This will separate the ball joint by pressing it out. They have a taper, and basically it's press fit. When you tighten in the nut, it presses into the knuckle. That's what holds it in place. It needs to be pressed out. That one is free. Remove the nut. Just work that out. Might have to move that a little bit. Just place that aside. This way I've got more room to move the knuckle to get the axle up.
I want to spray some rust penetrant into the splines here to help this slide out. It needs a plastic dead blow hammer to free it from the knuckle/the axle. Now it's moving nice and free. I can take the axle nut off. Now that I know that this axle will move free from inside the hub, I'm just going to put the axle nut back on for now, just a couple of threads to keep it from falling out potentially, because we need to go underneath and loosen these ball joint, the two nuts and the bolts, and pull the knuckle and strut assembly away from this lower arm and help us get the CV axle out.
We can separate the ball joint from the lower control arm by removing these nuts and this bolt here. You don't have to mess with the ball joint that's in the knuckle. Spray a little bit of rust penetrant on these. Just using the rag so it doesn't drip everywhere. This one has threads on the top side. These are 17 millimeter, so I'm using a 17 millimeter socket, a breaker bar and extension. Put these bolts aside so I can reuse them. I'm going to grab the lower control arm and I'll push up on the suspension arm a little bit, get them to separate. Might need to use a pry bar. That's why I put the nut on the axle shaft so it didn't slide completely out on me. Let's take the nut off of the axle, pull the axle out of the hub, and place that aside.
Now we're under the car. There is a axle bearing carrier that is both of the back of the engine block that our passenger side CV axle is going through. This is a bearing inside here, and then it goes out and into the transmission. I need to spray some rust penetrant in here and remove this big locking ring and then remove this locking bolt, and this should slide out of this carrier and come out of the transmission. We'll have a drain pan ready to catch any fluid that comes out of here. But that should do it. Get some rust penetrant up in here. You can either use a large flat bladed screwdriver. I'm using a big pry bar to kind of push it free.
Use some slip jaw pliers, kind of squeeze these together. This upper part of the snap ring is kind of rusted and seized into the groove. Take a ball-peen hammer and try to tap it free. Back to the slip jaw pliers, kind of basically free it from the groove that it's in. If this snap ring comes out without a problem
Tools used

PSA75001
Great prize with quality parts.
The wheel bearings included in this kit are not prepressed and will need to be pressed using a specialty tool.
Yes, this part will fit your vehicle.
