
★★★★★
August 19, 2023
5/5 stars
Easy installation drives amazing!!

Replaces










About TRQ:
TRQ is a trusted brand dedicated to making every repair a success story by combining premium parts with easy installation. Each TRQ part is engineered by a team of automotive experts to meet or exceed OEM standards, delivering enhanced performance and maximum longevity. With rigorous in-house testing, the brand ensures superior fit and function across every product line. TRQ also provides customers with best-in-class, step-by-step installation videos—so you can complete repairs with confidence, whether you're a first-time DIYer or an industry professional.
Product Features
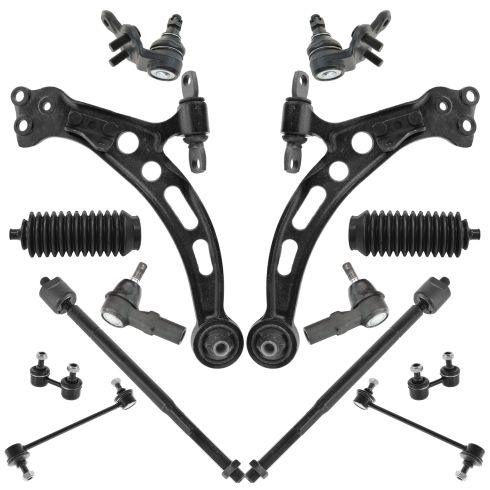
TRQ suspension kits are manufactured using premium raw materials and coatings for extended service life. Each TRQ suspension component is designed to be a direct, maintenance-free replacement to the stock unit. To extend the life of your steering and suspension components, TRQ recommends replacing components in pairs, sets, or kits. All products are fit and road-tested in our Massachusetts R&D facility to ensure we deliver on our promise of Trusted Reliable Quality.
Install Tip: When replacing steering components, have a professional alignment performed afterwards. This ensures proper tracking and even tire wear.
Our steering and suspension components are pre-greased and sealed for long life and do not require the extra maintenance typically required by greaseable versions.
Attention California Customers:
 WARNING: This product can expose you to chemicals including Chromium (Hexavalent Compounds), which is known to the State of California to cause cancer, and birth defects or other reproductive harm. For more information, go to www.P65Warnings.ca.gov
This part fits 3 vehicles spanning 1992-1996.
| Year | Make | Model | Description |
|---|---|---|---|
| 1992-1996 | Lexus | ES300 | Lexus ES300 Front & Rear 14 Piece Steering & Suspension Kit TRQ PSA59050 |
| 1995-1996 | Toyota | Avalon | Toyota Avalon Front & Rear 14 Piece Steering & Suspension Kit TRQ PSA59050 |
| 1992-1996 | Toyota | Camry | Toyota Camry Front & Rear 14 Piece Steering & Suspension Kit TRQ PSA59050 |
| Brand Label | Part Number |
|---|---|
| ACDelco | 45D3381 |
| Dorman | 520-404 |
| ACDelco | 45D3382 |
| ACDelco | 45D3383 |
| Delphi | TC1842 |
| ACDelco | CA30325 |
| Dorman | 520-403 |
| Delphi | TC1843 |
| NAPA Premium | 2605619 |
| Toyota | 4806833020 |
| NAPA | 260-5619 |
| MOOG Chassis Products | RK640192 |
| MOOG Chassis Products | ES3306 |
| Mevotech | CMS9652 |
| MOOG Chassis Products | CK640191 |
| Toyota | 4806906010 |
| Falcon Steering Systems | FCA216 |
| MOOG Chassis Products | K640191 |
| MOOG Chassis Products | RK620051 |
| MAS Industries | CA30324 |
| Dorman - OE Solutions | 520-406 |
| MAS Industries | CA30325 |
| MOOG Chassis Products | K90313 |
| Toyota | 4806833030 |
| Beck/Arnley | 103-2695 |
| Mevotech | MS9652 |
| Toyota | 48068-33031 |
| Toyota | 4806806040 |
| Mevotech | CMS9655 |
| Mevotech | GS9652 |
| Mcquay-Norris | FA4514 |
| Mcquay-Norris | FA3221 |
| Toyota | 4806933010 |
| Toyota | 4806806010 |
| Mcquay-Norris | FA4513 |
| MOOG Chassis Products | K90124 |
| Precision Driveline | 5CB86023 |
| Mevotech | RMS9652 |
| Mevotech | MS9654 |
| MOOG Chassis Products | RK620052 |
| MOOG Chassis Products | RK640191 |
| Toyota | 4806833010 |
| NAPA | 260-5969 |
| Dorman - OE Solutions | 520-405 |
| MOOG Chassis Products | EV301 |
| MOOG Chassis Products | K640192 |
| MAS Industries | CA30325PR |
| Toyota | 48069-33031 |
| Centric Parts | 623.44822 |
| Mevotech | MS9653 |
| Toyota | 4806906040 |
| NAPA Premium | 2605969 |
| Mcquay-Norris | FA4515 |
| Precision Driveline | 5CB86024 |
| MOOG Chassis Products | K9499 |
| Toyota | 4806933020 |
| Toyota | 4806848010 |
| MOOG Chassis Products | CK640192 |
| Mcquay-Norris | FA3222 |
| NAPA | 260-5618 |
| Precision Driveline | CB86023 |
| Mevotech | MS9655 |
| MOOG Chassis Products | K9877 |
| Precision Driveline | CB86024 |
| NAPA | 260-5617 |
| NAPA Premium | 2605617 |
| Toyota | 4806948010 |
| Centric Parts | 623.44821 |
| Raybestos Chassis | 507-1571 |
| Mevotech | CMS9654 |
| MAS Industries | CA30324PR |
| Mevotech | GS9653 |
| Mevotech | RMS9653 |
| Raybestos Chassis | 507-1381 |
| Ingalls Engineering | CAK640192 |
| Mevotech | CMS9653 |
| Toyota | 4806933030 |
| Falcon Steering Systems | FCA215 |
| Ingalls Engineering | CAK640191 |
| DIY Solutions | SUS00159 |
| DIY Solutions | SUS07382 |
| DIY Solutions | SUS06644 |
| DIY Solutions | SUS07402 |
| DIY Solutions | SUS05398 |
| DIY Solutions | SUS06643 |
| DIY Solutions | SUS05397 |
| General Motors | 88910838 |
| MAS Industries | CA64033PR |
| Toyota | 4806833031 |
| Delphi | TC1916 |
| Ingalls Engineering | CAK620052 |
| Mevotech | GS9654 |
| MOOG Chassis Products | CK620051 |
| Dorman - OE Solutions | 520-403 |
| Mevotech | RMS9654 |
| Mevotech | RMS9655 |
| Dorman - OE Solutions | 520-404 |
| MAS Industries | CA64033 |
| MOOG Chassis Products | CK620052 |
| SYD | 1525006 |
| MOOG Chassis Products | K620052 |
| MAS Industries | CA64034 |
| Mevotech | GS9655 |
| MOOG Chassis Products | K620051 |
| Toyota | 4806933031 |
| Precision Driveline | CB86025 |
| Precision Driveline | 5CB86026 |
| MAS Industries | CA64034PR |
| Ingalls Engineering | CAK620051 |
| NAPA Premium | 2605618 |
| SYD | 1525005 |
| Centric Parts | 623.44801 |
| Delphi | TC1915 |
| Precision Driveline | CB86026 |
| Raybestos Chassis | 507-1382 |
| Centric Parts | 623.448 |
| Precision Driveline | 5CB86025 |
| Falcon Automotive | CA215 |
| Falcon Automotive | CA216 |
| Mevotech | MK90313 |
| Mevotech | MES3306 |
| Mevotech | MEV301 |
| Mevotech | MK90124 |
| Mevotech | MK9499 |
| Mevotech | CMK9877 |
| Mevotech | MK9877 |
| Toyota | 4333039285 |
| Toyota | 4333039445 |
| General Motors | 94857926 |
| Lexus | 4504629355 |
| Lexus | 4550339135 |
| Lexus | 4550339055 |
| Toyota | 4504609700 |
| Toyota | 4504609020 |
| Lexus | 4504609020 |
| Toyota | 4550339135 |
| Toyota | 4550309030 |
| Toyota | 4550309040 |
| Toyota | 4504629355 |
| Toyota | 4883033010 |
| Lexus | 4333039285 |
| Toyota | 4550339055 |
| Toyota | 4333009050 |
| Toyota | 4883007010 |
| Lexus | 4504629255 |
| Toyota | 4504629255 |
| Toyota | 4333039435 |
| Toyota | 4883006020 |
| Lexus | 4550329355 |
| Toyota | 4882033010 |
| Toyota | 4333009051 |
| Toyota | 4550329355 |
| Carquest | CA230 |
| Carquest | CA227 |
| Carquest | CA229 |
| Carquest | CA228 |
| MOOG Chassis Products | ES3306P |
| Mevotech Supreme | CMS9655 |
| Mevotech Supreme | CMS9654 |
| EMPI | 88-1534-K |
| Dorman - Premium | CA30324PR |
| Dorman - Premium | CA30325PR |
| Dorman - Premium | CA64034PR |
| Dorman - Premium | CA64033PR |
| Hollander | 512-58289R |
| Hollander | 512-58385AR |
| Hollander | 512-58385AL |
| Hollander | 512-58289L |
| Delphi | TA2078 |
| Mevotech Supreme | MES3306 |
| Beck/Arnley | 101-4291 |
| Mevotech Supreme | GS9654 |
| Mevotech Supreme | RMS9653 |
| Mevotech Supreme | GS9653 |
| Mevotech Supreme | MK90313 |
| Mevotech Supreme | RMS9652 |
| Mevotech Supreme | MS9652 |
| Mevotech Supreme | CMS9652 |
| Mevotech Supreme | MK9499 |
| Mevotech Supreme | CMK9877 |
| Mevotech Supreme | GS9652 |
| Mevotech Supreme | CMS9653 |
| Mevotech Supreme | MS9655 |
| Mevotech Supreme | RMS9654 |
| Mevotech Supreme | MK90124 |
| Mevotech Supreme | MS9654 |
| Mevotech Supreme | MEV301 |
| Mevotech Supreme | MK9877 |
| Mevotech Supreme | RMS9655 |
| Mevotech Supreme | MS9653 |
| Mevotech Supreme | GS9655 |
| Toyota | 48069-33010 |
| Toyota | 48068-33010 |
This item may be interchangeable with parts from other brands with the above part numbers. This information is provided only for reference and does not guarantee that the item you are purchasing is identical to parts with part numbers from the brands listed above. To confirm that this item fits your vehicle, use the above "Check Vehicle Fit" option.
Lifetime Warranty
This item is backed by our limited lifetime warranty. In the event that this item should fail due to manufacturing defects during intended use, we will replace the part free of charge. This warranty covers the cost of the part only.
FREE Shipping is standard on orders shipped to the lower 48 States (Contiguous United States). Standard shipping charges apply to Hawaii and Alaska.
Shipping is not available to a P.O. Box, APO/FPO/DPO addresses, US Territories, or Canada for this item.
Expedited is available on checkout to the United States, excluding Alaska, Hawaii.
Final shipping costs are available at checkout.
Created on:
Tools used
Brought to you by 1AAuto.com, your source for quality replacement parts and the best service on the Internet.
Hi, I'm Mike from 1A Auto. I hope this how-to video helps you out, and next time you need parts for your vehicle, think of 1AAuto.com. Thanks.
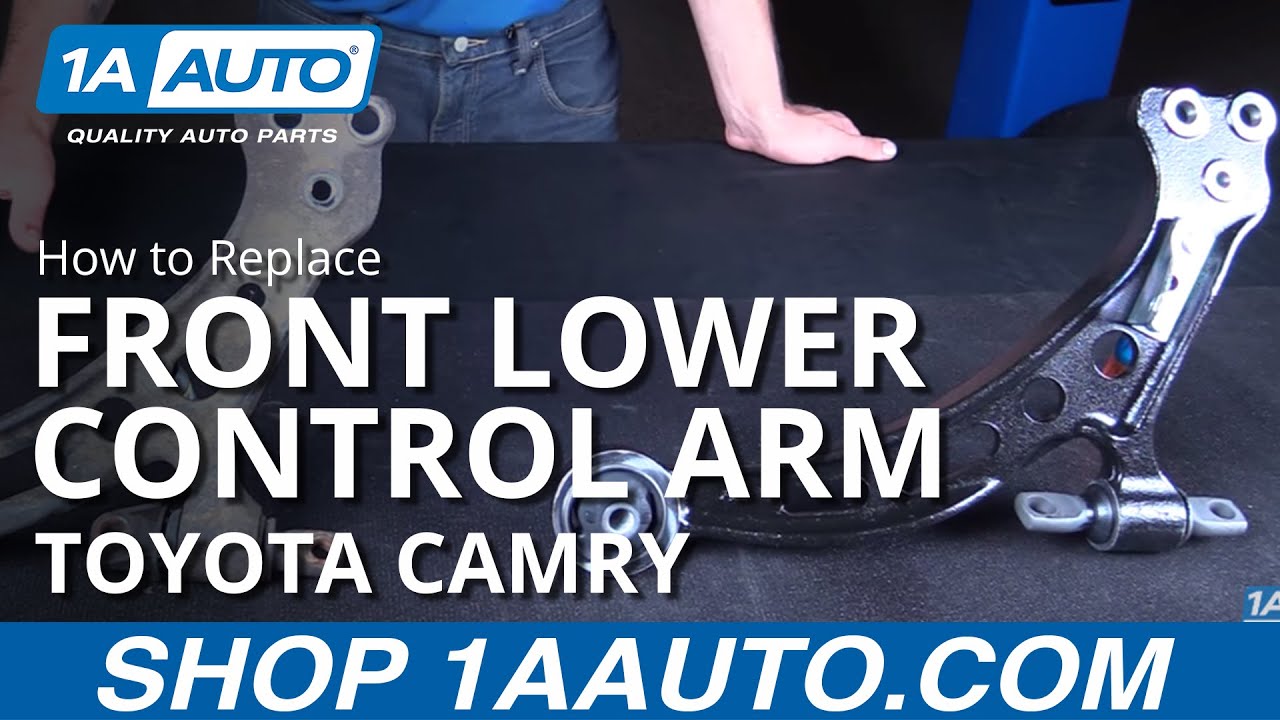
In this video, we're going to show you how to replace the front lower control arm in this Toyota Camry. This one is a 1998, but the procedure is pretty much the same for 1992 to 2001. You'll need a new front lower control arm from 1AAuto.com, 12 to 22 millimeter sockets with a ratchet and extension, a torque wrench, breaker bar, pry bar and jack and jack stands.
Break all your lug nuts loose while the vehicle's still on the ground. You're going to need a 21mm socket and a breaker bar. Install your jack under the vehicle, line it up with the pinch weld, jack the vehicle up high enough that you can get a stand underneath. Making sure you have enough clearance to remove your tire, or whatever you have to do under the vehicle. Install your jack stand onto this unibody frame rail under the vehicle. If you need to work on the rear of the vehicle, put your jack stand underneath and just ahead of the lower control arm here, right by the tow point. Once the weight is on your stands, give the vehicle a little shake, and make sure that they're on there secure. Repeat these steps on the opposite side. Make sure that you bring the vehicle up so that when it sits on the other set of jack stands, the vehicle will be level. You can now lower your vehicle onto the stands on this side.
With the vehicle raised and supported, remove your lug nuts the rest of the way. If you need a little more room to work, you can pull the hubcap off. Remove your wheel from the hub. We've put our vehicle on a lift to make it easier to film for you, but this job can be easily done with a jack and jack stands.
Remove the three 17 millimeters holding the lower ball joint bracket in: two nuts and bolt. We use a 17 millimeter socket and ratchet. Using a pry bar, I'm going to go in between the ball joint bracket and the control arm, pry down, and release the ball joint bracket from the lower control arm.
Behind the steering knuckle on the sub frame, we remove these two bolts holding the front portion of the lower control arm in place. Use a 19 millimeter socket and breaker bar to start them and finish removing them with a ratchet. Remove the bolt for the rear lower control arm bushing with a 19 millimeter socket and a breaker bar. After removing the bolt, use a long pry bar to pry the bushing out of the sub frame. You may have to move this a few different ways, and possibly pry up on the sway bar to release it from the vehicle.
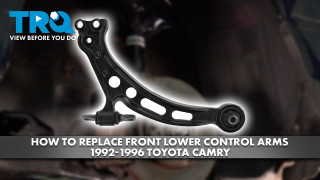
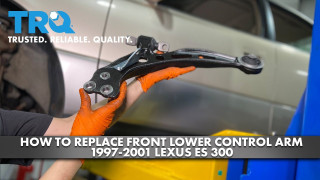
You can see our old part and our new part are exactly the same. Our new part comes with new bushings in both the rear and the front. We have the same three-bolt pattern on both sides to reinstall our ball joint into the control arm. They're both the same size and shape. This provision on our new control arm is for a sway bar that's not applicable to our Camry. It may apply to three liter Camrys or perhaps Solaras and other models. You can simply remove that with two, 14 millimeter nuts on the back, we'll show you how to do that a little bit later. Some common problems with these are they get damaged during accidents. They can be bent or misshapen from hitting heavy potholes or bad roadwork. The bushings – as you can see ours is over here – begin to slide out of the actual control arm as well. You can see it's getting a little torn up and separated in the front here too. That can cause a control arm to not track straight. It will actually push back toward the vehicle when you're driving forward. It can cause shaking, clunking, all kinds of noise, tire wear, alignment issues, you name it. If your old control arm has rusted, bent or tweaked in some way, or your bushings are loose and causing vibrations, noise and other problems, this new part from 1A Auto is going to go in, direct fit, just like your original equipment and fix you up right.
Install the rear bushing of the control arm into the sub frame, line it up, and start your bolt. Swing the control arm into position. Use a pry bar, if you have to, to line it up. Start the bolts. The longer of the two goes in the rear hole, and the shorter in the front. With all your other bolts started, pry down on the control arm, push the ball joint into place, start your 17 millimeter bolts and nuts.
Start the 17 millimeter nuts on the bottom until the centering sleeve is gone into the new control arm. Once the centering sleeves are in place, start the bolt, finish tightening down your ball joint bracket. Torque the hardware to 94 foot-pounds. Finish tightening the two, 19 millimeter bolts on the front bushing of the lower control arm. Torque all the 19 millimeter bolts to 152 foot-pounds. Finish tightening down the rear bushing bolt. Torque it to 152 foot-pounds.
Reinstall your wheel and tire. Start your lug nuts. Check that they're all seated. Jack up on your pinch weld. Be sure that where you jack isn't going to interfere with your ability to remove the jack stands. Bring the vehicle up until it's off the stands. Remove your stands from under the vehicle. With the stands clear, lower the vehicle. Move to the other side, and repeat these steps. If you've removed the tire, only lower the vehicle until the wheel touches the ground. With partial weight of the vehicle on the ground, torque your lug nuts to 76ftlb in a cross pattern. Then you can remove your jack the rest of the way. To reinstall your hubcap, align this notch with the valve stem on the wheel. Snap it back into place.
Thanks for tuning in. We hope this video helps you out. Brought to you by www.1AAuto.com, your source for quality replacement parts and the best service on the Internet. Please feel free to call us toll-free, 888-844-3393. We're the company that's here for you on the Internet and in person.
Tools used
Brought to you by 1AAuto.com, your source for quality replacement parts and the best service on the Internet.
Hi, I'm Mike from 1A Auto. I hope this how-to video helps you out, and next time you need parts for your vehicle, think of 1AAuto.com. Thanks.
In this video, we're going to be working on our 1998 Toyota Camry. We're going to be showing you how to remove and reinstall the rear sway bar links. These are small ball and socket joints, very similar to your ball joint. When these go bad, they can get up and down play in them that they're not designed to have, which can create a clicking or clunking sound going over big bumps, or as there's a difference in weight transfer from the left and right sides of the vehicle. This can also cause some sloppiness when cornering. That little bit of play will allow these to travel in and out before the sway bar starts to twist up and control the body roll of the vehicle in a corner. If you're having an issue with handling or some strange clicking and clunking sounds under the vehicle, this may be your solution.
If you like this video, please click "subscribe." We have a ton more info on this car, as well as many other makes and models. If you want these sway bar links for your vehicle, follow the link in the description over to 1AAuto.com. Here are the items you'll need for this repair.
Grab onto the hub cap and remove it from the wheel. We're going to use a 21 mm socket and breaker bar to remove all five lug nuts. We'll crack them loose now, raise and support the vehicle, and then finish removing the lugs. We've put our vehicle on a lift to make it easier to film for you, but this job can be easily done with a jack and jack stands. Remove the wheel and tire.
Place a pair of locking pliers around the back side of the sway bar. Use a 14 millimeter socket and ratchet to remove the nut on the other side. Remove the sway bar link and the locking pliers. Lock a pair of vise grips the same way, onto the back of the joint at the bottom. Take the nut off with the 14 millimeter socket and ratchet. Before starting this, we soaked our hardware in penetrating oil to make removal more easy. Remove the nut and the sway bar link. If you've got your vise grips on there tight, you can use the end of the ratchet to spread them open and get them off of there.
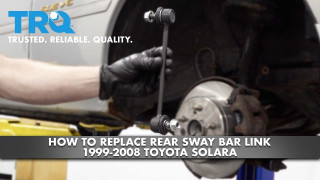
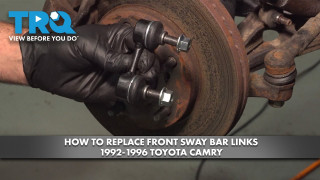
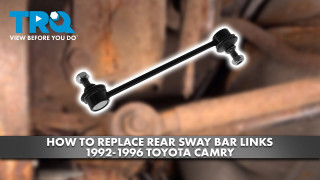
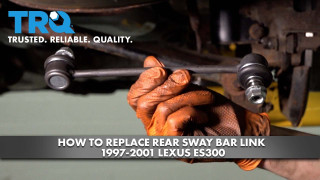
Here we have our old sway bar link that we removed from our vehicle, and our new part from 1AAuto.com. As you can see, they're the exact same length. The heads are skewed in the exact same direction. These are not directional, by the way. You can use these on the right or the left side, though we always recommend you replace them in pairs. They come with new nuts on them. What happens to these is: this is a ball and socket joint, just like your ball joint is on the front end of your vehicle. They develop up and down play in them eventually, where this socket actually gets bigger than the ball and it can click up and down. This causes some noises going over bumps, as well as issues with handling. If your car isn't handling like it's supposed to or has some clicking or clunking sounds going over bumps, these new parts from 1AAuto are going to go in, direct fit, just like your original equipment and fix you up right.
Remove the new nuts from your sway bar link, and install them into the sway bar, and into your strut. Start them on by hand, and then we'll clamp the back sides the same way we did when we removed them, with a pair of vise grips. Just be careful not to tear the boots. These new hardware are 17 millimeter, so we'll be using a 17 millimeter socket and ratchet. Torque these bolts to 29 foot-pounds. Repeat these steps on the opposite side, and you're good to go.
Reinstall the wheel and tire. Get all the lug nuts down as tight as you can by hand. Lower the vehicle carefully back onto the wheel and tire. Torque the lug nuts to 76 foot-pounds in a cross pattern. Line up the notch in the hubcap over the valve stem, and tap the hubcap back into place.
Thanks for tuning in. We hope this video helps you out. Brought to you by www.1AAuto.com, your source for quality replacement parts and the best service on the Internet. Please feel free to call us toll-free, 888-844-3393. We're the company that's here for you on the Internet and in person.
Tools used
Here we have our old sway bar length that we removed from our vehicle and our new part from 1AAuto.com. As you can see, they're the exact same length. The heads are skewed in the exact same direction. These are not directional by the way. You can use these on the right or the left side, though we always recommend you replace them in pairs. They come with new nuts on them.
What happens to these is: this is a ball and socket joint just like your ball joint is on the front end of your vehicle. They develop up and down play in them eventually where this socket actually gets bigger than the ball, and it can click up and down. This causes some noises going over bumps as well as issues with handling. If your car isn't handing like it's supposed to or has some clicking or clinking sounds going over bumps, these new parts from 1A Auto are going to go in, direct fit just like your original equipment and fix you up right.
Tools used
Brought to you by 1AAuto.com, your source for quality replacement parts and the best service on the Internet.
Hi, I'm Mike from 1A Auto. I hope this how-to video helps you out, and next time you need parts for your vehicle, think of 1AAuto.com. Thanks.
In this video, we're going to show you how to replace the front lower ball joint in a 1998 Toyota Camry. This information is going to be the same from 1992 to 2001 on the Camry, as well as several other Toyota vehicles.
The items you'll need for this repair are new front lower ball joints from 1AAuto.com, a 17mm socket ratchet and extension, 10 to 19mm wrenches, a torque wrench, needle-nose locking pliers, a pickle fork, a breaker bar, a hammer, pry bar, penetrating oil, and the jack and jack stands.
Break all your lug nuts loose while the vehicle's still on the ground. You're going to need a 21mm socket and a breaker bar. Install your jack under the vehicle, line it up with the pinch weld, jack the vehicle up high enough that you can get a stand underneath. Making sure you have enough clearance to remove your tire, or whatever you have to do under the vehicle. Install your jack stand onto this unibody frame rail under the vehicle. If you need to work on the rear of the vehicle, put your jack stand underneath and just ahead of the lower control arm here, right by the tow point. Once the weight is on your stands, give the vehicle a little shake, and make sure that they're on there secure. Repeat these steps on the opposite side. Make sure that you bring the vehicle up so that when it sits on the other set of jack stands, the vehicle will be level. You can now lower your vehicle onto the stands on this side.
With the vehicle raised and supported, remove your lug nuts the rest of the way. If you need a little more room to work, you can pull the hubcap off. Remove your wheel from the hub. We've put our vehicle on a lift to make it easier to film for you, but this job can be easily done with a jack and jack stands.
Locate the lower ball joint on the back side of the steering knuckle, just below the CV axle. Using a pair of needle noise pliers, straighten out the cotter pin. The head of the cotter pin on the driver's side of our vehicle has been mangled from an improper installation. We'll show you how to get a stuck one out. We'll use a pair of side cutters to break the head on the end of the cotter pin. Once that's split, we're going to use a large flat-headed punch to try to hit the broken ends of the cotter pin where they've snapped off pretty flush with the bolt to try to knock it out enough on the other side that we can grab it with a pair of pliers and pull it through. You want to be very gentle when you hit this. You need to hit it hard enough to move it out, but not so hard that it peens the ends over, and it won't come out of the ball joint. We're going to use a smaller flat punch now to try to push the legs of the cotter pin through as far as we can. We're just going to add a little penetrating oil here, just to try to help get those cotter pins out. Using that same pair of needle nose locking pliers, grab on.
We're going to use a 19mm open end wrench to try to get on there and break the nut loose on the ball joint. You can see that the CV axle might interfere with us removing it all the way, but once we get it pretty close and we know it's going to move, we can separate the ball joint from the knuckle, which will give us the extra clearance we need and allow us to finish removing it. The nut is now coming in contact with this shield around the ring of the CV axle, so we'll have to lower the ball joint down into the spindle to finish removing the nut.
Using a pickle fork, or a ball joint separator, and a hammer, knock the pickle fork in to pop the ball joint out of the spindle. Use that same 19mm wrench to finish taking off the nut. You'll notice I left the pickle fork in there, so if we come in contact with the CV axle again we can just pry down to get the extra clearance we need. We're hitting it again now, so we'll pull down. Finish removing the nut so we have the clearance to do it without hitting the CV axle. Remove the nut from the top of the ball joint.
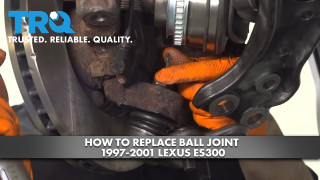
Using a 17mm socket and ratchet, remove the two nuts and the bolt connecting the ball joint bracket to the lower control arm. After you've removed all the bolts, use a pry bar to pull down on the control arm and release the ball joint.
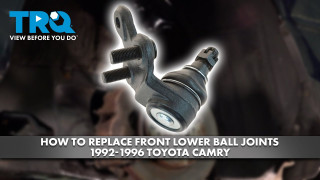
Here we have our old part from the vehicle and our new part from 1A Auto. As you can see, we have the same bracket here, the same bend to mount the ball joint into, and the same stud on each one of them. Flip them over, and you'll see that they're the exact same, with the exception of the new one being serviceable. We have a grease fitting on the bottom here so when you're down there doing your oil change and other maintenance things, you can grease all your fittings. It helps with the longevity and keeps them in good shape a lot longer.
Our new ball joint also comes with new castle nut and a new cotter pin. Just to give you an idea here while it's a little easier to see, ours was in there incorrectly in the video. They had installed their vertically, like this. If you install it sideways like that, it leaves a loop, and makes it easier for you to grab and take out later. If your old ball joint has a torn boot, it's blown out the grease, or it has up and down play in it, this new part from 1A Auto is going to go in, direct fit, just like your original equipment, and fix you up right.
Here we have our new ball joint from 1A Auto. Flip it over, and you'll notice the bottom of the joint is threaded. It comes with a grease fitting, or a Zerk fitting, that we'll have to install. Just thread it in by hand. With the 10mm open end wrench, just bring it down until it's tight. It’s very fine thread on this so you don't want to crank them down super tight. As long as it's on there snug and it's sealed so no grease comes out, you should be all right.
Install your new ball joint into the spindle and start the nut on there as far as you can. We're going to insert a pry bar into the control arm and pull down until we can install the studs of our ball joint bracket back into the control arm. Start the nuts onto the ball joint bracket. You can see that they have little centering acorns on the bottom there, and that will help us line up the top. Tighten those with a 17mm socket and ratchet. Once the centering portion starts in, move to the other one. Start our top bolt in, bring everything down tight. Torque both nuts and the bolt to 94 foot-pounds.
Tighten down the nut on the top of the spindle with a 19mm wrench. Be sure that one of the windows in the castle nut lines up with the hole in the stud, so we can install our cotter pin after it's tight. We'll install the cotter pin sideways with the longer of the two legs facing in toward the vehicle. Remember that this goes sideways, not vertically. We'll bend one of the legs around the nut. We can leave the other one straight or cut it off, whichever you prefer.
Start your lug nuts. Check that they're all seated. Jack up on your pinch weld. Be sure that where you jack isn't going to interfere with your ability to remove the jack stands. Bring the vehicle up until it's off the stands. Remove your stands from under the vehicle. With the stands clear, lower the vehicle. Move to the other side, and repeat these steps. If you've removed the tire, only lower the vehicle until the wheel touches the ground. With partial weight of the vehicle on the ground, torque your lug nuts to 76ftlb in a cross pattern. Then you can remove your jack the rest of the way. To reinstall your hubcap, align this notch with the valve stem on the wheel. Snap it back into place.
Thanks for tuning in. We hope this video helps you out. Brought to you by www.1AAuto.com, your source for quality replacement parts and the best service on the Internet. Please feel free to call us toll-free, 888-844-3393. We're the company that's here for you on the Internet and in person.
Easy installation drives amazing!!
My Camry is driving like a beauty thanks to 1a auto
It fit perfectly
Fast delivery and look good quality
Best price and availability.
Ball joints didnt come with grease fittings. Boots for the rack and pinion were to small inner diameter had to get professionally installed cost me 120. Also the ball joint nuts didnt have a counter sink collar so had to use old hardware.. either then that if you do everything to spec. When I went and had it aligned. They said everything was good.
Even if I had to wait an extra week for the part I appreciate your quick response and looking forward to doing more business with you, thanks.
The kit was perfect. Everything I needed to refresh the front end on my car. Perfect fit and easy to install. Ordering was straight forward and my parts arrived earlier than I expected.

PSA59050
Yes it does.
Our shipping takes about 3-5 business days within the continental US.
Yes, according to the information you provided, this part will fit all 1996 Camry and Avalon models.
