
★★★★★
October 25, 2025
Subaru Outback 2013 Break Pads.
Great product. I put them on last week and they work great.

Replaces









About TRQ:
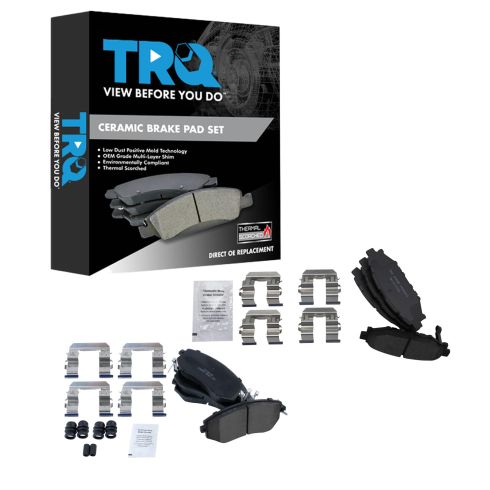
TRQ is a trusted brand dedicated to making every repair a success story by combining premium parts with easy installation. Each TRQ part is engineered by a team of automotive experts to meet or exceed OEM standards, delivering enhanced performance and maximum longevity. With rigorous in-house testing, the brand ensures superior fit and function across every product line. TRQ also provides customers with best-in-class, step-by-step installation videos—so you can complete repairs with confidence, whether you're a first-time DIYer or an industry professional.
TRQ brake pads are manufactured using premium raw materials and design standards to restore original performance. TRQ brake pads are positive molded and utilize a multi-layer shim for enhanced performance and service life. TRQ’s combination of materials and design ensures a low dust and low noise braking experience. TRQ recommends replacing your brake rotors when you replace your brake pads to ensure even wear of components and improved braking comfort. All products are fit and road-tested in our Massachusetts R&D facility to ensure we deliver on our promise of Trusted Reliable Quality.
Attention California Customers:
 WARNING: This product can expose you to chemicals including Lead and Lead Compounds, which are known to the State of California to cause cancer, and birth defects or other reproductive harm. For more information, go to www.P65Warnings.ca.gov.
This part fits 35 vehicles spanning 2010-2018.
| Year | Make | Model | Description |
|---|---|---|---|
| 2013 | Scion | FR-S | Scion FR-S Front & Rear Ceramic Brake Pads TRQ BFA20070 |
| 2013-2016 | Subaru | BRZ | Subaru BRZ Front & Rear Ceramic Brake Pads TRQ BFA20070 |
| 2016-2017 | Subaru | Crosstrek | Subaru Crosstrek Front & Rear Ceramic Brake Pads TRQ BFA20070 |
| 2011-2013 | Subaru | Forester | Subaru Forester Front & Rear Ceramic Brake Pads TRQ BFA20070 |
| 2014-2018 | Subaru | Forester | Subaru Forester 2.5i Limited Front & Rear Ceramic Brake Pads TRQ BFA20070 |
| 2014-2018 | Subaru | Forester | Subaru Forester 2.5i Touring Front & Rear Ceramic Brake Pads TRQ BFA20070 |
| 2014-2018 | Subaru | Forester | Subaru Forester 2.5i Front & Rear Ceramic Brake Pads TRQ BFA20070 |
| 2014-2018 | Subaru | Forester | Subaru Forester 2.5i Premium Front & Rear Ceramic Brake Pads TRQ BFA20070 |
| 2010 | Subaru | Impreza | Subaru Impreza WRX From 4/01/10 Production Date Front & Rear Ceramic Brake Pads TRQ BFA20070 |
| 2010 | Subaru | Impreza | Subaru Impreza 2.5i Premium From 4/01/10 Production Date Front & Rear Ceramic Brake Pads TRQ BFA20070 |
| 2010 | Subaru | Impreza | Subaru Impreza Outback Sport From 4/01/10 Production Date Front & Rear Ceramic Brake Pads TRQ BFA20070 |
| 2010 | Subaru | Impreza | Subaru Impreza 2.5 GT From 4/01/10 Production Date Front & Rear Ceramic Brake Pads TRQ BFA20070 |
| 2010 | Subaru | Impreza | Subaru Impreza 2.5i From 4/01/10 Production Date Front & Rear Ceramic Brake Pads TRQ BFA20070 |
| 2010 | Subaru | Impreza | Subaru Impreza WRX Premium From 4/01/10 Production Date Front & Rear Ceramic Brake Pads TRQ BFA20070 |
| 2010 | Subaru | Impreza | Subaru Impreza WRX Limited From 4/01/10 Production Date Front & Rear Ceramic Brake Pads TRQ BFA20070 |
| 2011 | Subaru | Impreza | Subaru Impreza Outback Sport Front & Rear Ceramic Brake Pads TRQ BFA20070 |
| 2011-2014 | Subaru | Impreza | Subaru Impreza WRX Limited Front & Rear Ceramic Brake Pads TRQ BFA20070 |
| 2011 | Subaru | Impreza | Subaru Impreza 2.5i Front & Rear Ceramic Brake Pads TRQ BFA20070 |
| 2011 | Subaru | Impreza | Subaru Impreza 2.5i Premium Front & Rear Ceramic Brake Pads TRQ BFA20070 |
| 2011-2014 | Subaru | Impreza | Subaru Impreza WRX Front & Rear Ceramic Brake Pads TRQ BFA20070 |
| 2011-2014 | Subaru | Impreza | Subaru Impreza WRX Premium Front & Rear Ceramic Brake Pads TRQ BFA20070 |
| 2012-2014 | Subaru | Impreza | Subaru Impreza Sport Limited Front & Rear Ceramic Brake Pads TRQ BFA20070 |
| 2012-2014 | Subaru | Impreza | Subaru Impreza Sport Premium Front & Rear Ceramic Brake Pads TRQ BFA20070 |
| 2012-2014 | Subaru | Impreza | Subaru Impreza Limited Front & Rear Ceramic Brake Pads TRQ BFA20070 |
| 2012-2014 | Subaru | Impreza | Subaru Impreza Premium Front & Rear Ceramic Brake Pads TRQ BFA20070 |
| 2012-2014 | Subaru | Impreza | Subaru Impreza Base Model Front & Rear Ceramic Brake Pads TRQ BFA20070 |
| 2015-2016 | Subaru | Impreza | Subaru Impreza Front & Rear Ceramic Brake Pads TRQ BFA20070 |
| 2013-2014 | Subaru | Legacy | Subaru Legacy 2.5i Limited Front & Rear Ceramic Brake Pads TRQ BFA20070 |
| 2013-2014 | Subaru | Legacy | Subaru Legacy 2.5i Premium Front & Rear Ceramic Brake Pads TRQ BFA20070 |
| 2013-2014 | Subaru | Legacy | Subaru Legacy 2.5i Front & Rear Ceramic Brake Pads TRQ BFA20070 |
| 2014 | Subaru | Legacy | Subaru Legacy 2.5i Sport Front & Rear Ceramic Brake Pads TRQ BFA20070 |
| 2013-2014 | Subaru | Outback | Subaru Outback 2.5i Premium Front & Rear Ceramic Brake Pads TRQ BFA20070 |
| 2013-2014 | Subaru | Outback | Subaru Outback 2.5i Front & Rear Ceramic Brake Pads TRQ BFA20070 |
| 2013-2014 | Subaru | Outback | Subaru Outback 2.5i Limited Front & Rear Ceramic Brake Pads TRQ BFA20070 |
| 2013-2015 | Subaru | XV Crosstrek | Subaru XV Crosstrek Front & Rear Ceramic Brake Pads TRQ BFA20070 |
| Brand Label | Part Number |
|---|---|
| Subaru | 26696AG030 |
| Subaru | 26696AG051 |
| Subaru | 26696FJ000 |
| FMSI | CD1539 |
| Subaru | 26296SC010 |
| Raybestos Brakes | MGD1114CH |
| Scion | SU00304089 |
| Subaru | 26296FJ030 |
| Raybestos Brakes | EHT1114H |
| Subaru | 26296SC000 |
| Subaru | 26696AG000 |
| Subaru | 26296FJ020 |
| Subaru | 26296AJ02A |
| FMSI | CD1114 |
| Raybestos Brakes | EHT1539H |
| Scion | SU00304678 |
| Raybestos Brakes | SGD1539C |
| Toyota | SU00304089 |
| Subaru | 26296SC011 |
| Raybestos Brakes | MGD1539CH |
| Raybestos Brakes | SGD1114C |
| Subaru | 26696AG031 |
| Sangsin Brake | SP1553 |
This item may be interchangeable with parts from other brands with the above part numbers. This information is provided only for reference and does not guarantee that the item you are purchasing is identical to parts with part numbers from the brands listed above. To confirm that this item fits your vehicle, use the above "Check Vehicle Fit" option.
Lifetime Warranty
This item is backed by our limited lifetime warranty. In the event that this item should fail due to manufacturing defects during intended use, we will replace the part free of charge. This warranty covers the cost of the part only.
FREE Shipping is standard on orders shipped to the lower 48 States (Contiguous United States). Standard shipping charges apply to Hawaii and Alaska.
Shipping is not available to a P.O. Box, APO/FPO/DPO addresses, US Territories, or Canada for this item.
Expedited is available on checkout to the United States, excluding Alaska, Hawaii.
Final shipping costs are available at checkout.
Created on:
Tools used
Hi, I’m Mike from 1A Auto. We’ve been selling auto parts for over 30 years!
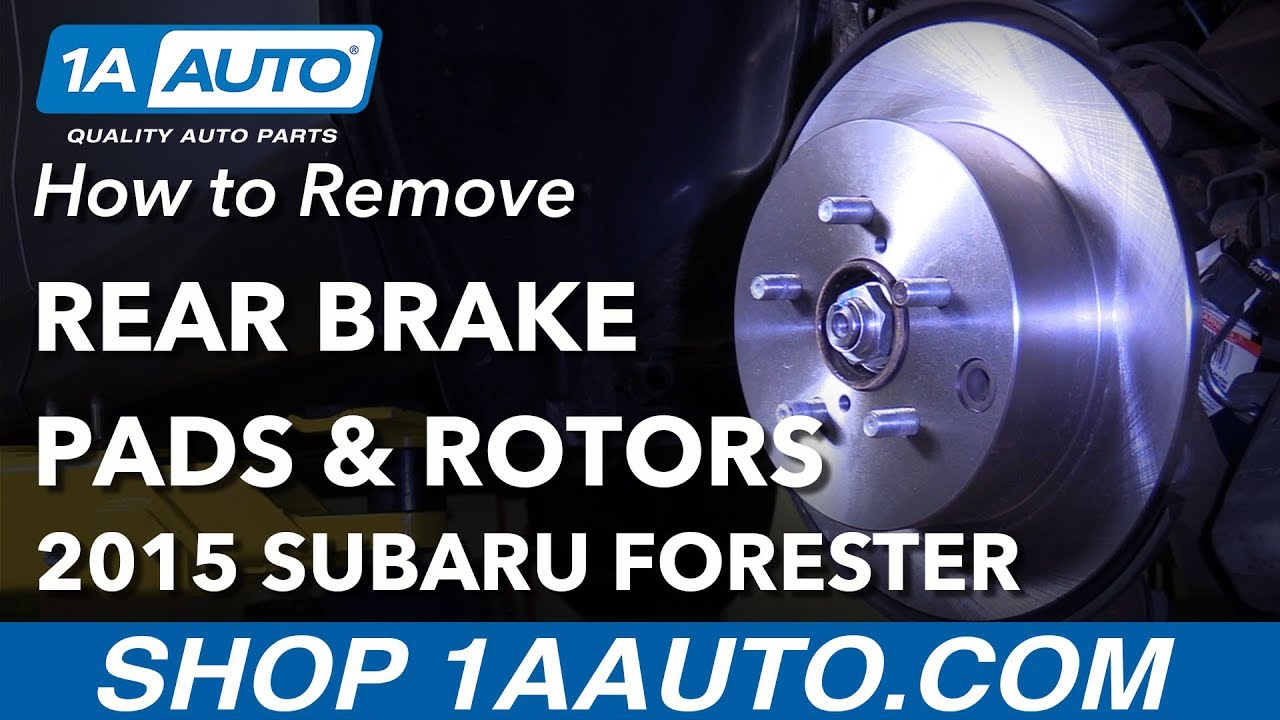
In this video, we will be replacing the rear brakes on a 2015 Subaru Forester. If you need these parts or other parts for your vehicle, click the link in the description and head over to 1AAuto.com.
We'll take this wheel off. We're going to put a 19 millimeter socket on our breaker bar. We're going to loosen these lug nuts before we take the vehicle and put it up in the air. So we'll take these lug nuts off. Now, pull the tire off.
Now we'll take these two caliper bolts off. I'm going to use a 14 millimeter wrench. Take these bolts off. Now I'm going to grasp the caliper, twist it back and forth, and I should be able to pull it out, just like that. Then I'm going to take a bungee cord. Install one through one hole. Go around here on the backside above the upper control arm. Then come around the back, and just have that sitting out of the way.
Next I'm going to take these pads out. Use a screwdriver to get underneath here. These ones are kind of stuck in there a little bit. Pry them out. Do a little tap, and then pry out the inboard ones, just like that. All right, now we're going to take this caliper bracket off. We're going to take these two 14 millimeter bolts out. I'm going to use a 14 millimeter socket and a ratchet. Pull that bolt out. I'll take the top bolt out, and slide the bracket off towards the back of the vehicle.
All right, to get the rotor off, I can take a hammer and hit all around here. We actually sell these hammers at 1AAuto.com. But in addition to that, there's these two little holes that are threaded. You can find some bolts that thread into them. This'll help you get it off a little bit. So we'll thread these on, and you can take a ratchet, and just snug these up a little bit. Just a little bit. You don't want to tighten it too much, because it's just going to strip it. So if you do that, that just puts a little pressure on the rotor, to make it come out a little bit.
Then we'll take our hammer, we're going to hit all around here. Tighten these bolts up a little bit more. And the rotor is loose enough to pull it off. All right, so we're going to clean up this caliper bracket. We use a little wire brush. Get in here and get all this corrosion and rust out. A lot of brake dust in here. I'll take a flat blade screwdriver, and we'll pull this pad guide out under here. Pull that off and set that aside.
We'll take our wire brush again, and just get in here. Clean that out, and clean out some of the off the back, but it's generally not too bad. All right, so now we'll put this pad guide back in. Push that down. And we'll do the same for the other side.
Next, we're going to pull out these caliper guide pins. We're going to spray these down with some brake parts cleaner, and wipe them down with a rag. Those are nice and clean. Now we can spray some brake parts cleaner down here. And then we'll take our rag and wipe it down.
Pull that out and drain it out. And then we'll take some caliper grease, and coat the guide pin, and then we'll reinstall the guide pin. And make sure that boot goes all the way around. And do the same for the other side.
All right, so now I'm going to take a wire brush, and we'll clean up the hub area. Get all in here. Just clean up some of the rust. We'll put the rotor on backwards for a second. We're going to take some brake parts cleaner. Clean the backside of the rotor, and we'll wipe it down as a protective coating on the rotors. We want to get that protective coating off. That prevents them from rusting. And we'll flip it over, and do the same to this side. And wipe it off with a rag.
We're going to take this old grommet out of the old rotor, and we're going to transfer it to the new rotor. Stick that in. We'll take our caliper bracket. Line that up on the rotor. It has two bolts. Get those both started. Now we're going to torque these caliper bolts to 48 foot-pounds. We're using a 14 millimeter socket and a torque wrench. You can get this torque wrench at 1AAuto.com.
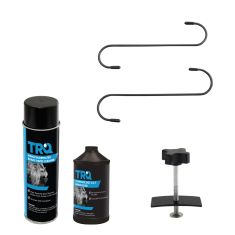
Now we're going to install the brake pads. We're going to just use a little bit of brake grease on the ends of the brake pads, and a little bit in the middle here. Don't get any on the friction material. Now I'll install that onto the caliper bracket, like that. And do the same for this one as well. That one on the inside. That's good. Now I'll take the bungee cord off the caliper. Flip it over. I'm going to take one of the old brake pads, slide it right there, and I'll take this brake caliper compressor tool, and we'll compress the caliper.
We sell these tools at 1AAuto.com. And we'll compress the caliper, so the piston is going back into the caliper. When the piston is doing this, this is sending brake fluid through the hoses, through the lines, back up to the master cylinder, and into the brake reservoir. And because we did not take off the hose on the caliper, we do not have to bleed the system after we're done.
So now we'll slide our piston over the brake pads. Line that up. Take our caliper bolts. Slide these in here. I'm going to use a small extension for the top one, because the brake hose gets in my way.
Now, throw up the tire. I'll stick the lug nuts on. Now we're going to torque these with a torque wrench in a star pattern, with a 19 millimeter socket and a torque wrench to 89 foot pounds. The reason you want to do it in a star pattern is to get the wheel tightened evenly. Before we take the vehicle and take it for a ride, we're going to want to pump the brake pedal, because what's happening is, there's an air gap between the brake caliper piston and the brake pad. So when we pump the pedal, that's pushing fluid back down to the calipers, and getting rid of that air gap. And once the brake pedal feels good, then you're good to go.
Thanks for watching. Visit us at 1AAuto.com for quality auto parts, fast and free shipping, and the best customer service in the industry.
Tools used
Hi, I’m Mike from 1A Auto. We’ve been selling auto parts for over 30 years!
Use a breaker bar, 19 millimeter deep socket to loosen the lug nuts of the vehicle on the ground. This way the wheel's not turning on you. Get them nice and loose. Raise and support the vehicle. With the lug nuts loose, I'm just going to use the socket and take them off the rest of the way and remove the tire and wheel. Take the entire wheel off and put this aside. Just going to turn the wheel so the brake caliper is facing out and I can get to it easier.
Use a flat-bladed screwdriver. Just going to slide it in here. Just pry the caliper outwards. It's going to compress the piston. And do it to both, because this is a double piston caliper. So we just want to loosen it just enough. It'll make it easier to slide this off of the pads. And you remove the top and bottom caliper slide pin bolts. 14 millimeter, we'll start with the top one. Get that loose, same for the bottom one. Get that loose and take them both out. Slide the caliper off. Take our bungee cord, and let's see. That should work. Up and around the coil spring. Came undone. Hang right there. Pull our pads out. Can wedge a flat-bladed screwdriver in there and help you pry it out.
We're not reusing these. There's an upper and lower caliper bracket bolt. They are 17 millimeter. We'll start with the lower one. It's on there pretty tight, so I'll readjust the wrench here. We'll use a dead blow mallet and break it free. Do the same to the top one. Going to switch to a 17 millimeter socket and ratchet, make this go quicker. Put the bracket aside. Let's place some rust penetrate in here. And hit these threaded openings here and down the studs. Thread a lug nut on here because we're going to tap the rotor with a dead blow to break it free. Alright, doesn't want to move. I'm going to use these pusher holes here. It's an 8x1.0 thread pitch. Just find some appropriately sized bolts to thread in there. They're metric. Just going to use the socket that fits them and just evenly tighten them. And this is just going to push the rotor right off the hub. Easy.
Here's our original brake rotor from our vehicle. These are the original pads. The brand new pads from 1AAuto.com. And you can see on these, take our brake pad measurement tool. The new ones have 10 millimeter, and the worn ones have 5 millimeter. They're roughly half worn. Not too bad, but we're going to replace them anyways. These are an exact match. I've got inside and outside here. Take these, they're an exact match for the wear indicators on them. Those will fit great and work great.
We look at our rotors. The original rotor has a black coating on the hub to prevent rust. It does wear off as brakes do get hot. So the paint does eventually wear down and it will begin to rust. However, we've got these E-coated rotors from 1AAuto.com. So they do paint the hub. They paint the edge, to prevent rust. Off course, this will always rust because it's bare metal where your brake pads ride. But that is an exact match for the factory rotor, it'll fit great and work great for you. Then we also have available these drilled and slotted rotors. These have a zinc coating so they don't rust. You can kind of see the difference.
Zinc coating right now is over the entire surface. It will wear off where the brake pads ride, so these will flash rust, but you can kind of see the difference in a raw metal and a zinc coated here. So this also is to prevent rust and these will look cooler on a vehicle. But everything will fit exactly the same as factory and work great. Just going to check the slide pins. These move and out real nicely, I'm not going to mess with them. They're working perfectly. If they were sticking, you could pull them out of the rubber boots and clean and lubricate them, but since these are working great, I'm going to leave them alone.
Caliper hardware is stainless. And to be re-used, we're just going to clean it, put some brake parts cleaner and a wire brush. And just do the same for both sides of the caliper bracket. We're going to use our drilled and slotted rotors. These can go on in either direction. The veins inside are straight. They are not left and right. But you can pick which direction you want these to go. We're going to put them towards the front. I'm going to put it on backwards first. Just make sure the braking surface is clean. I'm using brake parts cleaner. Wipe down anything with a rag. Any packaging oil that might be on these. Take them off for a second. I'm just going to clean this hub up—it's not too rusty. Spray a little bit of brake parts cleaner and wipe it down. I'm going to take some copper anti-seize, just put it on the hub surface here where the rotor will touch and could potentially rust on.
So just for future service, we'll make sure the rotor can come off easily. Install the rotor the proper way, take the lug nut, and thread that down so it can't fall off. I'm using brake parts cleaner, make sure the surface stays nice and clean, free of grease and dirt. You can also buy new caliper bracket bolts from 1A Auto. This one here is really rusty and gross and the top one wasn't too bad, but we've got two brand new ones and we're going to install those. I'll put a little bit of copper never seize on these bolts, prevent corrosion. Do the top one first. So the rotor is kind of out of place, I'm going to have to push it in. I'll just slide the bracket over first and get that lined up. I'm going to reach over, move the bracket around, find where it bolts in. Do the same for the bottom one, and I have the top bolt started. Get those threaded down. Tighten these down with my socket and ratchet.
There is a lock washer that will start to compress. Go down evenly and we'll put the box wrench on here and they're already pretty tight. Put them down. Nice and tight and a quarter turn more, like that. These do have a lock washer, so once that lock washer's compressed, it won't back out. Going to make sure that these pads stay nice and clean, you don't get any grease or oil or dirt on them. Just give them a quick spray with brake parts cleaner, you don't need to soak the pad, put a little bit of caliper grease on the gears. This will help them slide on the hardware. Brake pads are curved, so that outer is going to match the outer curve on the brake rotor. You don't want to try to install them backwards. The wear indicators go towards the bottom.
Install the rear pad, the inside pad. Push it in place. Going to take our old pad, put it inside the caliper. We'll take our c-clamp, look at the set up, and you're gently compressed the pistons back into the caliper. Press these in. Get this in the middle. Those are compressed in and should slide right over our pads. Slide pin bolts do have flat sides to them, they have curved and flat. The flat's going to sit like that, same for both upper and lower.
Reinstall the slide pin bolts. Just tighten these down. Get them tight, give them a little bit more, don't want to break them, they're just small bolts. So that moves nice, in and out on the slides. Used the lug nut to keep this rotor from falling off, just make sure you take it off before you try to put the wheel and tire on.
Wheel and tire on. Start lug nuts by hand. Just going to use the socket, thread these all down, then I'll put the vehicle on the ground and torque them. Going to torque the lug nuts to 89 foot pounds and in a cross pattern. Now we need to gently pump the brakes to move the pistons out to meet the pads, not going to press it all the way to the floor. Press it about a quarter of the way, build it up. They'll start to get harder. That's perfect. Now the brake job is done.
Thanks for watching. Visit us at 1AAuto.com for quality auto parts, fast and free shipping, and the best customer service in the industry
Tools used
Hi, I’m Mike from 1A Auto. We’ve been selling auto parts for over 30 years!
Using a 19 millimeter deep socket and a breaker bar, I'll loosen the lug nuts with the vehicle on the ground. I'll raise and support the vehicle. With the lug nuts loose, I'm going to use the socket and finish removing them. This wheel is nice and loose. I'll take it off and put it aside.
I'm going to take a flat bladed screwdriver and just wedge it in here, and then pull the caliper to the outside. This will compress the piston inside. It'll make it easier to pull it off just like that. You can see the piston. That actually moves really nicely on the slides so I know it's not seized and the piston went in there nice and smooth. This caliper's in good shape.
Now to remove the caliper's slide pin bolts, there's a bottom on and a top one, 14 millimeter. We're going to start with the top on. Spin it out. We'll do the same for the bottom one. We'll take our caliper off, and I'm just going to rest it on top of the suspension arm here. Just going to pop our pads out of the caliper bracket using a flat bladed screwdriver in here. Do the same for the other one.
I'm going to take a mallet here and just kind of wedge it in between them because I'm not reusing these. So those pads are really stuck in there. They should have a little bit more grease on the ends so they slide better. Now to remove the caliper bracket bolts, there's a bottom and a top on. I'm going to start with the top one. These are 14 millimeter. If they're really stiff, you can use a dead blow mallet. Just hit on it. Break them free. I'm going to switch to a ratcheting wrench to make this a little quicker. Do the top one the same way. I'm going to hold the bracket so it doesn't fall. Take the bracket out.
So you should have the parking brake off before you try this to get the rotor off because the parking brake assembly is inside of here with brake shoes and a rust ridge will sometimes build up on the inside, preventing you from just easily pulling this rotor off. I'm going to pop this rubber cap out with a flat bladed screwdriver. That's okay. If it pops inside, that's fine. You'll just get it when we pull the rotor off.
We need to find the adjuster, which is right there at the bottom. There's a star wheel adjuster just below that spring. We're going to turn it and release the tension so that this brake rotor will come off easier. So use a flat bladed screwdriver to push it in towards the car and you'll actually feel this rotor will get looser because it's pulling the brake shoes in away from the inside of the hub, inside of the hat here. I'm going to spray some rust penetrant around the hub here and inside these threaded holes. Just try to break the seal.
The rotor might be rusted to the hub a bit. Let's see if it's going to break free. I'm going to tap it with a dead blow mallet around it. It's a little loose. We're going to take some metric bolts. These are 8 by 1.0 thread pitch. I'm going to thread them in, and I'm going to use them to push the rotor off. I'm just going to use the appropriately sized socket for the bolts. I'll just turn it off.
You can start to see it's pushing it off. You just kind of go evenly back and forth. Sometimes, it's a lot easier than hitting it a bunch of times with a hammer. That's nice and loose now. You can actually pull that right off. Here we go and inside, you can see the parking brake assembly. It just drops a little rubber plug that I pushed inside there. Save that. We're going to reuse it.
Now just pushing in, it goes inside of the car in this adjuster wheel. It's pulling the adjuster in, which in turn, pulls the parking brake shoes in and it releases them from that outer rotor hat. On the inside, you can see where their brake shoes for the parking brake were riding, and then the rust ridge that builds over time and that rust ridge can make it hard to pull this rotor off unless you compress or retract those parking brake shoes in.
I took out the caliper slides by just pulling them in and out. Those are working nicely. They don't need to be cleaned or lubricated. Then reuse the hardware. It's stainless. You're just going to clean it with brake parts cleaner and a wire brush. You do that to the other side.
Now would be a good time to inspect your parking brake hardware. This all looks in good shape. It's not a very old car. Just going to take some brake parts cleaner and spray this down. All right, just going to spray the inside of the brake rotors with brake parts cleaner. Make sure it's nice and clean. I'll install it. I'm going to adjust the parking brake, turn it so I can see that star wheel again. Before, I was going under the spring to loosen it.
Now I'm going to go above the spring just a few turns to bring it out. It's hard to tell how far it's dragging because you're getting the resistance from the differential. So I just want to bring it out a little bit and then afterwards, we're going to go inside the car, pull it out a little bit more and we're going to pull up on the parking brake handle and it will self-adjust the brake shoes out to meet the new rotor. Don't forget. Reinstall that little rubber plug that keeps weather out of there. It just pushes back in.
We're going to put some copper anti-seize on the caliper mounting bolts. I'll install the caliper bracket—get the top one started. Might have to move the bracket around. Get that threaded in. Get the bottom on threaded in. Use the ratcheting wrench and just tighten these down. Get them snug and then we'll do a quarter turn more. Here's out original pad for our vehicle and a brand new one from 1AAuto.com.
So you can see here, this is worn to 6 millimeter and brand new pad has 8 millimeter. It's not really that worn. But we're going to show you how to replace it anyways. Using the same design, the inside pad will have the wear indicator. This is an outside pad. This will work great and fit great in your vehicle.
Just going to give the brake pads a quick clean with some brake parts cleaner. Don't have to soak them. Get rid of any dirty or grease. Take a little caliper grease and we'll put it on the ears. This one will go on the inside. Line it up. Push it in place and the same for the outside pad.
We need to push our piston back into the caliper so it can fit over the new brake pads. Put an old brake pad over it. Put a C-clamp in there and just kind of gently turn it and press the piston into the caliper. That should do it.
Reinstall the caliper and we'll put the slide pin bolts in. Same with the other one. We'll tighten these up just like that. If while you're tightening this, the slide pin bolt starts to spin, you can counterhold it with an adjustable wrench. Just get it situated in there and then tighten it. This one didn't spin on me so I didn't have to do that. We're going to do the same for the bottom one. Just tighten it. Once it gets tight, just stop. You don't want to break them. The copper's moving nicely. I haven't sprayed the face of this brake rotor yet. If you get this caliper on and you forget to do it, no big deal. You can spray it right now as it is. You can just turn it. It's all set.
Put the wheel and tire back on. Hold it up. Get the lug nuts started by hand. You're going to use the socket. Thread these all down. I'm going to lower the vehicle. I'll torque them. I'm going to torque the lug nuts to 89 foot-pounds in a cross pattern.
Now we need to gently pump the brakes to move the pistons out to meet the pads. I'm not going to press it all the way to the floor. Press it about a quarter of the way. Build it up. It'll start to get harder. That's perfect. Now the brake job is done.
At the rear, we want to adjust those parking brake shoes. You're going to hold the button and just pull it up. It'll start to get tighter. We'll see if it latches. A couple more times. It'll start to grab sooner and just do it until you feel it get tighter, lower. That's good there.
Thanks for watching. Visit us at 1AAuto.com for quality auto parts, fast and free shipping, and the best customer service in the industry.
Great product. I put them on last week and they work great.
The pad kits came with everything needed and were a snap to install. Braking seems to be good so, hopefully, they last a while.
Brakes work awesome
good
I order Brake set for My Subaru Front brake pads ok But rear brake pad only have 1 brake pad have indicator clip brake warning instead 1 more That mean You guys put inbox 3 normal 1 pad have a clip indicator warning when wear out...
Good quality brake pads. Fit perfectly. My order arrived a day early.
Great product, install video was easy to follow and I had the project wrapped in a few hours. After 2 weeks of use I have no issues with the brake pads or rotors, I bought products from A1 for my old Tundra and everything worked perfectly. I plan to keep shopping with them.
Worked great!
This is a good product, fit is factory perfect
Feels like brand new brakes. Recommend these units

BFA20070
The Set I purchased was for both front and rear brakes. Just like the box says.
These are Ceramic, the boxes are generic.
Yes, this part will fit your vehicle.
