
★★★★★
October 29, 2019
Great brakes
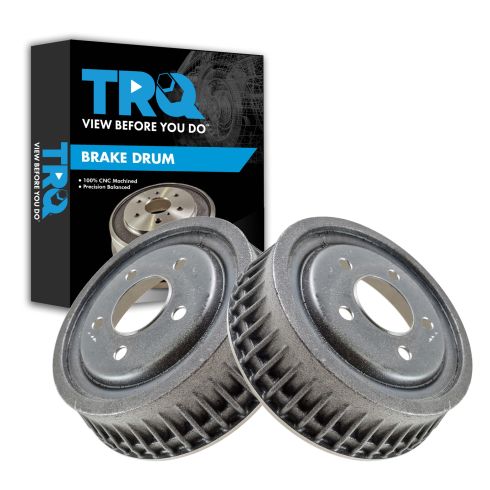
Love that it came as a pair. Great quality of brakes

Replaces





About TRQ:
TRQ is a trusted brand dedicated to making every repair a success story by combining premium parts with easy installation. Each TRQ part is engineered by a team of automotive experts to meet or exceed OEM standards, delivering enhanced performance and maximum longevity. With rigorous in-house testing, the brand ensures superior fit and function across every product line. TRQ also provides customers with best-in-class, step-by-step installation videos—so you can complete repairs with confidence, whether you're a first-time DIYer or an industry professional.
Attention California Customers:
 WARNING: This product can expose you to chemicals including Lead and Lead Compounds, which are known to the State of California to cause cancer, and birth defects or other reproductive harm. For more information, go to www.P65Warnings.ca.gov.
This part fits 65 vehicles spanning 1970-2005.
| Year | Make | Model | Description |
|---|---|---|---|
| 1984-1987 | Buick | Century | Buick Century Wagon Rear Driver & Passenger Side 2 Piece Brake Drum Set TRQ BRA19701 |
| 1989-1992 | Buick | Century | Buick Century Wagon Rear Driver & Passenger Side 2 Piece Brake Drum Set TRQ BRA19701 |
| 1992 | Buick | Century | Buick Century Coupe Rear Driver & Passenger Side with Finned Rear Brake Drums 2 Piece Brake Drum Set TRQ BRA19701 |
| 1992 | Buick | Century | Buick Century Sedan Rear Driver & Passenger Side with Finned Rear Brake Drums 2 Piece Brake Drum Set TRQ BRA19701 |
| 1993-2003 | Buick | Century | Buick Century Rear Driver & Passenger Side 2 Piece Brake Drum Set TRQ BRA19701 |
| 1985-1989 | Buick | Electra | Buick Electra Park Avenue Rear Driver & Passenger Side with Cast Iron Brake Drums 2 Piece Brake Drum Set TRQ BRA19701 |
| 1985-1989 | Buick | Electra | Buick Electra T-Type Rear Driver & Passenger Side with Cast Iron Brake Drums 2 Piece Brake Drum Set TRQ BRA19701 |
| 1985-1989 | Buick | Electra | Buick Electra Limited Rear Driver & Passenger Side with Cast Iron Brake Drums 2 Piece Brake Drum Set TRQ BRA19701 |
| 1989 | Buick | Electra | Buick Electra Park Avenue Ultra Rear Driver & Passenger Side with Cast Iron Brake Drums 2 Piece Brake Drum Set TRQ BRA19701 |
| 1990 | Buick | Electra | Buick Electra Rear Driver & Passenger Side with Cast Iron Brake Drums 2 Piece Brake Drum Set TRQ BRA19701 |
| 1986-1987 | Buick | LeSabre | Buick LeSabre Limited Rear Driver & Passenger Side with Cast Iron Brake Drums 2 Piece Brake Drum Set TRQ BRA19701 |
| 1986-1987 | Buick | LeSabre | Buick LeSabre Custom Rear Driver & Passenger Side with Cast Iron Brake Drums 2 Piece Brake Drum Set TRQ BRA19701 |
| 1987 | Buick | LeSabre | Buick LeSabre Base Model Rear Driver & Passenger Side with Cast Iron Brake Drums 2 Piece Brake Drum Set TRQ BRA19701 |
| 1987 | Buick | LeSabre | Buick LeSabre T-Type Rear Driver & Passenger Side with Cast Iron Brake Drums 2 Piece Brake Drum Set TRQ BRA19701 |
| 1988-1990 | Buick | LeSabre | Buick LeSabre Coupe Rear Driver & Passenger Side with Cast Iron Brake Drums 2 Piece Brake Drum Set TRQ BRA19701 |
| 1988-1990 | Buick | LeSabre | Buick LeSabre Sedan Rear Driver & Passenger Side with Cast Iron Brake Drums 2 Piece Brake Drum Set TRQ BRA19701 |
| 1991-1993 | Buick | LeSabre | Buick LeSabre Rear Driver & Passenger Side with Cast Iron Brake Drums 2 Piece Brake Drum Set TRQ BRA19701 |
| 1994-1999 | Buick | LeSabre | Buick LeSabre Rear Driver & Passenger Side 2 Piece Brake Drum Set TRQ BRA19701 |
| 1991 | Buick | Park Avenue | Buick Park Avenue Rear Driver & Passenger Side with Cast Iron Brake Drums 2 Piece Brake Drum Set TRQ BRA19701 |
| 1992-1996 | Buick | Park Avenue | Buick Park Avenue Rear Driver & Passenger Side 2 Piece Brake Drum Set TRQ BRA19701 |
| 1993 | Cadillac | 60 Special | Cadillac 60 Special Rear Driver & Passenger Side with 8.86 x 2.17 Inch Brake Drum 2 Piece Brake Drum Set TRQ BRA19701 |
| 1985-1989 | Cadillac | Commercial Chassis | Cadillac Commercial Chassis Rear Driver & Passenger Side 2 Piece Brake Drum Set TRQ BRA19701 |
| 1990-1991 | Cadillac | Commercial Chassis | Cadillac Commercial Chassis Rear Driver & Passenger Side with 8.86 x 2.17 Inch Brake Drum 2 Piece Brake Drum Set TRQ BRA19701 |
| 1992-1993 | Cadillac | Commercial Chassis | Cadillac Commercial Chassis Base Model Rear Driver & Passenger Side with 8.86 x 2.17 Inch Brake Drum 2 Piece Brake Drum Set TRQ BRA19701 |
| 1985-1989 | Cadillac | Deville | Cadillac Deville Rear Driver & Passenger Side with 8.86 x 2.17 Inch Brake Drum with Cast Iron Brake Drums 2 Piece Brake Drum Set TRQ BRA19701 |
| 1990-1993 | Cadillac | Deville | Cadillac Deville Rear Driver & Passenger Side with 8.86 x 2.17 Inch Brake Drum 2 Piece Brake Drum Set TRQ BRA19701 |
| 1985-1986 | Cadillac | Fleetwood | Cadillac Fleetwood Front Wheel Drive Rear Driver & Passenger Side with 8.86 x 2.17 Inch Brake Drum with Cast Iron Brake Drums 2 Piece Brake Drum Set TRQ BRA19701 |
| 1987-1989 | Cadillac | Fleetwood | Cadillac Fleetwood Rear Driver & Passenger Side with 8.86 x 2.17 Inch Brake Drum with Cast Iron Brake Drums 2 Piece Brake Drum Set TRQ BRA19701 |
| 1990-1992 | Cadillac | Fleetwood | Cadillac Fleetwood Rear Driver & Passenger Side with 8.86 x 2.17 Inch Brake Drum 2 Piece Brake Drum Set TRQ BRA19701 |
| 1984-1989 | Chevrolet | Celebrity | Chevrolet Celebrity Wagon Rear Driver & Passenger Side 2 Piece Brake Drum Set TRQ BRA19701 |
| 1990 | Chevrolet | Celebrity | Chevrolet Celebrity Rear Driver & Passenger Side 2 Piece Brake Drum Set TRQ BRA19701 |
| 2004-2005 | Chevrolet | Classic | Chevrolet Classic Rear Driver & Passenger Side 2 Piece Brake Drum Set TRQ BRA19701 |
| 1995-2001 | Chevrolet | Lumina | Chevrolet Lumina Rear Driver & Passenger Side 2 Piece Brake Drum Set TRQ BRA19701 |
| 1990-1996 | Chevrolet | Lumina APV | Chevrolet Lumina APV Rear Driver & Passenger Side with Cast Iron Brake Drums 2 Piece Brake Drum Set TRQ BRA19701 |
| 1997-2004 | Chevrolet | Malibu | Chevrolet Malibu Rear Driver & Passenger Side 2 Piece Brake Drum Set TRQ BRA19701 |
| 1970 | Chevrolet | Monte Carlo | Chevrolet Monte Carlo with Cut Out in Axle Cover Rear Driver & Passenger Side with 8.86 x 2.17 Inch Brake Drum 2 Piece Brake Drum Set TRQ BRA19701 |
| 1995-1999 | Chevrolet | Monte Carlo | Chevrolet Monte Carlo Rear Driver & Passenger Side 2 Piece Brake Drum Set TRQ BRA19701 |
| 1997-2005 | Chevrolet | Venture | Chevrolet Venture Rear Driver & Passenger Side 2 Piece Brake Drum Set TRQ BRA19701 |
| 1992-1995 | Oldsmobile | 88 | Olds 88 Rear Driver & Passenger Side with 8.86 x 2.17 Inch Brake Drum with Cast Iron Brake Drums 2 Piece Brake Drum Set TRQ BRA19701 |
| 1996-1999 | Oldsmobile | 88 | Olds 88 Rear Driver & Passenger Side 2 Piece Brake Drum Set TRQ BRA19701 |
| 1985-1994 | Oldsmobile | 98 | Olds 98 Rear Driver & Passenger Side with Cast Iron Brake Drums 2 Piece Brake Drum Set TRQ BRA19701 |
| 1995-1996 | Oldsmobile | 98 | Olds 98 Rear Driver & Passenger Side 2 Piece Brake Drum Set TRQ BRA19701 |
| 2003-2004 | Oldsmobile | Alero | Olds Alero Rear Driver & Passenger Side with Rear Drum Brakes 2 Piece Brake Drum Set TRQ BRA19701 |
| 1997-1999 | Oldsmobile | Cutlass | Olds Cutlass Rear Driver & Passenger Side 2 Piece Brake Drum Set TRQ BRA19701 |
| 1984-1985 | Oldsmobile | Cutlass Ciera | Olds Cutlass Ciera Cruiser LS Rear Driver & Passenger Side 2 Piece Brake Drum Set TRQ BRA19701 |
| 1986 | Oldsmobile | Cutlass Ciera | Olds Cutlass Ciera Wagon Rear Driver & Passenger Side 2 Piece Brake Drum Set TRQ BRA19701 |
| 1991-1992 | Oldsmobile | Cutlass Ciera | Olds Cutlass Ciera Wagon Rear Driver & Passenger Side 2 Piece Brake Drum Set TRQ BRA19701 |
| 1992 | Oldsmobile | Cutlass Ciera | Olds Cutlass Ciera Coupe Rear Driver & Passenger Side with Finned Rear Brake Drums 2 Piece Brake Drum Set TRQ BRA19701 |
| 1992 | Oldsmobile | Cutlass Ciera | Olds Cutlass Ciera Sedan Rear Driver & Passenger Side with Finned Rear Brake Drums 2 Piece Brake Drum Set TRQ BRA19701 |
| 1993-1996 | Oldsmobile | Cutlass Ciera | Olds Cutlass Ciera Rear Driver & Passenger Side 2 Piece Brake Drum Set TRQ BRA19701 |
| 1987-1990 | Oldsmobile | Cutlass Cruiser | Olds Cutlass Cruiser Rear Driver & Passenger Side 2 Piece Brake Drum Set TRQ BRA19701 |
| 1993 | Oldsmobile | Cutlass Cruiser | Olds Cutlass Cruiser Rear Driver & Passenger Side 2 Piece Brake Drum Set TRQ BRA19701 |
| 1986-1991 | Oldsmobile | Delta 88 | Olds Delta 88 Rear Driver & Passenger Side with 8.86 x 2.17 Inch Brake Drum with Cast Iron Brake Drums 2 Piece Brake Drum Set TRQ BRA19701 |
| 1996-1999 | Oldsmobile | LSS | Olds LSS Rear Driver & Passenger Side 2 Piece Brake Drum Set TRQ BRA19701 |
| 1997-1998 | Oldsmobile | Regency | Olds Regency Rear Driver & Passenger Side 2 Piece Brake Drum Set TRQ BRA19701 |
| 1990-2001 | Oldsmobile | Silhouette | Olds Silhouette Rear Driver & Passenger Side 2 Piece Brake Drum Set TRQ BRA19701 |
| 2002-2004 | Oldsmobile | Silhouette | Olds Silhouette Rear Driver & Passenger Side with Rear Drum Brakes 2 Piece Brake Drum Set TRQ BRA19701 |
| 1984-1991 | Pontiac | 6000 | Pontiac 6000 Wagon Rear Driver & Passenger Side 2 Piece Brake Drum Set TRQ BRA19701 |
| 1987-1995 | Pontiac | Bonneville | Pontiac Bonneville Rear Driver & Passenger Side with Cast Iron Brake Drums 2 Piece Brake Drum Set TRQ BRA19701 |
| 1996-1999 | Pontiac | Bonneville | Pontiac Bonneville Rear Driver & Passenger Side 2 Piece Brake Drum Set TRQ BRA19701 |
| 1999-2005 | Pontiac | Grand Am | Pontiac Grand Am Rear Driver & Passenger Side with Rear Drum Brakes 2 Piece Brake Drum Set TRQ BRA19701 |
| 1999-2001 | Pontiac | Montana | Pontiac Montana Rear Driver & Passenger Side 2 Piece Brake Drum Set TRQ BRA19701 |
| 2002-2004 | Pontiac | Montana | Pontiac Montana Rear Driver & Passenger Side with Rear Drum Brakes 2 Piece Brake Drum Set TRQ BRA19701 |
| 2005 | Pontiac | Montana | Pontiac Montana Base Model Rear Driver & Passenger Side 2 Piece Brake Drum Set TRQ BRA19701 |
| 1990-1998 | Pontiac | Trans Sport | Pontiac Trans Sport Rear Driver & Passenger Side 2 Piece Brake Drum Set TRQ BRA19701 |
| Brand Label | Part Number |
|---|---|
| Aimco | 8939 |
| Wagner | BD125482 |
| Raybestos Brakes | 2051 |
| DuraGo | BD8939 |
| Bendix | PDR0451 |
| Wagner | BD61776 |
| Raybestos Brakes | 2051FZN |
| Raybestos Brakes | 2051R |
| Raybestos Brakes | 2051P |
This item may be interchangeable with parts from other brands with the above part numbers. This information is provided only for reference and does not guarantee that the item you are purchasing is identical to parts with part numbers from the brands listed above. To confirm that this item fits your vehicle, use the above "Check Vehicle Fit" option.
Lifetime Warranty
This item is backed by our limited lifetime warranty. In the event that this item should fail due to manufacturing defects during intended use, we will replace the part free of charge. This warranty covers the cost of the part only.
FREE Shipping is standard on orders shipped to the lower 48 States (Contiguous United States). Standard shipping charges apply to Hawaii and Alaska.
Shipping is not available to a P.O. Box, APO/FPO/DPO addresses, US Territories, or Canada for this item.
Expedited is available on checkout to the United States, excluding Alaska, Hawaii.
Final shipping costs are available at checkout.

Created on:
Tools used
Brought to you by 1aauto.com, your source for replacement parts and the best service on the internet.
Hi. I'm Mike Green. I'm one of the owners of 1A Auto. I want to help you save time and money repairing and maintaining your vehicle. I'm going to use my 20+ years experience restoring and repairing cars and trucks like this to show you the correct way to install parts from 1aauto.com. The right parts installed correctly: that's going to save you time and money. Thank you and enjoy the video.
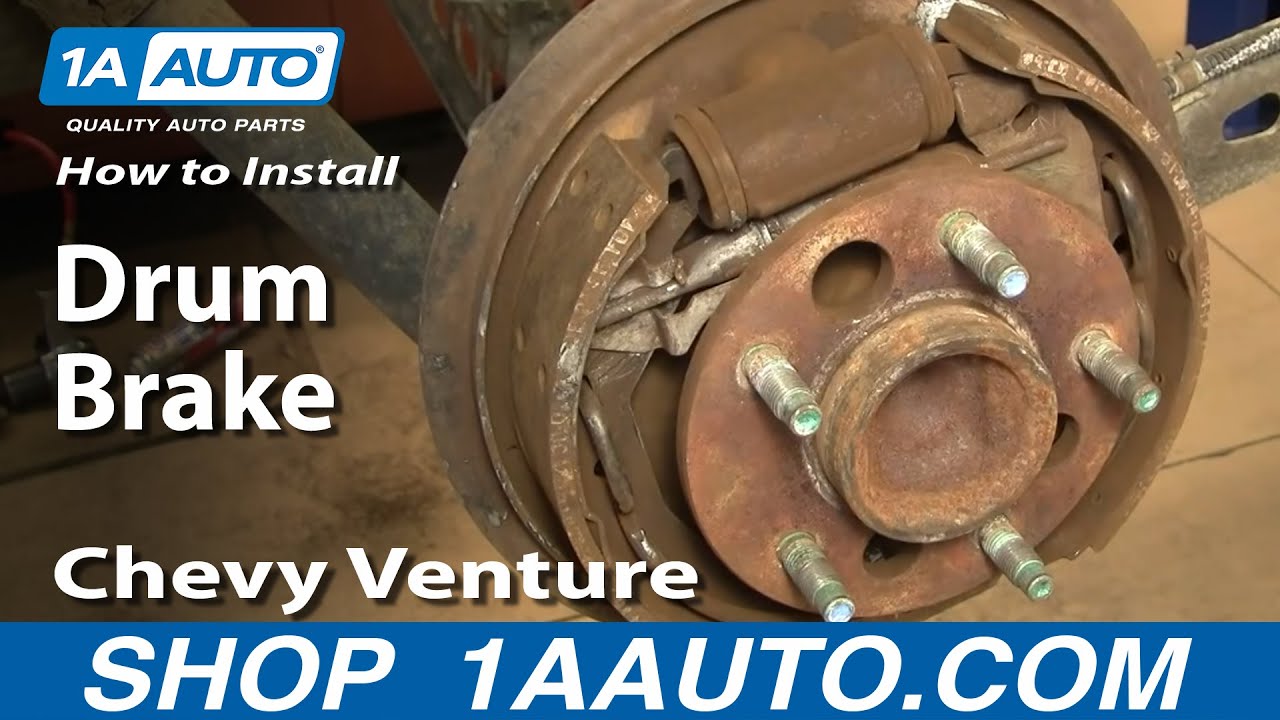
In this video we're going to show you how to replace your rear brake shoes and drums on this '98 Venture. This procedures the same for any '97 to '05 Venture, Transport, Montana, and Silhouette. Tools you'll need are 19 millimeter socket and/or ratchet, or your tire iron, jack and jack stand, regular screwdriver, pliers: both regular and needle nose pliers, and some white grease or some anti-seize lubricant.
First you want to remove your center cap with a screwdriver. Some of these have wheel covers that are held on by black caps that you loosen up and then pull the wheel cover off. These are 19 millimeter lug nuts. If you don't have air tools, if you're just using hand tools, loosen your lug nuts when the wheel is still on the ground then lift it up, secure the vehicle with jack stands and then remove the lug nuts the rest of the way.
Okay, then if you're lucky you can grab onto your drum and shake it a little bit and pull it right off. Okay. If it ends up that your drum doesn't come off easily, first what you'll want to do is de-adjust the brakes. To do that just go to the end of this video and you'll see how I tighten the brakes or adjust them. You want to reverse that procedure. Then you'll want to use a large hammer, beat on the drum and it should come loose.
You see here nice smooth surface. This is the braking surface of your drum. What you want to do is take your fingernail and go against that and see if there's any big gauges or ridges and also, I don't know if you can see it, but you can see where there's kind of a surface here and then it goes in slightly and then the surface. If this surface where it goes in, if that's gone, that means your drum is probably out of specifications, meaning you need a new one. I would recommend if you feel any big gauges or you see that this surface is thin that you just get a new drum.
Here are our brake shoes. You can see that this is the lining material and it's nice and thick. These are fine, but I'll show you how to take them apart and put them back together anyways. There are actually rivets in here that when these get thin it'll start scraping against the lining in the brake drum and making a squeaking noise. These are pretty good.
This is your wheel cylinder. Fluid comes in here and the wheel cylinder pushes out on the brake pads and then they rub against the drum and that's what provides the braking power. This in here, it's hard to see, but behind this yellow spring is your adjuster. That adjuster, when you back up and the brake shoes go out it's supposed to adjust to keep the brake shoes tight against the drum.
To take them apart you want to use a pair of needle nose pliers, grab onto this spring, pull it out, and then it just kind of comes out. Then you can just use a screwdriver and pry that out of the way. That allows this whole shoe to come down. There's some parts in here that are going to drop out.
Same thing on the other side: pry this up and out. Then this shoe is hooked on to the emergency brake so it just needs to come off like that and it comes off. This is the emergency brake arm and here's your adjuster I was talking about. Okay. You can see that this spins, gets larger. That pushes the brakes out and keeps them into adjustment.
Before we put this together you want to inspect your wheel cylinder. If your wheel cylinder is bad you'll start to see some fluid going down here and if you see that fluid you want to replace your wheel cylinder. This one looks like it's nice and dry. We're going to take a wire brush, and you can see here and here and also here, those are spots where the shoes rub against the backing plates. We're going to clean those off real good. Then there's the other ones. There's three spots on the front and three spots on the back.
Next we're going to take our adjuster. We're going to clean the end off here. Then we're going to wind it out. Clean off those threads. I'm using a little bit of anti-seize. You can use this or you can use some white lithium grease. I'm just putting a touch of lubricant where those rub against there. Then a touch on there and a little bit on the threads there. Thread that back in. This is the other end. I'm just going to put this on to just even out that lubricant.
Here's our original shoe. New one from 1A Auto. You can see, I just want to show you. Obviously Im going to pout these back on because they basically look new. Looks like they've even got spots where they haven't even worn yet, but I just want to show you the shoe from 1A Auto is exactly the same as the original. They'll fit correctly and go on there.
The shoes, you can actually see they're actually the same. There's no front or back, but this vehicle has been together before with this one in the front so I'm going to put it back together that way. If you're putting new shoes on this vehicle, it doesn't matter which one you put on the front or the back.
We'll put the front one on first. You basically want to put it on there and get it onto the emergency brake lever. Pull out your holding lever. You can pretty much do this by hand.
Quick note here I just inserted that rod into the wrong place. Just a little FYI: I do fix it later, but hey everybody makes mistakes, right?
There we go. Now this goes in and this longer finger goes in the back and you slide that right in here. You just want to try and make sure you get it all. Push that lever on. You don't want to have any space in between there. Now take a pair of regular pliers, grab onto this. Let's see here, get this in place better. Put this shoe in, spot down the bottom and then you can let go with your pliers.
The bottom of the shoe should be in place like that. Once you have it there, you just want to make sure the shoes are on correctly. Okay, made a little mistake with this one. I put the holder into the wrong hole, here. That'll work a lot better.
Now you want to take this. This is your bracket that held your spring. You want to just place it like this. There's a little hole, see that little hole it goes into right there, so it stays in place. Then this is the other end of your adjuster and you want to put it on like that. What I like to do is pry this out, get it in there in place. Reach through with my finger here, get the adjuster up, all together.
Now what you need to do so that you're back together, before you put that spring on, what you want to do is come to a preliminary adjustment. How you do that is you basically want it to be just a little bit difficult to get your drum on. You see it goes on easy, shakes all around, you know that the shoes are not adjusted where they need to be.
Just going to check in down here and make sure that's seated correctly. You just take a screwdriver and you're pushing these up. I'll use a smaller hole to make things easier. What you want to do is wind it out a little bit or adjust it out and then try your drum. It's making noise. That still is pretty loose. You can see that I can move the drum quite a bit. You want the shoes to be evenly spaced in the wheel cylinder.
You want to be careful if you feel it going on a little bit too hard, then it might be hard to get off. This is still it's starting to get pretty close so what I'm going to do is wind it out probably another couple of turns here. It's going on pretty tight.
Now I'll put my spring back on. You just put this right in there. Use you needle nose pliers to get that together. Then you want to make sure there's actually a plug right back in here. I don't know if you can see it there, but you can see it there. Pretty easy especially if you get from this side, take a screwdriver and retry it back there, it just pulls out. That plug allows you now to reach it back from here. See my screwdriver come through. So there's my screwdriver. Now from the back I can adjust this more if I want to.
Put my drum back on. You notice it went on tight, but now it spins and there's a little bit of drag there and that's basically where you want it. You want it to spin with just a little bit of drag because after about 20 or 30 miles that drag will wear down and you'll have perfectly adjusted brakes.
If I were to want to adjust it more from the back. You put your screwdriver in there, get a hold of that star, and move it up, which moves the wheel down, but I don't so I'm just going to put my rubber plug back in.
I'm going to speed up putting the wheel back on here. Put the wheel on. Put the lug nuts on by hand first so you don't cross thread them. Then tighten them up just preliminarily. Put the vehicle back down on the ground and torque them to 100 foot pounds. Then, very important, always test your brakes first, before you road test.
We hope this helps you out. Brought to you by www.1aauto.com. Your source for quality replacement parts and the best service on the internet. Please feel free to call us toll free 888-844-3393. We're the company that's here for you on the internet and in person.
Love that it came as a pair. Great quality of brakes

BRA19701
This listing is for a pair of brake drums only, and we do not carry the shoes or hardware to go along with them.
