

★★★★★
April 24, 2026
Perfect
Just the part I needed, with fast and free shipping!

Replaces





About TRQ:
TRQ is a trusted brand dedicated to making every repair a success story by combining premium parts with easy installation. Each TRQ part is engineered by a team of automotive experts to meet or exceed OEM standards, delivering enhanced performance and maximum longevity. With rigorous in-house testing, the brand ensures superior fit and function across every product line. TRQ also provides customers with best-in-class, step-by-step installation videos—so you can complete repairs with confidence, whether you're a first-time DIYer or an industry professional.
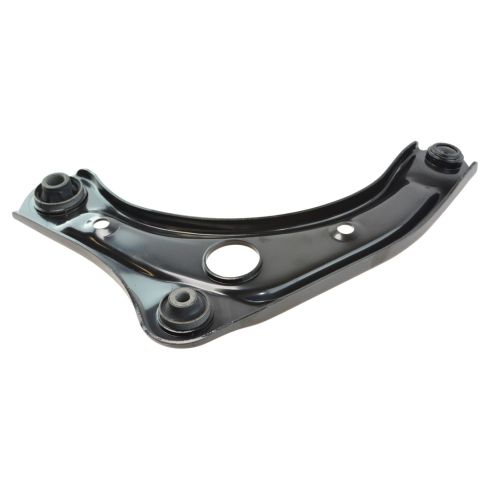
Our control arms are designed to be direct replacements for the original factory parts. They are 100% brand new and require no modifications for installation. No special tools are required because all of the bushings come pre-installed.
Our steering and suspension components are pre-greased and sealed for long life and do not require the extra maintenance typically required by greaseable versions.
Attention California Customers:
 WARNING: This product can expose you to chemicals including Lead and Lead Compounds, which are known to the State of California to cause cancer, and birth defects or other reproductive harm. For more information, go to www.P65Warnings.ca.gov.
This part fits 3 vehicles spanning 2012-2019.
| Year | Make | Model | Description |
|---|---|---|---|
| 2012 | Nissan | Versa | Nissan Versa Sedan Front Passenger Side Lower Control Arm with Ball Joint TRQ PSA84345 |
| 2013-2019 | Nissan | Versa | Nissan Versa Front Passenger Side Lower Control Arm with Ball Joint TRQ PSA84345 |
| 2014-2019 | Nissan | Versa Note | Nissan Versa Note Front Passenger Side Lower Control Arm with Ball Joint TRQ PSA84345 |
| Brand Label | Part Number |
|---|---|
| Dorman | 524-102 |
| MAS Industries | CB69314 |
| NAPA | 2606890 |
| Datsun/Nissan | 545001HK0B |
| MOOG Chassis Products | RK621576 |
| Mcquay-Norris | FA3953 |
| Datsun/Nissan | 545001HK0C |
| Datsun/Nissan | 545003DN0A |
| Datsun/Nissan | 545001HK0A |
| Mevotech | CMS301137 |
| Suzuki | 4521154L21 |
| Dorman - OE Solutions | 524-102 |
| DIY Solutions | SUS06014 |
| Hollander | 512-58957R |
| Mevotech Supreme | CMS301137 |
| Nissan | 54500-1HA0C |
This item may be interchangeable with parts from other brands with the above part numbers. This information is provided only for reference and does not guarantee that the item you are purchasing is identical to parts with part numbers from the brands listed above. To confirm that this item fits your vehicle, use the above "Check Vehicle Fit" option.
Lifetime Warranty
This item is backed by our limited lifetime warranty. In the event that this item should fail due to manufacturing defects during intended use, we will replace the part free of charge. This warranty covers the cost of the part only.
FREE Shipping is standard on orders shipped to the lower 48 States (Contiguous United States). Standard shipping charges apply to Hawaii and Alaska.
Shipping is not available to a P.O. Box, APO/FPO/DPO addresses, US Territories, or Canada for this item.
Expedited is available on checkout to the United States, excluding Alaska, Hawaii.
Final shipping costs are available at checkout.

Created on:
Tools used
Hi, I'm Mike at 1A Auto, we've been selling auto parts for over 30 years.
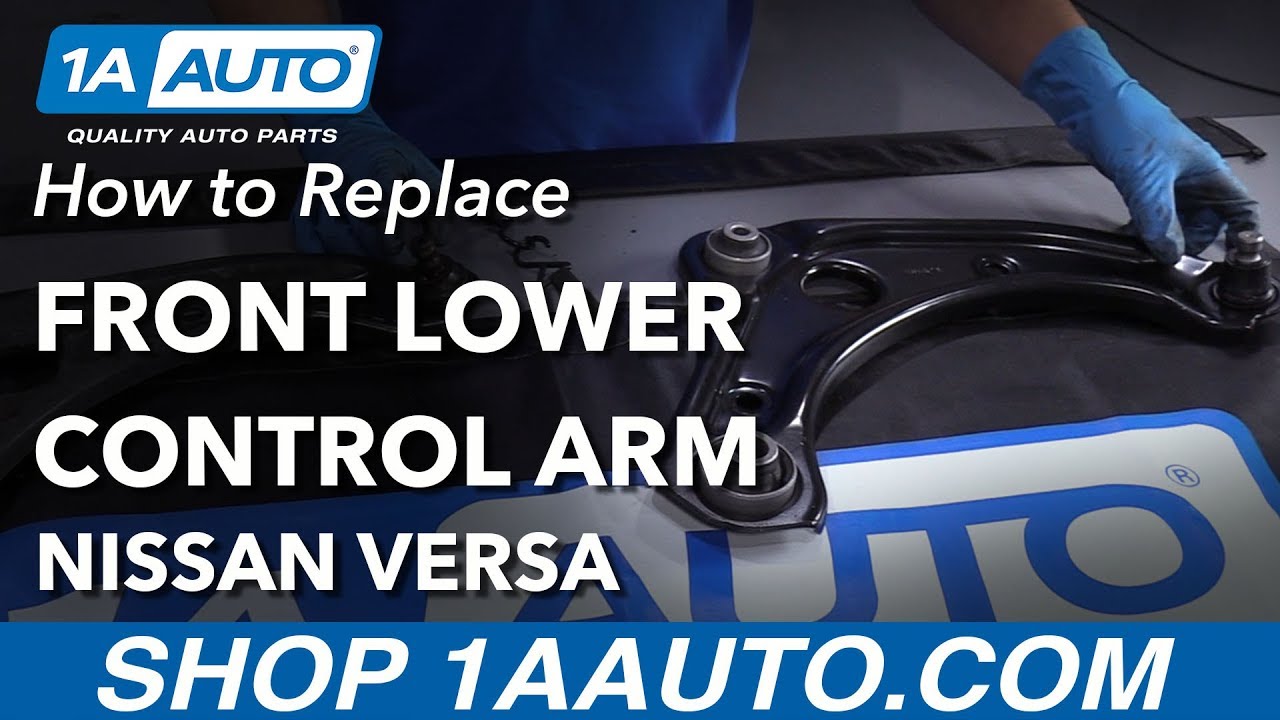
What's up guys, here we have some control arms from 1AAuto.com, we're gonna be installing them on this 2014 Nissan Versa. Some of the things about these control arms, they have nice bushings already installed in the ball joint. These bushings generally wear out over time and it's a good idea to replace them, but you can get them with the control arm. Get yours at 1AAuto.com.
We're gonna pull the hub cap off, we're gonna use a pry bar. You can try to grab it with your fingers and pull, it's a little tricky. Grab a pry bar or a straight blade screwdriver, get in behind here, just pry it out, pull it off.
Next we'll take a 21mm socket and a breaker bar, we're going to crack the lug nuts free before we raise the vehicle. No, now we're gonna raise and support the vehicle. We're using a two post lift, you can use the jack and jack stands.
Now I'm gonna take these nuts off. Before we take any of these bolts or nuts off, we're gonna spray this with some rust penetrant, and then right here as well.
Next we're gonna take this nut off, I'm gonna use a 14mm socket and a breaker bar on this side. On the other side I have to hold the bolt and I'm going to use a 14mm socket on a ratchet, it's coming loose. Then I can take the bolt out and take off the nut. If the bolt is just sitting there not spinning, take the nut off by hand. So, nut, this bolt is stuck in there pretty good, so I'm going to add some more rust penetrant, let it soak for a while. Soak this, write it up.
Alright, now we're gonna try to bang this bolt out, we'll use a little punch and a hammer. Not really moving too much, try just tapping it with the hammer a little bit, there it goes. Now I'll use the punch again. You don't really want to hammer it all the way out with just the hammer because you could mushroom the end and then the nut won't go on the bolt, and there's bolt.
Right I'm gonna use that pickle fork and separate the ball joint from the knuckle. You can use this, there's other ball joint tools you can use and spend, and then we'll just hammer it in, tap it a little bit, came right up.
Now we're gonna loosen this bolt up, we've got an 18mm nut on top and that 18mm bolt on the bottom. I'm gonna use an 18mm socket and a breaker bar first thing to loosen it up down here, and then I will use a wrench to hold the nut, and they're not starting to spin, put a wrench up there, 18mm wrench. So now I'll take the nut off up top.
The axle might get in your way a little bit, so you can try to loosen the knuckle around, pull that nut out. You can just unscrew the bolt and it should come right out, that bolt.
Up next we're gonna remove this bolt and use a 21mm socket and a breaker bar. Now that it's a little loose, I'm gonna switch to a extension and a ratchet. Now this is one of the bolts that helps hold the cradle up, but there is another bolt here, and there's another bolt up there, so it should be fine. Just taking this bolt out, pull that bolt up, then we can pull the control arm out.
I'm gonna take my pry bar, get in under here, pry it out a little bit, then come over here, hi this back section out like that.
Here's the old control arm, here's the new control arm from 1AAuto.com. As you can see, the shapes are the same, the bushings locations are in the same, a ball joint the same. Get yours at 1AAuto.com, you'll be ready to rock and roll.
Alright, to slide this in, this back one has to slide this way, so I'm going to slide this in this area first, get that into position.
Alright, so to get this to slide in a little easier, I actually went and turn the steering wheel back the other way, so the steering wheel is facing the driver's side, and that will give me a little more room over here to line this up. We can tap it in over here. We've got this hole lined up pretty good, just gonna take a Phillips head screwdriver, slide this, trying to get this lined up a little better, and then make sure this one's lined up pretty good.
So we'll install that bolt, slide that bolt in there, get down when I started, knees a pry bar, pry the control arm in a little bit. I'm gonna get it lined up, I'll just tap on the bolt, can take the nut, get that started.
Now that those are both going on, start snugging up the back 21mm bolt, use an 18mm wrench on top, 18mm socket and ratchet this bolt up. Then we're gonna torque this back bolt to 75 foot-pounds. We actually sell these torque wrenches at 1AAuto.com, and we're going to torque this nut and bolt with the torque wrench.
I'm gonna use a wrench up top and torque the bolt to 111 foot-pounds.
We're gonna install the ball joint. You're gonna want to be careful when you do this. You don't want to get your fingers stuck in between the ball joint and the knuckle. Use a pry bar, pride down on the control arm, line the ball joint up like that. There we go, let's, that's in there, and we can take our bolt back through.
I mean, you have to tap this a little bit, the hammer. Now I had to turn the steering wheel straight, so once that's straight, then I can slide the bolt in there. I'm gonna take a hammer, I'm just gonna tap it in, and I'm able to hammer the bolt in. It's the bolt's in, I can put the nut back on and snug it down and then torque it. There's a fourteen millimeter socket and a ratchet on one side and the same on the other, fourteen millimeter socket and a ratchet, they'll hold the bolt in. I'm gonna use a torque wrench with my fourteen millimeter socket. I'm going to torque this down at 28 foot-pounds.
Now install the wheel and tire, install the nuts, snug them up, and then we're gonna lower the vehicle and torque them. Next we're going to torque these lug nuts with a 21mm socket and a torque wrench, 284 foot-pounds. We're going to torque these in a star pattern or a cross pattern so that it torques the wheel down evenly.
You install this hubcap, you want to find where the slot goes for the valve stem, line that up and push it on, tap it on like that, or you can use a rubber mallet.
Whenever you're doing any kind of front-end work, whether replacing components or reusing components, and you take it apart, it's a good idea to have your alignment checked or even performed at a local shop. That way you don't have premature tire wear.
Thanks for watching. Visit us at 1AAuto.com for quality auto parts, fast and free shipping, and the best customer service in the industry. You
Just the part I needed, with fast and free shipping!
Part is defective.

PSA84345
