Replaces
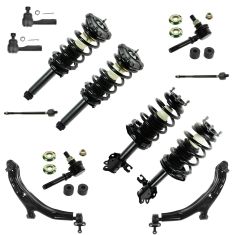
Replaces 2002-06 Nissan Sentra Front & Rear 12 Piece Steering & Suspension Kit TRQ PSA56208
$474.95
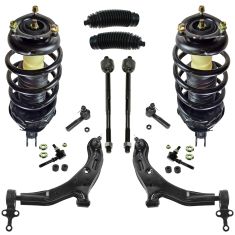
Replaces 2002-06 Nissan Sentra Front 12 Piece Steering & Suspension Kit TRQ PSA59944
$336.95
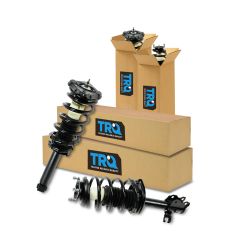
Replaces 2002-06 Nissan Sentra L4 1.8L Front & Rear 4 Piece Complete Strut Assembly & Shock Absorber Kit TRQ SKA60888
$331.95
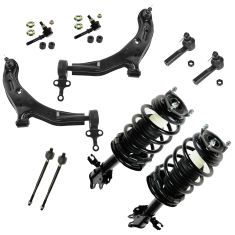
Replaces 2002-06 Nissan Sentra Front 10 Piece Steering & Suspension Kit TRQ PSA59110
$320.95
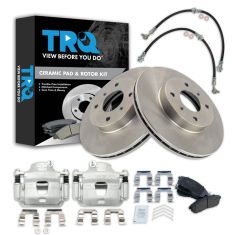
Replaces Nissan Sentra Front Ceramic Brake Pad & Rotor Kit with Calipers & Hoses TRQ BKA29905
$316.95
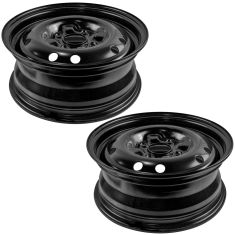
Replaces Nissan Altima Sentra Steel Wheel 2 Piece Set Dorman OE Solutions 1AWHK00059
$284.95
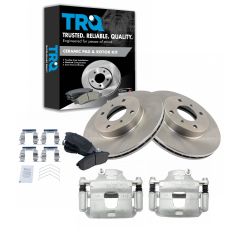
Replaces Nissan Altima Sentra Front Driver & Passenger Side Ceramic Brake Pad & Rotor Kit with Calipers TRQ BKA19123
$277.95
Replaces Nissan Sentra Front Semi-Metallic Brake Pad & Rotor Kit with Calipers TRQ BKA49536
$257.95
Part Details
Specifications
Assemblies may include halogen or incandescent test bulbs that should be replaced before installation.
Attention California Customers:
 WARNING: This product can expose you to chemicals including Chromium (Hexavalent Compounds), which is known to the State of California to cause cancer, and birth defects or other reproductive harm. For more information, go to www.P65Warnings.ca.gov
This item is backed by our limited lifetime warranty. In the event this item should fail due to manufacturing defects during intended use, we will replace the part free of charge. This warranty covers the cost of the part only.
The bulbs are for testing and not covered under our warranty. Our warranty applies to the light assembly only.
FREE Shipping is standard on Orders shipped to the lower 48 States (Contiguous United States). Standard shipping charges apply to Hawaii, Alaska and US Territories. Shipping is not available to Canada.
Expedited is available on checkout to the United States, excluding Alaska, Hawaii and US Territories as well as P.O. Boxes and APO/FPO/DPO addresses. Final shipping costs are available at checkout.


Created on:
Tools used
Brought to you by 1AAuto.com, your source for quality replacement parts and the best service on the Internet. Hi, I'm Mike from 1A Auto. I hope this how-to video helps you out, and next time you need parts for your vehicle, think of 1AAuto.com. Thanks.
In this video, we show you how to service the headlights on this 2006 Nissan Sentra. We show you both if you're looking to just change a bulb as well as if you want to replace the whole headlight because your headlight is clouded or damaged in any way. The only tool you'll need is the 10-mm wrench or a socket and ratchet. If you need to change a bulb on your headlight, you can reach in the back. It's actually just as easy to take the whole light out. It just allows easier access to the back. There are two 10-mm bolts right on top here, and I take these off.
Looking at the back of the new light, there's a pin here and then there's a connecting point right here. So, to get the old light out, and I try and grab underneath. Pull forward there, and then, this one is usually quite a bit more difficult. Trying to get underneath and you have to kind of pull and move the light side to side while you pull, and the light comes free there. Kind of bolted up for the fender, that bumper cover. Out and look back in here, and you'll see the connectors with little red tabs. Just use a screwdriver and pry the little red tabs back. Then, press on the connectors and disconnect.
Here are the connectors. These little tabs are locked in, so when you look back there, you just want to push those tabs back and then press there to disconnect. Once your light is out, then replacing the bulbs is pretty easy. Twist counterclockwise and take it out. New bulb goes in clockwise to lock. Same here. This bulb just pulls straight out, back in. Okay, if you're looking to install a new headlight because yours is broken or clouded or faded or worn out, we sell very nice replacements. Take the plastic out from around the edge and put it in place. Reconnect and lock the little red tabs. Reconnect and then put the light down in. Make sure this part goes underneath the fender there. Push the light in. Okay, I'm looking back here and I can see the little tab or the little ... that mounting rod. Make sure that goes in to the clip. Come here, and I'll show you that.
Okay, I'm looking down in. Let's see if I can see it here with the camera. That's difficult, but I think if you look at that, you can see just below the connector there, the wiring harness connector, you can see the little stud that's in the headlight going to the clip there. Okay, and here's a still photo. Before you go too far, make sure that your light is outside of this tab on the fender. Push inside in, and then, we can make sure two clips are going in. Everything looks good, and we can put these two bolts back on.
I'm just going to speed it up here as I start those bolts on and then tighten them up nice and firm. Once you do that, then you've got a nice new headlight or you've accomplished replacing your headlight bulb if you needed to.
We hope this helps you out. Brought to you by www.1AAuto.com, your source for quality replacement parts and the best service on the Internet. Please feel free to call us toll free 888-844-3393. We're the company that's here for you on the Internet and in person.