About TRQ: TRQ is a trusted brand dedicated to making every repair a success story by combining premium parts with easy installation. Each TRQ part is engineered by a team of automotive experts to meet or exceed OEM standards, delivering enhanced performance and maximum longevity. With rigorous in-house testing, the brand ensures superior fit and function across every product line. TRQ also provides customers with best-in-class, step-by-step installation videos—so you can complete repairs with confidence, whether you're a first-time DIYer or an industry professional.
Product Features
Application Specific Design: No modifications necessary
Anti-Corrosion Coated: Enhanced surface life
Pre-greased: No additional maintenance required
Kitted for Restored Performance: Improved road-feel and handling
Description
TRQ suspension kits are manufactured using premium raw materials and coatings for extended service life. Each TRQ suspension component is designed to be a direct, maintenance-free replacement to the stock unit. To extend the life of your steering and suspension components, TRQ recommends replacing components in pairs, sets, or kits. All products are fit and road-tested in our Massachusetts R&D facility to ensure we deliver on our promise of Trusted Reliable Quality.
Install Tip: When replacing steering components, have a professional alignment performed afterwards. This ensures proper tracking and even tire wear.
Our steering and suspension components are pre-greased and sealed for long life and do not require the extra maintenance typically required by greaseable versions.
Attention California Customers:
WARNING: This product can expose you to chemicals including Lead and Lead Compounds, which are known to the State of California to cause cancer, and birth defects or other reproductive harm. For more information, go to www.P65Warnings.ca.gov.
Nissan Maxima Front 8 Piece Steering & Suspension Kit TRQ PSA58702
Part Interchange
Brand Label
Part Number
Dorman
520-517
ACDelco
45D3214
Dorman
520-518
ACDelco
45D3215
MOOG Chassis Products
ES3438
NAPA Premium
2605413
Datsun/Nissan
54500-2Y412
Dorman - OE Solutions
520-518
Precision Driveline
5CB30029
Ingalls Engineering
CAK620354
Beck/Arnley
101-4932
Datsun/Nissan
545012Y421
MAS Industries
CB69003
Nissan
545002Y470
Precision Driveline
CB30029
Mevotech
CMS20458
Mevotech
GS20458
MOOG Chassis Products
K620355
MAS Industries
CB69004PR
Nissan
545006Y301
Precision Driveline
CB30030
MOOG Chassis Products
CK620355
Mcquay-Norris
FA4286
Nissan
545012Y470
Mevotech
MS20458
MOOG Chassis Products
K620354
Mevotech
CMS20459
Raybestos Chassis
507-1214
Precision Driveline
5CB30030
Dorman - OE Solutions
520-517
Nissan
545012Y412
MOOG Chassis Products
EV458
SYD
1516002
Mevotech
GS20459
Datsun/Nissan
545012Y412
SYD
1516001
Datsun/Nissan
545015Y720
Mevotech
MS20459
NAPA Premium
2605412
Falcon Steering Systems
FCA335
Nissan
545002Y412
MOOG Chassis Products
K90432
NAPA
260-5412
Datsun/Nissan
545012Y470
Nissan
545012Y411
Ingalls Engineering
CAK620355
MOOG Chassis Products
RK620354
Nissan
545002Y411
Raybestos Chassis
507-1215
MOOG Chassis Products
RK620355
Centric Parts
623.42057
Centric Parts
623.42056
Beck/Arnley
102-4932
MAS Industries
CB69003PR
Datsun/Nissan
545012Y411
Mcquay-Norris
FA4285
Beck/Arnley
101-4931
Datsun/Nissan
545016Y301
Beck/Arnley
102-4931
NAPA
260-5413
Nissan
545016Y301
Falcon Steering Systems
FCA336
Datsun/Nissan
545002Y470
MOOG Chassis Products
CK620354
MAS Industries
CB69004
MOOG Chassis Products
K90431
DIY Solutions
SUS07531
DIY Solutions
SUS06673
DIY Solutions
SUS06672
DIY Solutions
SUS07380
DIY Solutions
SUS05400
DIY Solutions
SUS05399
Falcon Automotive
CA335
Falcon Automotive
CA336
Mevotech
MK90431
Mevotech
MES3438
Mevotech
MK90432
Mcquay-Norris
ES3438
TRW Steering and Suspension Parts
JTE572
Dorman
T3438XL
NAPA Chassis Parts
2693103
MAS Industries
T3438
Centric Parts
612.42024
NAPA Chassis Parts
269-3150
Mevotech
MES3407
Datsun/Nissan
48520-0M085
MAS Industries
T3407
Firestone
ES3438
NAPA Chassis Parts
269-3103
Parts Master
ES3438
AutoZone
ES3438
NAPA Proformer
ES3438
Duralast
ES3438
ACDelco
45A0813
Dorman
534-601
ACDelco
45A0766
TRW Steering and Suspension Parts
ES3438
Import Direct Chassis
ER02002
Mcquay-Norris
ES3407
Centric Parts
613.42121
Raybestos Brakes
401-1813
Autospecialty
03-51015
Raybestos Brakes
401-1766
Autospecialty
351015
Datsun/Nissan
546682Y000
Datsun/Nissan
485215Y425
Datsun/Nissan
485215Y485
Datsun/Nissan
546182Y000
Datsun/Nissan
485215Y085
Datsun/Nissan
485212Y085
Datsun/Nissan
485212Y405
Datsun/Nissan
485212Y485
Datsun/Nissan
485215Y025
Datsun/Nissan
485212Y425
Datsun/Nissan
485212Y025
Datsun/Nissan
485200M085
Carquest
CA352B
Carquest
CA351B
Dorman - OE Solutions
534-601
Dorman - Premium
CB69003PR
Dorman - Premium
CB69004PR
Dorman - Premium
T3438XL
Hollander
512-58322L
Hollander
512-58521R
Datsun/Nissan
485200M025
INFINITI
485200M025
INFINITI
48520-0M085
Mevotech Supreme
MES3407
Mevotech Supreme
GS20459
Mevotech Supreme
MS20459
Mevotech Supreme
CMS20459
Mevotech Supreme
MES3438
Mevotech Supreme
MS20458
Mevotech Supreme
CMS20458
Mevotech Supreme
GS20458
Mevotech Supreme
MK90431
Nissan
54500-2Y400
Nissan
54501-2Y400
This item may be interchangeable with parts from other brands with the above part numbers.
This information is provided only for reference and does not guarantee that the item you are
purchasing is identical to parts with part numbers from the brands listed above.
To confirm that this item fits your vehicle, use the above "Check Vehicle Fit" option.
Lifetime Warranty
This item is backed by our limited lifetime warranty. In the event that this item should fail due to manufacturing defects during intended use, we will replace the part free of charge. This warranty covers the cost of the part only.
FREE Shipping is standard on orders shipped to the lower 48 States (Contiguous United States). Standard shipping charges apply to Hawaii and Alaska.
Shipping is not available to a P.O. Box, APO/FPO/DPO addresses, US Territories, or Canada for this item.
Expedited is available on checkout to the United States, excluding Alaska, Hawaii.
Final shipping costs are available at checkout.
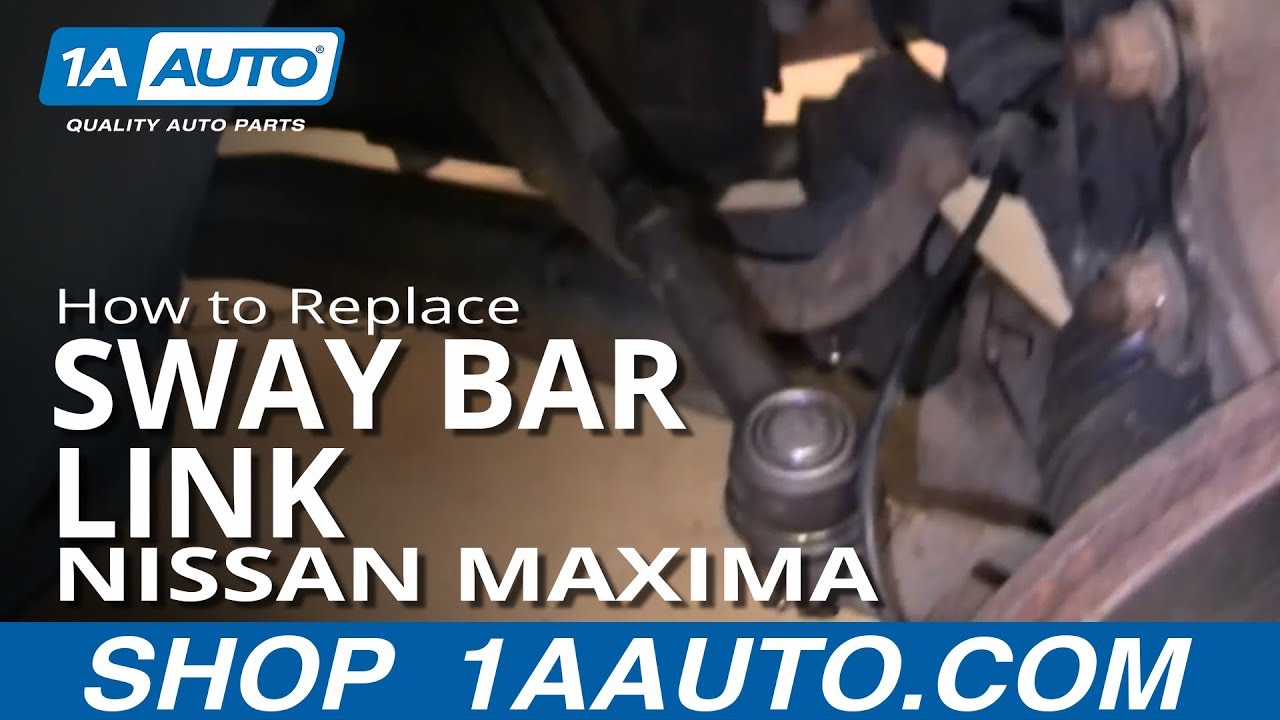
How to Replace Sway Bar Link 1999-2003 Nissan Maxima
How to Replace Outer Tie Rod 1995-2008 Nissan Maxima
Created on:
Tools used
14mm Wrench
21mm Socket
A Piece of Pipe (for leverage)
Torque Wrench
15mm Socket
Jack Stands
Ratchet
Floor Jack
1/2 Inch Breaker Bar
1. Removing the Wheel
Loosen the lug nuts with the vehicle on the ground
Raise the vehicle with a floor jack
Secure the vehicle on jack stands
Remove the lug nuts
Pull off the wheel
2. Removing the Stabilizer Link
Hold the lower sway bar link stud with a 14mm wrench
Remove the lower nut from the sway bar link with a 15mm socket and ratchet
Hold the upper sway bar link stud with a 14mm wrench
Remove the upper nut from the sway bar link with a 15mm socket and ratchet
Pull off the stabilizer link
3. Installing the Stabilizer Link
Hold the lower sway bar link stud with a 14mm wrench
Tighten the lower 15mm nut onto the stabilizer link
Hold the upper sway bar link stud with a 14mm wrench
Tighten the upper 15mm nut onto the stabilizer link
4. Reattaching the Wheel
Slide the wheel into place
Start the lug nuts by hand
Tighten the lug nuts preliminarily
Lower the vehicle to the ground
Tighten the lug nuts to 100 foot-pounds in a crossing or star pattern
Brought to you by 1AAuto.com, your source for quality replacement parts and the best service on the Internet.
Hi, I'm Don from 1A Auto. I hope this how-to video helps you out, and next time you need parts for your vehicle, think of 1AAuto.com. Thanks.
In this video, we're going to show you how to replace a front stabilizer link on this 2003 Maxima, pretty much the same procedure for any of this era of Maxima. Stabilizer links will rattle if you're going over bumps. Then you'll notice if you're going through turns, at the same time the rattle will go away. That's usually a good sign that your stabilizer link is getting loose. What you'll need is a new pair of stabilizer links from 1A Auto. In this video, we show how to replace the right-hand or passenger side one; the left-hand is the same procedure. We always recommend you replace them in pair. You'll need jack and jack stand, and 15 and 21 millimeter sockets. You'll need a ratchet or a breaker bar and pipe for some extra leverage, and a 14-millimeter wrench. Let's start off by removing the wheel. You're going to want a 12 millimeter socket and ratchet, or a breaker bar or your tire iron.
You'll probably want to start with the wheel on the ground. Loosen the lug nuts. Then raise and secure the vehicle with jack stands. Then remove the wheel and the tire.
I'm removing the 15 millimeter nut on the lower stabilizer link. You need a breaker bar and a pipe. I've broken the nut free, but I'm going to use a 14 millimeter wrench to hold the link rod and continue. We'll speed up here as we take that nut the rest of the way off. Again, using a 15 millimeter socket on one side and holding the stabilizer link rod. It was a 14 millimeter wrench on the other. I'm removing the upper 15 millimeter nut on the stabilizer link. It's the same thing here. You see Don gets going with a little bit of extra leverage from that pipe, then uses a 14 millimeter wrench to hold on to the shaft basically between the boot and the bracket while he removes the nut the rest of the way. We've got two nuts off. Pull out the stabilizer rod.
Here's the front stabilizer link. Now, we'll speed it up as we tighten up both those nuts. You want to get them about as tight as you can with a ratchet handle. You can see that probably the hardest part of this repair is making sure you have a pipe or something to get those nuts loose initially. Once you break that free, then it's a pretty straight-forward repair, taking off two 15 millimeter nuts, taking the part out, putting a new part in from 1A Auto, and then tightening it up.
Fast-forward. Put your wheel and tire back on. Start the lug nuts by hand first, and then tighten them up preliminarily. Set your torque wrench to 100 foot pounds and tighten the lug nuts. Use a star pattern. Draw a star pattern as you tighten them. Then just recheck them.
We hope this video helps you out. Brought to you by www.1AAuto.com, your source for quality replacement parts and the best service on the Internet. Please feel free to call us toll-free, 888-844-3393. We're the company that's here for you on the Internet and in person.
Tools used
Adjustable Wrench
A Piece of Pipe (for leverage)
Torque Wrench
15mm Socket
Rust Penetrant
Jack Stands
19mm Socket
21mm Socket
Large Hammer
Anti-Seize Grease
Lug Wrench
Ratchet
Floor Jack
Needle nose pliers
1/2 Inch Breaker Bar
13mm Wrench
1. Removing the Wheel
Loosen the lug nuts with the vehicle on the ground
Raise the vehicle with a floor jack
Secure the vehicle on jack stands
Remove the lug nuts
Pull off the wheel
2. Removing the Outer Tie Rod
Measure the distance from the end of the boot to the center of the top of the tie rod
Note that measurement
Apply penetrating oil to the tie rod lock nut
Hold the inner tie rod with a 13mm wrench
Loosen the locking nut with an adjustable wrench
Turn the wheel by hand or with the steering wheel for better access to the tie rod
Remove the cotter pin with needle nose pliers
If you cannot remove the cotter pin, sheer it off by removing the 19mm bolt
Remove the 19mm bolt
Loosen the tie rod from the spindle by striking the spindle with a hammer
Pull the outer tie rod out of the handle
Hold the inner tie rod with a 13mm wrench
Twist off the outer tie rod by hand
3. Installing the New Outer Tie Rod
Apply anti-seize grease to the inner tie rod
Hold the inner tie rod with a 13mm wrench
Twist the outer tie rod on by hand
Measure the distance from the end of the boot to the center of the top of the tie rod
This should equal the measurement recorded in Step 2
Push the outer tie rod into the spindle
Start the tie rod nut by hand
Tighten the nut to 55 foot-pounds of torque
Line the tie rod hole up with one of the slots in the nut
Insert the cotter pin and bend it to lock it
Hold the inner tie rod with a 13mm wrench
Tighten the locking nut with an adjustable wrench
4. Reattaching the Wheel
Slide the wheel into place
Start the lug nuts by hand
Tighten the lug nuts preliminarily
Lower the vehicle to the ground
Tighten the lug nuts to 100 foot-pounds in a crossing or star pattern
Brought to you by 1AAuto.com, your source for quality replacement parts and the best service on the Internet.
Hi, I'm Don from 1A Auto. I hope this how-to video helps you out, and next time you need parts for your vehicle, think of 1AAuto.com. Thanks.
In this video, we're going to show you how to replace the right hand outer tie rod on this 2003 Nissan Maxima. Obviously the left hand is the same procedure. This is the same for any 2000-2003 Maxima as well as the Infiniti I30.You'll need a new tie rod from 1aauto.com, jack and jack stands, 15-21 mm sockets. You'll need a ratchet and probably a breaker bar or a pipe for some extra leverage, pliers, a large hammer, penetrating oil, as well as you will, or we recommend, you get an alignment after you replace a steering component like this.
Let's start off by removing the wheel. You're going to want a 21 mm socket and ratchet or breaker bar or your tire iron and you'll probably want to start with the wheel on the ground, loosen the lug nuts, then raise and secure the vehicle with jack stands, and then remove the wheel and the tire.
At this point we're going to measure the distance between the end of the boot and the center of the top of the tie rod. It's roughly 11 and 3/4 inches. Yours might be different. It's always a good idea to use some penetrating oil on the lock nut. Spray that down and let it soak in. With our adjustable wrench, size up the nut holding on to the end of the tie rod, with a 13 mm open ended wrench holding the inner tie rod and free it up. Move the steering wheel to the right to gain better access. We're going to remove the securing cotter pin through the outer tie rod. We're just going to speed it up here as Don tries to get that cotter pin out. We couldn't get the cotter pin fully out, so we're going to use our 19 mm, 1/2 inch wrench and then try and sheer it. In this case we're going to use a little extra leverage with the bar on the end of our wrench. I'll speed it up here as we work that bolt the rest of the way off. Quick summary: we tried to get the cotter pin out. It just wouldn't come out. It was basically frozen in there so what we did is took the pliers and broke the ends off as much as we could and then just got the socket on there and sheered the cotter pin right off by moving the bolt.
To help release the outer tie rod from the spindle we use a hammer and hit against the spindle until it frees up. Now it's free. Pull the inner tie rod with your 14mm wrench and twist off the outer tie rod. OK, speed up and Don did misspeak a little bit there: he is using a 13 mm wrench to hold that tie rod.
We got the old outer tie rod and the new one and you can see that dimensionally they're very close, so when they go back in the alignment should be relatively close to what it was before we removed it. It's always a good idea to put a little anti-seize on the end of your inner tie rod so that if you ever have to replace it again, it'll come off just as easily as this did. Holding the inner tie rod, twist the new tie rod on. Check our length from the end of the boot to the center of the tie rod and it is 11 and 3/4 inches just like it was when we took it out. Place the other tie rod back into the spindle. It can be a little stiff. Now we'll secure the nut and set our torque wrench to 55 foot pounds and we're going to torque the nut. Now what you do is make sure that the hole in the outer tie rod matches the slot or one of the slots on the nut and if it doesn't, giving it a little bit more torque is acceptable to the point where the cotter pin slides through the outer tie rod. Bend the ends that come through back along the side of the nut. With the 13 mm wrench hold your inner tie rod and lock down on the nut. Fast forward here as we take that lug nut back off, put the wheel and tire on, and just put the lugs on by hand first and then preliminarily tighten them. Set your torque wrench to 100 foot pounds and tighten the lug nuts. Use a star pattern. Kind of draw a star pattern as you tighten them and then just recheck them.
We hope this helps you out. Brought to you by www.1AAuto.com, your source for quality replacement parts and the best service on the Internet. Please feel free to call us toll-free, 888-844-3393. We're the company that's here for you on the Internet and in person.
Product Reviews
3.8/ 5
★★★★★★★★★★
4 reviews
5★
50%
4★
25%
3★
0%
2★
0%
1★
25%
★★★★★July 26, 2021
A1 Front Suspension Kit for 2002 Maxima
You guys at A1 Auto are exactly that... A1!
The suspension parts fit flawlessly and the tutorial videos are super helpful should you get stuck when doing the repair.
Thank you, thank you, THANK YOU!
I will never use anyone else!
Max
★★★★★June 16, 2018
Overal, excellent fit and good part for the price!
The price for the amount of parts included in the kit is great, and everything fit and is operating great! My only complaints (and the only reason I did not give it five stars) is that some of the replacement bolts are not the same size as either the original factory or what they say in the video. Because of this I had to stop in the middle of the repair to go buy an additional socket size that I shouldn't have needed. The other small issue I noticed was that after installing the castle nut for the ball joint of the lower control arms, and torquing to specs indicated in the video, the cotter pin hole was above the slots of the castle nut so that it is not going to prevent the nut from reversing. It seems that the hole for the hotter pin was positioned too high. The parts are made in China and other countries "as available" so I'm not so sure about the quality control and uniformity. But, it all installed and is functional and saved me a lot of money taking it somewhere so overall I am
★★★★★July 31, 2017
2001 Maxima 3.0
With the help of the 1A Auto video this job was simple and took less time then I expected. The parts are well built and with the warranty you have no worries.
★★★★★March 17, 2017
Irregular part
The left control arm did not fit. I had to purchase a MOOG
control arm from Autozone which cost the entire purchase I had originally paid for in the 1A Auto parts. I thought I had found the perfect auto parts site particularly since women are always taken advantage of in auto parts stores, however due to this experience I probably won't buy auto parts from 1A Auto either.
Showing 1–4 of 4 reviews
PSA58702
In Stock
Customer Q&A
Got a question about this part? Post it and get answers from our team.
WilliamSeptember 6, 2016
Does inner tie rods have bellows?
No
B · April 24, 2021
Showing 1–1 of 1 question
Customer service
877-844-3393
Monday - Friday 8:00am - 9:30pm ET Saturday - Sunday 8:00am - 4:30pm ET
Ask a Question
Check Your Email
We sent a verification email to .
Click the Verify Email button in the email to submit your question.
This extra step helps prevent spam.
Select Your Vehicle
Specify your vehicle's year, make and model to guarantee fit.








 WARNING: This product can expose you to chemicals including Lead and Lead Compounds, which are known to the State of California to cause cancer, and birth defects or other reproductive harm. For more information, go to www.P65Warnings.ca.gov.