About TRQ: TRQ is a trusted brand dedicated to making every repair a success story by combining premium parts with easy installation. Each TRQ part is engineered by a team of automotive experts to meet or exceed OEM standards, delivering enhanced performance and maximum longevity. With rigorous in-house testing, the brand ensures superior fit and function across every product line. TRQ also provides customers with best-in-class, step-by-step installation videos—so you can complete repairs with confidence, whether you're a first-time DIYer or an industry professional.
Product Features
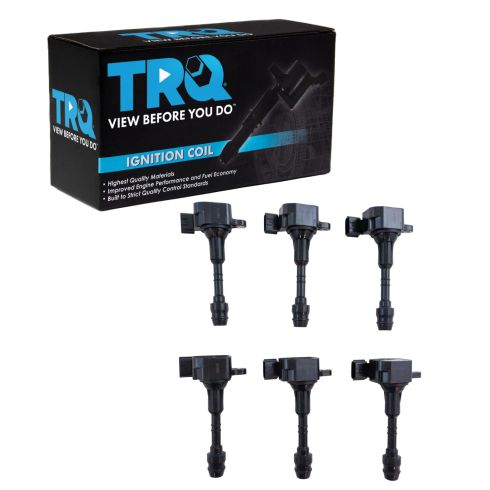
High dielectric epoxy and reinforced bobbins for extended service life
Rubber, Silicone, or Phenolic Resin Shell: Prevents premature boot wear
Application Specific Design: No modifications required
Complete repair to restore your engine to like-new condition
Description
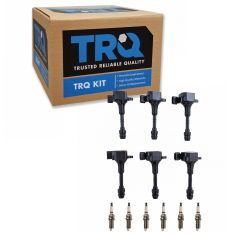
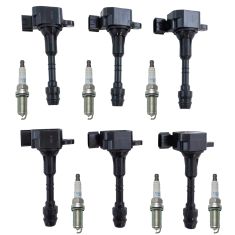
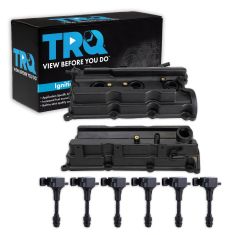
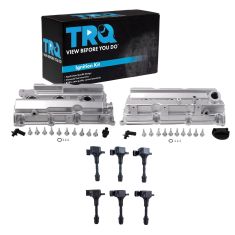
TRQ ignition coils will have your engine running like new. TRQ ignition coils are manufactured to precise specifications using premium raw materials to optimize each vehicle's ignition system. To ensure peak performance, TRQ recommends replacing ignition coils in sets to prevent electrical output imbalances. All products are fit and road-tested in our Massachusetts R&D facility to ensure we deliver on our promise of Trusted Reliable Quality.
Returns: Parts with electrical components cannot be returned once installed.
Attention California Customers:
WARNING: This product can expose you to chemicals including Lead and Lead Compounds, which are known to the State of California to cause cancer, and birth defects or other reproductive harm. For more information, go to www.P65Warnings.ca.gov.
This item may be interchangeable with parts from other brands with the above part numbers.
This information is provided only for reference and does not guarantee that the item you are
purchasing is identical to parts with part numbers from the brands listed above.
To confirm that this item fits your vehicle, use the above "Check Vehicle Fit" option.
Lifetime Warranty
This item is backed by our limited lifetime warranty. In the event that this item should fail due to manufacturing defects during intended use, we will replace the part free of charge. This warranty covers the cost of the part only.
Returns: Parts with electrical components cannot be returned once installed.
FREE Shipping is standard on orders shipped to the lower 48 States (Contiguous United States). Standard shipping charges apply to Hawaii and Alaska.
Shipping is not available to a P.O. Box, APO/FPO/DPO addresses, US Territories, or Canada for this item.
Expedited is available on checkout to the United States, excluding Alaska, Hawaii.
Final shipping costs are available at checkout.
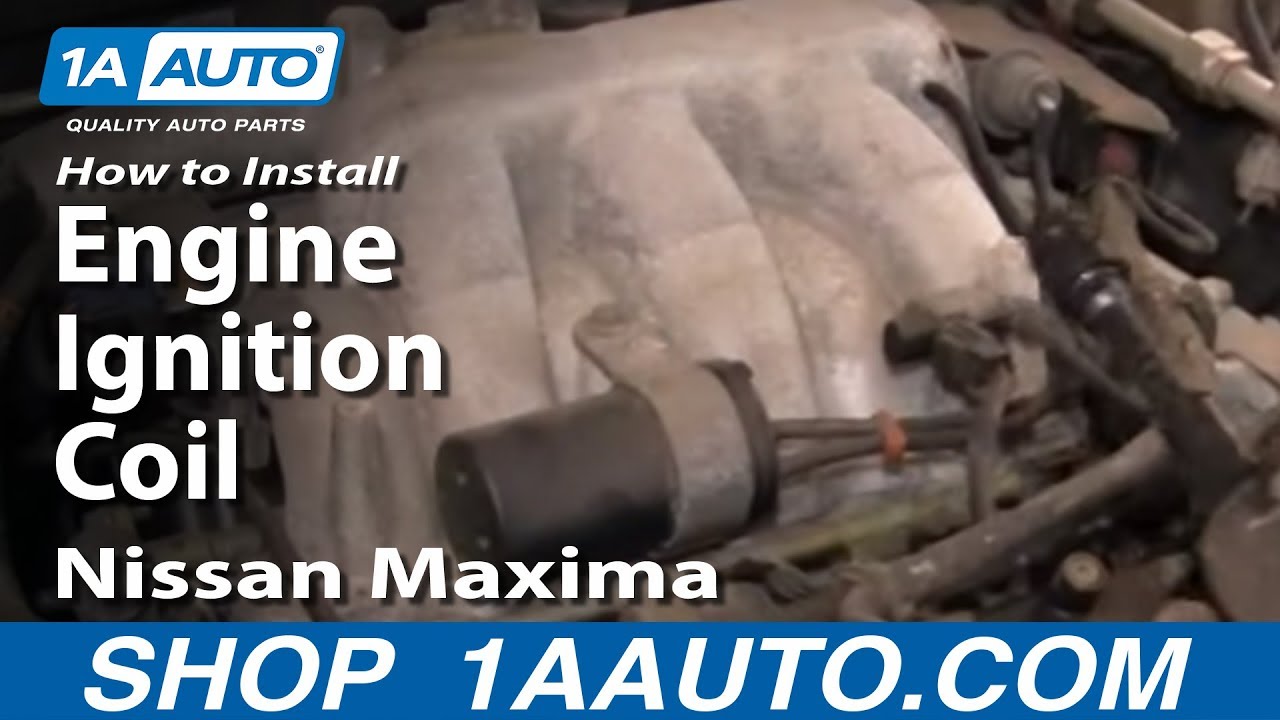
How to Replace Ignition Coil 2002-08 Nissan Maxima
Created on:
Tools used
Socket Extensions
T30 Driver
10mm Wrench
10mm Socket
Slip-Joint Pliers
Ratchet
1. Removing the Front Ignition Coils
Remove the four T30 Torx bolts from the engine cover
Remove the 10mm bolt from the ignition coil
Disconnect the ignition coil wiring lead
Pull out the ignition coil by hand
2. Installing the New Front Ignition Coils
Push the new coil into place
Connect the ignition coil wiring lead
Insert the 10mm bolt into the ignition coil
Repeat Steps 1 and 2 for the other two front ignition coils
3. Accessing the Rear Ignition Coils
Use a flat blade screwdriver to loosen the intake hose clamp screw
Disconnect the green wiring connector
Loosen the clamp on the middle intake line with the slip joint pliers
Disconnect the hose
Remove the two 10mm bolts from the front intake plenum brackets
Remove the two 12mm bolts from the rear intake plenum bracket
Loosen the clamp on the back vacuum line with the slip joint pliers
Remove the two 12mm nuts and three 12mm bolts from the front of the intake plenum
Disconnect the blue wiring harness
Pry the wires out of its clip with a flat blade screwdriver
Disconnect the wiring harnesses behind the plenum
Pry the wires out of its clip with a flat blade screwdriver
Pull the plenum up and out of the way
4. Replacing the Rear Ignition Coils
Replace these coils using the steps outlined in Steps 1 and 2
5. Reinstalling the Intake Plenum
Make sure nothing gets caught underneath the intake plenum
Push the plenum into place
Reconnect the intake hose
Start the two 12mm nuts and three 12mm bolts into the plenum by hand
Insert the two 12mm bolts into the rear plenum bracket
Tighten the two 12mm nuts and the three 12mm bolts to between 25-30 foot-pounds of torque
Reconnect the rear wiring harness
Insert the 10mm bolts into the front plenum brackets
Connect the wiring harnesses on the side of the plenum
Connect the vacuum hoses
Check that there are no loose connections
Put the engine cover back on
Insert the four T30 Torx screws into the engine cover
Brought to you by 1AAuto.com, your source for quality replacement parts and the best service on the Internet.
Hi, I'm Mike from 1A Auto. I hope this how-to video helps you out, and next time you need parts for your vehicle, think of 1AAuto.com. Thanks.
In this video we're going to show you how to replace the ignition coils on this 2003 Nissan Maxima. We go through the simple part of replacing the coil in the first part of the video. The front three coils are very easy to replace. All you need to replace them is a T30 torx driver and a 10mm socket with a ratchet or 10mm wrench. Then we detail how to take the upper intake plenum off, which allows you to get to the rear three coils. This requires a few more tools: pliers, and a 12mm socket and ratchet in addition to your 10mm.
Start with the T30 torx driver and remove the four bolts that hold the top engine cover. OK, so the coils on this side of the engine are really easy to see. With a 10mm socket, remove the bolt and here's a connector here. They have a tab on the top. Push the top tab with that finger. Disconnect. Finish taking this bolt out. Then the coils come right out. The new coil from 1A Auto is just like the original. It's going to go right in there. Just the same. Put it down in. Just push it straight down, reconnect the lead, bolt back in. Then you can see the two in the front here are just as easy as that one.
You may be saying "Well, how about the rear ones?" The rear ones are pretty easy but you do have to take this intake plenum off. I'm going to show you that real quick. We're going to start up top here. With a flat blade screwdriver, loosen up the clamp that holds the intake hose on. Make sure that's nice and loose. Make sure you can pull this off the intake and then we're going to disconnect this green connector here. Just push on the little tab that's on the front here and take that off. Then we're going to disconnect this middle line here. Pull that clamp off and then use my pliers. Grab onto the hose, make sure the hose twists a little bit. Pull that off. Take a 10mm socket. We're going to take off this bolt here. Let that bracket go to the side. We're going to take off this bolt here. Put these up here. It allows that to come off. Now we're going to use a 12mm socket. I can't really show them to you because they're back in here but if you just take your hand and reach back in here, you'll feel two bolts and they're going in this way. You need to remove those two bolts. That's a bracket holding up the back of the plenum.
As I'm looking back here I can see that there's another vacuum line. I'm just going to use my pliers. There's a clamp, squeeze the clamp, take the clamp off using pliers. Get the hose to twist, pull it off. Then take my extension, and there are two 12 mm nuts on each end. Then there are three 12mm bolts to remove. Disconnect this lead. Take the screwdriver and pry out the clip that holds the harness. Just take the screwdriver and again pry clip off that holds the harness. You should be able to push on the two teeth beside. So right here on the backside you can see I disconnected this here. There's also two connectors, little tabs. Disconnect them then squeeze this clip as well and disconnect this line. Pull these two vacuum lines up out of their clip, or vice versa. Disconnect that connection. Pull up. Now you can lift it up and push it out of the way enough. I'll show you here. You can lift it up and out of the way enough that you can now get to the coils. You may want to just have somebody help you out, lift it out of the way for that middle one. That's probably the most difficult one. I'm just going to fast forward as I put the plenum back on. It's pretty much a reversal procedure.
Make sure that there's nothing, no wires or anything between the upper intake plenum and the lower intake before you put it down. Get it down into place. Make sure that you get the intake hose over the opening of the plenum on the driver's side. Make sure you get it down in place. Just check underneath, make sure there's nothing between the plenum and the engine intake. I can see it go down on this side here, down there. Pull the intake tube up. Replace that. Get that intake tube on; it goes down nice and easy. Once it's in place, take and put the two nuts and the three bolts that hold the upper intake to the lower intake. I put those in place then I actually put the two bolts that hold the rear of the intake to the bracket, put those in place and tighten them up. After I've tightened those rear ones up then I tighten the plenum down. You want to tighten it down to about 25 to 30 foot pounds. Then just carefully, I basically just try to go methodically from the passenger side rear. Reconnect those two connections back there, and there are two vacuum lines. Then come around to the front and bolt on the two brackets. Make sure the connections are reconnected. Then around to the throttle body and air intake side. Bolt everything back together. Make sure all the electrical connections are connected and all the vacuum connections are connected.
Basically what I do is after I'm done I just look very carefully around. You basically look for any clean or shiny spot. Basically when you take connectors apart, you'll notice that they're dirty but then when you take them apart, the part that had fit together was nice and clean so it's a good idea to look around. Just look for any clean spots or shiny spots that might indicate that there's something that hasn't been reconnected. Once you have it all reconnected then you can put your intake cover back on.
We hope this helps you out. Brought to you by www.1AAuto.com, your source for quality replacement parts and the best service on the Internet. Please feel free to call us toll-free, 888-844-3393. We're the company that's here for you on the Internet and in person.
ICA61516
In Stock
Product Reviews
4.7/ 5
★★★★★★★★★★
99 reviews
5★
83%
4★
10%
3★
3%
2★
1%
1★
3%
Customer photos
★★★★★February 11, 2026
Nissan coil/ngk plugs
Products came quick, packaged well and quality looked good. Install coil packs and plugs. Our 2009 Pathfinder with 325k miles is running great again!
★★★★★December 6, 2025
Now she runs smooth
Good quality as always,everything worked great, couldn't ask for anything more.
★★★★★August 25, 2025
Junk Coil's
Got 2 new coils that are Junk right out of the Box. Customer is not happy with my service because of the miss fire's. Bought 2 New Factor One's.
★★★★★March 19, 2025
they work some time's I love lifetime warranty i just got 2 cbut i need 3 but i got it to work i will see how long ti work's for
★★★★★March 18, 2025
Unfortunately, poorly made items
These items didn't last long at all. For the price I paid, I thought I surely would get more time out of these. I just had to get some better name brand ones and viola, problem solved. I have wasted more money using TRQ. Same on you TRQ!
★★★★★December 25, 2024
Saved money by doing my own tune up !!!
Took me 2 weeks to get all plugs and coils properly in place in my 2002 Nissan Pathfinder ! I never did it before. But I'm glad I did because the Nissan dealership gave me an estimate of $ 2,200.00 for them to do it ! I said no thanks ! I then ordered 6 spark plugs and 6 ignition coils from !AAuto for $ 178.00 and did it myself !! My SUV runs perfectly now !!
★★★★★December 18, 2024
2007 Nissan Nismo Truck.
They work great and somewhat difficult to install. Lot's of Yoga moves but got them installed. Thank you for being there..
★★★★★October 1, 2024
DO THE JOB ONCE ORDER FROM ( 1A AUTO)
GREAT PRODUCT WILL ORDER AGAIN
★★★★★June 6, 2024
OEM quality
Perfect OEM fit. Much more affordable but give me the same performance. Highly recommend
★★★★★April 9, 2024
PO 303 Misfire Runs like crap!
Had a misfire code PO303 Replaced ignition coils with the TRQ brand coils from A1 Auto code gone runs smooth as glass sweet!
Showing 1–10 of 99 reviews
Customer Q&A
Got a question about this part? Post it and get answers from our team.
EmmanuelOctober 27, 2020
Are these ignition coils OE certified or aftermarket parts?
DIY solutions brand parts are manufactured by various aftermarket companies specifically for us and built to your vehicle's exact OEM specifications.
Emma · October 27, 2020
jorgeFebruary 19, 2020
Would this fit 05 Altima 3 5 SL?
Thank you for the inquiry. These coils fit 2002-2006 Nissan Altima V6 3.5L models.
Monday - Friday 8:00am - 9:30pm ET Saturday - Sunday 8:00am - 4:30pm ET
Ask a Question
Check Your Email
We sent a verification email to .
Click the Verify Email button in the email to submit your question.
This extra step helps prevent spam.
Nissan is a registered trademark of Nissan Motor Co., Ltd. 1A Auto is not affiliated with or sponsored by Nissan or Nissan Motor Co., Ltd.See all trademarks.
Select Your Vehicle
Specify your vehicle's year, make and model to guarantee fit.










 WARNING: This product can expose you to chemicals including Lead and Lead Compounds, which are known to the State of California to cause cancer, and birth defects or other reproductive harm. For more information, go to www.P65Warnings.ca.gov.