




★★★★★
January 20, 2023
Top notch service
This is a fantastic company to do business with!

Replaces
Complete Repair in One Purchase - Stop searching for parts individually and complete your repair with a customized kit or set from DIY Solutions.
High-Quality Parts from Trusted Brands - DIY Solutions' kits and sets are selected from the best automotive brands and include hard-to-find and even obsolete parts you may need for your vehicle.
Guaranteed Fit - DIY Solutions ensures its selected parts are quality-tested to guarantee fit and function.
Attention California Customers:
 WARNING: Cancer and Reproductive Harm - www.P65Warnings.ca.gov.
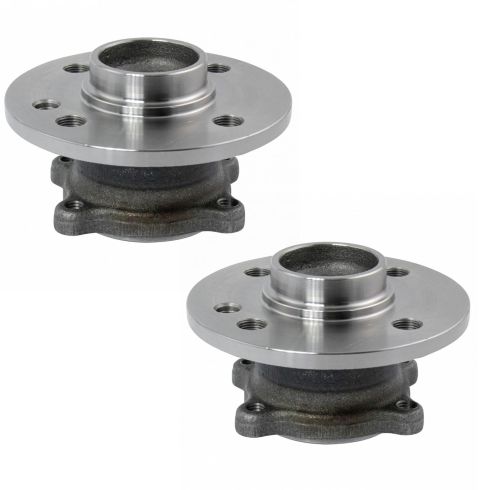
This part fits 2 vehicles spanning 2006-2015.
| Year | Make | Model | Description |
|---|---|---|---|
| 2006 | Mini | Cooper | Mini Cooper with 14mm Wheel Bolt Size Rear Driver & Passenger Side 2 Piece Wheel Bearing & Hub Assembly Set DIY Solutions HUB00832 |
| 2007-2015 | Mini | Cooper | Mini Cooper Rear Driver & Passenger Side 2 Piece Wheel Bearing & Hub Assembly Set DIY Solutions HUB00832 |
| Brand Label | Part Number |
|---|---|
| MOOG Hub Assemblies | 512427 |
| Timken | 512427 |
| BMW | 33-41-6-786-620 |
| Beck/Arnley | 051-6341 |
| SKF | BR930763 |
| BMW | 33-41-6-786-552 |
| BMW | 33-41-6-774-944 |
| SKF | VKBA6633 |
| Chicago Rawhide | BR930763 |
| Hollander | 538-50223 |
This item may be interchangeable with parts from other brands with the above part numbers. This information is provided only for reference and does not guarantee that the item you are purchasing is identical to parts with part numbers from the brands listed above. To confirm that this item fits your vehicle, use the above "Check Vehicle Fit" option.
Lifetime Warranty
This item is backed by our limited lifetime warranty. In the event that this item should fail due to manufacturing defects during intended use, we will replace the part free of charge. This warranty covers the cost of the part only.
FREE Shipping is standard on orders shipped to the lower 48 States (Contiguous United States). Standard shipping charges apply to Hawaii and Alaska.
Shipping is not available to a P.O. Box, APO/FPO/DPO addresses, US Territories, or Canada for this item.
Expedited is available on checkout to the United States, excluding Alaska, Hawaii.
Final shipping costs are available at checkout.


Created on:
Tools used
Hi I'm Mike at 1A Auto, we've been selling auto parts for over 30 years.
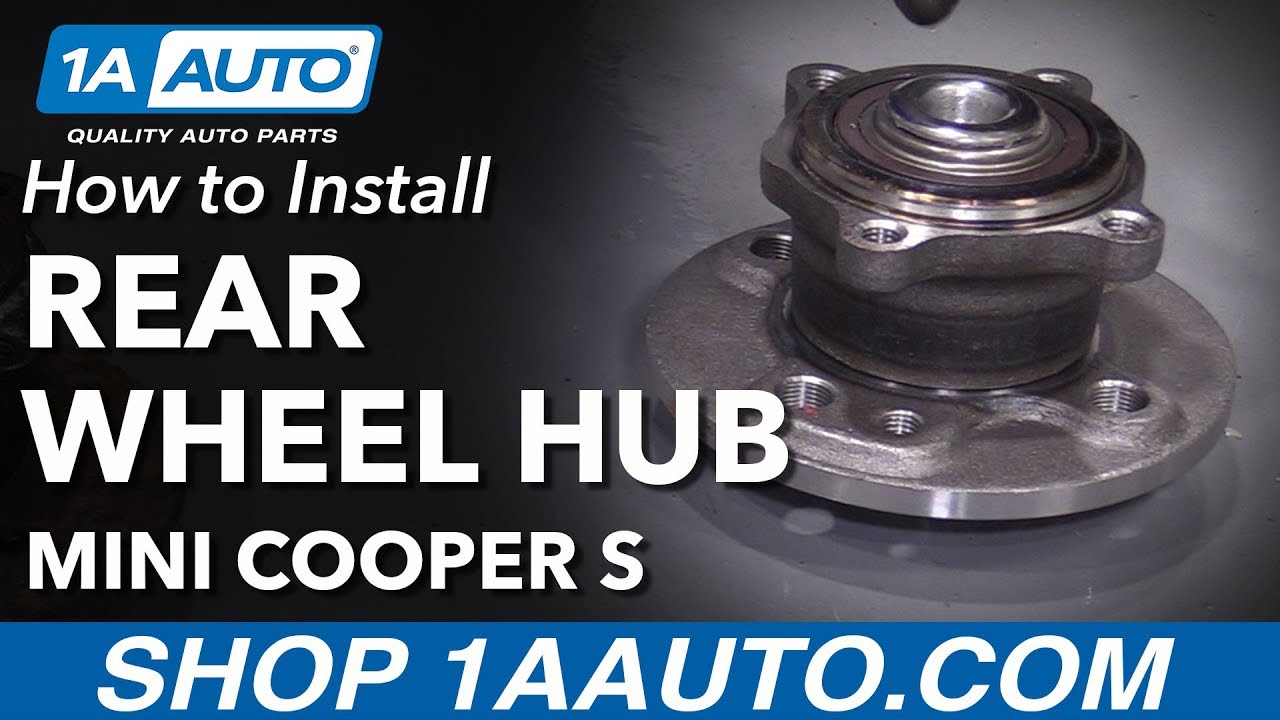
What's up guys, I'm Andy from 1A Auto, today I'm gonna show you how to install this new hub on this 2007 Mini Cooper S. If you need this part or other parts for your vehicle, click the link in the description and head over to 1AAuto.com.
We're gonna take this center cap off, I'm just going to use a straight bladed screwdriver. I'm gonna use a rag so I don't scratch the wheel, just get in here. There is a little slot on the cap right here, so pull that off.
I'm gonna loosen up these lug bolts, and these a 17mm socket and a breaker bar, just crack them free before we lift the vehicle.
Now I'm going to raise and support the vehicle. I'm using a two post lift, you're doing this at your house you can do it on jack and jack stands.
Right now I'll take these lug studs off, or lug bolts, excuse my seventeen millimeter, socket and a ratchet. Now when I take the last one off I'm gonna hold the wheel on because otherwise this is gonna fall, so I'll put a little pressure on the wheel. Well I take the last bolt out, out grab the wheel, pull it off.
Before we take this caliper off on the passenger side on this vehicle, we have a brake pad wear sensor. I'm just gonna use some needle nose pliers and grab it right here. It's a good idea to replace this when you're doing a brake job, it's not a hundred percent necessary, especially if you break it then you should replace it. Just wiggle it back and forth a little bit.
All right, so our sensor just cracked here, and you're trying to pull it out, so we're gonna have to replace this sensor, that's why it's a good idea to get a new one.
All right, so take that off there, and over here on the bleeder, slide this cap off and we can pull the sensor wire out of your way. And if you were gonna reuse this just sit that aside. And using needlenose, trying to get it out didn't really help us out. Yeah, this is just in there too long, it's been in here since brand-new. So we'll just take the caliper off and get it off when the pads come out.
One thing you want to keep in mind when you're working on the rear brakes, before we pull the caliper off, you are gonna want to make sure the parking brake is released. If you have an automatic transmission, leave it in park. If you have a manual transmission, make sure you leave it in gear. And it's a good idea to chock the front wheels so you do not roll.
I'm going to take these two bolts out, you can use a 13mm socket and a ratchet. This one's in there pretty good, I can see that the stud is spinning. We use a 15mm wrench to keep this caliper slide pin from spinning. Take this bolt out, do the same with the top one. It's on there pretty tight because there's some thread locker on there.
I'm going to slide this caliper off. I'm just gonna use a straight blade screwdriver, just pry it out a little bit. I can try to compress it but it's really not going to compress too much. All right, got that off. I'm gonna grab a bungee cord, I'm just gonna slide it around this strut here, hook it onto the caliper here, and then right there, keep that out of your way. You don't want to put any tension on the brake hose at this point.
I can take the pads out, these are frozen in there pretty good, so I'll take my straight blade screwdriver, get in there, pry it out a little bit. And as you can see, this is frozen in there pretty good, so we're gonna have to replace that. Same at this side, pull that off.
I need to take these two caliper bracket bolts out, they're a 16mm, so I'll use a 16mm socket and a breaker bar. Let's just break them loose first, then I'm gonna switch to a 16mm socket and a ratchet. It's kind of hard to reach those bolts, so just pull sock it off, loosen it up by hand.
And I'm gonna hold the bracket while I take the last bolt out. I pull the last bolt out, then I will just grab the bracket, slide it back.
Alright, so we're gonna take this bolt out that holds the rotor on. I'm going to use this impact driver, you can get these at 1AAuto.com, and I'm gonna use a T50 socket. So I just, on here, hold this, you're gonna hold a little bit pressure like you're loosening it, and then hit it with a hammer. Now I'll take my socket and my ratchet, just hold the rotor well I'm taking this out, you could also use an impact gun if you struggle a little bit, if you have air available, to pull that out. Pull the rotor right off.
There's four bolts that hold this hub assembly on. I'm just gonna take some rust penetrant, they're pretty rusty, you just spray them down, let them soak for a little while, that'll just make it easier to take the bolts up.
Alright, now I'm gonna take a 16mm socket and a ratchet, we'll take these four bolts out. Pull that bolt out, and we're gonna do the same with the other three. These back two bolts I'm actually going to use an extension because this sway bar link is in my way, so they can go around this sway bar link to be able to access these two bolts. Right now these bolts are loose, you can slide these out.
This hub is stuck on this knuckle, it's rusted, with the steel hub and the aluminum knuckle it generally causes a lot of corrosion and causes things to seize up. So I'm gonna use a hammer, just gonna tap it, slide it right off.
Here's our old wheel hub bearing, here's our new hub bearing assembly from 1AAuto.com. The shapes are the same, has this little ear at the top, this reluctor wheel for the ABS is the same, the front hub surface is the same. Get yours at 1AAuto.com and you'll be ready to rock and roll.
Before we install the new hub, just gonna use a wire brush to clean up this area where there was some corrosion. You go on the inside right here, you could also use some like sandpaper or some Emery cloth, just be careful around the wheel speed sensor right there. Take a little brake parts cleaner, clean this up, just wipe it the rag.
I'm just gonna use a little bit of copper anti-seize, this is just a high temp anti-seize, just in case this ever has to come off again then it stick, prevent any corrosion from happening between the two surfaces. Just a little light coat is good.
Then I'll take this hub, there's a little nub right there at the top, so that's gonna go up, install that in position. Then I'll take my bolts, get those started from the backside.
Once I get all those bolts started, I'm gonna take my socket and ratchet and start to tighten them down. Try to tighten them down evenly. It'll go too much. I'm gonna crisscross, start with this one, once it's down a little bit then cross over to the other ones, then I'll cross over to this one on the back here with my extension. Snug this one down.
I'm going to use my torque wrench in a 16mm socket. I'm gonna torque these two 41 foot-pounds.
We're gonna clean this brake caliper bracket. I'm just gonna use a wire brush, clean this area right here. We're gonna clean these pad clips, brake pad clips. Take a flat blade screwdriver, just get underneath here, peel them off, take that off. It's the back, sturdy. Just clean this off a little bit if there's any rust in here, we're gonna clean this off. This will just make the brake pads slide better. Take a pad clip, reinstall, line it up, push it down, and do the same with the other side.
We're gonna take these caliper slide pins, just hold the rubber grommet down, pull the pin out. Take a little break parts cleaner, spray that, take a rag and wipe it. And on the caliper sign, just spray some down the hole, take the rag and try to clean some of that. Then I'm gonna take some brake caliper grease, just put it on the pin, slide the pin back in, make sure it seats the rubber grommet. Do the same with this side.
Before we install the rotor, just gonna take some brake parts cleaner, wash it off. There's a protective coating on the rotor so that it doesn't rust, so you wanna wash that off. This side also, on this side, then wipe over the rag.
Now we're gonna install the rotor. Just line the holes up. There's an extra hole right here for this bolt, this torques bolt, it's gonna go there. Get that started. I'm gonna use my t-50. So now I'm gonna tighten this down a little bit with my ratchet, make sure all the holes are lined up good. You don't want to tighten this too much, just snug it, just holds the rotor from falling off.
I'm gonna install this brake caliper bracket, just slide it over the rotor. Take the brake caliper bolts, I'll just use my 16mm socket and an extension to try to get it to line up. Just get that started. Now I'll get the top one started. I'm gonna use a ratchet, just snug them up, snug, and then I'm gonna torque them. I'm gonna use my torque wrench and I'm gonna torque these 248 foot-pounds.
All right, now we're gonna install the pads in the caliper bracket. There is an inboard pad and in a outboard pad. The difference is this has this little extra ears on top, whereas the outboard one is flat. This is where the caliper piston is going to sit, and also the brake pad warning sensor is going to go in there. Slide that on the inside just like that, and then this one's going on the outside.
Next we have to compress this caliper piston. We need this special tool, we actually sell this tool at 1AAuto.com. It has different little ears on this so that we can take any extension and line this up with the piston from the caliper, and you can take a ratchet and slowly tighten this down. Get spin this, as this is spinning it's compressing the piston back into the caliper. It's pushing fluid back through the lines, back through the master cylinder and up into the reservoir.
It's a good idea to check your reservoir when you're done the brake job to make sure it's not overfull, adjust accordingly, and that looks like it's down all the way. And there's not any buttons on the actual pads that have to get lined up with anything, so that can go on just like that.
Now we're going to take the bungee cord off, take the brake caliper, slide it over the pads and the bracket just like that. We install these caliper bolts, there is threadlocker on these bolts. You can put new thread locker on, or if you get new bolts generally they come with thread locker. I'm going to use a 13mm socket, a ratchet, and a 15mm wrench, and I'm just gonna hold the slide pin with the wrench, snug up this bolt, snug that one up, do the same with this one. Now I'm gonna use a torque wrench, and I'm going to torque these bolts to 25 foot-pounds.
Your brake pad where sensor may break, so we're going to show you how to replace it and put a new one in. So with this broken sensor, over on the bleeder we're just gonna slide up this little bleeder cap, it's gonna come off here, and then there's a clip, this was clipped on over here, pull that off, and it's clipped in right here, right here as well, and right here. Just slide this through, clipped in right here.
Leave that clip there and then there's a connector behind here, you can slide the shield down a little bit. We're gonna pull on the connector, it's behind this blue connector, slide this down. Oh, if we pull it over here makes it a little easier to work on. Push this little button, pull the connector out.
So now we have our new sensor wire right here in connector, we want to line this up, make sure it goes on the right way. It only goes on one way, if you flip it over it's not gonna lock in. So there's like a horseshoe like curve on the bottom of this and then kind of like a little box on the top, and then also a groove in the top of the connector, so get those lined up. Line that up like that and lock it in place.
Now we're gonna fish this back up here and it's gonna get secured behind this blue connector back here. If you have to take the blue connector out you can pull that out, I'm just gonna slide it behind it and it's gonna click in back there, and this is gonna follow the other wire right here. There's a little retainer right here, it goes on the the lower control arm frame. There is another thing to secure it right here, depending on who makes a connector it may be different, or who who makes the sensor, so I'll take some needle nose pliers, just try to push this through. That looks good, and this is just gonna follow this other wire.
And I'll hook this over here at the brake pad first, just take this, this is gonna go on the brake pad with this little round piece facing the rotor. Take my needle nose pliers to help assist getting this in line, this up with the inboard brake pad, just push it on, kind of like locks in place a little bit, just like that. Push it down, it's good. This is going to connect to the bleeder right here, let's push that over like that, and these will connect to the wires like that. You do the same with the other ones, a little bit tricky, and slide that through just like that.
Now we're gonna install the wheel and tire, before I do that, sometimes it's pretty difficult to install the wheel on this type of setup because it does not have studs. So what you can do is get one of these kits, we actually sell at 1A Auto, this has the correct thread for this vehicle, and just slide these into here just like that, and we can take our wheel. You can line the holes up, then it'll actually line those up, position that in the right location for you, like unistall our lug nuts, and that kind of holds the wheel for you so you don't have to try to balance it.
Once you get those two lug nuts on and you can take these out and then put the other two lug bolts on, and you're good to go. I'm going to use a torque wrench and a 17mm socket, and I'm going to torque these lug bolts to 90 foot-pounds, and I'm going to do it in a cross pattern so that it torques the wheel down evenly. Just gonna go back and double check, make sure everything's tight. That's good.
Now we're gonna install the center cap. There's a little nub right there, you're gonna line that up with any of these. Line it up straight like that, just lock it in place.
After we're done the brake job, we're gonna want to pump the brake pedal because there's a little bit of an air gap between the caliper piston and the brake pads. So to eliminate that air grab, just pump the brake pedal.
Thanks for watching. Visit us at 1AAuto.com for quality auto parts, fast and free shipping, and the best customer service in the industry. You
This is a fantastic company to do business with!
This is a fantastic company to do business with!
Nice,fits precisely on my 2009 JCW MINI COOPER
These shipped in quickly, and fit perfectly. My only problem was with my old ones. Some rust had settled in on one of the front axles and it required a gear puller and application of heat to get it to pop loose, but the new ones are great, and quiet! No more noise, vibration. You Tube video was very helpful as well.
Worked perfectly, well packed for shipping and shipped FAST...what more could you ask for?
Parts fit perfect and install wasnt too difficult. Seem to be doing the job... 1A Auto ordering was easy and shipping was prompt. Will let you know how the parts last later.
I was quite pleased with the fit of the wheel bearing hubs. I was concerned that one bearing hub was defective, but 1A Auto replaced it immediately. In fact, I was so pleased with the service and cost...I ordered more hubs for the rear wheels. I highly suggest watching the videos on YouTube...it helps. Also, I suggest using a lift, versus jack stands, since there is no room to use a torque wrench.
Yes, this part will fit your vehicle.
Your vehicle should have bolts for the threaded holes. There are no studs required.
Yes. These rear hub assemblies are listed to fit your vehicle.
