Replaces
Product Features
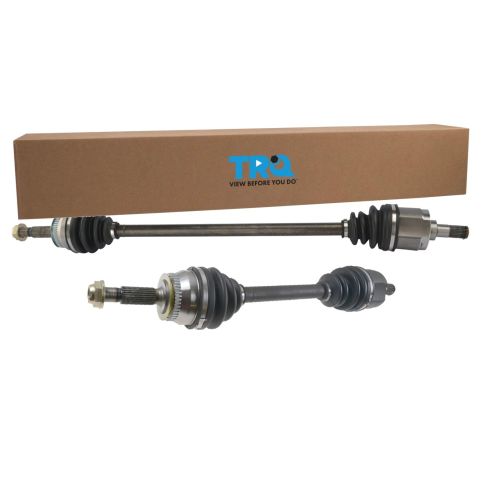
TRQ CV (constant velocity) drive axles are manufactured using premium raw materials designed to restore original performance. TRQ CV drive axles are new, so there is no core charge with your TRQ purchase. TRQ-designed drive axles utilize neoprene boots, moly grease, stainless steel clamps, and heat-treated ball tracks to ensure extended service life. Each TRQ axle is application-specific so each spline and thread will mate properly for a seamless fit. All products are fit and road-tested in our Massachusetts R&D facility to ensure we deliver on our promise of Trusted Reliable Quality.
CV axles are designed to transmit the power from your vehicle's drivetrain to the wheels while being able to flex and pivot to the demands of the steering and suspension systems. If your vehicle is making clicking noises at lower speeds or when making turns, it may be time to replace your CV axles with our 100% brand new assemblies.
Note: This is correct for models with or without ABS brakes. The tone ring can be removed if the original CV axle did not have one and the vehicle did not originally come equipped with ABS brakes.
Attention California Customers:
 WARNING: This product can expose you to chemicals including Lead and Lead Compounds, which are known to the State of California to cause cancer, and birth defects or other reproductive harm. For more information, go to www.P65Warnings.ca.gov.
Lifetime Warranty
This item is backed by our limited lifetime warranty. In the event that this item should fail due to manufacturing defects during intended use, we will replace the part free of charge. This warranty covers the cost of the part only.
FREE Shipping is standard on orders shipped to the lower 48 States (Contiguous United States). Standard shipping charges apply to Hawaii and Alaska.
Shipping is not available to a P.O. Box, APO/FPO/DPO addresses, US Territories, or Canada for this item.
Expedited is available on checkout to the United States, excluding Alaska, Hawaii.
Final shipping costs are available at checkout.

Created on:
Tools used
Brought to you by 1AAuto.com, your source for quality replacement parts and the best service on the Internet.
Hi, I'm Don from 1A Auto. I hope this how-to video helps you out, and next time you need parts for your vehicle, think of 1AAuto.com. Thanks.
In this video we're going to show you how to remove and reinstall a front axle in this 2005 Hyundai Elantra, pretty much the same for any 2001 to 2006. We show you the right hand or passenger side. The driver's side is the same procedure. You'll need a jack and jack stands, pliers, 22 and 32mm sockets. You'll need a ratchet, a breaker bar and a pipe or a pipe . you'll have to get some leverage on at least the axle bolt . hammer, 19mm wrench, pry bar and a torque wrench.
Start by removing one of the front wheels. If you don't have the benefits of air tools, you'll want to start with the vehicle on the ground, loosen the lug nuts, then jack up and secure the vehicle on jack stands and remove the lug nuts, the wheel cover and wheel and tire.
Remove the cotter pin from the axle. This is just a matter of bending the one side. Bend the legs straight and then pull it through the other side. Use a 32mm socket, breaker bar and a pipe to free up the nut at the end of the axle. I got Mike in the car holding the break so the wheel doesn't spin. Remove the nut and washer.
When I turn the wheel, I get a little better access for my wrenches. Use 14mm wrenches to hold the back side of the sway bar link and nut. Put a wrench in here to help me get a little bit extra leverage to break the nut free. You can try a couple of taps with a hammer to see if your axle breaks free. If not, put the nut back on and then use more force. That amount of hitting will probably damage the threads a little bit in the nut. You'll want to use a new nut when you go to put it back on, if you have to use this method, but you can usually get it off with a socket. Fast forward, as we remove that nut the rest of the way. I'm going to use my 14mm wrench to counter hold like we did on the top. Use the 14mm wrench to break it free. As you can see, there, what we do is we put the wrench on and then just hook another wrench on to the end just to give yourself some extra leverage. It helps you break the nut free. With the two nuts free pull your sway bar link out.
I've got a 19mm wrench on the nut for the lower ball joint, another wrench for leverage. You might have to hold the brake rotor in place. Once you get it broken free, you don't want to lock up your wrench between your axle and the nut so then you can use your open-ended one, switching it back and forth. We just speed up here as we loosen that nut up. You don't want to take it quite all the way off yet. Try to give a couple whacks to the spindle here, to free up the ball joint. I think you got it. Finish removing this nut from the ball joint.
Locate where the drive shaft goes into the transmission right here. Make sure you got a catch for any fluid that might come out and what we're going to do is you're going to use a pry bar and pry between the axle and the housing, right here. You can see it's already starting to come out and there's your fluid.
I'm feeding the axle back in where it came out, through the fender well, and I'm going to line up the splines to the transmission. Give it a little push, seat it in. Use a little lube on the access points here just to help them go in. It'll be easier.
Once the axle shaft is back in place you get the ball joint back up into the steering knuckle and then start the nut on top of the ball joint. Put your center hub nut back on. Torque it to 175 foot pounds. Insert the cotter pin back in. Make sure I lined it up with the holes and I'm setting those tabs back. Tighten the ball joint nut. I'm going to fast forward because this is just kind of tedious. You can only do it about 1/8th to a quarter of a turn at a time. Tighten it up with the one wrench and then hook another wrench on to it, and pull it nice and tight, basically about as tight as you can with those two wrenches.
I'm installing the link back in to the sway bar and to the control arm. There's a nice shot of our elbow there. You can see, once you've got it out it's a pretty easy process to get it back in. You might have to just kind of manipulate the link a little bit to get it to go through the stabilizer bar and the control arm, but then put the nuts on pretty much hand tight and then use your two 14mm wrenches and we actually also used, we used two 14mm wrenches and you could also use a 14mm and a 9/16 inch if you had to. You basically want to get them about as tight as you can with a wrench and then just hook the wrench on and just give it another pull about a quarter of a turn using both wrenches.
Put the wheel back in place, put the hub cap on, and start your lug nuts, and then you just want to hand tighten them. Hand start them first to make sure you don't cross the threads and then with your hands started, then just kind of pull and tighten them up. With the car back on the ground, put a little bit of pressure on it or weight on it. I'm going to use the 22mm socket and the torque wrench that I've set to 100 foot pounds and torque them, in a star pattern.
We hope this video helps you out. Brought to you by www.1AAuto.com, your source for quality replacement parts and the best service on the Internet. Please feel free to call us toll-free, 888-844-3393. We're the company that's here for you on the Internet and in person.


