How to Replace Shock Absorbers 2007-16 Chevy Silverado
Created on: 2013-10-07
You can learn how to change the rear shocks on your 07-13 Chevy Silverado or GMC Sierra. Watch this video where 1A Auto experts show you step by step!
-
step 1 :Removing the Shock
- Apply rust penetrant to the shock bolts
- Hold the lower shock bolt with a 21mm wrench
- Remove the lower 21mm nut from the shock
- Remove the upper 21mm bolt from the shock
- Tap the lower 21mm bolt out with a hammer
- Remove the upper 21mm bolt by hand
- Pull the shock down and out
-
step 2 :Installing the Shock
- Put the shock into place
- Start the upper 21mm bolt into the shock
- Raise the shock mounting point with a jack
- Push the shock into the lower mounting point
- Start the lower 21mm bolt and nut onto the shock
- Tighten the two 21mm bolts to 80 -85 foot-pounds.
- Repeat Steps 1 and 2 for the other shock
Tools needed
-
Torque Wrench
21mm Socket
21mm wrench
A Piece of Pipe (for leverage)
Hammer
Rust Penetrant
Jack Stands
Ratchet
Floor Jack
Flat Blade Screwdriver
Brought to you by 1AAuto.com, your source for quality replacement parts and the best service on the Internet.
Hi, I'm Mike from 1A Auto. I hope this how-to video helps you out, and next time you need parts for your vehicle, think of 1AAuto.com. Thanks.
In this video, we're going to show you how to replace the rear shocks on this 2011 Chevy Silverado 1500. It's the same part and process on the Silverados and Sierras from 2008 to 2013. The items you'll need are: new rear shocks from 1AAuto.com, a jack and jack stands, penetrating oil, 21 millimeter socket and ratchet, a piece of pipe for leverage, 21 millimeter wrench, a torque wrench, and a hammer.
The shocks are obviously located right under the vehicle, attached to the rear-end and up to the frame. We're going to show you the left side, and the right side is the same procedure. To start off, you're going to want to spray some penetrating oil on these bolts, the one at the bottom, and then the one up at the top. Using a 21 millimeter socket and ratchet with a piece of pipe, you want to loosen up that bolt. You'll see that the actual bolt will keep turning in there, so you're going to want to use a 21 millimeter wrench on the other side, and just loosen up that nut and remove it. You want to do the same thing to the upper bolt, but you won't need a wrench for this because the nut is actually welded to the truck. Using a hammer, just hit that bolt out. You can use another bolt or a small screwdriver. Just hit that in to push the bolts out. Once that bolt is removed, swing that down and you can pull the bolts out from up top.
Here's the old part in the front, and the new part from 1A Auto in the back. You can see they're identical. They'll fit exactly the same. Now, take your new rear shock, and put it up into place. Replace the bolt. Now, you want to swing that lower part into position. If you can see there, it wasn't actually going to reach. What you want to do is either lower your vehicle so there's a little bit of pressure on the wheels to push that up, or just put a jack underneath this, and bring it up. You're really just trying to get that high enough so that it will match up with the shock. Now as you can see, the bolt slides right in. You just want to replace that nut. We'll fast-forward as he tightens these two bolts up. Now torque the nut on the lower part to 80 to 85 foot pounds, and the same with the bolt up top. Then go ahead and replace the other side. We always recommend you replace your shocks in pairs.
We hope this video helps you out. Brought to you by www.1AAuto.com, your source for quality replacement parts and the best service on the Internet. Please feel free to call us toll-free, 888-844-3393. We're the company that's here for you on the Internet and in person.
Shop Products


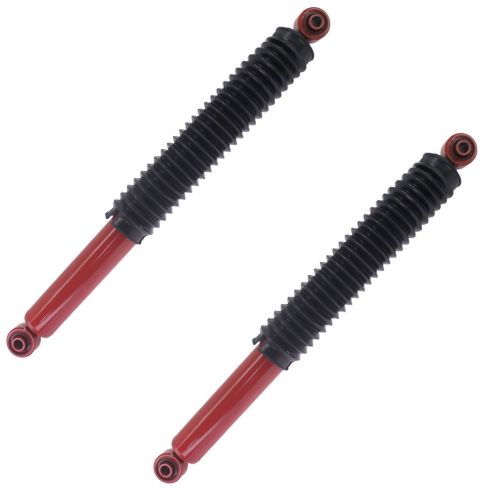
2007-18 Chevrolet GMC Rear Driver & Passenger Side 2 Piece Shock Absorber Set KYB MonoMax KYSSP00074
Part Details:
- 2 Piece
- (1) Rear Passenger Side Shock Absorber
- (1) Rear Driver Side Shock Absorber

How to Replace Front Struts 2000-07 Chevy Monte Carlo
How to repair, install , fix, change or replace your front shocks with their loaded struts on 00, 01, 02, 03, 04, 05, 06, 07 Chevy Monte Carlo.
