How to Replace Exterior Door Handle 1995-2000 Chevy Tahoe
Created on: 2010-04-26
Watch this video to learn how to replace an exterior door handle. The experts at 1A Auto show how to replace a broken or snapped outside door handle on your 88-98 Chevy Silverado, Suburban, or Tahoe; or GMC Sierra or Yukon.
-
step 1 :Remove the door panel and interior door panel.
- Refer to our other videos for detailed instructions on how to do this.
-
step 2 :Remove the old door handle
- Use a T30 Torx driver to remove the three screws on the side of the door securing the locking mechanism.
- Remove the two 10 mm bolts securing the door handle assembly.
- Use a flat blade screwdriver to pry out the door handle rod.
- Remove the outer door handle.
- Unclip the rod with your screwdriver from the handle.
-
step 3 :Install the new handle
- Clip the handle rod into the new door handle.
- Put the door handle into the door.
- Bolt it in using your 10 mm socket and ratchet handle and the two bolts you removed earlier.
- Guide your locking mechanism back into place and hook the door handle rod to it.
- Secure the locking mechanism by screwing it back into place with your T30 driver and screws.
- Make sure everything is in place properly and test the door handle and lock.
- Tighten up all your screws and bolts.
-
step 4 :Reassemble your interior outer and inner door panels
- Refer to our other videos for more detailed instructions.
Tools needed
-
Door Panel Removal Tool
Phillips Head Screwdriver
10mm Socket
Ratchet
7mm Socket
Flat Blade Screwdriver
Putty Knife
Brought to you by AAuto.com your source for replacement parts and the best service on the internet.
Hi, I'm Mike Green. I'm one of the owners of 1A Auto. I want to help you save time and money repairing and maintaining your vehicle. I'm going to use my 20 plus years experience restoring and repairing cars and trucks like this to show you the correct way to install parts from 1aauto.com. The right parts installed correctly, that's going to save you time and money. Thank you and enjoy the video.
Ok so we're going to replace the outside door handle on this 1996 Chevy Tahoe. This is exactly the same for any '95 to '98 GM truck or '95 to '99 Suburban, Yukon or Tahoe. You will need to see a couple of our other videos where we take off the door panel and the interior door panel just because it's kind of involved. It's not difficult but there are quite a few steps to it. Basically you have to remove the interior door panel and then the panel that holds the regulator and lock actuator and then to get to the door handle itself.
As you can see the tools that you need aren't that complicated; 7 mm socket and ratchet, a Phillips screwdriver, flat blade screwdriver, a putty knife or a door panel clip tool and a 10 mm socket and ratchet. Ok the bulk of the work on this repair is actually taking the door panel off and the interior door panel off and I have those videos as video responses to this video. Where we're going to start actually is you've basically taken the interior door panel off and the panel with the regulator and everything off and now you use a T-30 torqued driver and you really need a bit with a socket like this and a wrench or a ratchet handle. You don't have to have an air ratchet like I have but you need a ratchet handle to put enough torque on those to get them out so you remove those and then go from there.
Ok so I've raised my window and I've secured it with plenty of painters tape. Now you want to remove that 10 mm bolt and this 10 mm bolt. Ok now looking in there you can see that there's a clip right here and you see I've got it pried away. You've got to pry it; there's a hole right there and there's a tooth on the clip so you have to pry it away and up and then you can get that rod out like that. Good, now those bolts are undone. The panel comes up and out and this rod comes with it and then here again, we'll take the screwdriver and pry out this here and then push on the clip and then the rod comes out. Ok so you've got your new handle; make sure you've got your clip on here. This face should be on this side so you push the rod into it, make sure you've got your clip on here. Take this rod it's got the well on this part has a little red end and push it into your door handle and lock it. Then put it down in, up and on. Ok so here's our one 10 mm bolt.
I just have those on there hand tight. Now here's the lock mechanism and I'm going to make this look easy, nope. You want to bring it up into place and guide your webbed rod right into the hole. Ok so upon editing I realized that you couldn't really tell what I was doing in that shot. Basically, right in where that circle is in behind that weather strip the rod that was painted red at the bottom that you attach to the door handle comes down and you're lifting up the lock mechanism and making sure that rod goes down into the hole that's on the lever right in there. Obviously you'll know if you get it right because if you do the door will work; if you don't the door will not open. Make sure that all your doors are not locked when you test; basically it's a good tip for any time.
Then hang it up and put one of the 10 mm things in there. Ok I'm just going to tighten that up a little bit. Put another one in place. Now I'm going to take this rod, once you get it in get it started then take your hand out and reach in with this finger and push the rod in the rest of the way. Now I've got everything on, not quite tight yet I'm just going to test it real quick, that's good. Lock, unlock, ok. Now I'll tighten up the bolts in the handle and these two 30 screws and get the door back together.
That's basically how you do the door handle from this point on it's pretty much reassembling everything. Once you've taken it apart it's usually pretty easy to put it back together but we do have the videos on installing the door panel and the window regulator and lock actuator plate so you can either search our other videos or check out the replies to this video.
We hope this helps you out, brought to you by www.1AAuto.com your source for quality replacement parts and the best service on the internet. Please feel free to call us toll free 888-844-3393. We're the company that's here for you on the internet and in person.
Shop Products


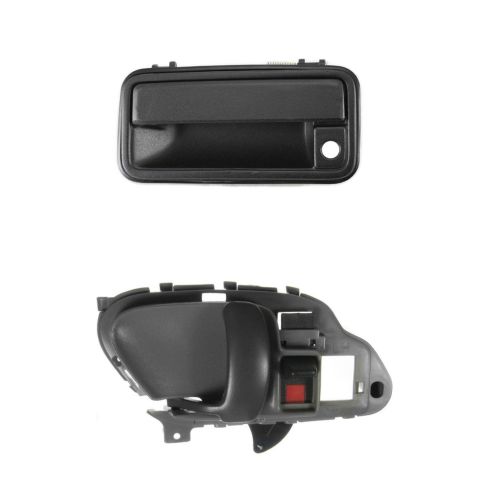
Chevrolet GMC Front Driver Side 2 Piece Interior & Exterior Door Handle Set TRQ DHA34759
Part Details:
- 2 Piece
- (1) Driver Side Interior Door Handle
- (1) Front Driver Side Exterior Door Handle

How to Replace Rear Exterior Door Handle 2001-05 BMW 325 Xi
Check out this video if you need to replace the door handle on your 01-05 BMW 3 Series. 1A Auto shows you how to do it, step by step!
