How to Replace CV Axle Shaft 1998 Volvo S70
Created on: 2012-01-11
In this video, 1A Auto shows you how to replace CV joint axles in a 98 Volvo S70.
-
step 1 :Remove the wheel
- Loosen the lug nuts with your 19 mm socket and ratchet or a lug wrench.
- Raise and secure the vehicle.
-
step 2 :Remove the brakes
- Check out our other videos for more detailed instructions on brakes
-
step 3 :remove or move the strut out of the way
- Hit the top three nuts and bottom two with penetrating oil
- Loosen two or remove two of the 13 mm bolts.
- disconnect the stabilizer link from the strut
- Use a 17 mm socket to break the stabilizer link nut loose and then use an Allen wrench and a wrench to remove it the rest of the way.
- Unclip the ABS cable from the strut.
- Remove the 18 mm bolts at the bottom of the strut.
- Move the strut to the side.
-
step 4 :Remove the CV Joint Axle
- Use a hammer and a socket extension to drive out the axle.
- Unbolt the axle from the transmission using a 12 mm socket and ratchet
- Pull your axle out of the car.
- Replace with your new axle.
- Bolt the new axle into the transmission and torque the cap bolts to 35 ft lbs.
- Work the axle into the hub.
- Fit the strut into the steering knuckle and bolt in the 18 mm bolts.
- Torque the 18 mm bolts to 55 to 60 ft lbs.
- Tighten the top three nuts to 20 to 22 ft lbs.
-
step 5 :Reassemble the stabilizer links and brakes
- Tighten together the stabilizer link.
- Clip the ABS cable back onto the strut.
- Check out our other videos for more detailed brake assembly instructions.
-
step 6 :Put the wheel back on.
- Hand tighten the lug nuts
- Lower the vehicle
- See your owner’s for torque specs for the hub nut or bolt.
- Torque the lug nuts in a star pattern to 100 ft lbs.
If you took your brakes apart, pump the brakes a few times to recompress the calipers and carefully road test before driving regularly.
Tools needed
-
Hammer
Jack Stands
10mm Wrench
7mm Allen Wrench
Ratchet
Floor Jack
11mm Wrench
12mm Wrench
13mm Wrench
11mm Socket
14mm Wrench
12mm Socket
13mm Socket
15mm Wrench
14mm Socket
Torque Wrench
16mm Wrench
17mm Wrench
15mm Socket
18mm Wrench
16mm Socket
17mm Socket
19mm Wrench
18mm Socket
19mm Socket
10mm Socket
1/2 Inch Breaker Bar
Brought to you by 1AAuto.com, your source for quality replacement parts and the best service on the internet. Hi, I'm Mike Green. I'm one of the owners of 1A Auto. I want to help you save time and money repairing and maintaining your vehicle. I'm going to use my 20 plus years experience, restoring and repairing cars and trucks like these to show you the correct way to install parts from 1AAuto.com. The right parts installed correctly, that's going to save you time and money. Thank you and enjoy the video.
In this video, we're going to show you how to replace the front drive or CV Axle. We're going to show you the passenger side, the driver side is a similar procedure. Just a little different because of some clearance issues but we're going to show you the passenger side. We take it or take it out and put the old one because this car didn't need a new one. It actually needed a new hub so we just shot this video as part of that. Tools you'll need are Jack and Jack stands, 10-19mm Wrenches and Sockets, you'll need a Ratchet, a Breaker Bar and/or a Pipe for some extra leverage on the Ratchet if you don't have a Breaker Bar. Some of the bolts are a little tough. You'll need a Torque Wrench to put it back together. Large Hammer, 3/16 or 6m Allen Wrench and if you are going to remove the brakes, you'll also need a T47 Torx Bit, a large C-clamp and large Screw Driver or Small Pry bar. If you don't have the benefit of impact tools, you want to use a 19mm Socket and Ratchet and a Breaker Bar or your tire iron. Loosen the lug nuts while your car is on the ground, then lift it up, secure it, then remove the lug nuts all the way.
Also, if you don't have impact tools, you'll want to pull off the little center cap and loosen you see there going to be a large nut or a 14mm bolt. You want to loosen that with the vehicle on the ground and held in place first. I'm going to speed it up as I remove the lugs and then the wheel and tire and I'm also going to keep it going fast through the brakes. You can remove your axles without taking the brakes apart. It's arguable whether that's easy or not. The brakes are kind of bulky and just making a little more difficult to get the stuff but if you do want to remove the brakes, you can see how I do it here. There's also a video for how to do a brake job on one of these S70s if you want to see it taken apart the brakes in regular speed but bear with it for about another 30 seconds and we'll get to the meat. Okay. Here at the top, I'm going to spray the three mounting nuts on the top of the strut and you can either just loosen them up or you can take two of them off and leave one on. You may want to just pull the strut out of the way. That's really the easiest way. I do leave the strut in there and just work around it. Next, we're going to disconnect our stabilizer link from the strut and then we're going to use some penetrating oil there and then just put some penetrating oil on the strut bolts. First, I'm going to take a 17mm Socket, put it on here with a larger Ratchet and see if I can break it loose.
Now that those are broken free, you'll find that the center stud is going to spin, so you can put an Allen Wrench in there. A 3/16 or 6mm Allen Wrench will work. Allen Wrench holds the stud while you loosen up. Just speed up here as I remove that nut the rest of the way and disconnect the top of that stabilizer link. Additionally, there's an ABS harness that's attached to the strut just with the rubber grommet. You can just pull that away from its clip. These bolts for the struts are 18mm. I suggest a Breaker Bar or a piece of Pipe on your Ratchet. I'll then speed a little up here as I change over to my Ratchet and a wrench and remove those bolts the rest of the way. Now here, I'm just going to remove the bolts from the strut and then release it from the knuckle and move it out of the way. Pull your suspension down, push your strut around, two bolts in, and get these nuts on. Now, you want to torque these bolts to between 55 and 60 foot pounds and then go up on top, put your other nuts on and you want to torque them to 20 to 22 foot pounds. Once that strut on there, you just take an extension and then your axle should drive out pretty easily. Now, you can see your axles free there.
Now, looking up from underneath where the axle goes into the transmission, there are two bolts on a cap, they're 12mm so we're going to remove those. Now you can reach in and pull your axle and it slides out. Just be careful that you don't hit any ABS or your brake line harnesses as its coming out. Here, so I'm going to go over and put in the axle shaft back in. You'll notice I am putting the old one back in. If you notice on this picture, there's a brand new hub on there. That's what this vehicle actually needed was the new hub so I'm just doing this video to show you how to do it. Didn't needed a new axle shaft so I didn't see a need to put a new one into it. Feed it back in. Be careful of your brake lines and your CV boots. Now, your cap goes back on, there's a larger space here that goes to the bottom. Torque these to 35 foot pounds. Now, feed your axle into the hub here. Again, just take care not to damage your boots at all. Move stuff right on until your axle goes in. Pull your suspension down. Put your strut around. Put your bolts in. Start these nuts on. Now you want to torque these bolts to between 55 and 60 foot pounds, and then go up on top, put your other nuts on and you want to torque them to 20 to 22 foot pounds.
Now, put your stabilizer link back in place and start the nut on and then, use your Wrench and Allen Wrench to tighten it up. This part, it's not a critical suspension part, it's important but not critical. It probably does have a torque spec but I just tighten it, basically just tight as I can get it using the Allen Wrench and the combination Wrench. At this point, you want to start your either center nut or bolt that holds the axle to the hub. You're not going to tighten at this point. You're just going to start it in there. You tighten it when the vehicle is on the ground. Here again, I'm just going to burn through. I'm putting the brakes back together to fast forward. You can probably pick up enough here to put them back together if you take them apart, and if you don't, you can just kind of move forward to putting the wheel on and torquing the lug nuts. You can see that the tire has, the wheel has a space here and that goes over this spike. I'm going to grab the spoke below that space. Put the wheel on. Just going to speed it up here as I put in the lugs by hand then use my impact wrench just to preliminary tighten the lugs. Our vehicle uses the small bolt so you tighten that to 33 foot pounds and then you tighten it an additional eight of a turn. If your vehicle uses the larger nut, you want to tighten it to 89 foot pounds and then tighten it after that about a third of a turn. Just put the center cap on, torque your lug nuts to a 100 foot pounds. Just put the center cap on, torque your lug nuts to a 100 foot pounds. If you do decide to take your brakes apart, make sure that you pump the brakes a bunch of times before you road test the vehicle and a few test stops for five and 10 miles an hour, make sure everything stopping correctly.
We hope this helps you out. Brought to you by www.1AAuto.com, your source for quality replacement parts and the best service on the internet. Please feel free to call us toll-free, 888-844-3393. We're the company that's here for you on the internet and in person.
Shop Products


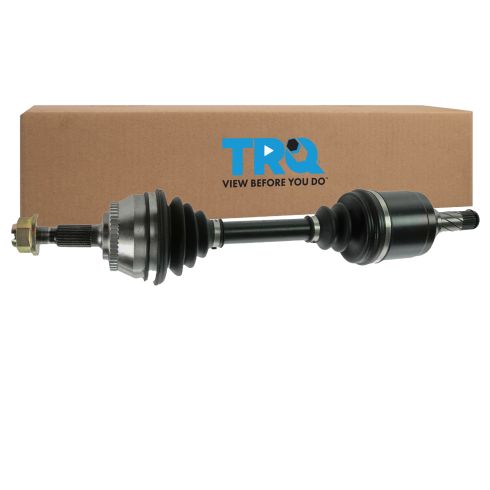
Volvo 850 C70 S70 V70 Front Driver Side CV Axle Assembly TRQ CSA82169
Part Details:
- 26
- 26
- 48
- Male
- Standard Replacement
- Yes
- M22x1.5
- Yes
- 36 mm
- 1.42 in
- Male
- 574 mm
- 22.6 in
- Neoprene
- Neoprene
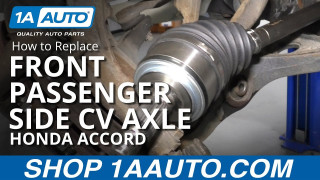
How to Replace Front Passenger Side CV Axle 2003-07 Honda Accord
Watch this video to learn how to replace the passenger side CV axle on your 03-07 Honda Accord. The driver side is covered in another video!
