
★★★★★
March 31, 2026
It looks like it was refurbish.i thought I was getting a new

Replaces







About TRQ:
TRQ is a trusted brand dedicated to making every repair a success story by combining premium parts with easy installation. Each TRQ part is engineered by a team of automotive experts to meet or exceed OEM standards, delivering enhanced performance and maximum longevity. With rigorous in-house testing, the brand ensures superior fit and function across every product line. TRQ also provides customers with best-in-class, step-by-step installation videos—so you can complete repairs with confidence, whether you're a first-time DIYer or an industry professional.
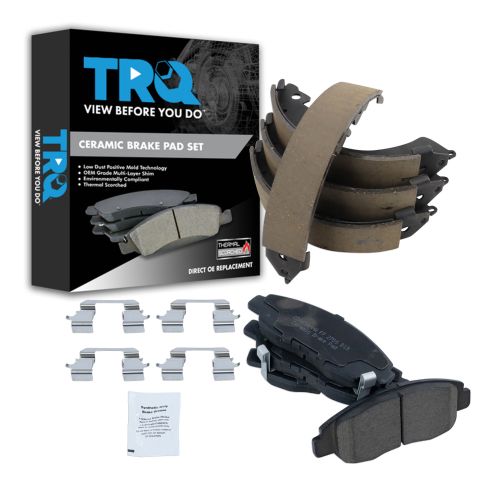
TRQ brake pads are manufactured using premium raw materials and design standards to restore original performance. TRQ brake pads are positive molded and utilize a multi-layer shim for enhanced performance and service life. TRQ’s combination of materials and design ensures a low dust and low noise braking experience. TRQ recommends replacing your brake rotors when you replace your brake pads to ensure even wear of components and improved braking comfort. All products are fit and road-tested in our Massachusetts R&D facility to ensure we deliver on our promise of Trusted Reliable Quality.
Attention California Customers:
 WARNING: This product can expose you to chemicals including Lead and Lead Compounds, which are known to the State of California to cause cancer, and birth defects or other reproductive harm. For more information, go to www.P65Warnings.ca.gov.
This part fits 25 vehicles spanning 1996-2005.
| Year | Make | Model | Description |
|---|---|---|---|
| 1996 | Honda | Civic | Honda Civic EX Automatic Transmission Front & Rear with 4 Wheel ABS Brakes Ceramic Brake Pads TRQ BFA18549 |
| 1996 | Honda | Civic | Honda Civic EX Manual Transmission Front & Rear without ABS Brakes Ceramic Brake Pads TRQ BFA18549 |
| 1996 | Honda | Civic | Honda Civic EX Automatic Transmission Front & Rear without ABS Brakes Ceramic Brake Pads TRQ BFA18549 |
| 1996 | Honda | Civic | Honda Civic EX Manual Transmission Front & Rear with 4 Wheel ABS Brakes Ceramic Brake Pads TRQ BFA18549 |
| 1996 | Honda | Civic | Honda Civic LX Automatic Transmission Front & Rear with 4 Wheel ABS Brakes Ceramic Brake Pads TRQ BFA18549 |
| 1997-2000 | Honda | Civic | Honda Civic EX Front & Rear Ceramic Brake Pads TRQ BFA18549 |
| 1999-2000 | Honda | Civic | Honda Civic SI Front & Rear Ceramic Brake Pads TRQ BFA18549 |
| 2001-2002 | Honda | Civic | Honda Civic Front & Rear Ceramic Brake Pads TRQ BFA18549 |
| 2003-2004 | Honda | Civic | Honda Civic GX Front & Rear Ceramic Brake Pads TRQ BFA18549 |
| 2003-2004 | Honda | Civic | Honda Civic HX Front & Rear Ceramic Brake Pads TRQ BFA18549 |
| 2003-2004 | Honda | Civic | Honda Civic LX Front & Rear Ceramic Brake Pads TRQ BFA18549 |
| 2003-2004 | Honda | Civic | Honda Civic DX Front & Rear Ceramic Brake Pads TRQ BFA18549 |
| 2003-2004 | Honda | Civic | Honda Civic EX Front & Rear Ceramic Brake Pads TRQ BFA18549 |
| 2004 | Honda | Civic | Honda Civic Value Package Front & Rear Ceramic Brake Pads TRQ BFA18549 |
| 2005 | Honda | Civic | Honda Civic GX Sedan Front & Rear Ceramic Brake Pads TRQ BFA18549 |
| 2005 | Honda | Civic | Honda Civic LX Sedan Front & Rear Ceramic Brake Pads TRQ BFA18549 |
| 2005 | Honda | Civic | Honda Civic EX Special Edition Coupe Front & Rear Ceramic Brake Pads TRQ BFA18549 |
| 2005 | Honda | Civic | Honda Civic LX Special Edition Coupe Front & Rear Ceramic Brake Pads TRQ BFA18549 |
| 2005 | Honda | Civic | Honda Civic Value Package Sedan Front & Rear Ceramic Brake Pads TRQ BFA18549 |
| 2005 | Honda | Civic | Honda Civic Value Package Coupe Front & Rear Ceramic Brake Pads TRQ BFA18549 |
| 2005 | Honda | Civic | Honda Civic EX Coupe Front & Rear Ceramic Brake Pads TRQ BFA18549 |
| 2005 | Honda | Civic | Honda Civic DX Sedan Front & Rear Ceramic Brake Pads TRQ BFA18549 |
| 2005 | Honda | Civic | Honda Civic HX Coupe Front & Rear Ceramic Brake Pads TRQ BFA18549 |
| 2005 | Honda | Civic | Honda Civic EX Sedan Front & Rear Ceramic Brake Pads TRQ BFA18549 |
| 2005 | Honda | Civic | Honda Civic LX Coupe Front & Rear Ceramic Brake Pads TRQ BFA18549 |
| Brand Label | Part Number |
|---|---|
| Raybestos Brakes | SGD465AC |
| Raybestos Brakes | SGD465A |
| Raybestos Brakes | EHT465AH |
| FMSI | CD465A |
| Raybestos Brakes | MGD465ACH |
| FMSI | S576 |
| Raybestos Brakes | EHT465H |
This item may be interchangeable with parts from other brands with the above part numbers. This information is provided only for reference and does not guarantee that the item you are purchasing is identical to parts with part numbers from the brands listed above. To confirm that this item fits your vehicle, use the above "Check Vehicle Fit" option.
Lifetime Warranty
This item is backed by our limited lifetime warranty. In the event that this item should fail due to manufacturing defects during intended use, we will replace the part free of charge. This warranty covers the cost of the part only.
FREE Shipping is standard on orders shipped to the lower 48 States (Contiguous United States). Standard shipping charges apply to Hawaii and Alaska.
Shipping is not available to a P.O. Box, APO/FPO/DPO addresses, US Territories, or Canada for this item.
Expedited is available on checkout to the United States, excluding Alaska, Hawaii.
Final shipping costs are available at checkout.
Created on:
Tools used
Brought to you by 1AAuto.com, your source for quality replacement parts and the best service on the Internet.
Hi, I'm Mike from 1A Auto. I hope this how-to video helps you out, and next time you need parts for your vehicle, think of 1AAuto.com. Thanks!
In this video, we're going to show you how to replace the front brakes. This is a 2003 Honda Civic, but the procedure is pretty much the same for the 2001 to 2005 models. This is for the sedans and coupes. We show you on the driver side, but the passenger side is the same procedure. We always recommend you replace the brakes in pairs. Items you'll need include new brakes from 1AAuto.com, 12 to 19 millimeter sockets with ratchet & extension, flat-blade and Phillips screwdrivers, both small and large, a number 3 Phillips bits as well as driver, large C clamp, pry bar, torque wrench, jack and jack stands, wire brush and grease.
Remove the front wheel, held on by four 19 millimeter lug nuts. If you have a different style hub cap, you'll need to remove that, but just use a breaker bar or your tire iron and loosen the lug nuts while the tire is on the ground. Now raise and support the vehicle. Now remove the lug nuts the rest of the way, and the wheel and tire.
With the wheel off, you can check the condition of your brakes. You can run a screwdriver or your fingernail up and down, front and back. Check for any deep grooves or ridges and actually even though the rotors look a little rusty, that's just from not being used. They're actually in pretty good shape. The outer pad, you can see right here, actually still pretty thick on this vehicle. Now in behind we can see your inner pads right here, again thick. Actually, the brakes on this vehicle are not in bad shape, but we're going to take them apart and put new ones on to show you.
Remove your caliper, we're going to remove two 12 millimeter bolts here and up here. Then later on, we'll be removing the whole caliper bracket so that's two 17 millimeter bolts here and up here. Before you remove those two 12 millimeter bolts, it's helpful, use a large screwdriver or a small pry bar. Insert it in here and pry out and this pulls your caliper out, which actually pushes the caliper piston back in. It can make it a lot easier to get the caliper off. You're just prying slowly, the calipers moving out. It'll go back some when you release it and now we'll remove those two 12 millimeter bolts. Then remove the caliper, put it up, make sure it's secure so it won't fall down. Then, with the caliper out of the way, you can see better. Here's the wear marks on your pads as they wear down, those disappear. That's when you know it's time to replace your pads.
Remove, pull the pad out and up, same thing on the back side. Out and up. Remove the caliper bracket, we're going to remove those two 17 millimeter bolts. If they're still here, you need to remove these two Phillips screws. It's possible, although not likely, that you can just use a number 3 Phillips screwdriver, then remove them. You'll need to use a number 3 bit on a ratchet. If you just kind of shock them real quick, it'll come off.
Hopefully your rotor will just come right off. If you find that it doesn't come off easily, you can take a couple of M8 bolts and thread them into there and push them off with the bolts.
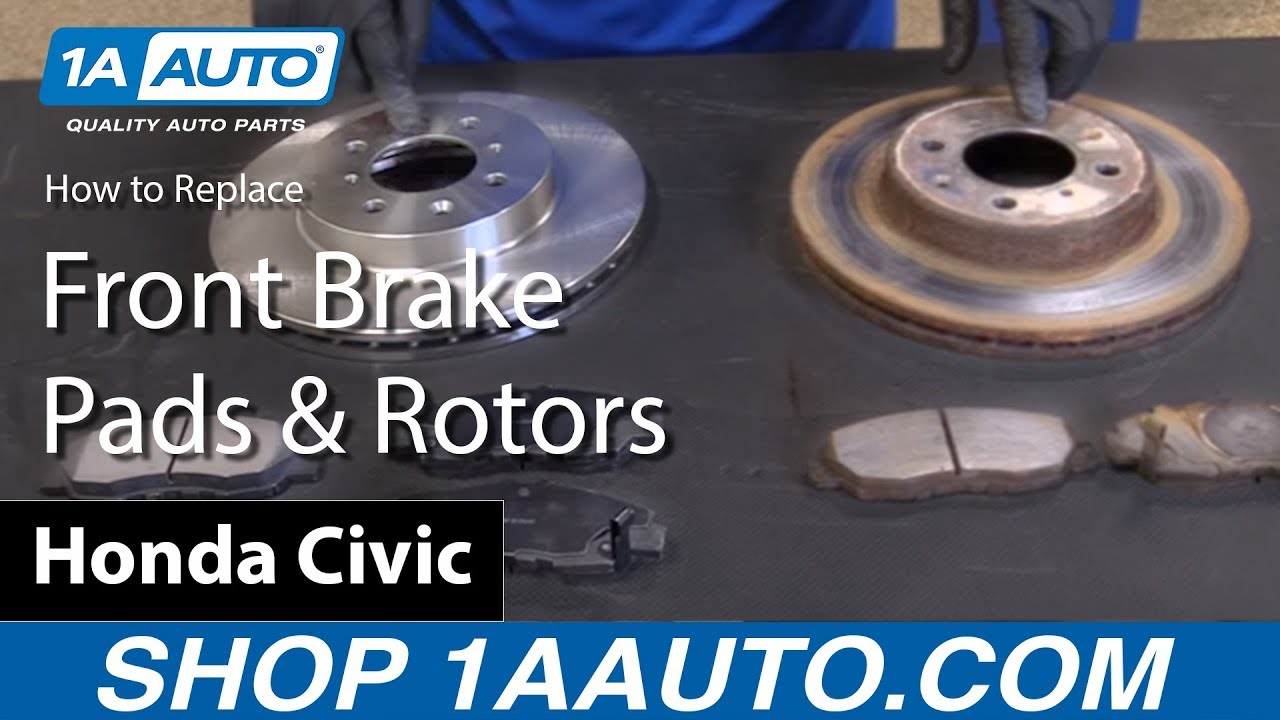
The original parts from the car: driver side pads, new rotors from 1A Auto, and then the pad set here and the rotors you can see exactly the same, same countersunk holes and everything. You're going to install just like the original, except your brakes. The rotor, just make sure that you line up the countersunk holes with the thread holes.
For the hub, put that on, and you can use the original screws or sometimes just use a lug nut to hold things together. These, you just want to tighten them up a little bit. You don't want to make them very tight, because you don't want to make them hard to get off next time, but just to hold things in place. Make sure that your slides here are nice and free. This one doesn't actually, it's a little bit less free than I'd like, so you can just pull them out. We'll clean it up and we'll put some new grease on it. You'll also want to clean up your slides if you don't put new slides on them, just use a wire brush on both sides.
There's some grease, spread it on, and reinstall and make sure it's really free. You're going to install the caliper bracket. It'll be 17 millimeter bolts that hold it. You want to torque these to 108 Newton-meters which is 80 foot-pounds. Make sure our caliper piston is back inside the caliper, just put your old brake pad in place. Use a large C-clamp and tighten it up. Push it back in place and remove the clamp, and remove the old pad. Spread some grease around the back.
Also, put a little bit of grease on the ends, then you can put it in place. Then grease is spread on the rear one. You want the tab on the bottom. Now you can put your caliper back down. You may have to push your slide in, in order to get it in place.
Reinstall your two 12 millimeter bolts, and these are 34 Newton-meters or 25 foot-pounds. Put your wheel back in place. Tighten your lug nuts. We'll tighten them preliminary and then torque them when the vehicle is back down on the ground. Tighten your lug nuts, 80 foot-pounds and just cross in the pattern.
Anytime you do work on your brakes, make sure you pump the pedal. Get a nice firm pedal before you test drive the vehicle.
Thanks for tuning in. We hope this video helped you out. Next time you need parts for your car, please visit 1AAuto.com. Also check out our other helpful how-to and diagnosis videos.
Tools used
Hi, I’m Mike from 1A Auto. We’ve been selling auto parts for over 30 years!
With the vehicle on the ground I'm going to use a 19 millimeter socket and a breaker bar to loosen the lug nuts. With the lug nuts loosened I'm now going to raise and support the vehicle. With the lug nuts loosened I should be able to use just the socket and finish removing them and I can take the wheel off. With the last lug nut removed I can take the wheel off.
Before I remove the caliper from the bracket, I'm going to try to squeeze it in first. Relieve some of the pressure on the piston. Get it to slide back into the caliper. This way when I go to remove it it'll slide right off. The caliper is held on with two bolts. One on the bottom and one on the top. They go in the side pins. This caliper doesn't have any stop to keep the slide pins from spinning when we go to remove it so we'll use a 19 millimeter wrench to kind of hold it. Use a 12 millimeter wrench to loosen it. Now I can just thread those out by hand. With the bolts out, I can slide the caliper off the pads and out of the bracket. I'll take the caliper and I want to hang it by the rubber hose using a bungee cord. Just wrap it through the strut. Give a couple twists here. Slide the pads out. Kind of wiggle them out of place.
The caliper bracket is held on with two bolts. There's a lower one and an upper one here. Let's start with the lower one, 17 millimeter. It's on there pretty tight, so I'm going to use the dead blow on the end of the wrench. Work on the upper one. Use the ratchet and socket just to make this go a little quicker. The other side. Hold onto the bracket as I loosen this upper one. There. Slide that out. The rotor is held to the hub with these two Phillips head screws. I need a big Phillips head screwdriver to remove them. They're in there and they're kind of stuck. I'm just going to have work at it. Spray some rust penetrant. Around here.
We've got an impact driver, which when you hit it, it spins the bit out, so I'm going to use that to help us get these out. I'll leave it loose. Now I'm going to get this one out. If after removing these two screws the rotor is still seized to the hub you can put two bolts in here and push it off. We're lucky this one's pretty loose. It'll slide right off. The brakes we took off the Civic are basically brand new. We're just going to reuse them. We just wanted to show you how to take them off. But 1A Auto does sell the front and rear brake kit for this vehicle. Here's the pad we took off.
Here's a brand new pad from 1A Auto. You can see this one is not really worn down that much. If we measure it it's just under 10 millimeters and when we look at the brand new pad from 1A Auto it's just about 10 millimeters as well. Since these are in good shape we're going to reuse the old ones for now. But if you need brand new brake pads you can get them from 1AAuto.com.
Just put this rotor back on. This would be the same if it was brand new. Kind of put it on backwards first. Take your brake parts cleaner. Just clean it down. Take a rag and wipe off the greasy hand prints. Flip it over. Install it the correct way. Line up these countersunk holes here with the threaded holes in the hub. Push that on. Some brake parts cleaner and clean the outside surface of the brake rotor. You can reuse these screws if you want to. You don't really have to. They just kind of hold the rotor in place while you're installing the caliper and caliper bracket. Clean our caliper hardware. Those are stainless steel clips on either ends. They can be reused. Just take some brake parts cleaner. Spray them down. And a wire brush. Take a rag and wipe them off. Repeat that for the other side. Now's a good time to check these slide pins. Make sure they move freely. That slides in and out real nice. Same for this one. Put the bracket over here. Put the bolts through the knuckle.
Have to move the caliper back around to find the openings. Thread them in by hand. Get that one caught. Work on the top one. Just going to slide these down with a ratchet. I'll come back and torque them afterwards. Just going to clean these pads with some brake parts cleaner before I put them back in. Put a little bit of caliper grease on the ears. I want the wear indicators on the inside. Place it into the clip and push it in place. And I'm going to repeat this for the other pad.
I'll take the brake caliper. Pull out the bungee cord. Get this out of here so I don't forget it. That's okay. This piston's pretty well compressed into the brake caliper. If these brake pads are really worn out this piston could be sitting way far out here and you'd have to take one of the old brake pads before you can install it and use a large C-clamp and you'd actually compress the piston back into the brake caliper. Since we're reusing the same pads and the thickness hasn't changed we don't need to do that. I'm just going to slide this into place. Install the bolts back in the slide pin. Just going to snug these up. Then I'll torque them. I'm going to counter hold the slide pins and then use a torque wrench to torque the slide caliper bolts, slide pin bolts. Torque these to 25 foot pounds. Caliper bracket bolts need to be torqued to 80 foot-pounds.
Reinstall the wheel. Thread the lug nuts on by hand. I'm just going to snug them down. And when I put the car on the ground I will torque them. I'm going to torque the lug nuts to 80 foot pounds. Go in a cross pattern. And the final step, to push the caliper pistons back out to meet the pads I'm going to gently press on the break and pump up the pedal pressure. You'll feel it start to get harder.
Thanks for watching. Visit us at 1AAuto.com for quality auto parts, fast and free shipping, and the best customer service in the industry.
It looks like it was refurbish.i thought I was getting a new

BFA18549
