About TRQ: TRQ is a trusted brand dedicated to making every repair a success story by combining premium parts with easy installation. Each TRQ part is engineered by a team of automotive experts to meet or exceed OEM standards, delivering enhanced performance and maximum longevity. With rigorous in-house testing, the brand ensures superior fit and function across every product line. TRQ also provides customers with best-in-class, step-by-step installation videos—so you can complete repairs with confidence, whether you're a first-time DIYer or an industry professional.
Product Features
Application Specific Design: No modifications necessary
Anti-Corrosion Coated: Enhanced surface life
Pre-greased: No additional maintenance required
Kitted for Restored Performance: Improved road-feel and handling
Description
TRQ suspension kits are manufactured using premium raw materials and coatings for extended service life. Each TRQ suspension component is designed to be a direct, maintenance-free replacement to the stock unit. To extend the life of your steering and suspension components, TRQ recommends replacing components in pairs, sets, or kits. All products are fit and road-tested in our Massachusetts R&D facility to ensure we deliver on our promise of Trusted Reliable Quality.
Replacing struts used to require specialized tools to compress, remove, and transfer the old spring and mount. Our Pre-assembled, complete strut & spring assemblies come with all new parts and make the job much quicker and easier for the do-it-yourself mechanic.
Strut & spring assembly contains:
Upper Strut Mount
Strut Bearing
Coil Spring
Boot & Bumper Kit
Gas-charged Strut
Install Tip: When replacing steering components, have a professional alignment performed afterwards. This ensures proper tracking and even tire wear.
Our steering and suspension components are pre-greased and sealed for long life and do not require the extra maintenance typically required by greaseable versions.
Attention California Customers:
WARNING: This product can expose you to chemicals including Chromium (Hexavalent Compounds), which is known to the State of California to cause cancer, and birth defects or other reproductive harm. For more information, go to www.P65Warnings.ca.gov
This part fits
6 vehicles spanning 2006-2011.
Fits these Makes
Select vehicle
Year
Make
Model
Description
2006-2011
Honda
Civic
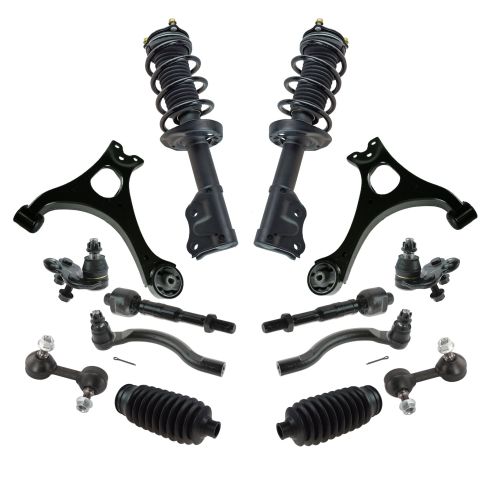
Honda Civic GX Sedan Front 14 Piece Steering & Suspension Kit TRQ PSA74317
2006-2011
Honda
Civic
Honda Civic LX Sedan Front 14 Piece Steering & Suspension Kit TRQ PSA74317
2006-2011
Honda
Civic
Honda Civic EX Sedan Front 14 Piece Steering & Suspension Kit TRQ PSA74317
2006-2011
Honda
Civic
Honda Civic DX Sedan Front 14 Piece Steering & Suspension Kit TRQ PSA74317
2009-2011
Honda
Civic
Honda Civic LX-S Sedan Front 14 Piece Steering & Suspension Kit TRQ PSA74317
2009-2011
Honda
Civic
Honda Civic EX-L Sedan Front 14 Piece Steering & Suspension Kit TRQ PSA74317
Part Interchange
Brand Label
Part Number
NAPA Premium
2605713
MOOG Chassis Products
ES800373
Precision Driveline
CB60078
Beck/Arnley
102-5293
Mevotech
CMS60101
NAPA
2605712
MOOG Chassis Products
CK620382
Mevotech
GS60101
Mevotech
MS60700
Precision Driveline
CB60079
NAPA
2605713
Ingalls Engineering
CAK620383
SYD
1509013
DIY Solutions
SUS07845
MOOG Chassis Products
K620383
Raybestos Chassis
507-1442
MOOG Chassis Products
K620382
MAS Industries
CA59163PR
DIY Solutions
SUS05423
EMPI
88-1627-K
Mevotech Original Grade
GS60101
Beck/Arnley
101-5293
Carquest
CA411B
Beck/Arnley
101-5949
Beck/Arnley
103-3074
MOOG Chassis Products
K80769
Mevotech
MS60501
Mevotech
MK80768
DIY Solutions
SUS06944
MOOG Chassis Products
K150284
Dorman - OE Solutions
520-565
DIY Solutions
SUS07218
Honda
51350SNAA03
Mevotech
MS60100
Monroe Shocks & Struts
172287
Ingalls Engineering
CAK620382
Monroe Shocks & Struts
172286
Beck/Arnley
102-5294
MAS Industries
CA59163
DIY Solutions
SUS07844
Precision Driveline
5CB60079
KYB
SR4242
Mevotech
GS60100
Beck/Arnley
101-5950
SYD
1509012
Delphi
TC2922
MOOG Chassis Products
EV800246
Mevotech
MS60601
MOOG Chassis Products
K500070
MOOG Chassis Products
ES800374
Mevotech
CMS60100
Mevotech
MS60101
MAS Industries
CA59164
Mcquay-Norris
FA4609
Unity Automotive
11815
KYB
SR4241
Unity Automotive
11816
Delphi
TC2923
Carquest
CA410B
DIY Solutions
SUS05422
DIY Solutions
SUS06945
MOOG Chassis Products
CK620383
Beck/Arnley
101-5294
Mevotech
MS60600
Honda
51360SNAA03
Raybestos Chassis
507-1441
NAPA Premium
2605712
DIY Solutions
SUS07843
DIY Solutions
SUS00338
MOOG Chassis Products
K80768
Mevotech
MS60500
Dorman - OE Solutions
520-566
MOOG Chassis Products
K500069
Mevotech
MK80769
Mcquay-Norris
FA4608
Mevotech Original Grade
GS60100
MAS Industries
CA59164PR
DIY Solutions
SUS00337
Honda
53010SNEA01
Honda
51230SNAA03
Honda
51220SNAA02
Honda
52130SNAA03
Honda
51320SNAA02
Honda
51230SNAA02
Honda
53010SNAA01
Honda
51321SNAA02
Honda
51350SVBA02
Honda
51220SNAA03
Honda
52130SNAA02
Honda
51360SVBA02
Honda
53535SNAA01
Honda
53534SNAA01
Import Direct
5CB60078
TRW
JTC2593
SKP
SRK620383
Import Direct
5CB60079
Mevotech Supreme
CMS60100
Dorman - Premium
CA59163PR
Dorman - Premium
CA59164PR
MOOG Chassis Products
RK620382
TRW
JTC2592
SKP
SRK620382
MOOG Chassis Products
RK620383
Mevotech Supreme
CMS60101
Hollander
512-50122R
Hollander
512-50123L
NAPA Chassis Parts
2693531
Raybestos Brakes
4012194
Dorman
534-838
Dorman
TO59131XL
Dorman
TO36012XL
Dorman
531-083
NAPA Proformer
1693531
Carquest Premium Chassis Parts
310-233897
Dorman
TO36011XL
Dorman
534-877
Beck/Arnley
101-5947
Honda
53560SNEA01
Honda
53560SNAA02
Import Direct Chassis
ER04017
TRW Steering and Suspension Parts
ES800374
MOOG Chassis Products
ES800239
Honda
53540SNEA01
Import Direct Chassis
ER10004
Dorman
TO59132XL
Raybestos Brakes
4012193
Mcquay-Norris
ES4431
Mcquay-Norris
ES4430
Honda
53560-SNE-A02
Carquest Premium Chassis Parts
310-233899
Honda
53540-SNE-A02
Dorman
534-839
AutoZone
ES800373
Honda
53540SNAA02
Duralast
ES800373
Import Direct Chassis
ER10003
Honda
53560SNAA01
Duralast
ES800374
NAPA Chassis Parts
269-3531
NAPA Chassis Parts
269-3530
TRW Steering and Suspension Parts
JTE1437
MAS Industries
TO59131
AutoZone
ES800374
TRW Steering and Suspension Parts
ES800373
Beck/Arnley
101-5948
MAS Industries
TO59132
Mevotech Supreme
MS60500
Mevotech Supreme
MS60601
Mevotech Supreme
MS60501
Mevotech Supreme
MK80768
Mevotech Supreme
MK80769
Mevotech Supreme
GS60100
Mevotech Supreme
MS60100
Mevotech Supreme
GS60101
Mevotech Supreme
MS60700
Mevotech Supreme
MS60101
Mevotech Supreme
MS60600
This item may be interchangeable with parts from other brands with the above part numbers.
This information is provided only for reference and does not guarantee that the item you are
purchasing is identical to parts with part numbers from the brands listed above.
To confirm that this item fits your vehicle, use the above "Check Vehicle Fit" option.
Lifetime Warranty
This item is backed by our limited lifetime warranty. In the event that this item should fail due to manufacturing defects during intended use, we will replace the part free of charge. This warranty covers the cost of the part only.
FREE Shipping is standard on orders shipped to the lower 48 States (Contiguous United States). Standard shipping charges apply to Hawaii and Alaska.
Shipping is not available to a P.O. Box, APO/FPO/DPO addresses, US Territories, or Canada for this item.
Expedited is available on checkout to the United States, excluding Alaska, Hawaii.
Final shipping costs are available at checkout.
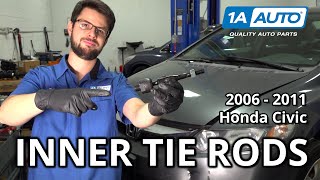
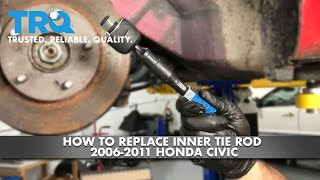
How to Replace Inner Tie Rods 2006-2011 Honda Civic
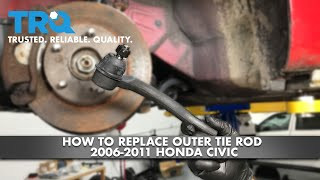
How to Replace Outer Tie Rods 2006-2011 Honda Civic
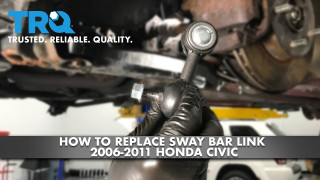
How to Replace Front Sway Bar Links 2006-2011 Honda Civic
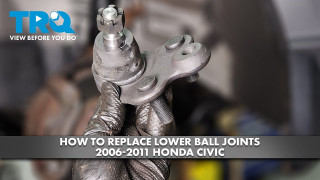
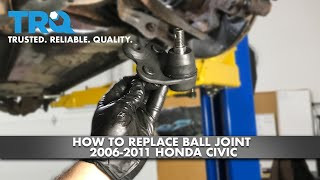
How to Replace Front Lower Ball Joint 2006-11 Honda Civic
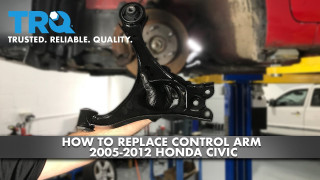
How to Replace Front Lower Control Arms 2006-2011 Honda Civic
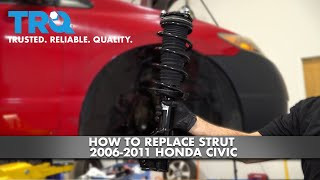
How to Replace Front Struts 2006-2011 Honda Civic
Created on:
Tools used
Hammer
Pry Bar
Jack Stands
19mm Socket
3/8 Inch Drive Ratchet
Safety Glasses
Pliers
Side Cutters
21mm wrench
24mm Wrench
Gloves
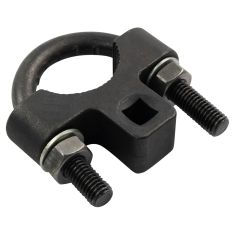
Inner Tie Rod Removal Tool
Wheel Chocks
Anti-Seize Grease
Floor Jack
1/2 Inch Impact Gun
Tools used
Side Cutters
Torque Wrench
Gloves
24mm Wrench
Hammer
Jack Stands
Wheel Chocks
19mm Socket
Floor Jack
Safety Glasses
1/2 Inch Impact Gun
Tools used
Torque Wrench
Gloves
14mm Socket
Rust Penetrant
Jack Stands
5mm Hex Socket
Wheel Chocks
19mm Socket
Ratchet
Floor Jack
Safety Glasses
Tools used
Socket Extensions
Torque Wrench
Rust Penetrant
Pry Bar
Paper Towels
Jack Stands
Complete Metric Wrench Set
Ratchet
Floor Jack
Needle nose pliers
1/2 Inch Breaker Bar
Complete Metric Socket Set
1. Removing the Wheel
Loosen the lug nuts with a 19mm socket
Loosen the lug nuts with the vehicle on the ground
Raise the vehicle with a floor jack
Secure the vehicle on jack stands
Remove the lug nuts
Pull off the wheel
2. Removing the Ball Joint
Pull the knuckle toward you
Straighten the cotter pin
Remove the cotter pin from the castle nut
Loosen the nut with a 19mm wrench and dead blow mallet if needed
Remove the ball joint with a ball joint separator, ratchet, and socket
Remove the castle nut
Remove the ball joint from the lower control arm with a pry bar
3. Installing the Ball Joint
Clean the surface of the lower control arm
Insert the ball joint into the knuckle
Hand-tighten the castle nut
Maneuver the ball joint into the control arm
Tighten the bolts to the ball joint with a 17mm socket and ratchet
Torque the three lower nuts to 43 foot-pounds
Tighten the castle nut with a 22mm wrench
Insert the cotter pin
Bend the ends of the cotter pin
4. Reattaching the Wheel
Slide the wheel into place
Start the lug nuts by hand
Tighten the lug nuts preliminarily
Lower the vehicle to the ground
Tighten the lug nuts to 80 foot-pounds in a crossing or star pattern
Reattach the center cap
Tighten the lug nut covers with a 22mm socket
Hi, I’m Mike from 1A Auto. We’ve been selling auto parts for over 30 years!
Turn the knuckle out a little bit this way until we see the ball joint. Remove the cotter pin using some needle nose pliers. Pop the little part up and over—that should come right out. Let's spray some rust penetrant on it to help it move. Take your 19mm box wrench.
This is really hard to move, so I'm going to use the dead blow mallet and hit the wrench. Try to break it free. This is on here pretty tight. I tried hitting it with the dead blow, but it didn't work, so we're going to use a cheater bar here. You could just use a piece of pipe. Going to put it over the wrench and give you extra leverage. Sometimes you loosen it too far and then you can't get your box wrench out, so I'm just going to tighten it back up a little bit. And once I can get my box wrench out, now we take the open-ended part and continue to loosen in. That will have to come off, with it loosened, so what we're going to do is thread it back down but not all the way. Then I'll start loosening these bolts under here.
I'll just spray some rust penetrant on the bolt that's right here, that's holding the ball joint in and on the two nuts. I have a 17mm socket and extension and a long breaker bar to get these free. That one's loose. Get this one loose. I've got those loose. I'm going to switch to a ratchet. Now, I'm just taking them out.
I'm going to use a ball joint separator and slide it in here. Get it in place. Use the appropriate sized socket for yours—this one is a 15/16ths. Going to tighten it and it will pop the ball joint down. Break free with a snap. Remove this nut the rest of the way. Now I can get the nut off that it's slid down. This ball joint is loose. It's also loose here in the arm. Going to use some pry bars to just pry down on the arm and pop the ball joint out of the lower control arm. And just, the whole strut is holding the brake, knuckle, and axle assembly. I just reach up here and just pop this down, and that should slide right out of there.
This is our original ball joint that came out of the vehicle. Here’s a brand new one from 1AAuto.com. See the same style ball joint. A new one comes with a new castle nut, and also comes with some new nuts for underneath and a new bolt and a new cotter pin. They're the same style ball joint. This one is marked L for left. This should fit great and work great in your vehicle.
I'm just going to wipe some dirt off the top of the control arm right here. A little bit of the grease off the bottom of the knuckle. Don't have to go crazy, just some of the big chunks, get them out of there. Take the ball joint and get it up in here. Now, I'll take the castle nut and just sort of capture it, just so the ball joint doesn't fall out. Now, I can pull down, and push this out a little bit. I just kind of maneuvered it up into here. I'm just going to give it a little push, get it into place, use the pry bar to kind of readjust it, and just push it home with my hand. I'll get these two nuts caught so it doesn't pop back out. There's a new washer that came with this one.
Reinstall that with the bolt. Thread them in by hand, but don't cross-thread. Now I'm just going to snug these down and come back and torque them afterwards, but in the meantime, get them nice and even.
I want to torque these, starting with this nut here, then the rear nut, then the bolt. Torquing these to 43 foot-pounds. I'll turn this back out so I can see the nut and already getting tight. The placement nut is at 21mm. Use the open-ended part of the wrench to tighten. There is a torque for these, it's very difficult to get a torque wrench in here so I'm just going to tighten it nice and tight because it will have the cotter pin to hold it.
Almost there where the opening is free for the cotter pin. So, right there, I can go straight through with the cotter pin now. Right through here. Grab the cotter pin with my fingers and bend it up now. Sometimes you might need to use pliers. This one's long enough I can do it with my fingers. These go down that way, go down that way. Cotter pin is installed. The ball joint is replaced.
Thanks for watching. Visit us at 1AAuto.com for quality auto parts, fast and free shipping, and the best customer service in the industry.
Tools used
Torque Wrench
14mm Socket
Pry Bar
17mm Socket
Jack Stands
19mm Socket
Safety Glasses
5mm Hex Wrench
Rubber Mallet
Gloves
Wheel Chocks
Ratchet
Floor Jack
1/2 Inch Impact Gun
Tools used
12mm Socket
Torque Wrench
Hammer
14mm Socket
17mm Socket
Jack Stands
19mm Wrench
19mm Socket
Safety Glasses
Pliers
Gloves
Wheel Chocks
Anti-Seize Grease
Ratchet
Floor Jack
1/2 Inch Impact Gun
PSA74317
In Stock
Product Reviews
4.5/ 5
★★★★★★★★★★
2 reviews
5★
50%
4★
50%
3★
0%
2★
0%
1★
0%
★★★★★August 5, 2024
Overall good but lacked in the hardware departments
Ordered my kits about 3 months ago now. Fitment was spot on and the parts are still holding out great! Ball joint is making some noise but that may be due to me needing to tighten the nut. Would have given 5 stars but when it came time to bolt, the nuts were oval and would cross threaded. Had to run to the auto parts store for the nuts and bolts.
★★★★★September 4, 2023
Great
Parts were excellent. Fixed the problem I was having while also being super easy to install and well made. Especially for the price
Showing 1–2 of 2 reviews
Customer Q&A
Got a question about this part? Post it and get answers from our team.
JohnDecember 29, 2025
DOES THIS FIT THE 8TH GEN CIVIC SI COUPE??
Currently, we do not carry this part for your vehicle. We're always updating our inventory so please check back soon!
Nick · December 30, 2025
Showing 1–1 of 1 question
Customer service
877-844-3393
Monday - Friday 8:00am - 9:30pm ET Saturday - Sunday 8:00am - 4:30pm ET
Ask a Question
Check Your Email
We sent a verification email to .
Click the Verify Email button in the email to submit your question.
This extra step helps prevent spam.
Select Your Vehicle
Specify your vehicle's year, make and model to guarantee fit.










 WARNING: This product can expose you to chemicals including Chromium (Hexavalent Compounds), which is known to the State of California to cause cancer, and birth defects or other reproductive harm. For more information, go to www.P65Warnings.ca.gov