
★★★★★
June 26, 2025
Perfect fit, great performance
Easy installation and perfect fit. Look great & can notice the difference in breaking.

Replaces







About TRQ:
TRQ is a trusted brand dedicated to making every repair a success story by combining premium parts with easy installation. Each TRQ part is engineered by a team of automotive experts to meet or exceed OEM standards, delivering enhanced performance and maximum longevity. With rigorous in-house testing, the brand ensures superior fit and function across every product line. TRQ also provides customers with best-in-class, step-by-step installation videos—so you can complete repairs with confidence, whether you're a first-time DIYer or an industry professional.
Product Features
Attention California Customers:
 WARNING: This product can expose you to chemicals including Lead and Lead Compounds, which are known to the State of California to cause cancer, and birth defects or other reproductive harm. For more information, go to www.P65Warnings.ca.gov.
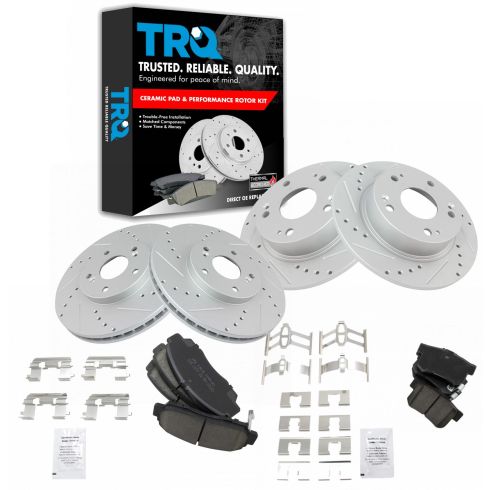
This part fits 5 vehicles spanning 2003-2008.
| Year | Make | Model | Description |
|---|---|---|---|
| 2004-2008 | Acura | TSX | Acura TSX Front & Rear Ceramic Premium G-Coated Brake Pad & Rotor Kit TRQ Performance BKA12196 |
| 2003-2004 | Honda | Accord | Honda Accord Coupe V6 3.0L Manual Transmission Front & Rear with Rear Disc Brakes Ceramic Premium G-Coated Brake Pad & Rotor Kit TRQ Performance BKA12196 |
| 2005 | Honda | Accord | Honda Accord EX Coupe V6 3.0L Manual Transmission Front & Rear Ceramic Premium G-Coated Brake Pad & Rotor Kit TRQ Performance BKA12196 |
| 2006 | Honda | Accord | Honda Accord Coupe V6 3.0L Manual Transmission Front & Rear with Rear Disc Brakes Ceramic Premium G-Coated Brake Pad & Rotor Kit TRQ Performance BKA12196 |
| 2007 | Honda | Accord | Honda Accord EX Coupe V6 3.0L Manual Transmission Front & Rear Ceramic Premium G-Coated Brake Pad & Rotor Kit TRQ Performance BKA12196 |
| Brand Label | Part Number |
|---|---|
| Raybestos Brakes | MGD787CH |
| Raybestos Brakes | SGD787C |
| Raybestos Brakes | EHT537H |
| Raybestos Brakes | MGD537CH |
| Raybestos Brakes | SGD537C |
| Raybestos Brakes | EHT787H |
| Wagner | BD126082 |
| DuraGo | BR31315 |
| Raybestos Brakes | 980138 |
| Bendix | PRT5405 |
| Bendix | PRT5287 |
| Raybestos Brakes | 96795 |
| Aimco | 31275 |
| Aimco | 31315 |
| DuraGo | BR31275 |
| Wagner | BD125674 |
| Raybestos Brakes | 980666 |
| Honda | 43022S6DE50 |
| Honda | 43022SV4G21 |
| Honda | 43022SY8A01 |
| Acura | 43022SV4A20 |
| Suzuki | 55800-57L52 |
| Suzuki | 5580057L50 |
| Acura | 43022SY8A01 |
| Honda | 43022SV4A23 |
| Honda | 45022SEAJ11 |
| Suzuki | 5580080J02 |
| Acura | 45022S0KA01 |
| Honda | 43022SY8A00 |
| Honda | 43022SV4A22 |
| Acura | 45022SZ3A00 |
| Honda | 45022SEAJ00 |
| Honda | 43022SM4G00 |
| Acura | 43022TR0A00 |
| Acura | 45022S0KA11 |
| Honda | 43022S84A50 |
| Honda | 43022SL5000 |
| Acura | 43022SV4G22 |
| Honda | 43022S5AJ00 |
| Honda | 43022SV4G22 |
| Acura | 45022SEAJ11 |
| Honda | 45022S0KA12 |
| Suzuki | 5580080J00 |
| Acura | 43022SY8A00 |
| Honda | 43022SV4A20 |
| Honda | 45022SDRA10 |
| Honda | 43022TR0A01 |
| Honda | 43022S6D010 |
| Acura | 45022SEPA01 |
| Acura | 45022SEPA00 |
| Honda | 43022SV4A21 |
| Suzuki | 5580080J01 |
| Suzuki | 43022SM4G00 |
| Acura | 43022SL5000 |
| Honda | 43022S2A000 |
| Honda | 43022TR0A00 |
| Acura | 43022TR0A01 |
| Acura | 45022SECA00 |
| Suzuki | 5580057L00 |
| Acura | 43022S84A50 |
| Honda | 43022SV4G20 |
| Honda | 43022SV4A00 |
| Acura | 43022S5AJ00 |
| FMSI | CD787 |
| FMSI | CD537 |
| Raybestos Brakes | 980666R |
| Raybestos Brakes | 980138FZN |
| Raybestos Brakes | 96795FZN |
| Raybestos Brakes | 96795PER |
| Raybestos Brakes | 980138P |
| Raybestos Brakes | 980138R |
| Raybestos Brakes | 96795R |
| Raybestos Brakes | 980666FZN |
| Raybestos Brakes | 96795P |
| Hollander | 530-58833 |
| Hollander | 533-58672 |
| Raybestos Brakes | 980666P |
This item may be interchangeable with parts from other brands with the above part numbers. This information is provided only for reference and does not guarantee that the item you are purchasing is identical to parts with part numbers from the brands listed above. To confirm that this item fits your vehicle, use the above "Check Vehicle Fit" option.
Lifetime Warranty
This item is backed by our limited lifetime warranty. In the event that this item should fail due to manufacturing defects during intended use, we will replace the part free of charge. This warranty covers the cost of the part only.
FREE Shipping is standard on orders shipped to the lower 48 States (Contiguous United States). Standard shipping charges apply to Hawaii and Alaska.
Shipping is not available to a P.O. Box, APO/FPO/DPO addresses, US Territories, or Canada for this item.
Expedited is available on checkout to the United States, excluding Alaska, Hawaii.
Final shipping costs are available at checkout.
Created on:
Tools used
Hi. I'm Mike from 1A Auto. We've been selling auto parts for over 30 years.
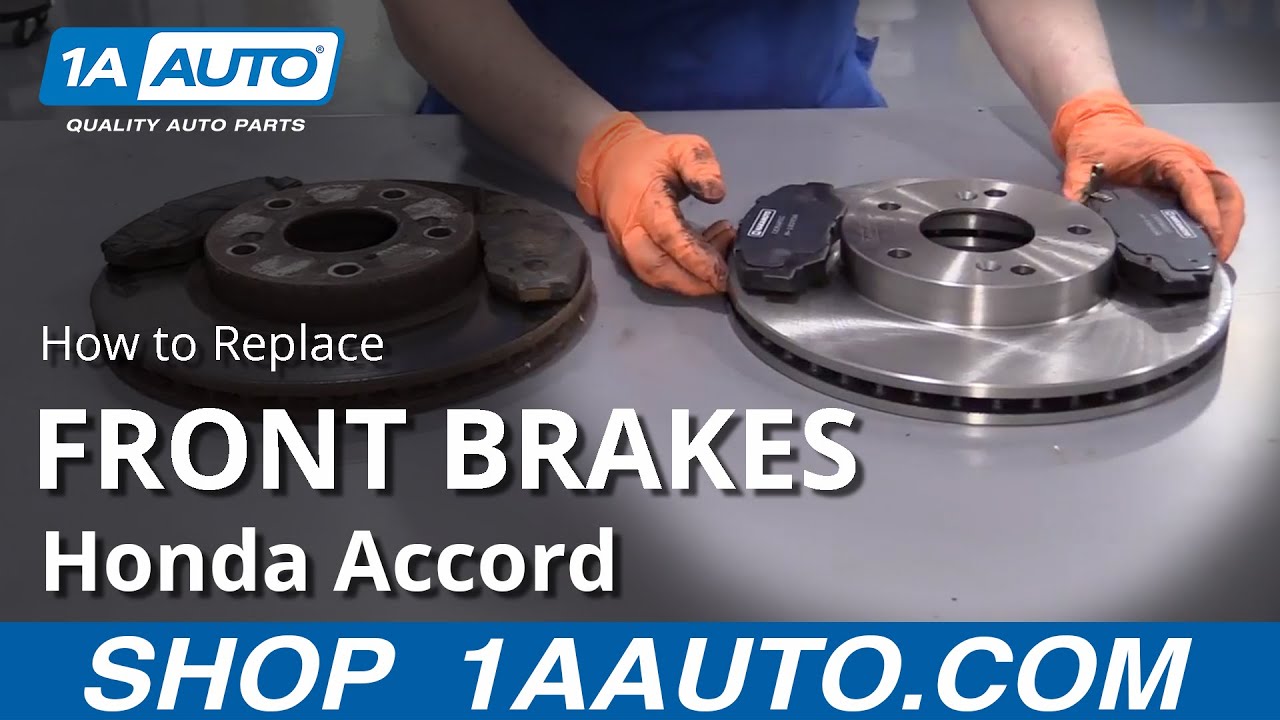
Hi everyone. Sue here from 1A Auto. Today, we have an '07 Honda Accord in the shop, and we're going to be showing you how to do a front-brake service. If you need those parts or any other parts of your car, click on the link below and head on over to 1aauto.com. 19-millimeter socket to loosen up the lug nuts. Now, I am going to raise and support my vehicle with my two-post lift, and you can use jack stands with a jack. Now, we're clear to remove the tire.
First thing to do is remove the boot for the caliper bleeder, and we're going to break that open and make sure it moves. 10-millimeter wrench. Nice and smooth. I'm just going to lightly snug it, so that I can break it free once it's hanging. 12-millimeter socket. We can break free the caliper mounting/slider bolts. It's two. One on the top, one in the bottom. So now we're going to look at the caliper slider bolts.
They both look good shape. Nothing's wrong with them. I can take a pry bar now and just pry my caliper off in the caliper bracket. While that's out, I can look at it, make sure the dust boot's not torn. There's no fluid leak. I'm going to take my tool that pushes the caliper piston back, snug it up before I start to push that piston back. I can open that bleeder screw again.
Aim it at the bucket I have down below to catch the brake fluid. At this time, I'm going to feel out the caliper piston. It's going back really smooth. No glitches. It's not frozen. No fluid's coming out of the dust boot. So, we have a good seal. Once that's snug, I can re-tighten my bleeder screw. 17-millimeter socket, and now we're going to break free the caliper bracket to knuckle bolts.
It's just two of them. One top, one bottom. Now we have the bracket with pads in it. There's the front rotor. So, now all's we have to do is take the pads out of the bracket, and that's basically if they're frozen, and then you can take a hammer, or I just squeeze them sometimes as the outer pad and the inner. I'm noting where the indicator is on the inner pad.
Here, we have our front rotor for our '07 Honda Accord from 1A Auto, and here we have our set of pads. They come pre-shimmed. They have the beveled edges to allow the brake dust to disperse evenly. Both inner and outer pad have that marking, and they both come with the shims. The rotors are a nice crosscut. They have the manufacturer's amount of vintage specs, and it has the actual specs stamped on it.
Here, we have a rotor that we took off. It's probably not original equipment, so if you need these parts or any of the parts for your car, click on the link below and head on over to 1aauto.com. Now, I'm going to clean the surface of the hub. Use a little brake clean. You can see all that dirt and grease come right off, and just use a nice wire brush. We don't want any raised grease. I mean, raised rust lines.
I just want to point something out here. So if someone has done a brake job on this car probably in the past eight months or so, then you can see the groove lines. They took what we call a grinder wheel or a whizzer cookie, and they just went to town on this hub. There's a couple of problems with that. That is shaving the metal off. You can see the actual marks. The car is probably... It's an '07, so it's 12 years old. It's up there in age.
The customer's never going to feel a pulsation, but you need to keep this down to a minimal of how much metal you take away from a hub on a mounting surface. So, now, we're going to clean up our front caliper bracket. First thing I'm going to do is clean the tins while they're in the bracket. It's easier to hold onto them. Do that to both sides. Now, we can take the tins off.
Let's clean out the surface that they mount to. See that right there? It's layers of rust. That's what I want to avoid, so I can chip away that. That'd be great. What happens there is that rust ends up swelling and pushing that tin up. It makes that pad not slide in and out of the bracket, so we call that... It'll end up with uneven wear and premature wear. That's the whole point of doing what we're doing.
That's much better. I'm going to clean the backside of the brackets here, the tins. These tins are in good shape. You can always order a set of tins with the brake job. So, if you don't want to clean, you want to avoid this part of the job. It will go quicker. Plus you don't know if it's damaged until you take it apart. So, might be best for the few dollars it costs to be prepared and just change them out new every time.
Now, I'm going to take the sliders out, and these are stiff, so I don't know what I'm going to find when I take this out whether it's damaged. I might actually take a pair of pliers to this. I got it. Wow. Okay, so either they put too much grease in there, or they didn't clean it when they redid it. Look at the condition of this. Looks like it's going to be able to be reusable. Let's take the boot off, really examine the boot. Make sure there's no pin holes.
That looks good. I'm going to take the wire brush and clean inside there. I'm going to repeat that process on this side. I'm going to reinstall the boot. Both sides, reinstall. Let's put some silicone paste right in there. This is water resistant, so hopefully, it stops that rust buildup that we saw that we took out. That only goes underneath, nothing on the top part of the tins.
We want a smooth sliding surface. Okay, the rubber bushing always goes on the top caliber bracket. I don't know about always. That seems like it's always that way, especially with Hondas. I got to put some on the boot inside. Much smoother. I couldn't even turn it before. Perfect. Let's do the same on the other side. I've put the rotor on backwards so that I can clean the surface before I install it.
I'm just getting the package oil off, the anti-rusts they put on for it when it sits on the shelf. I got to spray a little anti-seize lubricant on the hub. Now, I can mount my rotor. This did not have any of the mounting screws. They must have fallen off in previous... or maybe broke off in previous installations. I'm going to use a lug nut to hold that rotor flush to the hub. Now, you clean this surface of the verdict.
Now, we're ready to install our caliper bracket. We have a upper bolt key. Slide it. Then the lower bolt. We're just going to snug these. Then I'm going to torque them to the manufacturer's specs. 80-foot pounds is the specs for these caliper to knuckle bracket bolts. Now, we can put our pads in the caliper bracket. Put the inner one in first, and that's the one with the indicator, and it's on the top and the outer pad.
Let's grab the caliper, ready to mount that. You'll see a flat spot on the sliders. Those line up with the angle of the caliper. I'm going to torque down the caliper slider bolt, and it's 26-foot pounds. Last thing I'm going to do is reopen the bleeder screw, and let it gravity bleed till I see a steady stream of fluid. Looks good. No air bubbles. Well, we can snug that up. Let's clean it and re-install our caliper with the screw cover.
Now, we're ready to put our wheel back on. I'm just going to snug them up by hand. Then I'll lower it down on the ground with the weight of the vehicle on it, and I'll torque the wheel to 80-foot pounds. 19-millimeter socket, and we're going to torque the wheel to 80-foot pounds in a star pattern. Double check. Now, we're going to repeat the process on the other side.
Thanks for watching. Visit us at 1aauto.com for quality auto parts, fast and free shipping, and the best customer service in the industry.
Tools used
Hi, I'm Mike from 1A Auto. We've been selling auto parts for over 30 years.
Hi, everyone. Sue here from 1A Auto, and today on our '06 Honda Element I'm going to show you how to replace the rear brakes. If you need those parts, or any other parts for your car, click on the link below and head on over to One A Auto.com.
19 millimeter socket, and we're going to break free the lug nuts. You got the pressure of the vehicle on the tire still, so it doesn't turn.
I use the two post lift. At home you can use a jack and jack stands. I'm going to take all the lug nuts off and remove the tire.
Let's break the bleeder screw open, make sure that we can push that piston back. We know it moves when the fluid comes out. Just snug it back up. Now I'm going to dismount the caliper from the caliper bracket. The caliper slider pins, bolts, are 14 millimeter socket or a wrench. Now the little pry bar, I'm going to pry this right off. There we go.
So now I've got to push the piston back. I like to use a little pair of C-clamp pliers, so I'll set it right in there, get it ready to snug ... But I'm not going to compress that piston until I loosen up the bleeder screw. Grab my 10 millimeter, break that free. Have a good catch basin with some pads underneath. Now the bleeder screw's open and I've got my adjusters now. I'm just going to squeeze this. You never want to reverse the brake fluid on an ABS system, plus this gives you your chance to really check out your caliper, make sure it's in working order. That went right back really nice and smooth. So now I'm going to snug that bleeder screw up, remove my pliers. Now I can examine the actual caliper boot and piston and make sure that everything looks good.
I have no moisture around the seal. Everything looks in good shape there. I'm happy with that. I'm just going to set that aside, make sure it's out of my way.
Let's take that bottom bolt out. Now we can pull the caliper bracket off and see what we got here. We have no pad, no pad there, and very little bit of a pad left on the ear. about a quarter of a pad left there. So we're going to see where this failed.
So for some reason the sliders work, slider pins work, and for some reason that outer pad wore off, or the bonding came undone and slid off. Let's see if we have any swelling underneath the hardware, which eliminates the pad from doing its job and sliding back and forth freely.
Now it's time to take the rotor off, and these rotors have mounting ... little screws on them. So we're going to use a pneumatic screwdriver that acts like a puncture, so you hold it taut and hit it with a hammer. So if you get one where the Phillip's head is all worn out, I'm going to use a chisel and literally try to turn it with a chisel. There we go.
And you don't need these. They're just there to help keep the rotor flush while you're adjusting the E brakes. I'm just going to give it a quick little spray down on the hub area, see if we can ... pray this comes right off. Give a quick hit of the hammer. Okay, let's get it off the rest of the way. Wow.
Here we have our new rotor from One A Auto and brake pads. This is the old one that we took off. See the thickness difference. Obviously this is new. The pads from One A Auto come with a nice cooling vent, an angled, so there's no brake dust build up. The rotor is a solid motor with a nice cross cut. They even mill the inside where the E brake shoes go, and a cutout for the backing plate to water, so water can distribute out. So if you need these parts or any other parts of your car, click on the link below and head on over to One A Auto.com.
Here we have our new rotor and the old rotor, and we have to cross over the rubber boot that covers up the slot for the self adjuster on the E brakes. Don't forget to transfer that silver because you don't get a new one with anything. I didn't get one with the hardware either. So it's the slot that has the seat on it. You can just install that right there. We'll be taking it back out when we go to adjust the brakes. Now I'm going to clean the new rotor, getting the packaging oil off of it, the anti-rust oil.
I'm going to put some anti-seize around the hub here on the surface. I already took a wire brush to it. So you're going to line up the adjuster hole and the mounting bolt holes. So with that we have ... it's going to go like this. So now we need to undo the adjuster a little bit. The E brake shoes will not fit inside the rotor housing, it's the hat of the rotor. So I'm backing off on the adjustment. There we go, perfect.
At this point I want to adjust E brake, and by doing that the the rotor has to be flush on the hat, the hub. So where we had ... this screw hole hasn't been used for a while, it's all rusty, and this one was stripped. So I'm going to use two lug nuts. If you have the two mounting screws and they work, you don't have to use the lug nuts, you can use those, and you just want to make sure it's tight to the hub and if you have to bang on it ... You want to be able to spin this and adjust the E brakes, and turn it.
Okay. Now I'm going to take that adjuster cover off. I might back off a little bit on that. You're going to use the window, line up where the star adjuster is, and this way you can adjust it.
I have a high spot right there that I'm not a fan of.
You don't want the brakes to beat snug because if they're too snug, when it goes down the road ... brakes expand ... the wheels start to smoke obviously because it will be almost as if you have the E brake on. There we go.
This backing plate is pretty bad. That's where I'm going to leave it. Now we're going to install the boot.
So now comes the time where we're going to clean up our caliper bracket in silicone and get it ready for the brake pads. Take the old hardware off ... and that's reusable, but you'd have to clean it up. Like I would take a wire wheel to it, or a wire brush if you don't have one, clean the pad surface that it's going to slide on. But I ordered new hardware from One A Auto. This comes coated. It's got a neoprene coating on the back so rust cannot attach itself to the tin, and a new pad spring that goes on the caliper side, that keeps the pads from clanking and making noise.
So we're going to clean the caliper bracket. Take a wire brush to the surface. Do that on both sides. Clean it. Get a little caliper grease, put a thin coat on the metal wherever the tin's going to sit. We don't want water building up in there. Then we're going to take the tins and put them back on. If you use the old ones definitely clean both sides of the tins so that ... See that tab? It's like a butterfly tab there. So that's going to go down and sit right in there. You can take a pair of pliers if you want, squeeze them down, and repeat the process on this side.
Now we're going to clean the caliper pins. Take that out and wipe off the old paste. Look at it: there's no rust. It looks good. The boot: examine it. Make sure there's no tears. And with this I like to use a silicone paste. You can use caliper grease. I'm going to put the silicone paste in there. It's a water base. I like to put it on the inside of the boot grooves. Then I'll take the slider pin and lube up the flat side, or all the way around lightly, with a little glob on the end. That's a glob to me. So then I'm going to slide it in there and work it around, get any air out, squeeze it down.
Okay, it needs to go down more so we're going to get the air out. I'm going to use a pocket screwdriver. Just hold the boot open, squeeze it all the way down. There we go. Repeat the process on this side.
Make sure you get the air out. Do not puncture the boot. Now we're ready to install that bracket. We're going to start the bolts by hand, and I'm just going to snug them down and then get the manufacturer's specs, and torque them down. Let's get the caliper itself out of the way. So a size 14 socket in case you forget. Okay, snug those up. Get our torque wrench. The manufacturer's specs on this is 41 foot pounds.
So now I'm going to put in the new caliper hardware for the anti-rattle clips. I'm just going to take a screwdriver and, poke in there, pry this down again. That's what it looks like. A new, new one, itt's going to have more tension to it. So to start you put this in, bring it all the way over to one side. There it is. So I just kind of did that fast, but I brought it all the way to one side, clipped it in, and then just pushed my finger down on this side: snapped right in.
Now we can install our pads. The one with the indicator goes on the inside, and the one without it goes on the out. They just basically sit right in. like that. And then we're just going to slide the caliper on, get our two slider bolts. It's a 14 millimeter socket. The torque on that is 16 foot pounds. Now we're going to gravity bleed because we did open up that bleeder screw, so I'm going to put a 10 millimeter on there, break it open. Got my catch pan down there. Didn't really get any air bubbles so we're just going to snug it off, get a nice steady drip, clean that up.
Now we're going to put the bleeder screw cover back on. Ready to pump the brakes up.
... Front. I'm going to seek the pads and pump up the brakes. So the manufacturer recommends Dot Three, which I'm going to put in, and this is the diaphragm. It goes down by suction when the brake fluid is low, so just push it gently back into place. Make sure there's no chunks of dirt or anything, or debris. So it's Dot Three brake fluid. I'm going to fill it up to the full line which is on the side here. You can see it starting to come up. I'm going to reinstall the cap. It's got these offsets ... see how they're angled ... so they lock them down and then it just kind of sucks it down. So then they're good.
Now let's put the lug nuts back on. It's a 19 millimeter socket. Just going to tighten them all down and then I can lower it down and torque it. So I'm going to torque the wheels to manufacturer spec, which is 80 foot pounds, and always do it in a star pattern. Double check.
Thanks for watching. Visit us at OneA Auto.com for quality auto parts, fast and free shipping, and the best customer service in the industry.
Easy installation and perfect fit. Look great & can notice the difference in breaking.
Front rotors I got twice were warped had to but from a different vendor because I did not want to keep paying the mechanic to change my brakes for a 3 or possibly 4th time if I got more warped rotors
Fit very well with issues just like OEM , great price !!! Ship fast n on time !!!
I purchased 2 TRQ rear brake calipers as well with this kit on my 05 Tsx. Stopping power is great, definitely happy.
Look great no sound and feels responsive. As usual will be coming back
Excellent quality. Perfect fit.
Top quality and product shipped quickly to my house. Highly recommend for anyone interested in getting parts.
Loving them
Excellent brakes fits well. Delivery on time. Better than OEM.
Fits perfectly. Definitely worth the price! Have no issues with performance at all.

BKA12196
For the Acura it is not specific to transmission type, but if you are purchasing for an Accord Coupe it needs to be a 3.0L with a manual trans only.
