About TRQ: TRQ is a trusted brand dedicated to making every repair a success story by combining premium parts with easy installation. Each TRQ part is engineered by a team of automotive experts to meet or exceed OEM standards, delivering enhanced performance and maximum longevity. With rigorous in-house testing, the brand ensures superior fit and function across every product line. TRQ also provides customers with best-in-class, step-by-step installation videos—so you can complete repairs with confidence, whether you're a first-time DIYer or an industry professional.
Product Features
Application Specific Design: No modifications necessary
Anti-Corrosion Coated: Enhanced surface life
Pre-greased: No additional maintenance required
Kitted for Restored Performance: Improved road-feel and handling
Description
TRQ suspension kits are manufactured using premium raw materials and coatings for extended service life. Each TRQ suspension component is designed to be a direct, maintenance-free replacement to the stock unit. To extend the life of your steering and suspension components, TRQ recommends replacing components in pairs, sets, or kits. All products are fit and road-tested in our Massachusetts R&D facility to ensure we deliver on our promise of Trusted Reliable Quality.
Our steering and suspension components are pre-greased and sealed for long life and do not require the extra maintenance typically required by greaseable versions.
Attention California Customers:
WARNING: This product can expose you to chemicals including Chromium (Hexavalent Compounds), which is known to the State of California to cause cancer, and birth defects or other reproductive harm. For more information, go to www.P65Warnings.ca.gov
This part fits
9 vehicles spanning 2002-2009.
Fits these Makes
Select vehicle
Year
Make
Model
Description
2004-2007
Buick
Rainier
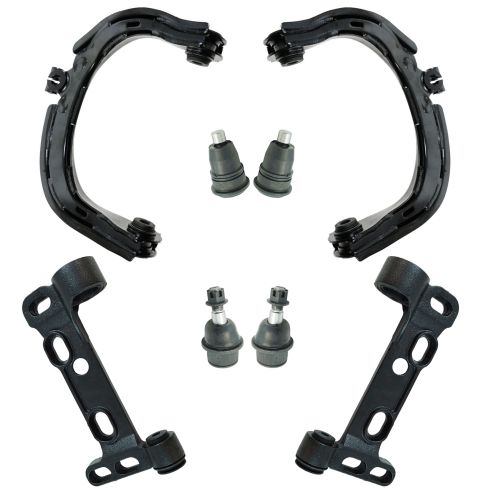
Buick Rainier Front 8 Piece Suspension Kit TRQ PSA56372
2002-2009
Chevrolet
Trailblazer
Chevrolet Trailblazer Front 8 Piece Suspension Kit TRQ PSA56372
2002-2006
Chevrolet
Trailblazer EXT
Chevrolet Trailblazer EXT Front 8 Piece Suspension Kit TRQ PSA56372
2002-2009
GMC
Envoy
GMC Envoy Front 8 Piece Suspension Kit TRQ PSA56372
2003-2006
GMC
Envoy XL
GMC Envoy XL Front 8 Piece Suspension Kit TRQ PSA56372
2004-2005
GMC
Envoy XUV
GMC Envoy XUV Front 8 Piece Suspension Kit TRQ PSA56372
2003-2008
Isuzu
Ascender
Isuzu Ascender Front 8 Piece Suspension Kit TRQ PSA56372
2002-2004
Oldsmobile
Bravada
Olds Bravada Front 8 Piece Suspension Kit TRQ PSA56372
2005-2009
Saab
9-7X
Saab 9-7X Front 8 Piece Suspension Kit TRQ PSA56372
Part Interchange
Brand Label
Part Number
ACDelco
45D10101
Dorman
520-144
ACDelco
45D1211
ACDelco
45D1210
Dorman
520158
ACDelco
45D10100
Dorman
520-143
Dorman
520157
Isuzu
8257867740
General Motors
15198625
General Motors
15077245
General Motors
15762669
Precision Driveline
3CB50059
General Motors
15280282
Ingalls Engineering
CAK640293
Ingalls Engineering
CAK641135
Ingalls Engineering
CAK640294
NAPA
2606864
MAS Industries
CA90337PR
General Motors
15912461
MOOG Chassis Products
CK640294
MAS Industries
CA90338
Mcquay-Norris
FA3350
Falcon Steering Systems
FCA710
SYD
15077245L
Isuzu
15858683
General Motors
15198624
Isuzu
8259189640
Mcquay-Norris
FA3349
Mevotech
GS50104
NAPA Premium
2605937
Mevotech
MS50105
Ingalls Engineering
CAK641134
General Motors
15298272
MOOG Chassis Products
RK641135
Dorman - OE Solutions
520-144
General Motors
25786780
Mevotech
GS50105
Mevotech
MS50104
Mevotech
CMS50105
MAS Industries
CAS91164
Dorman - OE Solutions
520-158
MOOG Chassis Products
K6663
General Motors
15912465
Raybestos Chassis
507-1150
Beck/Arnley
102-7073
Precision Driveline
CB50059
MOOG Chassis Products
K6664
Raybestos Chassis
507-1149
Precision Driveline
CB50058
Isuzu
8257867750
Isuzu
8259189650
Centric Parts
623.66819
General Motors
25786775
Raybestos Chassis
502-1208
General Motors
15077244
MAS Industries
CAS91163
NAPA
2606865
Mcquay-Norris
FA3348
Mcquay-Norris
FA3351
MOOG Chassis Products
K640294
Centric Parts
622.66819
Dorman - OE Solutions
520-157
Mcquay-Norris
FA4947
Dorman - OE Solutions
520-143
MOOG Chassis Products
RK640293
General Motors
25786774
Isuzu
15858682
General Motors
25918964
General Motors
15158963
Mcquay-Norris
FA3942
Mevotech
CMS501182
MAS Industries
CA90338PR
Beck/Arnley
102-7072
Centric Parts
622.6682
Precision Driveline
CB50094
Mcquay-Norris
FA3943
NAPA Premium
2605936
MOOG Chassis Products
RK640294
SYD
15077244R
Isuzu
8158586820
MasterPro
3CB50436
General Motors
15091391
Mevotech
CMS501183
MOOG Chassis Products
RK641134
MAS Industries
CA90337
General Motors
15298273
NAPA Premium
2606864
MAS Industries
CAS91164PR
Raybestos Chassis
502-1209
Mevotech
MS501183
Mcquay-Norris
FA4946
Precision Driveline
CB50095
Mevotech
MS501182
General Motors
15858682
General Motors
25918965
Falcon Steering Systems
FCA711
MOOG Chassis Products
CK640293
NAPA
260-5937
NAPA
260-5936
MAS Industries
CAS91163PR
Mevotech
GS50155
General Motors
15858683
Mevotech
GS50154
Mevotech
CMS50104
General Motors
25786779
MasterPro
3CB50437
General Motors
15080913
General Motors
15080914
General Motors
15091392
General Motors
15158962
General Motors
15762668
NAPA Premium
2606865
General Motors
15280281
MOOG Chassis Products
K640293
Centric Parts
623.6682
Isuzu
8158586830
Precision Driveline
3CB50058
DIY Solutions
SUS05510
DIY Solutions
SUS05509
DIY Solutions
SUS00148
DIY Solutions
SUS00185
DIY Solutions
SUS05049
DIY Solutions
SUS05050
General Motors
22157319
General Motors
19133670
General Motors
22157320
Mevotech
MK6663
Mevotech
MK6664
Carquest
CA397
Carquest
CA396
Dorman - Premium
CA90337PR
Dorman - Premium
CAS91164PR
Dorman - Premium
CAS91163PR
Dorman - Premium
CA90338PR
Hollander
512-01443R
Hollander
512-01444L
Hollander
511-01054R
Hollander
511-01055L
NAPA Chassis Parts
260-5937
Precision Chassis
3CB50059
AutoZone
CA8595
Raybestos Brakes
502-1209
MasterPro Chassis
3CB50437
Saab
25786775
Centric Parts
62366819
TRW Steering and Suspension Parts
JTC2428
Precision Chassis
3CB50058
AutoZone
CA8594
NAPA Chassis Parts
260-5936
MasterPro Chassis
3CB50436
TRW Steering and Suspension Parts
JTC2429
Raybestos Brakes
502-1208
Saab
25786774
Centric Parts
62366820
Mevotech Supreme
GS50105
Mevotech Supreme
MS501182
Mevotech Supreme
CMS50104
Mevotech Supreme
GS50155
Mevotech Supreme
CMS501183
Mevotech Supreme
CMS501182
Mevotech Supreme
CMS50105
Mevotech Supreme
MS50105
Mevotech Supreme
MK6663
Mevotech Supreme
MS50104
Mevotech Supreme
GS50154
Mevotech Supreme
GS50104
Mevotech Supreme
MS501183
Mevotech Supreme
MK6664
This item may be interchangeable with parts from other brands with the above part numbers.
This information is provided only for reference and does not guarantee that the item you are
purchasing is identical to parts with part numbers from the brands listed above.
To confirm that this item fits your vehicle, use the above "Check Vehicle Fit" option.
Lifetime Warranty
This item is backed by our limited lifetime warranty. In the event that this item should fail due to manufacturing defects during intended use, we will replace the part free of charge. This warranty covers the cost of the part only.
FREE Shipping is standard on orders shipped to the lower 48 States (Contiguous United States). Standard shipping charges apply to Hawaii and Alaska.
Shipping is not available to a P.O. Box, APO/FPO/DPO addresses, US Territories, or Canada for this item.
Expedited is available on checkout to the United States, excluding Alaska, Hawaii.
Final shipping costs are available at checkout.
How to Replace Ball Joint 2003-06 GMC Envoy XL
How to Replace Control Arm 2002-09 GMC Envoy XL
Created on:
Tools used
Razor Blade / Gasket Scraper
15mm Wrench
Torque Wrench
Hammer
15mm Socket
Ball Joint Press
Rust Penetrant
Pry Bar
Jack Stands
19mm Socket
10mm Wrench
Grease Gun
Bearing Grease
Flat Blade Screwdriver
Wire Ties
10mm Socket
Ratchet
Floor Jack
Wire Cutters
1. Removing the Wheel
Pry off the center cap with a flat blade screwdriver
Loosen the lug nuts with the vehicle on the ground
Raise the vehicle with a floor jack
Secure the vehicle on jack stands
Remove the lug nuts
Pull off the wheel
2. Removing the Ball Joint
Separate the axle from its housing with a pry bar and a hammer
Unclip the brake line from its clips
Remove the ball joint retaining ring with a hammer and punch
Remove two 10mm bolts from the steering knuckle bracket
Apply penetrating oil to the control arm nut and bolt
Remove the 15mm nut and bolt from the control arm
Strike the control arm with a hammer to loosen it
Pull the steering knuckle forward
Support the wheel knuckle with wire ties
Cut off the ball joint boot with a razor
Fit a ball joint press to the ball joint
Tighten the press to press out the ball joint
Remove the ball joint press
Tap out the ball joint with a hammer
3. Installing the New Ball Joint
Push the new ball joint into place
Fit the ball joint press onto the ball joint
Tighten the ball joint press to press in the ball joint
Tap the ball joint in with a hammer
Tap the snap ring into place with a hammer and punch
If you are replacing the snap ring, put the new ring on with snap ring pliers
Push the steering knuckle into place
Push the control arm onto the ball joint
Tap the control arm onto the ball joint with a hammer
Start the 15mm nut and bolt into the control arm
Remove the wire ties from the steering knuckle
Push the axle into its housing
Tighten the 15mm nut to 50 foot-pounds of torque
Fasten the grease fitting onto the ball joint with a 10mm wrench
Add grease to the ball joint with a grease gun
Insert the two 10mm bolts into the steering knuckle bracket
Clip the brake line into place
4. Reattaching the Wheel
Slide the wheel into place
Start the lug nuts by hand
Tighten the lug nuts preliminarily
Lower the vehicle to the ground
Tighten the lug nuts to 100 foot-pounds in a crossing or star pattern
Reattach the center cap
Brought to you by 1AAuto.com, your source for quality replacement parts and the best service on the Internet.
Hi, I'm Mike from 1A Auto. I hope this how-to video helps you out, and next time you need parts for your vehicle, think of 1AAuto.com. Thanks.
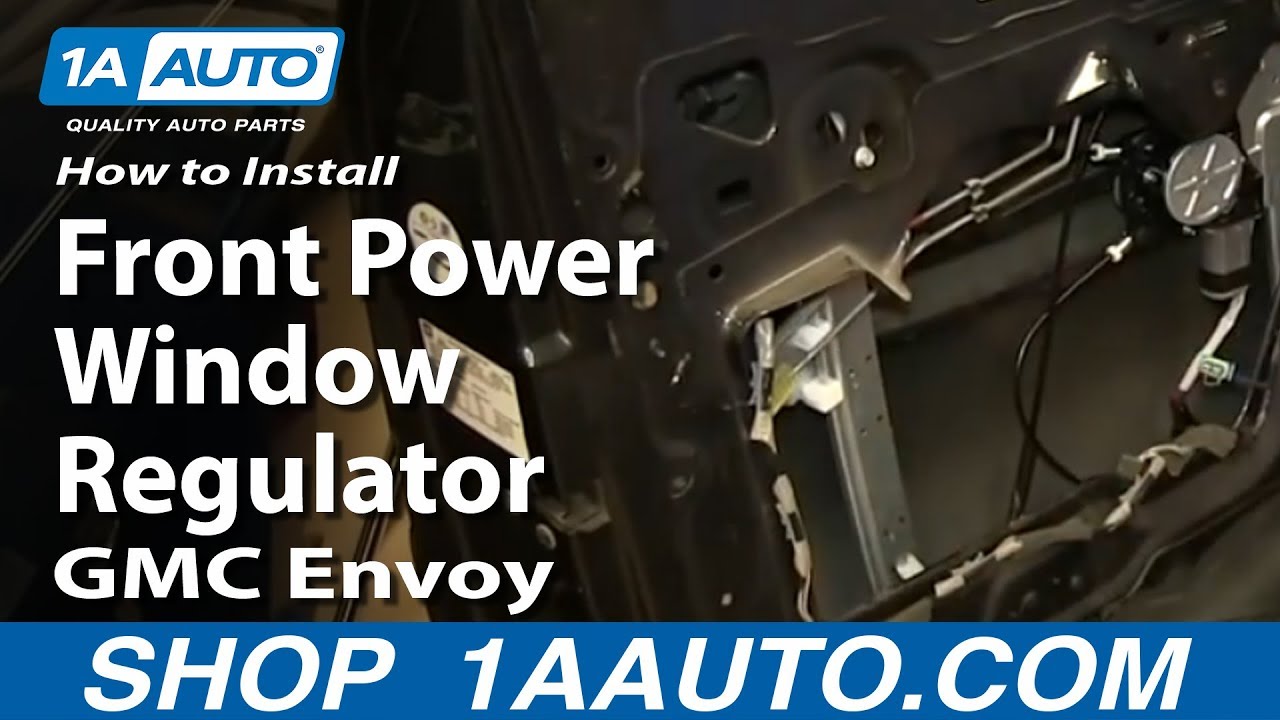
In this video, we're going to show you how to replace an upper ball joint on this 2003 GMC Envoy XL and we show you on the passenger's side but the driver's side is the same procedure. The items you'll need for this are a new upper ball joint from 1AAuto.com; flat blade screwdriver; 10, 15, and 19 millimeter socket and ratchet; 15 millimeter wrench; hammer; punch; snap ring pliers, depending on the condition of your old ring around your ball joint; razor; ball joint press; jack and jack stands; and a torque wrench.
Start off by removing your wheel and tire. Pry off the cap first. If you don't have the benefit of air tools, you want to loosen the lug nuts then raise and secure the vehicle on jack stands and remove the lug nuts that way. We have air tools so we put the vehicle up on jack and jack stands to remove the lug nuts and remove the wheel and tire.
Using a pry bar or a large flat blade screwdriver, just insert it in between the axle and the axle housing and just hammer it to separate the axle. Now, remove this clip here, and ours is broken so we're just going to use some wire cutters to remove the wire tie, but normally you just pry the clip open with the flat blade screwdriver. There's a rotating ring that holds the ball joint in. You want to use a punch and a hammer and you can see we do it before we release the upper control arm. You want to get that retaining ring out. Next, remove these two 10 millimeter bolts. We'll fast forward as Mike does that. Just pull the wheel knuckle forward and just make sure your axle pulls free and then support your wheel knuckle with wire ties or string just so that it's not being supported by those harnesses. We're just going to cut off this boot around the ball joint.
With this little tool, we'll be able to press on the hard part of the ball joint and we actually have the augment ours with another little attachment. Then this cup goes around the outside of the ball joint there. Put the press on here. Now, the press will be pushing around the edge of the ball joint and down into the cup and the cup is holding. It's not hitting the ball joint. It's holding around the steering knuckle. It's very important that you line everything up straight. Go nice and slow. You can see the ball joint has been pushed down and out.
Take your new ball joint and push it up into place. Push that up in. You need a sleeve to go up on top and this can just contact right against the bottom of your ball joint. We use the press to push the ball joint up and in and sometimes it helps to just use a hammer. You put a lot of pressure on with the press then use the hammer to get the ball joint, and seed it all the way in. If your old ring is still in good condition, just hit it back into place. Otherwise, use snap ring pliers and put the new snap ring into place.
Push the wheel knuckle back and then just push your upper control arm down on to the ball joint and hammer it down the rest of the way and just slide that bolt through. Replace the nut and make sure you remove your wire ties or string. Push the axle back into place. We'll fast forward as Mike tightens this up. Torque this to 50 foot-pounds. Twist the grease fitting into place and tighten it up with a 10 millimeter wrench. If you have a grease gun, just top it off. Then, just put the bolts back into place and re-clip your harness. Our clip is broken so we're just going to use a wire tie and then just tighten up those two 10 millimeter bolts.
Replace your wheel and replace the lug nuts and tighten them up preliminarily. Lower the vehicle, tighten the rest of the way and torque each of them to a hundred foot-pounds in a crossing pattern. Once you have them torqued, replace you cap then you should be all set.
We hope this video helps you out. Brought to you by www.1AAuto.com, your source for quality replacement parts and the best service on the Internet. Please feel free to call us toll-free, 888-844-3393. We're the company that's here for you on the Internet and in person.
Tools used
15mm Wrench
Torque Wrench
Hammer
15mm Socket
Rust Penetrant
Jack Stands
19mm Socket
Wire or String
21mm wrench
Flat Blade Screwdriver
Wire Ties
Ratchet
Floor Jack
Needle nose pliers
Wire Cutters
1. Removing the Wheel
Pry off the center cap with a flat blade screwdriver
Loosen the lug nuts with the vehicle on the ground
Raise the vehicle with a floor jack
Secure the vehicle on jack stands
Remove the lug nuts
Pull off the wheel
2. Removing the Control Arm
Apply penetrating oil to the 15mm bolt that holds the control arm to the steering knuckle Remove the 15mm bolt that holds the control arm to the steering knuckle
Pry the brake line from its clips with a flat blade screwdriver
Strike the control arm with a hammer to separate it from the steering knuckle
Secure the knuckle with wire ties, wire, or string
Apply penetrating oil to the two 21mm control arm bolts
Remove one 21mm bolt from the control arm
Loosen the other 21mm bolt
Push out the second 21mm bolt with a hammer and a flat blade screwdriver
Pull off the control arm
Strike the remaining bolt out of the control arm with a hammer
3. Installing the New Control Arm
Pry the brake line clips out of the control arm with a flat blade screwdriver
Push the new control arm into place
Start the two 21mm bolts into the control arm
Tighten the two 21mm bolts preliminarily
Remove whatever is securing the wheel knuckle
Put the control arm onto the wheel knuckle
Tap the control arm onto the wheel knuckle using a hammer
Start the 15mm bolt and nut that hold the control arm to the steering knuckle
Tighten the 15mm bolt to 50 foot-pounds of torque
Push the brake line clips onto the new control arm
Clip the brake line into the clips
4. Reattaching the Wheel
Slide the wheel into place
Start the lug nuts by hand
Tighten the lug nuts preliminarily
Lower the vehicle to the ground
Tighten the lug nuts to 100 foot-pounds in a crossing or star pattern
Reattach the center cap
Brought to you by 1AAuto.com, your source for quality replacement parts and the best service on the Internet.
Hi, I'm Don from 1A Auto. I hope this how-to video helps you out, and next time you need parts for your vehicle, think of 1AAuto.com. Thanks.
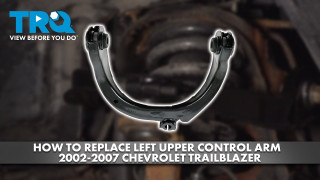
In this video, we're going to show you how to replace an upper control arm on this 2003 GMC Envoy XL. We show you on the passenger side, but the driver's side is the same procedure. The items you'll need for this are a new upper control arm from 1AAuto.com, flat blade screwdriver, 15mm and 19mm socket and ratchet, 15mm and 21mm wrenches, a hammer, torque wrench, pliers, and jack and jack stands.
Start out by removing your wheel and tire. Pry off the cap first. If you don't have the benefit of air tools, you'll want to loosen the lug nuts then raise and secure the vehicle on jack stands and remove the lug nuts the rest of the way. We have air tools, so we put the vehicle up on jack and jack stands, removed the lug nuts, and removed the wheel and tire.
Next, spray some penetrating oil on this 15mm bolt and then remove it using a 15mm socket and ratchet and a 15mm wrench. Now, remove this clip here. Ours is broken, so we're just going to use some wire cutters to remove the wire tie, but normally you would just pry the clip open with a flat blade screwdriver. Then, just pry this clip open and pull the harness free. You just use a flat blade screwdriver. Push in on the tab and it'll open up. Hit the upper control arm with a hammer to break it free. Hit it up and off the ball joint. Now, you want to secure your wheel knuckle. We're just going to use some wire ties to secure it. You could also use string or wire. You just want to make sure it's not going to move around too much.
Next, you want to remove these two 21mm bolts at the top of the control arm. Start off using a 21mm wrench and another wrench for some extra leverage. Just break both bolts free. Now we'll fast forward as Mike removes those bolts.You won't be able to remove them entirely, but you only need to remove them so that the bolt is not sticking out past the bushing. Sometimes, the bolts may get jammed and not move as far as you need them to. Just use a flat blade screwdriver and a hammer. You want to hit just underneath the upper control arm. The,n you can slide down the front and then remove that bolt the rest of the way by hand. Then angle it and remove the other bolt by hand. If it's jammed in there, you only really need one out. You can angle it and pull it out. Then just use a hammer to remove that other bolt.
As you can see, this upper control arm is in bad shape. You shouldn't have that much play. Now, just pry this clip out using a small flat blade screwdriver. On the right is the old upper control arm.
On the left is the new one from 1AAuto. You can see they are identical and they'll fit exactly the same. Push the back bolt in first and angle it into place. Tip the front of the upper control arm down and put the other bolt in. Then, angle it up into place. Then, just start both of those bolts in by hand until it secures the upper control arm into place. To start off, this bolt at the front, you won't be able to actually get the wrench onto it so just use a pair of pliers to tighten it in a little bit until you can get the wrench on it. We'll just fast forward as Mike tightens both of those 21mm bolts up. You're only really tightening these preliminarily.
Remove whatever you used to secure your wheel knuckle. Using a hammer, knock the upper control arm back down onto the ball joint and replace that 15mm bolt and the nut. Then just tighten it up and torque it to 15 foot-pounds. Push your clip into your new upper control arm. Re-clip the harness into it. Re-clip the harness into the clip on the wheel knuckle. Again, since ours is broken, we're just going to use a wire tie.
Replace your wheel. Replace the lug nuts and tighten them up preliminarily. Lower the vehicle. Tighten them the rest of the way and torque each of them to a hundred foot pounds in a crossing pattern. Have your vehicle back down on the ground with all the weight back on the suspension. Now you tighten up the two bolts that hold the control arm in and you want to tighten them to about roughly a hundred foot- pounds. I'm pulling them as tight as I can with that wrench. Then, the last thing you want to do is you do want to have your alignment checked and fixed after you perform this repair.
We hope this video helps you out. Brought to you by www.1AAuto.com, your source for quality replacement parts and the best service on the Internet. Please feel free to call us toll-free, 888-844-3393. We're the company that's here for you on the Internet and in person.
PSA56372
In Stock
Product Reviews
3.5/ 5
★★★★★★★★★★
2 reviews
5★
50%
4★
0%
3★
0%
2★
50%
1★
0%
★★★★★April 11, 2023
It is a good kit but not super happy overall
Happy with the kit not super happy with 1a auto. Super expensive returns. If you order from them just be absolutely sure what you need because they will not cut you any slack.
★★★★★November 6, 2019
I was really happy with the parts. And delivery was fast.
Showing 1–2 of 2 reviews
Customer Q&A
Got a question about this part? Post it and get answers from our team.
CMarch 2, 2019
Do these come with the bushing like in the pictures?
Yes it does..
VICTOR · March 2, 2019
Showing 1–1 of 1 question
Customer service
877-844-3393
Monday - Friday 8:00am - 9:30pm ET Saturday - Sunday 8:00am - 4:30pm ET
Ask a Question
Check Your Email
We sent a verification email to .
Click the Verify Email button in the email to submit your question.
This extra step helps prevent spam.
Chevrolet is a registered trademark of General Motors Company. 1A Auto is not affiliated with or sponsored by Chevrolet or General Motors Company.See all trademarks.
Select Your Vehicle
Specify your vehicle's year, make and model to guarantee fit.










 WARNING: This product can expose you to chemicals including Chromium (Hexavalent Compounds), which is known to the State of California to cause cancer, and birth defects or other reproductive harm. For more information, go to www.P65Warnings.ca.gov