
★★★★★
August 16, 2022
Exact fit, good quality and great value

Replaces







About TRQ:
TRQ is a trusted brand dedicated to making every repair a success story by combining premium parts with easy installation. Each TRQ part is engineered by a team of automotive experts to meet or exceed OEM standards, delivering enhanced performance and maximum longevity. With rigorous in-house testing, the brand ensures superior fit and function across every product line. TRQ also provides customers with best-in-class, step-by-step installation videos—so you can complete repairs with confidence, whether you're a first-time DIYer or an industry professional.
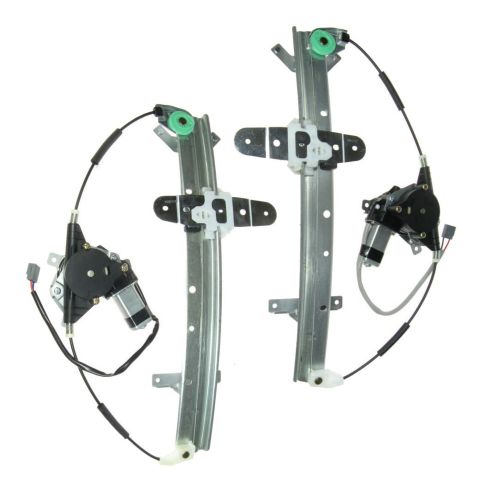
This window regulator is a high quality aftermarket part that meets or exceeds the performance of the original. Subjected to extensive testing and quality control standards, allows us to offer this regulator with our superior warranty!
Attention California Customers:
 WARNING: This product can expose you to chemicals including Lead and Lead Compounds, which are known to the State of California to cause cancer, and birth defects or other reproductive harm. For more information, go to www.P65Warnings.ca.gov.
This part fits 3 vehicles spanning 1992-2011.
| Year | Make | Model | Description |
|---|---|---|---|
| 1992-2011 | Ford | Crown Victoria | Ford Crown Victoria Rear Driver & Passenger Side 2 Piece Power Power Window Motor & Regulator Assembly Set TRQ WRA50221 |
| 1992-2011 | Mercury | Grand Marquis | Mercury Grand Marquis Rear Driver & Passenger Side 2 Piece Power Power Window Motor & Regulator Assembly Set TRQ WRA50221 |
| 2003-2004 | Mercury | Marauder | Mercury Marauder Rear Driver & Passenger Side 2 Piece Power Power Window Motor & Regulator Assembly Set TRQ WRA50221 |
| Brand Label | Part Number |
|---|---|
| Dorman | 741-679 |
| Dorman | 741-678 |
| Ford | 6W7Z5427008AAPFM |
| Ford | 6W7Z5427009AAPFM |
| Dorman - OE Solutions | 741-678 |
| Dorman - OE Solutions | 741-679 |
| Kool Vue | REPF491703 |
| CARDONE Reman | 82382ER |
| Ford | F7AZ5427009AA |
| Echlin | WLA5019 |
| Ford | 6W7Z 5427009 AA |
| ACI | 83149 |
| Ford | 1W7Z 5423394 AA |
| Echlin | WLA5013 |
| Ford | XW7Z5427009AA |
| Ford | 6W7Z5427009AA |
| NAPA | 6654775 |
| CARDONE New | 82-383ER |
| Parts Perfect | 53261 |
| ACI | 83148 |
| Kool Vue | F491702 |
| TYC | 3552-1985L |
| NAPA | 6654488 |
| Mercury | 1W7Z 5423395 AA |
| CARDONE New | 82-382ER |
| Ford | 1W7Z5423395AA |
| Ford | 2W7Z5427009BA |
| Ford | F2AZ5427009A |
| TYC | 660247 |
| ACDelco | 11A71 |
| TYC | 660248 |
| Mercury | 6W7Z 5427009 AA |
| Hollander | 135-00133L |
| Ford | 2W7Z5427008AA |
| Ford | 3W7Z5427009AA |
| Ford | 1W7Z 5423395 AA |
| Parts Perfect | 53260 |
| Mercury | 6W7Z 5427008 AA |
| Ford | F2AZ5427008A |
| NAPA | 6654772 |
| Ford | 6W7Z5427008AA |
| Ford | 6W7Z 5427008 AA |
| VDO | WL43110 |
| TYC | 3552-1985R |
| Ford | F7AZ5427008AA |
| Ford | 1W7Z5423394AA |
| Brocks Performance | 3552-1985R |
| Mercury | 1W7Z 5423394 AA |
| Brocks Performance | 3552-1985L |
| NAPA | 6654771 |
| Siemens | WL43110 |
| VDO | WL43111 |
| Kool Vue | F491701 |
| Hollander | 135-00134R |
| ACDelco | 11A72 |
| Siemens | WL43111 |
| CARDONE Reman | 82383ER |
| Partslink Numbering System | FO1550111 |
| Partslink Numbering System | FO1551111 |
| Four Seasons | 83148 |
| Four Seasons | 83149 |
| AISIN | RPAFD015 |
| SKP | SK741678 |
| AISIN | RPAFD016 |
| SKP | SK741679 |
| Brock | 3553-1981R |
| Brock | 3553-1981L |
This item may be interchangeable with parts from other brands with the above part numbers. This information is provided only for reference and does not guarantee that the item you are purchasing is identical to parts with part numbers from the brands listed above. To confirm that this item fits your vehicle, use the above "Check Vehicle Fit" option.
Lifetime Warranty
This item is backed by our limited lifetime warranty. In the event that this item should fail due to manufacturing defects during intended use, we will replace the part free of charge. This warranty covers the cost of the part only.
FREE Shipping is standard on orders shipped to the lower 48 States (Contiguous United States). Standard shipping charges apply to Hawaii and Alaska.
Shipping is not available to a P.O. Box, APO/FPO/DPO addresses, US Territories, or Canada for this item.
Expedited is available on checkout to the United States, excluding Alaska, Hawaii.
Final shipping costs are available at checkout.

Created on:
Tools used
Brought to you by 1AAuto.com, your source for quality replacement parts and the best service on the Internet.
Hi, I'm Mike from 1A Auto. I hope this how-to video helps you out, and next time you need parts for your vehicle, think of 1AAuto.com. Thanks.
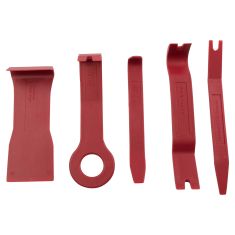
In this video, we're going to show you how to replace a rear window regulator on this 2000 Grand Marquis. The same as any '98 to '02 Grand Marquis, pretty similar for any 1998 to 2011 Grand Marquis as well as the Ford Crown Victoria. There may be some differences in how you remove the door panel between vehicles and years. The tools you'll need are a flat blade screwdriver, a Philips screwdriver, and the original regulators are riveted in, so you'll need a hammer and punch and a drill with a 3/8 drill bit to drill out the rivets, 11mm socket with ratchets, needle nose pliers. To reinstall, if you don't have a rivet and rivet guns you'll need five 1/2 long small bolts with lock nuts and two long small bolts with lock nuts.
You will use a flat blade screwdriver and come on in here, carefully pry this up, right up here, and you pull it right out. Then you'll need a Phillips screwdriver, just carefully remove these two Phillips screws. Use your flat blade screwdriver and go right in here. You can see a tab on the side, pry up, and pull down on one side. Turn it over, same thing right over here pry up. Now you want to use your flat blade screwdriver and pry down on the top of this bezel and then it comes out.
Then there's two covers here, just pry up the bottom. Use the bottom, that way if you accidentally scratch something you're less likely to show. Now there are four screws. Phillips screws are removed here, here, and then one down here. Just speed up the film here as I remove those four Phillips screws. Once those screws are out, lift up on your panel. You have to kind of shake it a little bit to get it out, and then pull your switch through. Now it's off.
To remove your door handle there's a Phillips screw right in here. Remove that screw and slide your handle forward and pull it out. Then when you look behind, you'll see that its attached to a rod and what you want to do is kind of pull it down and then forward and off the rod like that.
The regulators in these are actually activated by a cable. Mine is actually working fine. When your regulator breaks you'll usually hear when you press the switch you usually hear the motor try to work and you'll either hear a crunching, or grinding, or clicking noise. Or youll just hear the motor trying to work and nothing happening. Also when your regulator breaks you can usually take your window, grab it by hand and move it up and down. Mine, like I said, is not broken so I'm just showing you on this car.
What you'll want to do is the regulator is attached through the door with a series of rivets. There's one, two, and three here that hold the motor bracket on. Then there are two down here near the bottom of the door. That holds the bottom of the rail. Then there are two nuts, 11mm, that hold the regulator there. Then there are two rivets that hold the window regulator to the window. One there and one through there where you took the door handle out. Again, what you'll need to do is if your regulator is broken is just lift up and support the window in this position so you can get to those rivets.
To remove the rivets, you'll want a punch like this with a pointed tip and the first thing you want to do is knock the center of the rivets out. I'm putting the punch right on there, holding it against it. And, like I said, that knocks the center of the rivet out. I do that to the other four. And speed up here as I knock it out for the two that hold the motor and then the two down below which you can't quite see me do. Here I'm using my hammer and punch to punch out the rivets that hold the regulator to the window. As you can see, I'm hitting them quite hard. Make sure you hit the center of the rivet, it will come out and you don't really have to worry about breaking your window. Your windows can actually take quite an indirect hit.
Now take a drill with a 3/8 bit on it, and you want to carefully drill this through the rivet. The rivet is soft aluminum, so it should come out pretty easy. If you do it without pushing too hard, you usually can do it without the rivet spinning. Okay, you can see the head comes right off and so well do that for the rest of them. I'll fast-forward here again as I drill out the rest of the rivets. One thing you'll see me do is you'll see me bring a screwdriver in. Sometimes when the rivets start to spin what you can do is, obviously they're going to spin clockwise with the drill, so what you can do is take a screwdriver, put it in, pry it underneath and then pry up the right side so it kind of holds the rivet in place as you drill. Just be careful that when you do this that you don't slip and get your hand too close to the drill or anything like that.
These ones in the window you want to use your punch and drive out the rest of the rivet. Use an 11mm socket with a ratchet extension and remove this bolt here. Then this bolt up here. Additionally you'll want to take your screwdriver and pry up and pull this weather strip off. Then take your window, let's see here, you push the bottom of the window out. That allows it to slide down by the regulator. You can take this piece of trim, pull it down some, actually you can pull it right off. Now you're going to take your window here and this secondary window and push it down. Pull this window up and out of your way a little bit. Reach down in here and feed the bigger window right out.
The two 11mm nuts we want to remove those. Right here is where your power window motor plugs in. There's just a little tab. I'm pushing back the tab with my thumb, pulling up on the connector, pull this little safety pin right through and now these rivets are probably still holding it a little bit. The motors right here. Just kind of put a screwdriver in and pry out a little bit. You'll pop the rivets. And fast-forward as I just use my screwdriver, pop the rest of those rivets out. You may have to use your hammer and punch to knock them out as well. Then you're motor and regulator basically are free. You just kind of force the two top studs out and then you just kind of have to manipulate your regulator and motor and pull them right out through the hole in the door.
My original regulator is in fine shape. Normally what happens on these regulators is the cable breaks but this one's fine so I am going to reinstall it. Regulators from 1A Auto they come, they will install just like the original if they have the correct connector for the motor and everything.
For reinstallation, put the bottom of the regulator in first. Feed the motor in. Now you want to come up here and get these two studs in first. Look right down through here. Those studs are in. Start these nuts on. Now just fast-forward as I just get those two 11mm nuts on that hold the top of the window regulator rail. Just kind of hand tighten them. Now I'm using some smaller bolts and lock nuts. Obviously, if you have a rivet gun and rivets, you can rivet this in place. Before I do that I just kind of finding my parts here, make sure it's not caught up anywhere. Plug it in. Okay, I'm speeding up, and basically, in layman's terms, what I'm doing here is I'm using small bolts with lock nuts to replace the rivets, because most people don't have access to a rivet gun and rivets. Basically, we use small bolts with the lock nuts on the back. Put them on and then use a wrench and socket and ratchet, or two wrenches to tighten them up. I'm doing that for the three bolts that hold the window motor, and the bottom, and then the two bolts that hold the bottom of the regulator rail.
Lastly, as far as the regulator and motor installing into the door, just tighten up the two 11mm nuts that hold the top of the rail. Before you feed your window in make sure that the old rivets are all the way out. Feed the window in. Put this bolt back in here for the front channel. Ill speed it up as we tighten that up. We just put the window down in and put the bolt back in this channel and tightened it up. I kind of have to speed through some of this here or else this videos going to be longer than the YouTube 20 minutes.
You basically feed your rear quarter window back down in. Actually, first push your window forward into the front channel, then feed your rear quarter window back down in. Then lift while you're kind of paying attention to the front and rear of the window, making sure they do in the channels. Lift the window up into place and eventually you'll get it into the channels. You can lift it all the way up. Sorry I didn't film this very well, but you'll want to put the bolt back in to that rear channel and tighten it up. And just all the while just make sure that your window is in the channels correctly and will move up and down freely.
Our regulator is down in place. Just use an inch-long bolt and a lock nut for the other side. And I'll speed up here as we tighten up the bolt and lock nut with a wrench and socket ratchet. Then, obviously repeat for the other attachment point for the regulator. You've got the key on and it works good. Remember to put the trim back around the upper part of the window. It can be a little difficult. You just kind of put it on top the pinch weld and you might have to work it around to get it in correctly. Then, as well, make sure you put the weather strip back in place.
And I'll speed up here as I put the inside door handle back on. Remember to kind of twist it onto the rod. Push it in, slide it back, and then use the screw and screwdriver and attach it. Then carefully put the water shield back in place.
Okay, put the shield back around the handle. Make sure you pull the wiring harness through and stick the shield back on as well as you can. Some extra tape or something might be in order if it doesn't stick on there really well. Put the panel back in. Make sure you feed your switch through the hole in the insulation here. The clips just go right into the door. In place, make sure that your lock button goes up and in. Push it against the door and down and on. Then, pull your switch through. Okay, and I'll speed up again as I put the 4 screws back in. The 2 longest screws are the ones that go way down in the bottom and right under the door handle and then the kind of short pan head screws go into the door pole. Fast forward again as I put the Phillips' screws in and tighten them up for the switch.
We hope this video helps you out. Brought to you by www.1AAuto.com, your source for quality replacement parts and the best service on the Internet. Please feel free to call us toll-free, 888-844-3393. We're the company that's here for you on the Internet and in person.
Exact fit, good quality and great value
Works great
Quick delivery! Excellent fit and finish. Easy to install with directions and even YouTube videos to boot. Love buying from 1A Auto because you are assured that you will get product that fits, works and good customer service too.
I actually changed all 4 of my window regulaters. The first one I spent about 3 hours. ( it was hot out so l didn't hurry) the others took about an hour a peace. Watching the video about 3 or 4 times sure helps.
The window regulators were received exactly as described and for the best price. The video instructions were invaluable for this repair. I would recommend for anyone looking to do this repair. The rear windows work so great that I might have to replace the front ones which are alittle sluggish
Qualified recommendation. After you remove the old regulator, the new one comes prepped to slide in, in place of the old one. The on-line video is great Works good except for the last inch of upward travel. I have to give it a hand push to get it all the way. Seems like the motor is underpowered.
The price was fair and parts were ship really fast everything was there except for a few bolts and nuts but otherwise the parts are working well so far. I would recommend others to buy from 1 A auto, I rate you a 5-star
Quick response. Part came in good condition. I still need to install it. Installation video is greatly appreciated.

WRA50221
