

★★★★★
January 6, 2026
Excellent parts !!!!
I love the parts and prices ????

Replaces






About TRQ:
TRQ is a trusted brand dedicated to making every repair a success story by combining premium parts with easy installation. Each TRQ part is engineered by a team of automotive experts to meet or exceed OEM standards, delivering enhanced performance and maximum longevity. With rigorous in-house testing, the brand ensures superior fit and function across every product line. TRQ also provides customers with best-in-class, step-by-step installation videos—so you can complete repairs with confidence, whether you're a first-time DIYer or an industry professional.
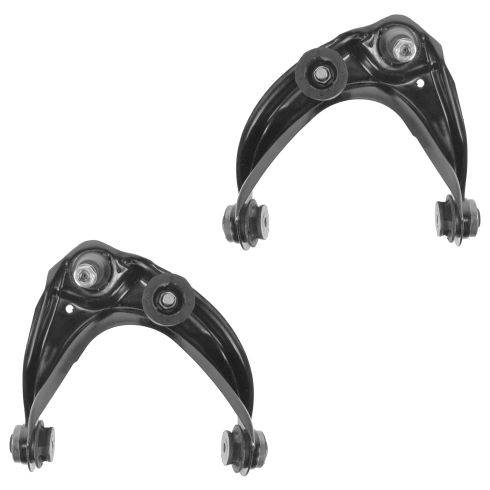
Our control arms are designed to be direct replacements for the original factory parts. They are 100% brand new and require no modifications for installation. No special tools are required because all of the bushings come pre-installed.
Our steering and suspension components are pre-greased and sealed for long life and do not require the extra maintenance typically required by greaseable versions.
Attention California Customers:
 WARNING: This product can expose you to chemicals including Lead and Lead Compounds, which are known to the State of California to cause cancer, and birth defects or other reproductive harm. For more information, go to www.P65Warnings.ca.gov.
This part fits 8 vehicles spanning 2003-2012.
| Year | Make | Model | Description |
|---|---|---|---|
| 2006-2012 | Ford | Fusion | Ford Fusion Front Driver & Passenger Side Upper 2 Piece Control Arm with Ball Joint Set TRQ PSA62412 |
| 2007-2012 | Lincoln | MKZ | Lincoln MKZ Front Driver & Passenger Side Upper 2 Piece Control Arm with Ball Joint Set TRQ PSA62412 |
| 2006 | Lincoln | Zephyr | Lincoln Zephyr Front Driver & Passenger Side Upper 2 Piece Control Arm with Ball Joint Set TRQ PSA62412 |
| 2003-2005 | Mazda | 6 | Mazda 6 Front Driver & Passenger Side Upper 2 Piece Control Arm with Ball Joint Set TRQ PSA62412 |
| 2006-2007 | Mazda | 6 | Mazda 6 i Front Driver & Passenger Side Upper 2 Piece Control Arm with Ball Joint Set TRQ PSA62412 |
| 2006-2007 | Mazda | 6 | Mazda 6 S Front Driver & Passenger Side Upper 2 Piece Control Arm with Ball Joint Set TRQ PSA62412 |
| 2008 | Mazda | 6 | Mazda 6 Front Driver & Passenger Side Upper 2 Piece Control Arm with Ball Joint Set TRQ PSA62412 |
| 2006-2011 | Mercury | Milan | Mercury Milan Front Driver & Passenger Side Upper 2 Piece Control Arm with Ball Joint Set TRQ PSA62412 |
| Brand Label | Part Number |
|---|---|
| Dorman | 521-793 |
| Mazda | GJ6A34250B |
| Mazda | GK2A34250B |
| Mazda | GK2A34200B |
| ACDelco | 45D1128 |
| Mazda | GN3A34200A |
| Mazda | GK2A34250C |
| Mazda | GR8C34200 |
| Mazda | GJ6A34200B |
| ACDelco | 45D1129 |
| Dorman | 521-852 |
| Dorman | 520-882 |
| Mazda | GK2A34200C |
| Mazda | GN3A34250A |
| Dorman | 520-881 |
| Mazda | GR8C34250 |
| Dorman | 521-794 |
| Dorman | 521-851 |
| Motorcraft | MCSOE165 |
| MOOG Chassis Products | RK620636 |
| Ingalls Engineering | CAK620635 |
| Mevotech | CMS76107 |
| Raybestos Chassis | 502-1128 |
| MOOG Chassis Products | K620636 |
| MAS Industries | CB65047 |
| Ford | GK2A34250C |
| Raybestos Chassis | 502-1129 |
| Mcquay-Norris | FA4317 |
| MOOG Chassis Products | CK620636 |
| Mevotech | MS76108 |
| Mevotech | CMS76108 |
| Ford | 7E5Z3085L |
| Mevotech | MS76107 |
| Dorman - OE Solutions | 521-851 |
| Ford | AE5Z3085C |
| Beck/Arnley | 101-5535 |
| Dorman - OE Solutions | 520-881 |
| Precision Driveline | CB76026 |
| Ford | AE5Z3085B |
| MAS Industries | CB65177 |
| NAPA Premium | 2605444 |
| NAPA | 260-5443 |
| Falcon Steering Systems | FCA961 |
| Precision Driveline | CB76027 |
| Centric Parts | 623.61009 |
| Beck/Arnley | 101-5534 |
| Dorman - OE Solutions | 521-852 |
| Beck/Arnley | 102-5535 |
| MAS Industries | CB65057 |
| SYD | 1508053 |
| Precision Driveline | 3CB76099 |
| Mevotech | GS76108 |
| MAS Industries | CB65057PR |
| Mevotech | GS76107 |
| Ford | 6E5Z3085BA |
| Ford | 6E5Z3084C |
| MAS Industries | CB65048 |
| Ford | AE5Z3085A |
| Ford | 6E5Z3085C |
| Ingalls Engineering | CAK620636 |
| Dorman - OE Solutions | 520-882 |
| MAS Industries | CB65047PR |
| NAPA | 260-5444 |
| Centric Parts | 623.61008 |
| MAS Industries | CB65058 |
| Precision Driveline | 3CB76097 |
| Ford | AE5Z3084A |
| MAS Industries | CB65048PR |
| MOOG Chassis Products | CK620635 |
| Ford | AE5Z3084B |
| SYD | 1508052 |
| NAPA Premium | 2605443 |
| MOOG Chassis Products | K620635 |
| SYD | 1513007 |
| Falcon Steering Systems | FCA960 |
| Beck/Arnley | 102-5534 |
| Ford | 7E5Z3084R |
| Ford | GK2A34200C |
| MAS Industries | CB65058PR |
| MAS Industries | CB65178 |
| Ford | 6E5Z3084BA |
| SYD | 1513008 |
| Mcquay-Norris | FA4316 |
| Ford | AE5Z3084C |
| MOOG Chassis Products | RK620635 |
| DIY Solutions | SUS01706 |
| DIY Solutions | SUS05219 |
| DIY Solutions | SUS05220 |
| Motorcraft | MCSOE155 |
| Carquest | CA388B |
| Carquest | CA387B |
| Dorman - Premium | CB65048PR |
| Dorman - Premium | CB65047PR |
| Dorman - OE Solutions | 521-794 |
| Dorman - Premium | CB65057PR |
| Dorman - Premium | CB65058PR |
| Dorman - OE Solutions | 521-793 |
| Hollander | 511-00340R |
| Hollander | 511-00341L |
| Hollander | 511-00357L |
| Hollander | 511-00356R |
| Mevotech Supreme | CMS76107 |
| Mevotech Supreme | GS76107 |
| Mevotech Supreme | CMS76108 |
| Mevotech Supreme | MS76107 |
| Mevotech Supreme | MS76108 |
| Mevotech Supreme | GS76108 |
| Mazda | GJ6A-34-250 |
| Mazda | GJ6A-34-200 |
This item may be interchangeable with parts from other brands with the above part numbers. This information is provided only for reference and does not guarantee that the item you are purchasing is identical to parts with part numbers from the brands listed above. To confirm that this item fits your vehicle, use the above "Check Vehicle Fit" option.
Lifetime Warranty
This item is backed by our limited lifetime warranty. In the event that this item should fail due to manufacturing defects during intended use, we will replace the part free of charge. This warranty covers the cost of the part only.
FREE Shipping is standard on orders shipped to the lower 48 States (Contiguous United States). Standard shipping charges apply to Hawaii and Alaska.
Shipping is not available to a P.O. Box, APO/FPO/DPO addresses, US Territories, or Canada for this item.
Expedited is available on checkout to the United States, excluding Alaska, Hawaii.
Final shipping costs are available at checkout.
Created on:
Tools used
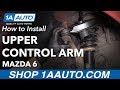
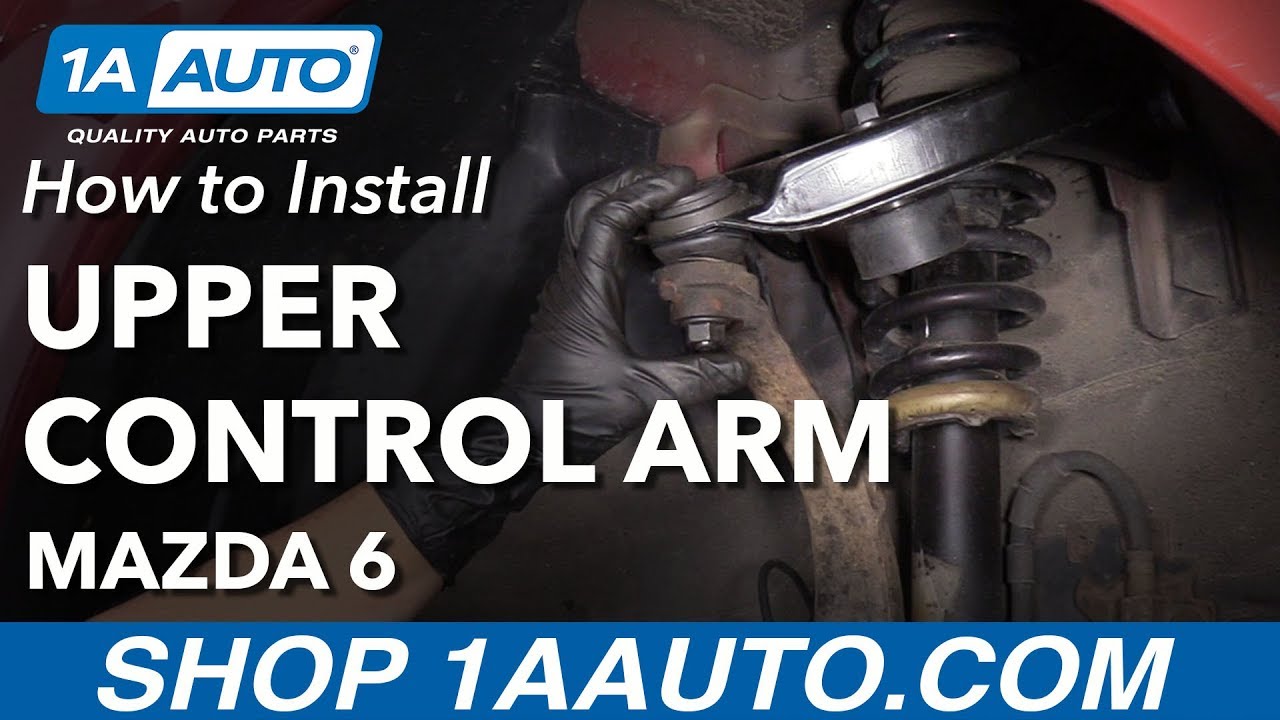
Hi, I'm Mike at 1A Auto, we've been selling auto parts for over 30 years. Everyone, Sue from 1A Auto, and today we're gonna be installing and upper control arm in our 2007 Mazda 6. You can get this part or any other parts that you need for your vehicle at 1AAuto.com or click at the link below.
So we're going to start by removing the wheel. I have it partially on the ground so I can break the lug nut free. It's a 21mm socket, I got my half-inch breaker bar. All right, snug, those are broken free and I could turn it by hand. I'm gonna raise my vehicle, I have a two post lift, if you have a floor jack and jack stands you do the same thing.
So now with the car up in the air we're gonna remove the lug nuts and set him aside. Perfect. It wasn't on there, and this happens quite often when you have an aluminum rim with a steel front end, obviously the steel and the aluminum, they oxidize together. So I'm going to show you how to take this wheel off safely, a lot of people don't think about this, I know I didn't the first couple of times I did it.
Take a lug nut and just put it back on by hand, not all the way, halfway, and now when you take your rubber mallet or your pry bar and you hit it from the other side, it doesn't fly off. I take a rubber mallet and I hit the rubber part of the tire in the back side, that came off nice and easy. Sometimes they they don't wanna come off that easy and you just gotta keep giving it an effort back and forth. Now we can remove that lug nut and just mount the tire.
So we're removing the upper ball joint nut lock nut, it's a 17mm socket or a wrench. Now that I broke it free with the wrench, I'm gonna give it a little spray and move over to a socket and ratchet.
So now to break the upper ball joint from the knuckle, I'm gonna hit it right here where that point is with a hammer. If you have a pickle fork at home you can try that, but you don't want to tear the boot if you're reusing the ball joint. So hittin it a couple of times with the hammer, sometimes it will jolt that stud free out of the knuckle. In this case it didn't, so I am gonna be using my pickle for. I'm gonna get it and hope that I don't pinch that boot. I really don't want to tear it. Nice and easy.
So a good shake to remove the two inner bolts on the control arm, they're 13mm socket or ratchet. In this case I have to use a wrench because the front coil spring's right there. So 13mm, break it free. I'm gonna break both of them free and then I'll get my ratcheting wrench in there, speed up the process.
So so once both bolts are loose, you can move this up and down and then I have a more free range to get in it.
Okay, so now we're gonna see which bolt has to come out first. So I think I'm going to go with the rear one. You can see the front one's hitting that spring, so I can get that air one out first. It's coming. Now get that one out. Hopefully we have enough range now to get this round. Watch out for that ABS wire. So I think I'm gonna try to go up in between the spring here. Whoa, look at that, it's like winning the lottery. And there she is, you can pull the control arm out.
Here we have our upper control arm, this is the one that we just took out, the original equipment, and here's the replacement from 1AAuto.com. It comes with a lock nut.
Don't forget to take off the plastic shipping cover, they put those on there so during shipping the boot doesn't get torn, and if it gets pinched grease doesn't come out and go all over the place. So that is just for shipping methods, make sure you take that off and discard it, you don't need it. It comes with a balance weight, those are set from the factory.
So if you need this product or any other product for your vehicles, click on the link below and come on over to 1AAuto.com.
Now to install the new control arm, I'm gonna slide it right in there and we're gonna decide on which bolt goes in first, the easiest. I'm still gonna go with the front one, I think that's gonna be the easiest way to get it in with up with that one. So I line it up and pushing it halfway through the bushing, I think I'm just gonna wiggle it back before I'm gonna get my pry bar and do the opposite what I did to pull it out, see if I can push it in.
Not gonna go to the back one, line up the bushing, I think I'm gonna use the fiber on this one also. So after a good long struggle trying to get that back bolt in and trying to pry down, move it over, hammer it, I got my extra-long pry bar and I just used basically momentum physics and I bent the spring that way, and then you zip, my hand got it in there. So hopefully you have something strong enough that's got a long piece of steel to it, if you're at home and doing this, and you can pry the spring away from the body to get that in.
Now I'm gonna hand tightening these upper control arm bolts, so I'm gonna just bottom out with my ratchet wrench and then I'm gonna get my longest 13mm wrench on there and really tighten up, because I can't get a torque wrench in there. So you can at home, please, do the torque is 49 foot-pounds, I'm pretty sure I'm incapable of breaking it, so obviously if you're a big burly man out there, don't put your whole back into it, that'd be very disappointing day. I feel it tight enough, I think so.
Now I'm gonna put the upper ball joint into the knuckle, I'm just gonna pull it stand out a little bit, try to line it up, and this is what I'm going to use a pry bar for leverage, I can start by. So now that I have the locknut snug down, my upper ball joint in the knuckle, yeah, I'm gonna torque it to 39 foot-pounds. There we go.
So now I'm just going to remount my tire, throw it up against the hub, put my lug nuts on hand tight, I'm just going to hand tighten them with my socket, then I'm gonna lower it down on the ground. I'm going to torque these to 83 foot-pounds, it's not gonna torque my wheels at 83 foot-pounds in a star pattern, that just helps make sure that the seat of the rim is seated correctly against the hub.
There you go, thanks for watching. Visit us at 1AAuto.com for quality Auto Parts, fast and free shipping, and the best customer service in the industry.
I love the parts and prices ????
First one was not good they accept and send a good replacement Thank u
Great fit no issues
Upper control arms were a direct fit. The videos are a great asset to your site, always helpful.
Perfect fit
Good part
Fit great! DIY
Perfect fit.Nobody can beat you guy's Prices& Customer service. I Thank you, My Mazda6 Thanks you.When no one has the parts i need You guys always Pull Through.
????????
Excellent service and delivery time.fit perfectly..will continue buying their affordable great parts

PSA62412
Thank you for your inquiry! Can you please provide us with your 17-digit VIN number?
Our parts are exact replacements for your vehicle's OEM parts. As long as your year, make, and model match up with our listing, these parts will directly fit and function like the originals.
The ball joint/control arms I purchased are not able to be greased. In my opinion this is a better option because grease doesn't get everywhere, you don't have to worry about greasing ever and sealed ball joints don't let any contaminates in from roads or weather
