

★★★★★
December 28, 2023
Very happy with the results and product quality and performance thank you Mr. Lane

Replaces







About TRQ:
TRQ is a trusted brand dedicated to making every repair a success story by combining premium parts with easy installation. Each TRQ part is engineered by a team of automotive experts to meet or exceed OEM standards, delivering enhanced performance and maximum longevity. With rigorous in-house testing, the brand ensures superior fit and function across every product line. TRQ also provides customers with best-in-class, step-by-step installation videos—so you can complete repairs with confidence, whether you're a first-time DIYer or an industry professional.
Our control arms are designed to be direct replacements for the original factory parts. They are 100% brand new and require no modifications for installation. No special tools are required because all of the bushings come pre-installed.
Our steering and suspension components are pre-greased and sealed for long life and do not require the extra maintenance typically required by greaseable versions.
Attention California Customers:
 WARNING: This product can expose you to chemicals including Lead and Lead Compounds, which are known to the State of California to cause cancer, and birth defects or other reproductive harm. For more information, go to www.P65Warnings.ca.gov.
This part fits 14 vehicles spanning 2003-2008.
| Year | Make | Model | Description |
|---|---|---|---|
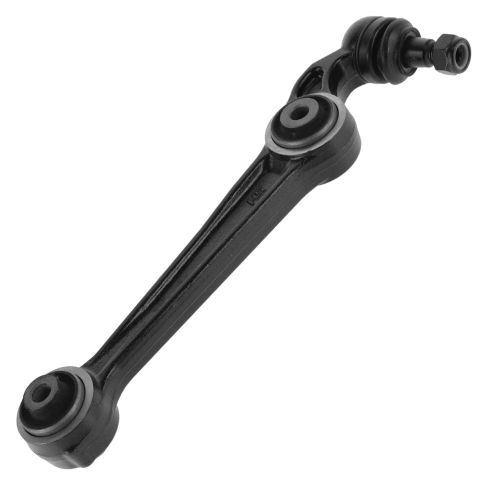
| 2006 | Ford | Fusion | Ford Fusion Front Wheel Drive Front Passenger Side Lower Forward Control Arm with Ball Joint TRQ PSA83989 |
| 2006 | Ford | Fusion | Ford Fusion Front Wheel Drive Front Driver Side Lower Forward Control Arm with Ball Joint TRQ PSA83989 |
| 2007 | Ford | Fusion | Ford Fusion with 12mm Attaching Bolts To 9/03/06 Production Date Front Passenger Side Lower Forward Control Arm with Ball Joint TRQ PSA83989 |
| 2007 | Ford | Fusion | Ford Fusion with 12mm Attaching Bolts To 9/03/06 Production Date Front Driver Side Lower Forward Control Arm with Ball Joint TRQ PSA83989 |
| 2007 | Lincoln | MKZ | Lincoln MKZ with 12mm Attaching Bolts To 9/03/06 Production Date Front Driver Side Lower Forward Control Arm with Ball Joint TRQ PSA83989 |
| 2007 | Lincoln | MKZ | Lincoln MKZ with 12mm Attaching Bolts To 9/03/06 Production Date Front Passenger Side Lower Forward Control Arm with Ball Joint TRQ PSA83989 |
| 2006 | Lincoln | Zephyr | Lincoln Zephyr Front Wheel Drive Front Driver Side Lower Forward Control Arm with Ball Joint TRQ PSA83989 |
| 2006 | Lincoln | Zephyr | Lincoln Zephyr Front Wheel Drive Front Passenger Side Lower Forward Control Arm with Ball Joint TRQ PSA83989 |
| 2003-2008 | Mazda | 6 | Mazda 6 Front Driver Side Lower Forward Control Arm with Ball Joint TRQ PSA83989 |
| 2003-2008 | Mazda | 6 | Mazda 6 Front Passenger Side Lower Forward Control Arm with Ball Joint TRQ PSA83989 |
| 2006 | Mercury | Milan | Mercury Milan Front Wheel Drive Front Driver Side Lower Forward Control Arm with Ball Joint TRQ PSA83989 |
| 2006 | Mercury | Milan | Mercury Milan Front Wheel Drive Front Passenger Side Lower Forward Control Arm with Ball Joint TRQ PSA83989 |
| 2007 | Mercury | Milan | Mercury Milan with 12mm Attaching Bolts To 9/03/06 Production Date Front Passenger Side Lower Forward Control Arm with Ball Joint TRQ PSA83989 |
| 2007 | Mercury | Milan | Mercury Milan with 12mm Attaching Bolts To 9/03/06 Production Date Front Driver Side Lower Forward Control Arm with Ball Joint TRQ PSA83989 |
| Brand Label | Part Number |
|---|---|
| Delphi | TC1411 |
| Mazda | GJ6A34300E |
| Dorman | 520-809 |
| Mazda | GJ6A34300B |
| Mazda | GJ6A34300C |
| Mazda | GJ6A34300D |
| MOOG Chassis Products | CK620069 |
| MOOG Chassis Products | RK620815 |
| NAPA Premium | 2605594 |
| Centric Parts | 623.4503 |
| Beck/Arnley | 102-5531 |
| Falcon Steering Systems | FCA922 |
| Precision Driveline | 2CB76105 |
| Mcquay-Norris | FA4490 |
| NAPA | 260-5594 |
| Ford | 5M8Z3078S |
| NAPA Premium | 2606888 |
| Mevotech | GS76104 |
| MAS Industries | CB65045 |
| Ingalls Engineering | CAK620069 |
| Raybestos Chassis | 507-1363 |
| SYD | 1508027 |
| MOOG Chassis Products | RK620149 |
| Beck/Arnley | 101-5531 |
| Mevotech | MS76104 |
| MOOG Chassis Products | RK620148 |
| Dorman - OE Solutions | 520-809 |
| MOOG Chassis Products | K620069 |
| Precision Driveline | CB76023 |
| Mevotech | CMS76104 |
| DIY Solutions | SUS05528 |
| Carquest | CA384B |
| Dorman - Premium | CB65045PR |
| Hollander | 512-58700 |
| Hollander | 512-00543 |
| Mevotech Supreme | CMS76104 |
| Mevotech Supreme | GS76104 |
| Mevotech Supreme | MS76104 |
| Mazda | GJ6A-34-300 |
This item may be interchangeable with parts from other brands with the above part numbers. This information is provided only for reference and does not guarantee that the item you are purchasing is identical to parts with part numbers from the brands listed above. To confirm that this item fits your vehicle, use the above "Check Vehicle Fit" option.
Lifetime Warranty
This item is backed by our limited lifetime warranty. In the event that this item should fail due to manufacturing defects during intended use, we will replace the part free of charge. This warranty covers the cost of the part only.
FREE Shipping is standard on orders shipped to the lower 48 States (Contiguous United States). Standard shipping charges apply to Hawaii and Alaska.
Shipping is not available to a P.O. Box, APO/FPO/DPO addresses, US Territories, or Canada for this item.
Expedited is available on checkout to the United States, excluding Alaska, Hawaii.
Final shipping costs are available at checkout.
Created on:
Tools used
Tools used
Hi, I'm Mike at 1A Auto. We've been selling auto parts for over 30 years.
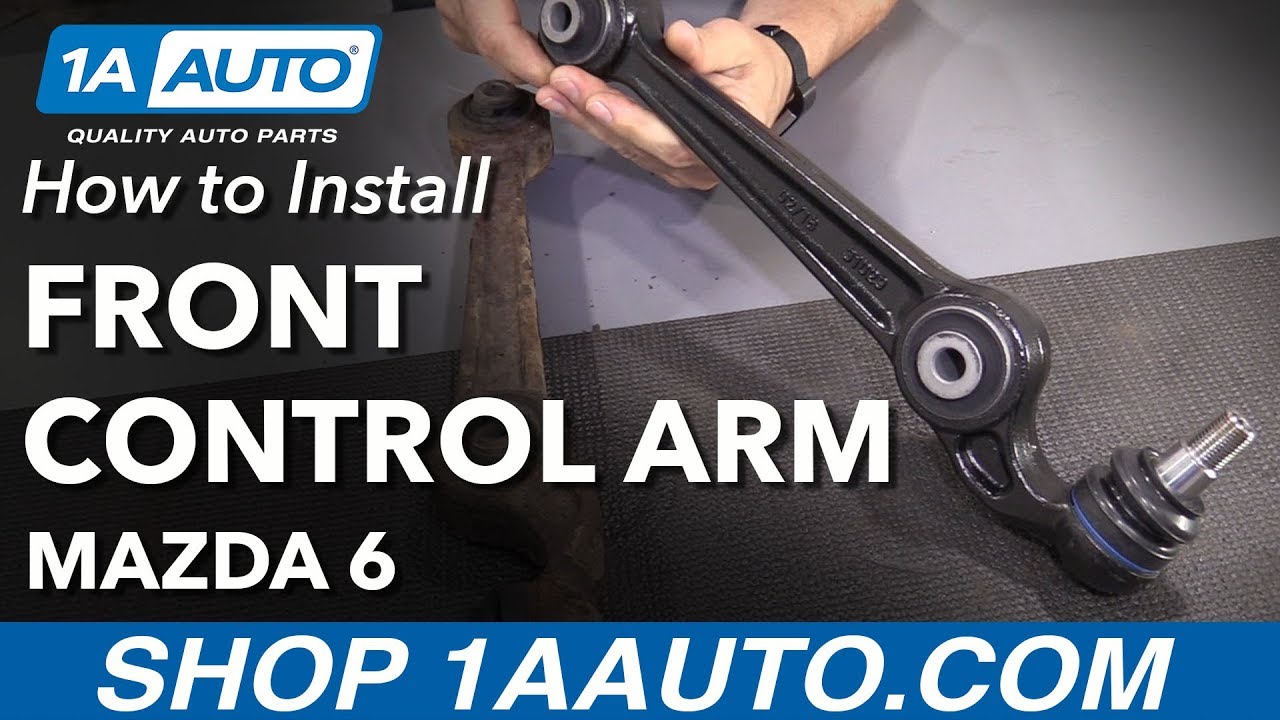
Hi everyone, today we're going to be installing our rear lower control arm on our 2007 Mazda 6 sedan behind me, and this is the, the part, they call it the rear lower control arm in the front because there's two on this particular vehicle. So if you need this part or any part for your car, come on over to 1AAuto.com.
So we're going to start by removing the wheel. I have it partially on the ground so I can break the lug nut free. It's a 21mm socket, I got my half inch breaker bar. Alright, so now those are broken free and I could turn it by hand.
I'm going to raise my vehicle. I have a two post lift, if you have a floor jack and jack stands you do the same thing. So now with the car up in the air we're gonna remove the lug nuts, instead of my side. Perfect, it's frozen on there, and this happens quite often when you have an aluminum rim with a steel front end, obviously the steel and the aluminum, they oxidize together.
So I'm going to show you how to take this wheel off safely, a lot of people don't think about this, I know I didn't my first couple of times I did it. Take a lug nut and just put it back on by hand, not all the way, halfway, and now when you take your rubber mallet or your pry bar and you hit it from the other side, it doesn't fly off. I take a rubber mallet and I hit the rubber part of the tire, in the backside that came off nice and easy. Sometimes they, they don't wanna come off that easy and you just gotta keep giving it an effort back and forth. Now we can remove that lug nut and just mount the tire.
I'm gonna be removing the right lower control arm rear. The front has been removed for other processing, and the brakes have been taken off for another job, but while I'm here, I'm gonna remove the rear, and you'll be able to see better access with any other items removed. You don't need to remove the forward control arm or the brakes to do the rear lower control arm.
So now we're going to remove the nut from the knuckle for the rear rear control arm ball joint. It is a fifteen sixteenths or 24mm, I have a half inch ratchet on that, and you can see the movement from the CV shaft. So if I was to remove, if I was doing the job and I was doing both lower control arms, the front and the rear, I would have loosened up both these nuts at the same time before I dismounted the actual control up from this knuckle. Well, where I did that for a different show, and now I'm doing the rear, I just, you have to be careful from the movement if you don't want to pull that axle out of the joint.
Now I'm going to remove the rear would control arm ball joint from the knuckle, and I take the liberty to spray with a rust inhibitor spray, and I'm gonna use my pickle fork. I'm gonna go in right between the balls, right in the knuckle, make some noise here and see if I can separate them. That's how you do it, by the way, with that rear control arm ball joint.
Now, out, you can see both of these bushings, sometimes they will actually come out with pressed onto this sleeve on the stud of the ball joint, and when that happens you need to pull it off or press it off. I did the other side and I needed to use the press to press them off, a puller almost broke. So if that does happen, if you have a puller you can try it, be careful, safety glasses please. If you cannot get it off the actual outer ball joint, you have to go to a machine shop and get it pressed off.
To remove the rear lower control arm ball joint, the mounting bolt is right here, that's a 15mm head bolt, it's about four and a half inches long, goes into the subframe. The nut is welded in the frame, see, you have to worry about that, but to access that we have to lower the subframe. So first thing you're gonna do is get a bottle jack or another jack and support the subframe.
Now the pressure on it I can lower the, take the nut off where the body mouth goes to this subframe to the body, and I have to take this bracket down first. This is 15mm socket, and then we have another one right here, the large bolt. This nut is 18, I mean 21mm, sorry, 21mm nut. That one will be a little bit difficult breaking free. 21mm socket, I'm gonna break that free, let that bracket write down. The nut, note there's a washer, make sure you don't lose that.
Now we're gonna repeat these steps to bracket on the other side. 21mm nut, socket into 15. I'm gonna take this bracket down, and now the rear subframe will be free to pivot down so we can get to that money bolt for that control arm.
So there is a wire harness, it looks like it's for the O2 sensors, that is attached to this bracket. I'm just gonna leave it attached, a lot of hang freely, there's no need to undo that. I left the two front bolts attached to the subframe because I don't want, no need to take it all the way down.
I'm using a 15mm swivel, you can use a wrench, to break us free. Put it the control I'm in my hand, get that bolt out. I'm gonna use a little pry bar, and then I can pull this right out.
Here we have our two lower control arms for our oh seven Mazda 6. This one came from 1AAuto.com. They both the same length, same curvature. Comes with the factory style nut, which you need on this because of the spacer on the actual knuckle. Comes with pre-loaded threadlocker in it, and it has the shipping cover which goes over the dust boot to protect it during shipping. Make sure you discard that when you installing. Self greased joint with a nice locking ring clip.
High quality, can do this pot or any other part for your vehicle, come on over to 1AAuto.com.
To install the rear control arm, make sure you take the nut off first and the protective boot, we set those aside. And remember, when installing the stud for the lower ball joint, doesn't go up into the knuckle, it actually goes down into the knuckle. So this side could be installed wrong, goes in real nice but doesn't line up. You don't want to make that mistake because then you have done both the subframe again.
So we're gonna slide that right in. Now I can line my bolt up in, I have to get my pry bar again, little helping hand, line the threads up. Once I snug this down, I'm gonna get my torque wrench and I'm gonna torque it to the manufacturer's specs.
Before I put the subframe up, before I torque down this, the rear mounting of this control arm, I'm going to put it in the knuckle, because if it tightens that bushing up too tight and I can't move my control arm in place, that won't be good. You just gonna put the stud right through the hole there.
So I had to use my pry bar again to bring this subframe down so I could get my torque wrench in there. It's 93 foot-pounds to tighten this. You pry bar out.
I'm gonna mount this bracket back up, line up those two holes, make sure I put the washer on and the nut first just loosely so I can line these two bolts up. This is where I'm gonna actually lift up my subframe to line everything up again. Now the bolts will go right and smooth, find those up.
I'm going to repeat the process and the other side, put the bracket back up. I'm gonna torque this bolt to 114 foot-pounds, that's a 21mm socket. While I'm tightening that up and guiding my plastic, ma my plastic, sorry, my steel bracket, I just want to snug those bolts up. I do want to torque the body bolt, its body mount bolt, before I torque those down though.
Okay, now we're just going to repeat this process over here, the smaller bolts, 15mm socket, 76 foot-pounds.
Now we're ready to lower support, a bottle jack here, pull jack and we can get this out of the way.
So now I'm just going to remount my tire, thread up against the hub, put my lug nuts on hand tight. I'm just going to hand tighten them with my socket, then I'm gonna lower it down on the ground.
I'm going to torque these 83 foot-pounds. It's not going to torque my wheels at 83 foot-pounds in a star pattern, that just helps make sure that the seat of the rim is seated correctly against the hub. Check it, there you go.
Thanks for watching, visit us at 1AAuto.com for quality auto parts, fast and free shipping, and the best customer service in the industry.
Tools used
Hi, I wanna talk to you about control arm and lower ball joints on some models, particularly Fusion, Acura, Hondas, some Lincolns. What happens is you go to replace your lower ball joint which is one-piece control arm, this is the...where you'll receive it with a new nut, and then the plastic shipping that covers just the protector for the boot, that gets discarded, and what happens is when you take the old one out it might look like that. And that is because the spacer here that comes from the factory that is part of the knuckle, it's a little sleeve, gets frozen onto this ball joint from over time being pressed in and then the rust forms around it so when you take it out it's gonna look just like that. Then you get your new ball joint and you're like, "Hey, it's not the same size." You need this part. So the best way to do it is, obviously your old ball joint's no good anyways if you're replacing it, so you can take a chisel and a hammer and hammer it, spray it up, get it all loose, pop it off. Try your best not to damage this, you definitely don't wanna damage any part of this inner sleeve. This would probably be a dealer part and it's gonna come with the knuckle. Some dealers will have it separate for you but it might have to be ordered. Then you're gonna place it right back in the way it was. As you can see this knuckle already has two of 'em in there, and then you'll install your new ball joint, put that spindle right down in there, put the nut on and torque it to specification.
Very happy with the results and product quality and performance thank you Mr. Lane
Fit as listed
Arrived 1 day earlier than scheduled. Quality appears good. Perfect fit easy to install. Used 1-A auto video to help with installation and to get torque specs. Only been on a little while but so far so good. But I wish they had a grease zert on the ball joint so it could be greased.
I was hearing a really loud creaking from my front end that got progressively worse over a couple of years. I finally bought these lower rearward and the frontward control arms to replace. My car doesnt make anymore sounds and I am happy that I didnt have to pay a franchise mechanic thousands of dollars for the work. Good deal and great product.
Its good, very good price
I ordered and received my parts with no complications. The repair videos are thorough and helped tremendously with my repairs for a do-it-yourselfer. Their prices are fair and reasonable and parts come in when stated. I would recommend A1 Auto to everyone I know

PSA83989
