
★★★★★
April 29, 2026
Worked perfectly on my 2011 Ford Escape!
No Issues.
Replaces


About TRQ:
TRQ is a trusted brand dedicated to making every repair a success story by combining premium parts with easy installation. Each TRQ part is engineered by a team of automotive experts to meet or exceed OEM standards, delivering enhanced performance and maximum longevity. With rigorous in-house testing, the brand ensures superior fit and function across every product line. TRQ also provides customers with best-in-class, step-by-step installation videos—so you can complete repairs with confidence, whether you're a first-time DIYer or an industry professional.
Returns: Parts with electrical components cannot be returned once installed.
Left Hand Drive:
All of our auto parts are intended for Left Hand Drive USDM vehicles. If your vehicle is Right Hand Drive, please ensure the part is correct for your specific vehicle.
Attention California Customers:
 WARNING: This product can expose you to chemicals including Lead and Lead Compounds, which are known to the State of California to cause cancer, and birth defects or other reproductive harm. For more information, go to www.P65Warnings.ca.gov.
Lifetime Warranty
This item is backed by our limited lifetime warranty. In the event that this item should fail due to manufacturing defects during intended use, we will replace the part free of charge. This warranty covers the cost of the part only.
Returns: Parts with electrical components cannot be returned once installed.
FREE Shipping is standard on Orders shipped to the lower 48 States (Contiguous United States). Standard shipping charges apply to Hawaii, Alaska and US Territories. Shipping is not available to Canada.
Expedited is available on checkout to the United States, excluding Alaska, Hawaii and US Territories as well as P.O. Boxes and APO/FPO/DPO addresses. Final shipping costs are available at checkout.
Created on:
Tools used
Brought to you by 1AAuto.com, your source for quality replacement parts and the best service on the Internet.
Hi, I'm Mike from 1A Auto. I hope this how-to video helps you out, and next time you need parts for your vehicle, think of 1AAuto.com. Thanks.
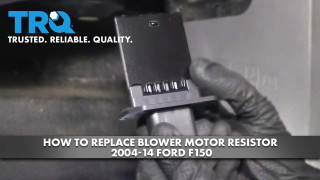
In this video, we're going to show you how to replace the blower motor resistor on this 2005 Ford F150. It's the same part and similar process on these F150s from 2004 to 2010. The items you'll need for this is new blower motor resistor from 1AAuto.com and an 8 millimeter socket and ratchet.
Open up your glove box and just push in on the passenger's side and pull it down. Now, push the tab on the bottom of this harness and then just pull it free. Then remove these two 8 millimeter bolts. We'll fast forward as Mike does that. You can use an air ratchet for this, just to speed up the process. Once you remove the bolts, it pulls right out. Then, you just want to pull off this gasket as well.
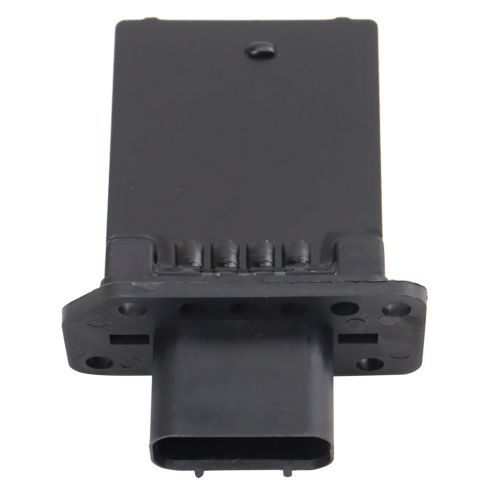
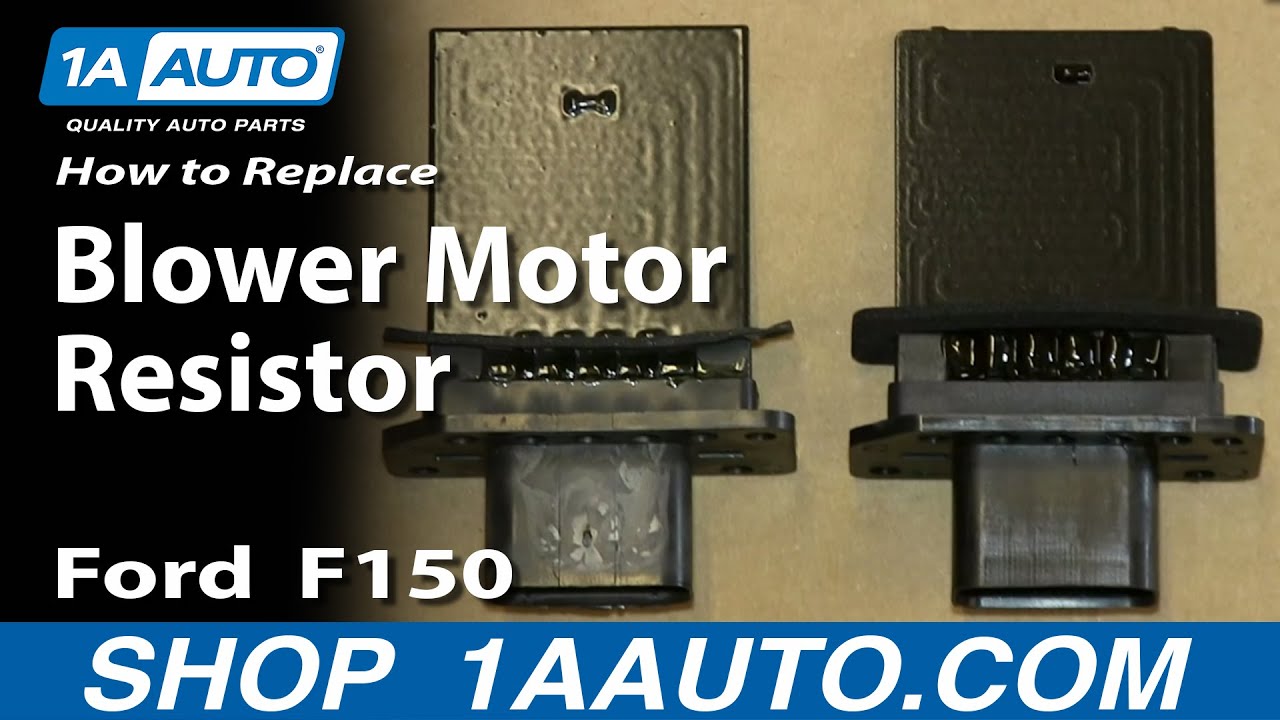
On the left is the old blower motor resistor. On the right is the new one from 1AAuto. You can see they're identical and they'll fit exactly the same. Make sure the gasket's in place, and then feed your blower motor resistor back into place. Then, replace those two 8 millimeter bolts by hand. One corner is notched and there's a tab in it, so you can only put it in one way. Tighten up the bolts, careful not to over-tighten them. You don't want to strip out the plastic. Reconnect your harness and then push in the side of your glove box and close it.
We hope this video helps you out. Brought to you by www.1AAuto.com, your source for quality replacement parts and the best service on the Internet. Please feel free to call us toll-free, 888-844-3393. We're the company that's here for you on the Internet and in person.
Tools used
Tools used
Tools used
Hi I'm Mike from 1A Auto. We've been selling auto parts for over 30 years.
What's up, guys? I'm Andy from 1A Auto. In this video I'm going to show you how to replace this blower motor resistor on this 2012 Ford escape. If you need this part or other parts for your vehicle, click the link in the description and head over to 1aauto.com.
So when I turn the key on and I have the HVAC on, and I'm going through the blower motor settings--one, two, three, nothing happens. Once I get to setting number four, it comes on full blast. So at this point, I'm going to replace the blower motor resistor. If you have this same problem, you may need a blower motor resistor.
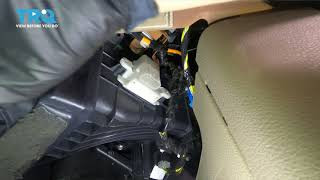
All right, I'm going to open the glove box. Pull that open. Then, on the sides, I'm just going to use my hands and push. Try to get this glove box to flip down, just like that. Now the blower motor resistor is located right here in the top of this HVAC box. What I'm going to do is the connector's a little tricky to disconnect. I am going to use a pick and try to push it on this lock while I lift up on the connector. I'll show you that right there. That's where the lock is. They don't give you much room to get your finger in there, and that will release the tab on that. So disconnect that.
With that out of your way, I'm going to take a eight millimeter socket and extension and a ratchet, and there's two bolts that go down from the top. It's a little bit tricky to get your hands in here. Take these bolts out or screws. There's a couple of screws. Once that's loose, take that screw out, and I'll take the other one out. Now you need the extension more for this other one. Not so much that first one. You might be able to do it without an extension, but take this out. And once it's loose, you can do it by hand, take that screw out, and I can grab the resistor and just slide it up just like that.
Here's the old resistor. Here's the new blower motor resistor from 1aauto.com. As you can see it's got the same shape. You look at the end and the connector is the same; the other side is the same. Get yours at 1aauto.com and you'll be ready to rock and roll.
Now I'll take the new resistor. Get it in position and slide it down just like that. Kind of hard. Really can't see what you're doing. There are a couple of tabs that line up with the holes on the resistor. Look at the old resistor. This is where the screws go. So with it like that, there's a screw there and a screw there. And then there's two little pins that line the resistor up. So get both screws started just by hand. And I'll take my eight millimeter socket and ratchet, I'll tighten these down. It is in plastic, so you just want to snug it, not too tight. Okay with those tight, then I can reconnect the connector. Line that up and lock it in place. Again, take the glove box, push this in a little bit, and close that.
Right now we're going to test it. Turn the key on, and I can hear the blower motor working on setting one, number two, on three and also four. So we fixed the problem.
Thanks for watching. Visit us at 1aauto.com for quality auto parts, fast and free shipping and the best customer service in the industry.

HCA40068
No Issues.
It worked, all levels of my ac working again.
Part was identical to original. Replaced the resistor with the new one and it works perfectly. I am very satisfied with the part received.
This was my second one. I love that there are videos from 1A online to help show you install.
Great part and wonderful customer service. I will always use 1A Auto after this wonderful purchase experience.
So far so good. Part solved my blower speed problem. Videos were helpful in changing the part.
Great fit and great video. I would never have been able to find it or install it without your help. Installed and all fan speeds are running great!
Fit perfect easy install works fine
Worked great
Worked great. Followed 1A Autos DIY video and got this replaced in 30 minutes. Piece of cake!
That matches my experience as well. The original one lasted about 10 years, but I have had to replace it every couple years since.
Nope, you can DIY
This part is listed for vehicles with Manual Temperature Control.
DIY solutions brand parts are manufactured by various aftermarket companies specifically for us and built to your vehicle's exact OEM specifications.
This item will fit all 2013 Ford F150 models with manual temperature control.
The resistor (part number 9L34-19E624-AC) you removed from your F150 is for an AUTOMATIC temperature control system. The replacement part number you ordered was for a MANUAL temperature control system and why it doesn't fit.
This resistor controls the higher speeds. If only 1 speed is working it may need to be replaced. I have replaced mine in a 2010 Ford Escape twice. The videos on line were informative. Tight quarters but pretty easy to replace and I am not a mechanic by any means. Good luck!
