Replaces


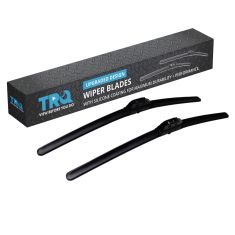
Recommended for your 2009 Mazda B2300 Truck
Part Details
Specifications
About TRQ:
TRQ is a trusted brand dedicated to making every repair a success story by combining premium parts with easy installation. Each TRQ part is engineered by a team of automotive experts to meet or exceed OEM standards, delivering enhanced performance and maximum longevity. With rigorous in-house testing, the brand ensures superior fit and function across every product line. TRQ also provides customers with best-in-class, step-by-step installation videos—so you can complete repairs with confidence, whether you're a first-time DIYer or an industry professional.
Attention California Customers:
 WARNING: This product can expose you to chemicals including Lead and Lead Compounds, which are known to the State of California to cause cancer, and birth defects or other reproductive harm. For more information, go to www.P65Warnings.ca.gov.
Lifetime Warranty
This item is backed by our limited lifetime warranty. In the event that this item should fail due to manufacturing defects during intended use, we will replace the part free of charge. This warranty covers the cost of the part only.
FREE Shipping is standard on orders shipped to the lower 48 States (Contiguous United States). Standard shipping charges apply to Hawaii and Alaska.
Shipping is not available to a P.O. Box, APO/FPO/DPO addresses, US Territories, or Canada for this item.
Expedited is available on checkout to the United States, excluding Alaska, Hawaii.
Final shipping costs are available at checkout.
Created on:
Tools used
Brought to you by 1AAuto.com, your source for quality replacement parts and the best service on the internet.
Hi, I'm Mike Green. I'm one of the owners of 1A Auto. I want to help you save time and money repairing and maintaining your vehicle. I'm going to use my 20+ year's experience restoring and repairing cars and trucks like this to show you the correct way to install parts from 1AAuto.com. The right parts installed correctly that's going to save you time and money. Thank you and enjoy the video.
In this video we're going to kind of show you the basics of a window regulator replacement on this Ford Ranger. This requires drilling of rivets and this Ranger didn't have a bad window regulator so I don't actually go through the full process. I basically show you how to get to the regulator and then what you do once you're there, but again this truck didn't have a bad regulator so I didn't want to drill it.
Tools you're going to need: an 8mm wrench to disconnect the battery, a Philips and flat blade screwdriver to take the door panel apart, a drill with a 3/8 bit, and then some short nuts and bolts and the wrenches and sockets you'll need to tighten those nuts and bolts.
So the first thing you're going to want to do is disconnect your negative battery cable. Start by removing two screws that are right down here under the door panel. They're both Phillips screws. Once we've removed those screws, you actually just pull on this panel and it snaps in at the top so just carefully give it a good tug. You'll see that there are clips up here and one down here to hold it. Now you actually want to push all these switches through. They all kind of have little thumb tabs that you push on to come through. This mirror switch use a little screwdriver and kind of work it in there and pull it off and feed that harness back through. Then push that switch through. Take the lock switch and push it through using a screw driver to work it in. Put that harness through. Power window switch has a couple of screws on it. I like to take them off before I feed the switch through. It's just a little easier. Take the power window switch here and push it down and push that tab down. Once you have the window switch through, then you just want to pop this bezel off which is on the top of the bottom kind of pry up like that. Pry up like that and that bezel comes off. Then you can feed that through the panel. That's off, and now you want to remove two more screws, one here and one down here. Once those screws are out then you just lift up on the panel. Lift it up over the door lock here and then it comes off. On the back side it just has a bunch of hooks that hook into the door.
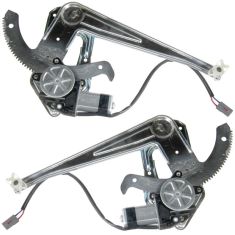
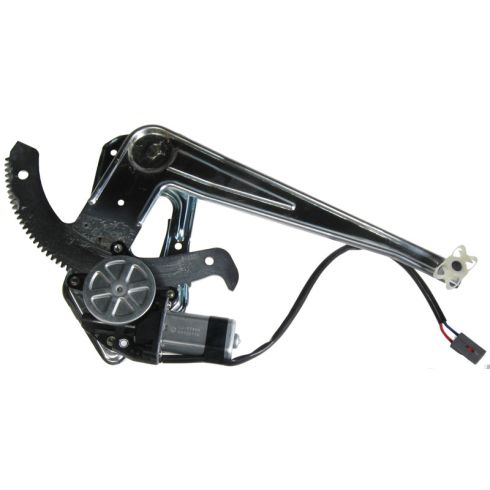
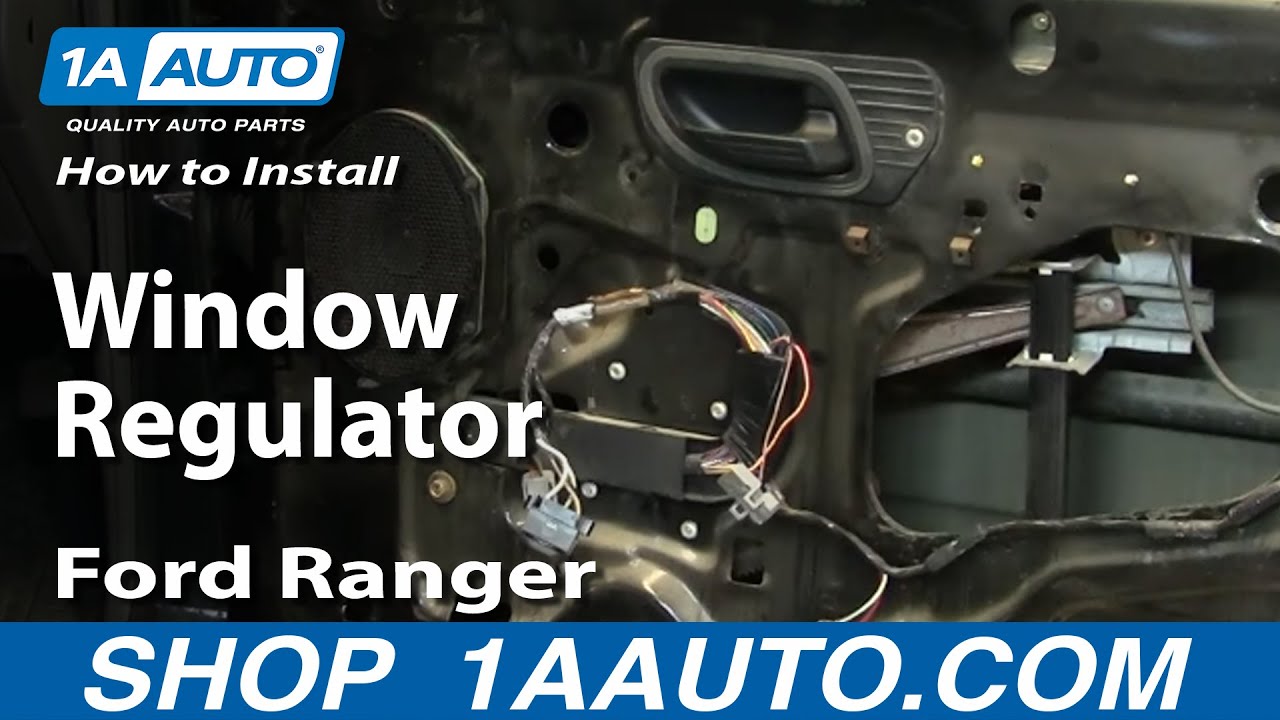
To access the inside of the door you'll need to remove this shield. Just do it very carefully because this protects your door panel and stuff from getting water in it. So if you're looking to replace your window regulator, I've got a new one here so you just kind of can see it is fastened with four rivets here so it's basically in there like that. And then here's the arm that attaches to the window so what you would do is drill out these four rivets. Use about a 3/8-inch drill bit. Drill out those rivets and then support your window, probably have a helper just kind of hold the window and then you slide the regulator out, and it disconnects right here. This is the window motor connection which is nothing more than just use a screwdriver and pull this little tab up a little bit and disconnect it. But then like I said, this car has a good window regulator in it so I don't want to drill it out and put it back in, but you are going to want to have short bolts, short nuts and bolts that just go through here a little bit and fasten so that nothing contacts on the back side. Sorry I can't do a little more in depth than that, but like I said this is a good regulator. I don't want to drill the rivets out of this truck and put a new one in there when it doesn't really need one, but that's basically how you get to the regulator and what you need to do to replace it.
Now here I'm just going to fast forward through putting the door panel back on. If you do want to see this in real time just check out our other videos and you'll see the video for the Ranger door panel, and that takes you through it in regular time. And, again, hope this really helps you out. Again, one more time sorry we couldn't actually do a regulator, do one on these Rangers. This one just happened to be good and I just didn't want to drill out the door, and replace a regulator that didn't really need to be replaced, but it's not all that difficult and you should probably be able to handle it with this video so we hope it helps you and thank you very much.
We hope this helps you out. Brought to you by www.1AAuto.com, your source for quality replacement parts and the best service on the internet. Please feel free to call us toll free 888-844-3393. We're the company that's here for you on the internet and in person.
Tools used
Hi, I'm Mike from 1AAuto. We've been selling auto parts for over 30 years! We're dedicated to delivering quality auto parts, expert customer service, and fast and free shipping, all backed by our 100% satisfaction guarantee. We've created thousands of videos to help you install our parts with confidence. That saves you time and money, so visit us at 1AAuto.com, your trusted source for quality auto parts.
In this video, we're going to be working with our 2001 Ford Ranger. We're going to show you how to remove and replace your driver's power window regulator motor.
If you like this video, please click "subscribe." We have a ton more information on this truck, as well as many other makes and models. If you need this part for your vehicle, you can follow the link down in the description over to 1AAuto.com.
Here are the items you'll need for this repair: Phillips screwdriver, flat blade screwdriver, drill and drill bits, painter’s tape, rubber gloves, hammer, chisel, punch, 11mm sockets, ratchet, socket extensions, rivets, rivet gun and appropriate size wrenches and sockets
Open your door, and remove the two Phillips head screws below the door handle. Open the door handle and release this panel from the door. Pry up and remove the electrical connectors from this panel, using a small flat-blade screwdriver to do this. You want to be careful not to break these arms off. This connector is removed by undoing the two Phillips head screws. You might have to just pry carefully to separate this connector with your flat blade. Remove the last connector the same way we did with the first one by prying up on those tabs and popping it off. Remove the Phillips head screw we just uncovered by removing that panel. One more Phillips head screw at the bottom corner here. Lift up on the panel and remove it from the truck.
Remove the inner door liner. Be careful not to tear it. This adhesive on the back side is reusable if properly stored, so make sure you lay this skin down, with the adhesive facing up, in a clean, dry place. Since we'll likely have to move the window up and down several times throughout this process, we're going to remove our window switch from the trim panel here. It's just these two metal tabs on the bottom. We'll push in and push the switch through the trim. Go ahead and plug it back in.
Turn your key on and bring the window up until we have clear access to the rivets securing the window. To remove the glass from the regulator, we'll have to drill out these two rivets. You'll want to start with a small bit to get a pilot hole going in the stud of the rivet, and then move your way up until you get through the head of the rivet without trying to drill through the glass. Be sure to keep one hand on the window while drilling out the last rivet. Lift up on the window.
It helps to have rubber gloves for this portion of the job because it gives you a little bit better grip on the glass. Keep the glass up in the opening and use painter's tape to secure the window to the top of the door so it's out of our way while we're working on the rest of the regulator. Using a small flat blade screwdriver, lift up on the tab and disconnect the connector for the motor. Then drill out the remaining five rivets for the motor and the rest of the regulator. The last rivet is giving us a hard time and is spinning, so we can't really drill it out. In cases like this, the best solution is to get back there with a really sharp chisel and just cut the head of the rivet off. Remove the 11 millimeter nut securing the last portion of the regulator in, the one at the bottom, and one here at the top with an 11 millimeter socket, ratchet, and extension. Remove the last portion of the regulator, and remove the entire assembly from the door.
Reinstall the assembly into the truck being careful not to bend any of these components. Realign this vertical rod of the regulator with the hole in the bottom and the one at the top, and then reinstall the two 11 millimeter nuts. Tighten them back up with your 11 millimeter socket and ratchet. Now, if you have a large enough rivet gun, you can get window regulator rivets and reinstall these the same way they were from the factory, or you can just get some hardware that's the right size. Personally I think the easiest way to do this is with the bolts facing out from the back.
Line up the regulator, one bolt at a time. Start the nut. Unless you're using the rivet gun, you can't get a bolt into this top hole because of where the regulator rides, but tightening up these four bolts that we do have should hold everything just fine. We'll do that, in our case, with a 13 millimeter socket, ratchet, and a wrench. Depending on what hardware you use you may need different tools in order to tighten these down. Reconnect the connector at the bottom of the motor. Turn the key on. Bring the regulator up. Remove the tape from the window, being sure to keep a hand on there to support the glass. Carefully lower the window down. Line it up. You may need to use a punch or do a little more drilling in order to remove the rest of the rivets from the glass.
Install your new hardware through the glass. Install the nut on the back. Make sure you don't tighten it all the way until you have your other bolt and nut in. You may have to move the regulator a little to be able to get back there and reach the other nut. We're tightening our hardware down with a ten millimeter socket, ratchet, and wrench. Depending on what hardware you use, the tools you need may be different. Check for proper operation.
Reinstall your door panel. Reinstall your weather shielding. Pull the wire harness through. It's easiest to line up to the top of the interior door handle here and then simply press it into place. These hooks on the inside of the door panel will slide into these slots on the inside edge of the door. Be sure that the wiring harness is pulled through when you start and that you hook in to the weather seal under the window here, and that you line up the door lock into its hole. With our lock in place, and our door in the weatherstrip at the top of the window, we'll push in there. Then we can move along and lift up slightly and push in to engage the rest of our door panel before re-installing the first two screws. Reinstall your electrical connectors to the appropriate switches. We'll have to reinstall the two Phillips head screws for our window switch. Once all your switches are reinstalled, line up this panel into your door, snap the clips back into place, and reinstall the two Phillips head screws under the door handle.
Thanks for watching. Visit us at 1AAuto.com for quality auto parts, fast and free shipping, and the best customer service in the industry.

WRA51255