
★★★★★
May 20, 2026
Everything good so far better fuel mileage.
Replaces


Part Details
Specifications
About TRQ:
TRQ is a trusted brand dedicated to making every repair a success story by combining premium parts with easy installation. Each TRQ part is engineered by a team of automotive experts to meet or exceed OEM standards, delivering enhanced performance and maximum longevity. With rigorous in-house testing, the brand ensures superior fit and function across every product line. TRQ also provides customers with best-in-class, step-by-step installation videos—so you can complete repairs with confidence, whether you're a first-time DIYer or an industry professional.
Product Features
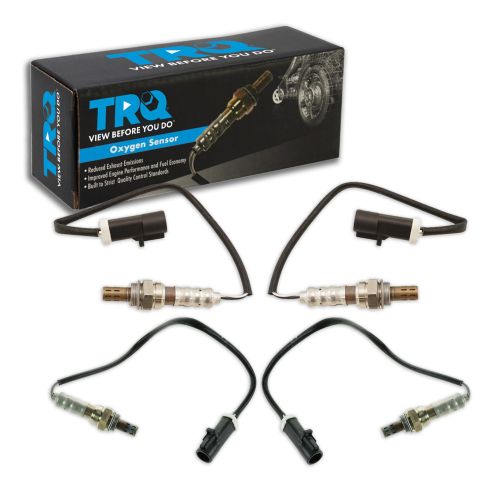
TRQ oxygen sensors are manufactured to precise specifications using premium raw materials to optimize your vehicle’s emission system. Each sensor is isostatically-pressed for improved strength and durability, and plasma-sprayed to improve sensitivity and prolong the service life of the sensors. Oxygen sensors wear out over time and should be replaced every 60,000 miles to prevent poor engine performance. TRQ recommends replacing the oxygen sensors in sets to optimize fuel economy and reduce overall emissions. All products are fit and road-tested in our Massachusetts R&D facility to ensure we deliver on our promise of Trusted Reliable Quality.
What is Upstream vs. Downstream?
Install Tip: You may be required to reset the vehicle computer after installation of this part.
Returns: Parts with electrical components cannot be returned once installed.
Attention California Customers:
 WARNING: This product can expose you to chemicals including Lead and Lead Compounds, which are known to the State of California to cause cancer, and birth defects or other reproductive harm. For more information, go to www.P65Warnings.ca.gov.
Lifetime Warranty
This item is backed by our limited lifetime warranty. In the event that this item should fail due to manufacturing defects during intended use, we will replace the part free of charge. This warranty covers the cost of the part only.
Returns: Parts with electrical components cannot be returned once installed.
FREE Shipping is standard on Orders shipped to the lower 48 States (Contiguous United States). Standard shipping charges apply to Hawaii, Alaska and US Territories. Shipping is not available to Canada.
Expedited is available on checkout to the United States, excluding Alaska, Hawaii and US Territories as well as P.O. Boxes and APO/FPO/DPO addresses. Final shipping costs are available at checkout.

Created on:
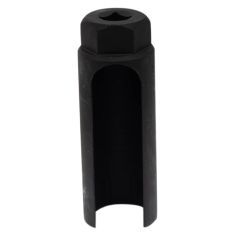
Tools used
Hi. I'm Mike from 1A Auto. We've been selling auto parts for over 30 years. We're dedicated to delivering quality auto parts, expert customer service, fast and free shipping all backed by a 100% satisfaction guarantee. So visit us at 1AAuto.com, your trusted source for quality auto parts.
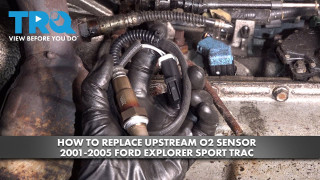
Right here, on the driver's side of the truck right behind the catalytic converters you'll find an O2 sensor. This is the rear O2 sensor, also known as the downstream sensor, and it's pretty easy to disconnect on this truck, especially in this case because this truck actually has a brand-new catalytic converter pipe and it has relatively new O2 sensors. So we're going to show you how to replace them.
We're going to use a 22 millimeter wrench. You can come up from the front and get the wrench on their pretty easily, and then it's just a matter of pushing up to loosen the O2 sensor. Then, if you follow the wire up to the top of the transfer case, you can see it plugs in right here. And if you pull on, if you push the little tab down, right here, and then pull on the connector, it should slide right out. At that point, you can come right back around and spin your O2 sensor right out of the exhaust system, just like that. There we go.
When installing the O2 sensor, you always want to put the O2 sensor in first and tighten it up rather than plugging it in first, and that way it makes it so your wires don't get all bound up. So right now, you can spin it into the hole and make sure that the wires aren't getting all twisted up at the same time. Because if you twist the wires up, sometimes they'll actually get damaged and we don't want to do that. So, we'll use the same 22 millimeter wrench to tighten up the O2 sensor from the front just like when we loosened it.
All right. It's nice and tight now. And at this point we can feed the wire up over the transfer case and we can play it right into the wire harness, just like that.
Thanks for watching. Visit us at 1AAuto.com for quality auto parts, fast and free shipping and the best customer service in the industry.
Tools used
Hi, I'm Mike from 1A Auto. We've been selling auto parts for over 30 years. We're dedicated to delivering quality auto parts, expert customer service, fast and free shipping, all backed by our 100% satisfaction guarantee. Visit us at 1AAuto.com, your trusted source for quality auto parts.
In this video I have a couple of oxygen sensors with me. While there are some aesthetic differences here, the wire lengths are a little different, the actual body and tip of the sensor are a little different, the threads and gasket are the same, and on the other end the connections are actually the same. I can plug these into either position on our vehicle. But if I had to ask you which one's upstream and which one's downstream, you probably can't tell just from looking at them. That's true of most oxygen sensors. The way you determine whether or not an O2 sensor is upstream or downstream is all done visually.
Your oxygen sensor position can be determined relative to your catalytic convertor. As the name suggests, upstream sensors will be located upstream or ahead of, in front of, above, closer to the engine than your catalytic convertors. This means that they see the exhaust gasses first. They then go through the catalytic convertor and to the downstream oxygen sensor, which will either be located in the catalytic convertor like our vehicle here, or after the catalytic convertor to monitor the gasses coming out of the cat and make sure that it's being efficient relative to the readings of the upstream O2 sensor.
The other determination you need to make is bank one versus bank two. Determining which bank is which can be done by looking at a picture of your vehicle's firing order. Whichever bank contains cylinder one is going to be bank one, and the other one, regardless of whether or not cylinder two is in it, is going to be bank two by default. These banks are true of V engines like V8s, V6s, and flat engines like Porsches and Subarus that have individual banks.
On inline four-cylinder engines, as long as they have one exhaust manifold like a Jeep four-liter or a four-cylinder Honda engine, you'll only have one bank with an upstream and downstream O2 sensor. There will be no bank two on the engine.
On our vehicle here, this is the passenger side, which we've already determined from the firing order is bank one. We have our upstream sensor here closest to the engine ahead of the cat. Then we have our downstream or sensor two here inside of the catalytic convertor. This could also be located somewhere after the cat. Here I have my two sensors for the vehicle. While they are aesthetically different, we can now tell this is my upstream sensor because it looks just like the upstream sensor I have up there. This is my downstream sensor. Now that we know which one's which, we can order the right part, correct the problem, and fix you up right.
Thanks for watching. Visit us at 1AAuto.com for quality auto parts, fast and free shipping, and the best customer service in the industry.
Tools used
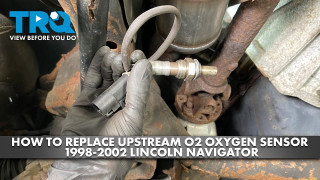
Hi, I'm Mike from 1A Auto. We've been selling auto parts for over 30 years. We're dedicated to delivering quality auto parts, expert customer service, fast and free shipping, all backed by our 100% satisfaction guarantee. Visit us at 1AAuto.com, your trusted source for quality auto parts.
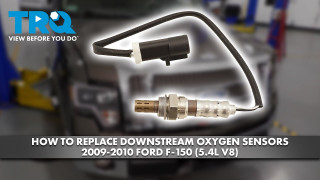
In this video, we're going to show you how to replace the downstream oxygen sensor on this 2006 Ford Explorer. It has the 4.6 liter engine. We show you on, I believe the passenger side; driver's side's the same procedure. We hope you like the video. Please click subscribe. Check out 1AAuto.com for all your parts needs for your Explorer or whatever vehicle you might have. Here are the items you'll need for this repair.
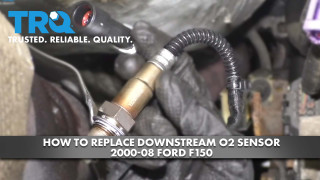
Raise and support your vehicle with jack and jack stands. We have ours on a lift. The downstream oxygen sensors are the ones that go right into the catalytic converter. Passenger side is here and driver's side is over here. We're going to show you how to replace the passenger side one.
Follow your oxygen sensor connection up to this blue connector here. There's a tab right here. Press with your thumb and pull to disconnect. To remove your bad O2 sensor, just use a pair of pliers or a pair of wire cutters and cut the wires. That allows you to easily get a 7/8ths wrench right down and on. Many times these are in there kind of tough, so I like to use a hammer just to give it some impact. A few hits will loosen it up. Use some rust penetrant and let it sit. And then I've got it out a little bit and then put rust oil on there, rust penetrant, and now I'm actually going to thread it back in and see if I can work some down in. The old sensor is out.
Here are the old sensor from the vehicle and the new one from 1A Auto. Remove the shipping protector before installation. The connections are exactly the same. The oxygen sensors are exactly the same. The one from 1A Auto is going to be a very good replacement. It's going to fit and function just like your original. New oxygen sensors are available at 1AAuto.com.
Thread in the oxygen sensor. Use a 7/8ths wrench and use the open end to tighten it up. And then just make sure your lead goes up and the tab is down to go into the connector and plug it in and make sure it clicks.
Thanks for watching. Visit us at 1AAuto.com for quality auto parts, fast and free shipping, and the best customer service in the industry.
Tools used
Hi, I'm Mike from 1A Auto. We've been selling auto parts for over 30 years. We're dedicated to delivering quality auto parts, expert customer service, fast and free shipping, all backed by our 100% satisfaction guarantee. Visit us at 1AAuto.com, your trusted source for quality auto parts.
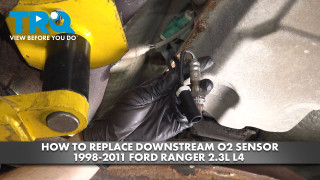
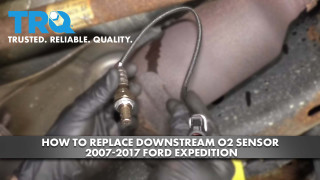
Right here on the passenger side of the tuck, on the rear, right behind the catalytic converter, is your rear O2 sensor. It's also known as a downstream O2 sensor, and it's quite easy to take out on this truck. This one actually has a newer exhaust system in it, which is actually making it even easier for us. If yours is old and rusty, it'll take a little bit more force, but it'll still work the same exact way. We're going to start with a 22 millimeter wrench on the O2 sensor itself. We should be able to loosen it up just like that. There is such a thing as an O2 sensor socket, which also makes life a little bit easier. There you go, it's actually out of the pipe that easily.
An O2 sensor socket will make it easier because it fits around the whole socket, or the whole O2 sensor itself, and it allows the wires to go through. So you can use a big breaker bar if you need to instead of a wrench that might slip.
Up at the top of the sensor is a connector, which you need to disconnect to get the sensor out of the truck. Looks like it's going to be a two handed thing. I apologize for kind of blocking the camera there, but you can see this is how the clip works. You push down the tab right here and it releases it from the other connector. Whenever you install an O2 sensor, you never want to plug it in first. You always want to install it first, because when you install it. It's going to spin and if the connector doesn't spin, you're going to bind up all the wires and sometimes it'll actually damage the wire. If you're ever putting an O2 sensor in, make sure you screw it in first. Then once it's all the way screwed in, then you plug it in.
Same 22 millimeter wrench is what we're going to use to tighten it. At that point, you can go up to where you disconnected it. It's the blue connector right on top of the transfer case. Where the transfer case meets the transmission, I should say. At this point, it should snap right into place. Just like that. You'll feel it click.
Thanks for watching. Visit us at 1AAuto.com for quality auto parts, fast and free shipping, and the best customer service in the industry.
Tools used

OSA61636
Everything good so far better fuel mileage.
Great stufff going to get more
Nice quality, work just as expected.
Quick delivery. Great price. Good quality. Perfect fit and they are functioning well in my 2008 Ford Expedition, so far. I've noticed an improvement in both my MPG and acceleration.
Not sure but they fit my 2007 with v6
Items as described, BIG difference in engine performance, lean codes cleared and haven't returned. Best price, definitely recommend.
So far theyve worked well??
Good product for the price !!
Truck runs great feels a tad stronger
Great to do business with you. Thank you.
This part will not fit your vehicle, but we may have a part that is listed to fit. Please enter your vehicle's year make and model in the search bar at the top of the page. This will display parts guaranteed to fit your vehicle. Just be sure to verify all of the information shown in the Vehicle Fit tab before ordering.
No, this kit is specific to 1999 Ford Explorer models with a V6 3.0L engine.
No, these parts are listed to fit the 2004 Ford Ranger V6 3.0L. This part will not fit your vehicle, but we may have a part that is listed to fit. Please enter your vehicle's year make and model in the search bar at the top of the page. This will display parts guaranteed to fit your vehicle. Just be sure to verify all of the information shown in the Vehicle Fit tab before ordering.
Yes, the downstream on both the right and left should be able to fit in the others place. The up stream cannot be placed on the down stream, it will give bad readings and false codes if done.
If you are asking how many sensors there are, it comes with all 4. 2 upstream and 2 down stream.
The parts will come as being labeled for upstream and downstream.
I ordered for a 2006 Ford explore a
Yes, according to the information you provided, this part will fit your vehicle.
As long as it has a 5.4L engine then this will fit a 2002 Ford Lightning.
This kit will not fit the V8.
